Back up Mac before a factory reset
Create a bootable and full backup before you factory reset a Mac. It can save the system and data in case there are issue to reset the Mac.
Quick Navigation:
One of the recent version of Apple's operating system, macOS Ventura, offers a number of new features and enhancements to improve your Mac experience. With advancements like Stage Manager, improved Spotlight search, and enhanced privacy features, it's designed to make your digital life smoother and more intuitive. However, there are times when performing a factory reset on macOS Ventura becomes necessary. Whether you're preparing your Mac for sale, tackling persistent issues, or aiming to improve performance, a factory reset can be a valuable tool.
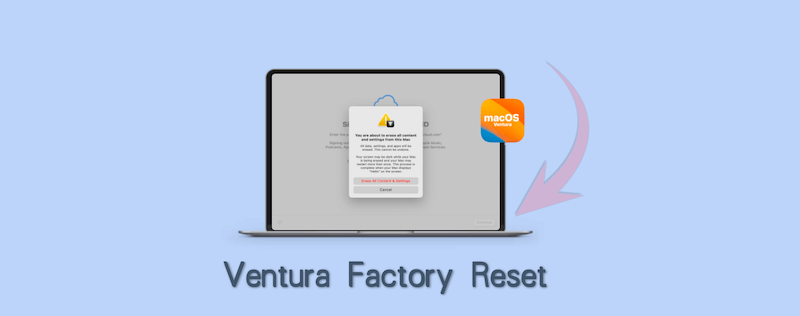
In this guide, we'll walk you through the entire process of factory resetting macOS Ventura. From preparing your system to completing the reset and troubleshooting common issues, you'll find detailed instructions to help you get through the process efficiently.
Factory resetting a Mac removes all user data, settings, and applications, returning the device to its original factory state. This process is beneficial in several scenarios:
Before diving into the reset process, it's crucial to back up your data. A factory reset will erase everything on your Mac, so having a secure backup ensures that you won't lose important files.
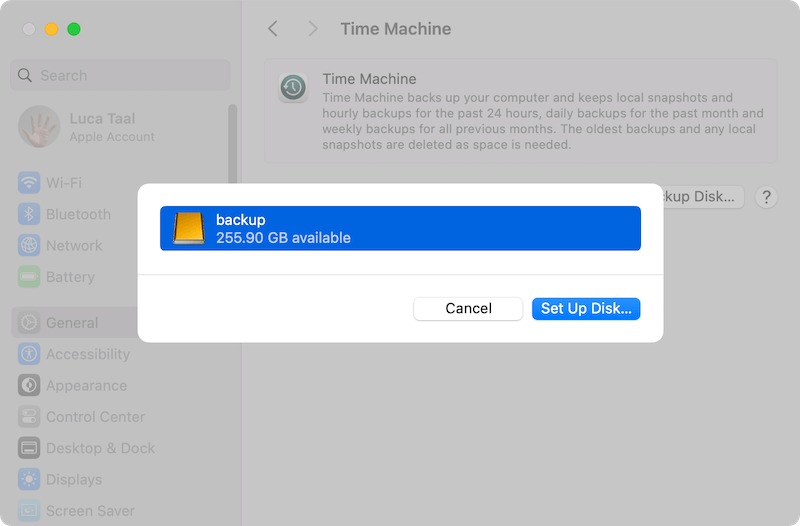
Using Time Machine: Time Machine is Apple's built-in backup solution that makes it easy to create a full backup of your system. Connect an external hard drive to your Mac and follow these steps:
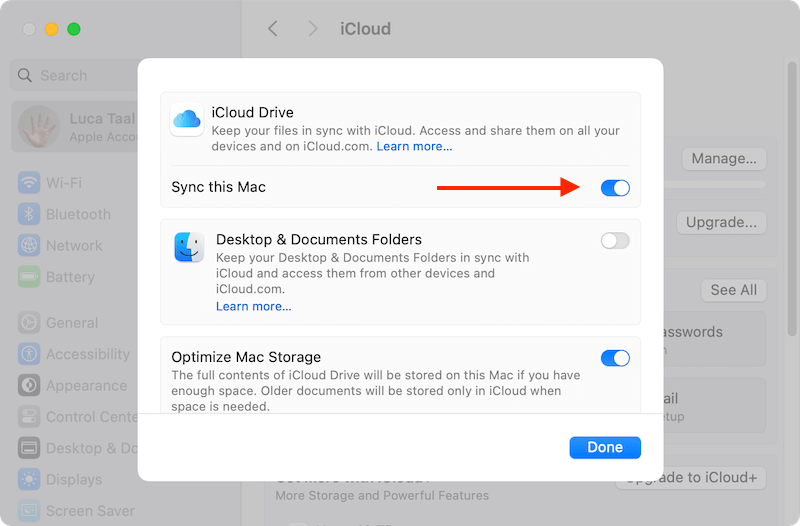
Using iCloud: If you prefer a cloud-based backup, iCloud can help. Ensure that iCloud Backup is enabled:
Other Cloud Services: You can also use services like Google Drive, Dropbox, or OneDrive to back up important files. Simply upload your crucial documents and media to the respective cloud storage.
Back up Mac before a factory reset
Create a bootable and full backup before you factory reset a Mac. It can save the system and data in case there are issue to reset the Mac.
De-authorizing your Mac from various accounts helps avoid potential issues with software licenses.
De-authorize Music
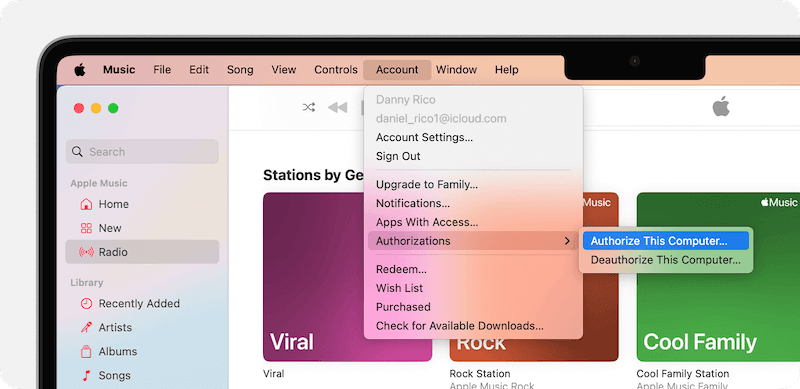
De-authorize Other Services
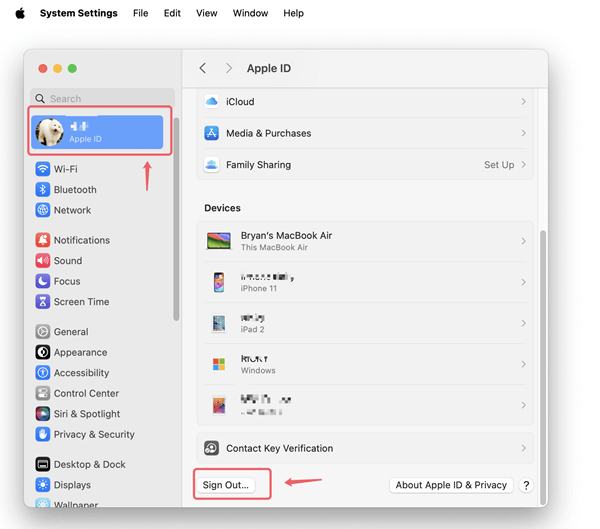
Sign Out of iCloud
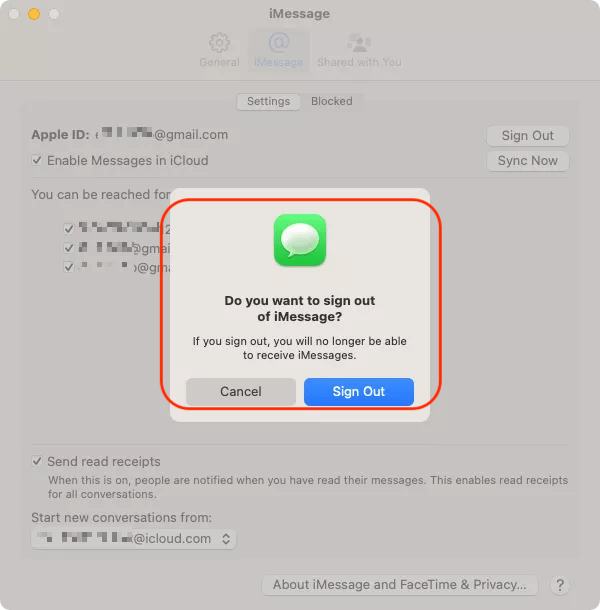
Sign Out of Messages
Deactivate Third-Party Software Licenses
Some third-party applications require deactivation before uninstalling. Check the documentation for any licensed software you've installed to ensure they are properly deactivated. This step is especially important for software that has activation limits.
To start the factory reset process, you need to access macOS Recovery Mode. This can be done in a few different ways depending on your Mac model:
For Apple Silicon Macs:
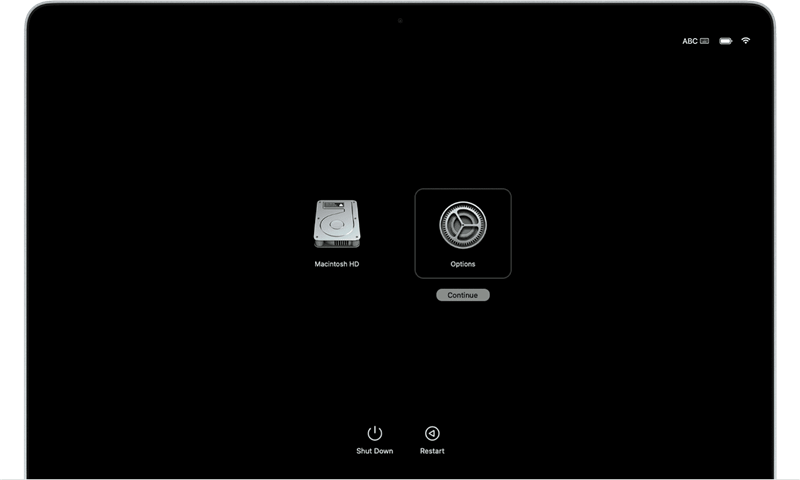
For Intel-based Macs:
Press and hold Command (⌘) + R as soon as your Mac restarts to see the Apple logo or spinning globe.
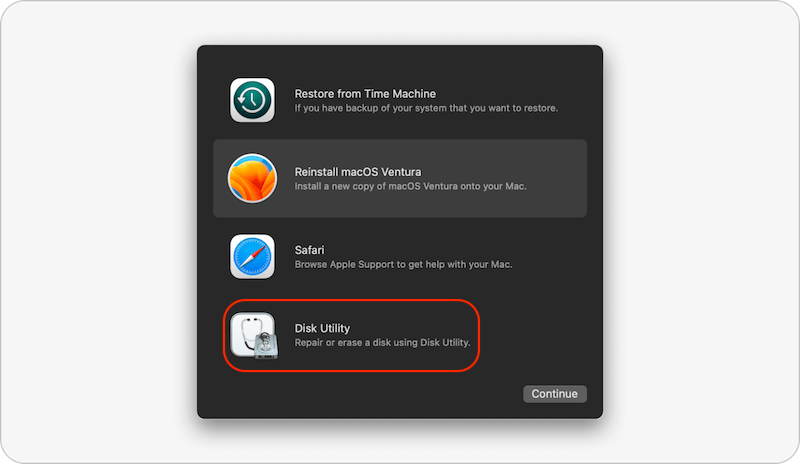
Once in Recovery Mode, you'll need to erase your startup disk:
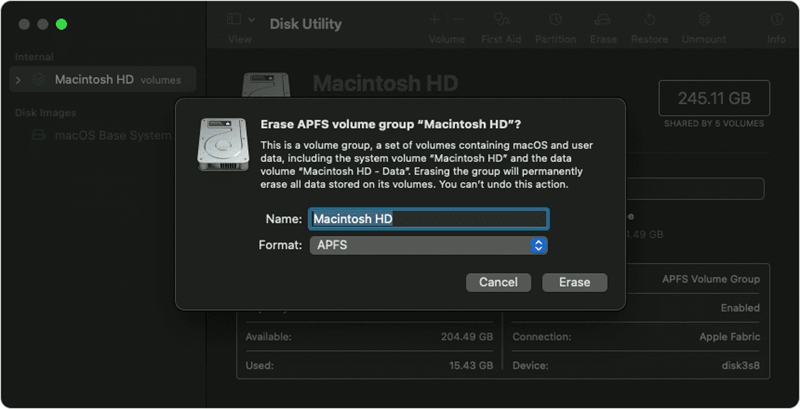
After erasing the disk, reinstalling macOS Ventura is the next step:

After reinstalling macOS Ventura, your Mac will restart and display the setup screen. You have two choices:
If the Mac will be sold or given to another hand, a factory reset is not enough. Even if the Mac is factory reset, the removed personal files can be easily recovered by professional data recovery software.
If you want to ensure the personal data will not be recovered to keep your privacy safe, it's necessary to wipe the removed data permanently after a factory reset. How to wipe the removed personal files permanently? You need a reliable data erasure software to do the job.
DoYourData Super Eraser for Mac is a professional data wiping software that can securely wipe the removed files from a hard drive. This ensure the private or sensitive data will not be recovered.
After factory reset the Ventura macOS, you can do as follows to ensure the personal data on the drive will be gone for good.
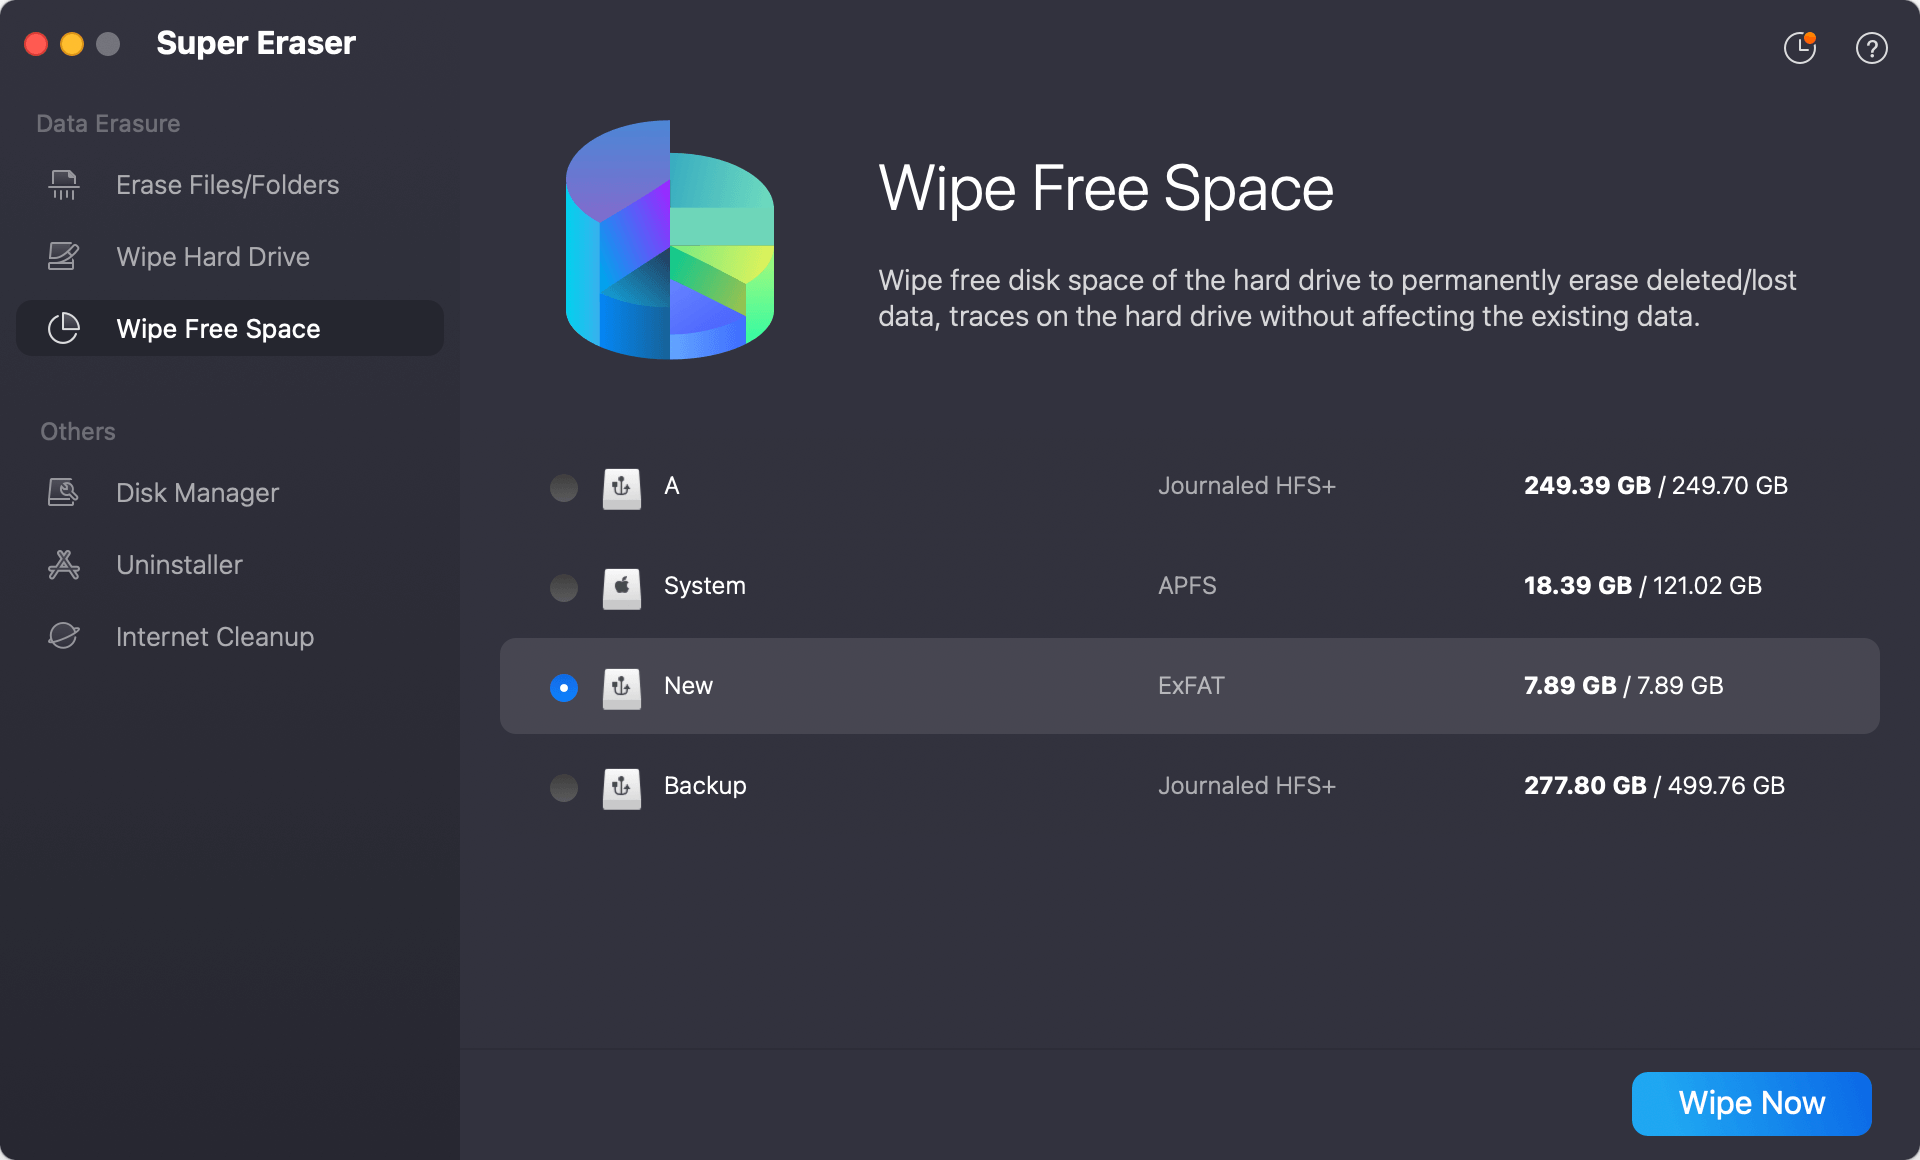
Step 1. Download and install DoYourData Super Eraser on your Mac. Start the software and choose the mode Wipe Free Space. Select your Mac internal drive from the drive list and click on Wipe Now button.
Step 2. There will be a popup window where you can select a data erasure standard to process the data sanitation.
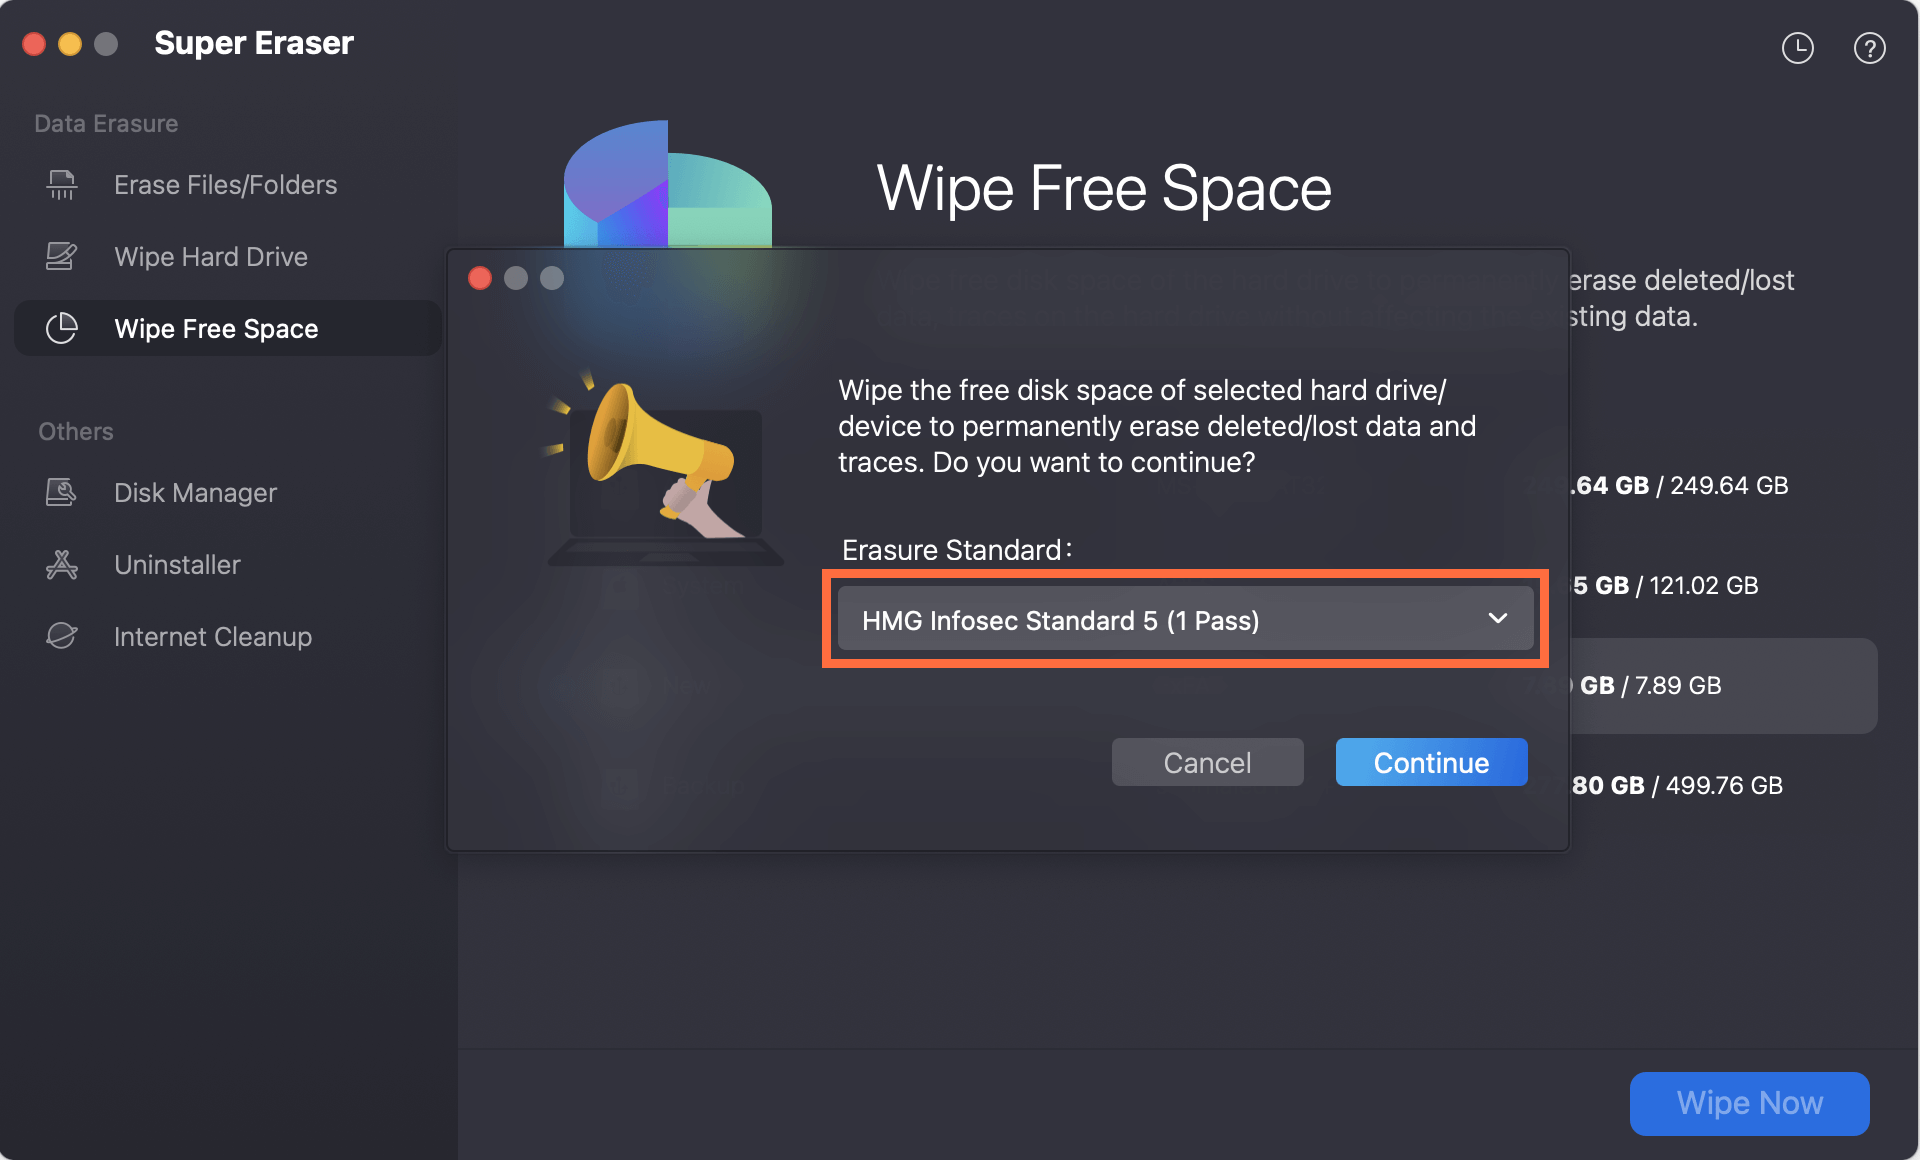
Step 3. After confirming the data erasure standard, click the Continue button and the software will execute the data wiping process. You can just wait patiently.
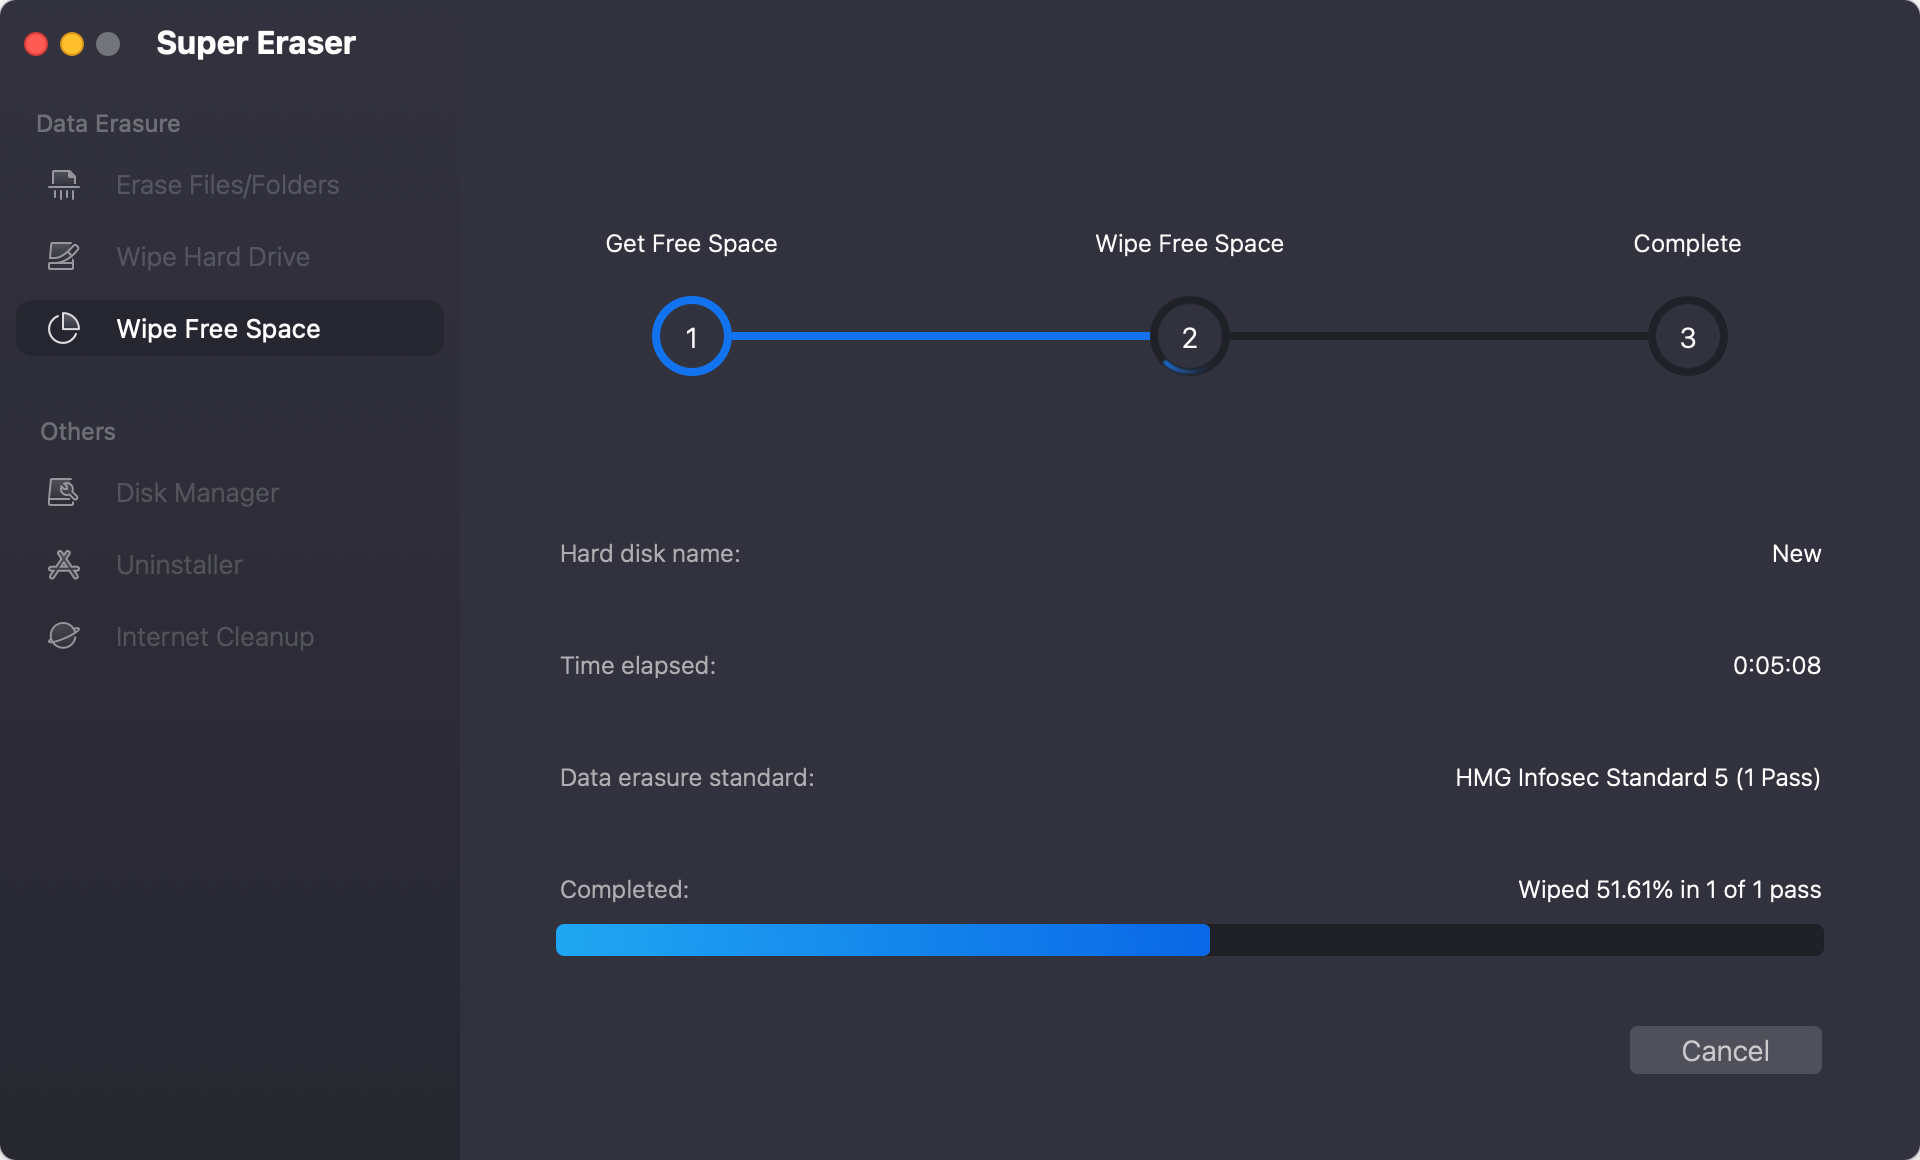
After the data wiping is done, all the personal files on the Mac is totally erased and will not be recovered in any way. You can just turn off the computer and get it ready for sale or transfer. The new owner can complete the setup process themselves.
If you just need to use the Mac by yourself after a factory, then you need to reconfigure all the settings from scratch:
Go through the setup process to configure your Mac as a new device. You can choose to restore from a Time Machine backup or start fresh.
1. Restoring Backed-Up Data
Once macOS Ventura is reinstalled, you'll need to restore your data:
2. Reinstalling Essential Apps
After restoring your data, it's time to reinstall any essential applications. You can use the App Store or download software from developers' websites. Ensure that you reinstall and update all necessary applications for optimal performance.
3. Setting Up macOS Ventura from Scratch
With the basic setup complete, you can now configure macOS Ventura to your preferences:
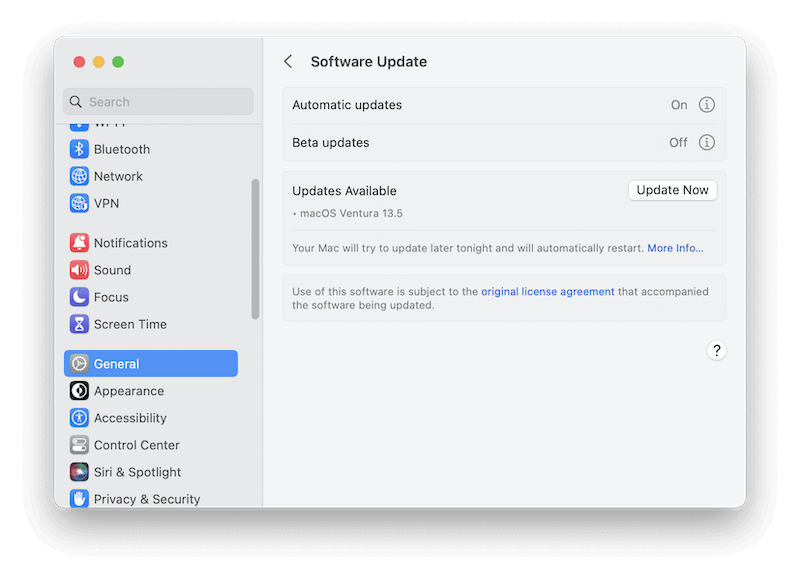
1. Internet Recovery Fails
If macOS cannot reinstall from internet recovery, you might encounter errors. Here's how to address them:
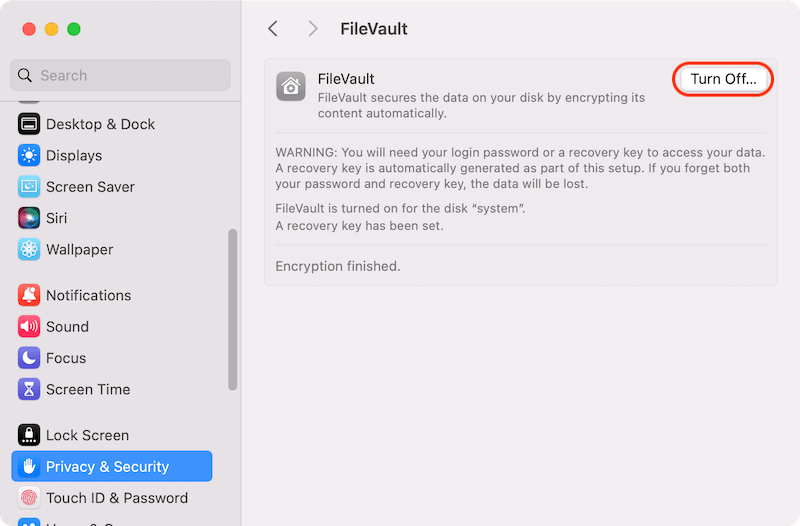
2. Unable to Erase Startup Disk
If you face issues erasing the startup disk, consider these troubleshooting steps:
1. Reset System Settings Only
If a full factory reset seems excessive, consider resetting only system settings:
Go to System Settings and manually adjust settings to default. You can also use Terminal commands to reset specific preferences.
2. Reinstall macOS Without Wiping Data
If you want to reinstall macOS without erasing your data, follow these steps:
Restart your Mac and access Recovery Mode. Select Reinstall macOS and choose the option to install over the existing system. Follow the prompts to complete the reinstallation without erasing your disk.
Performing a factory reset on macOS Ventura is a straightforward process but requires careful preparation to ensure that your data is preserved and the reset is successful. By following the steps outlined in this guide, you can effectively reset your Mac, whether for troubleshooting, selling, or simply starting fresh. Remember to backup your data, sign out of accounts, and reinstall essential apps to make the transition as smooth as possible.
Another important thing is to wipe the data permanently if the set Mac will be sold or donated. If you encounter any issues, refer to the troubleshooting tips or consider alternatives that suit your needs. With the right approach, you'll have your Mac up and running in no time, ready for a new chapter with macOS Ventura.

DoYourData Super Eraser for Mac
DoYourData Super Eraser for Mac is a 100% safe, powerful and easy-to-use data erasure program. It offers certified data erasure standards including Peter Gutmann, U.S. Army AR380-19, DoD 5220.22-M ECE to permanently erase data from Macs and external devices, making data recovery be impossible.
