Quick Navigation:
- Understanding Deep Scan Recovery
- Key Features to Look for in Free Deep Scan Recovery Software for Mac
- Top 5 Free Deep Scan Recovery Software for Mac
- Step-by-Step Guide: How to Perform a Deep Scan Recovery on Mac
- Conclusion
Losing important files on your Mac can be a frustrating experience, despite any particular reason. Often, these files might seem permanently lost, but thanks to powerful data recovery tools, there's hope. Deep scan recovery software offers a thorough way to retrieve lost data by combing through every sector of your drive. This article explores free deep scan recovery software available for Mac, their features, how they work, and provides guidance on how to use them effectively.
Understanding Deep Scan Recovery

Deep scan recovery is a comprehensive method for retrieving lost or deleted files. Unlike quick scan recovery, which looks for recently deleted files in easy-to-find locations, deep scan recovery dives deeper into your Mac’s storage, analyzing each sector of your drive to locate any recoverable data.
How Deep Scan Recovery Works?
Deep scans operate by examining the raw data on your drive, looking for file signatures—unique patterns that indicate different types of files. This process is more thorough than quick scans and can recover files even if the disk structure is damaged or the file system has been reformatted.
When to Use Deep Scan Recovery
Deep scan recovery is ideal in several situations:
- After formatting a drive: Even if the drive has been formatted, a deep scan can often recover data that hasn't been overwritten.
- When files are corrupted: If files are damaged or corrupted, a deep scan may still locate fragments of data to reconstruct the lost files.
- For severely deleted data: If files were deleted a long time ago or are not found in the trash, a deep scan is your best bet for retrieval.
Key Features to Look for in Free Deep Scan Recovery Software for Mac
Not all deep scan recovery tools are created equal. When choosing a software solution, consider the following key features:
- Compatibility with macOS versions: Ensure the software supports your current macOS version.
- Support for different file types: The software should be compatible enough to support any kind of file.
- Ease of use and user interface: A simple, user-friendly interface makes the recovery process smoother, especially for non-technical users.
- Free versus paid versions: Many recovery tools offer both free and paid versions. Free versions may have limitations for example limited volume of data or restricted number of users.
- Speed and efficiency: Deep scans can be time-consuming, so software with optimized recovery speed and efficiency is desirable.
- Security and data privacy considerations: Ensure the software is safe to use and does not compromise your data privacy.
Top 5 Free Deep Scan Recovery Software for Mac
1. Do Your Data Recovery for Mac Free
One of the most efficient data recovery tools available for Apple users is Do Your Data Recovery for Mac Free. Developed by DoYourData, with its robust deep scan capability, Do Your Data Recovery for Mac Free can retrieve files from a wide range of storage devices, including HDDs, SSDs, SD cards, USB drives, internal and external hard drives, and more.
Key Features:
- User-Friendly Interface: Because of its user-friendly design, Do Your Data Recovery for Mac Free is suitable for both novice and expert users. The interface is clean, intuitive, and guides users through the recovery process step by step.
- Wide File Type Support: Do Your Data Recovery for Mac Free supports all file formats, including emails, documents, photos, videos, and music files.
- Disk Management Tools: These features help mount drive on Mac, fix corrupted SD card or USB flash drive on Mac, etc.
- Deep Scans: Deeply scan the hard drive and ensure find every recoverable file.
How to Use Do Your Data Recovery for Mac Free:
- Download and install Do Your Data Recovery for Mac Free.
- Launch the application and select the drive or partition you wish to recover data from.
![Free Deep Scan Recovery Software for Mac]()
- Click on Scan button to deeply scan the drive.
![Free Deep Scan Recovery Software for Mac]()
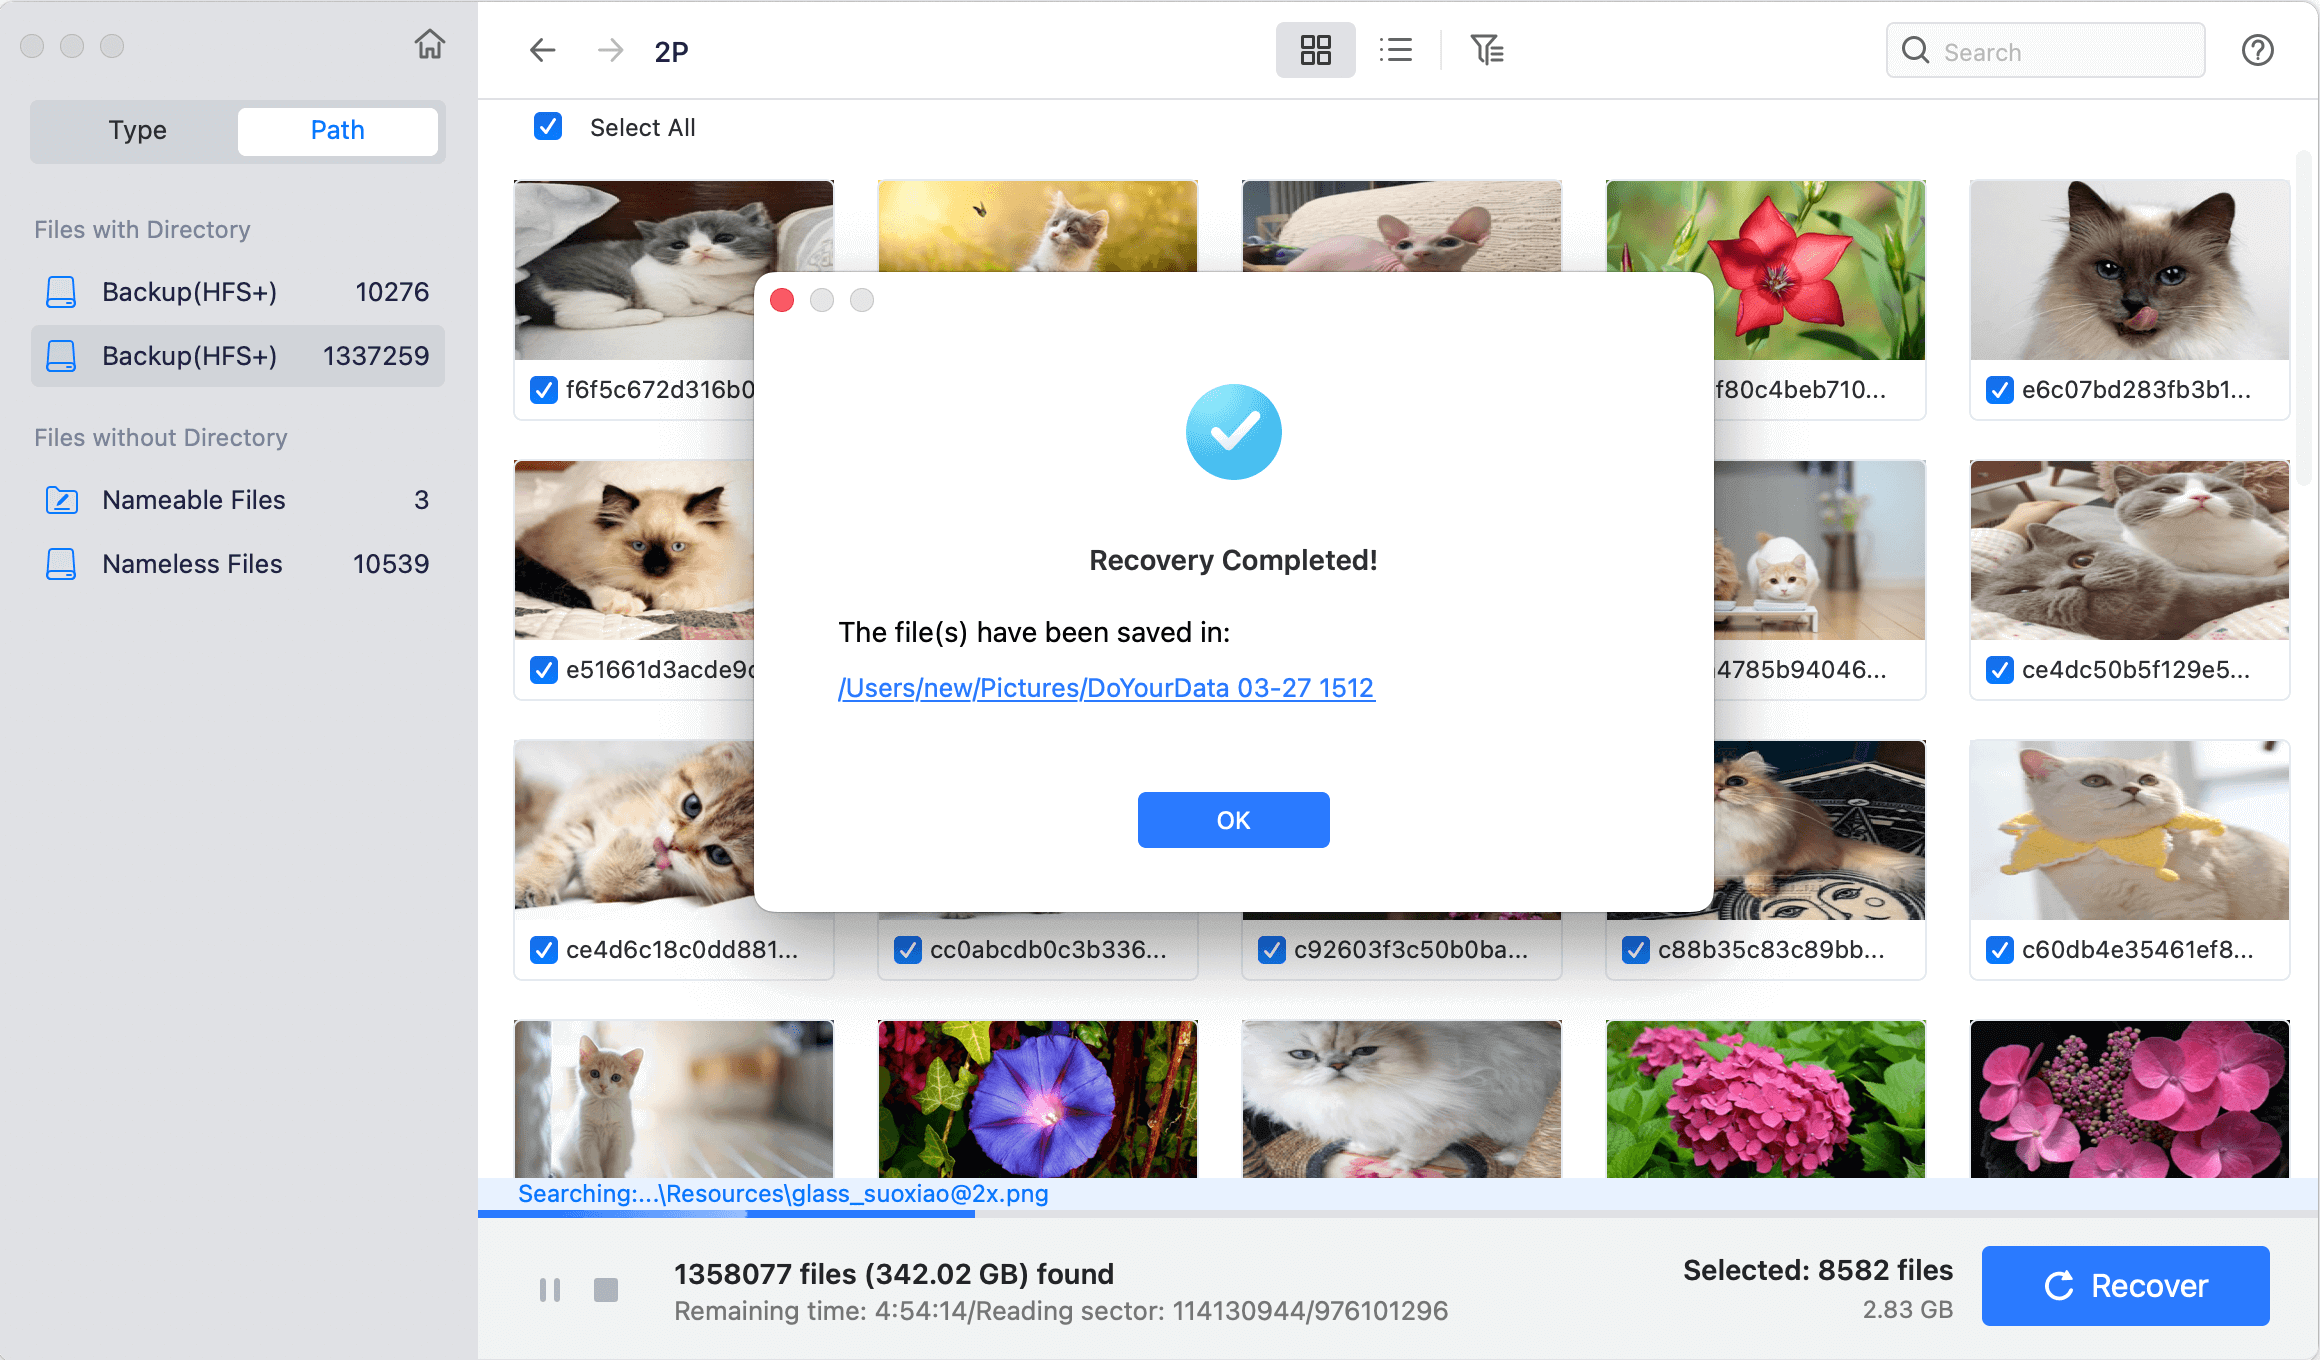
- After scanning, browse the recoverable files and select those you wish to restore.
![Free Deep Scan Recovery Software for Mac]()
- Click "Recover" and select a location to store the files that were recovered.
![Free Deep Scan Recovery Software for Mac]()
2. TestDisk and PhotoRec

CGSecurity has developed two open-source data recovery tools: TestDisk and PhotoRec. PhotoRec is specialized in file recovery from a range of storage devices, whereas TestDisk is particularly intended for recovering lost partitions and restoring bootable non-booting drives. When combined, they provide a thorough deep scan recovery solution for Mac.
Key Features:
- Free and Open-Source: TestDisk and PhotoRec are both totally free and open-source programs that can be used by everyone without any restrictions on data recovery.
- Robust Deep Scanning: PhotoRec's deep scan function extensively combs storage devices for misplaced files, retrieving a variety of file kinds, such as records, photos, videos, and documents.
- File System Support: TestDisk is adaptable for a range of recovery situations because it supports a number of file systems, including FAT, NTFS, exFAT, and ext2/ext3/ext4.
- Cross-Platform Compatibility: TestDisk and PhotoRec offer a uniform recovery experience on Windows, Linux, and macOS, regardless of the operating system.
How to Use TestDisk and PhotoRec:
- Download and install TestDisk and PhotoRec from the CGSecurity website.
- Open Terminal and navigate to the directory where the programs are installed.
- Launch PhotoRec by typing sudo photorec and selecting the disk or partition to be scanned.
- Choose the file formats you want to recover and start the deep scan.
- Once the scan is complete, PhotoRec will save the recovered files in the specified directory.
3. Donemax Data Recovery for Mac for Mac

Donemax Data Recovery for Mac is another popular data recovery tool that offers a free version for Mac users. It is renowned for being easy to use and efficient in recovering deleted files as well as those lost as a result of formatting, system crashes, unintentional deletion, and partition loss.
Key Features:
- User-Friendly Interface: The recovery process is made simple to understand by Donemax Data Recovery for Mac's simple interface design.
- Quick and Deep Scan Modes: The program lets users select the degree of scanning that best suits their needs by providing both quick and deep scan options.
- Preview Before Recovery: Users can preview recoverable files before restoring them, ensuring they only recover the files they need.
- Wide Range of Supported File Types: Donemax can recover a wide range of file types, including emails, documents, pictures, videos, and more.
How to Use Donemax Data Recovery for Mac:
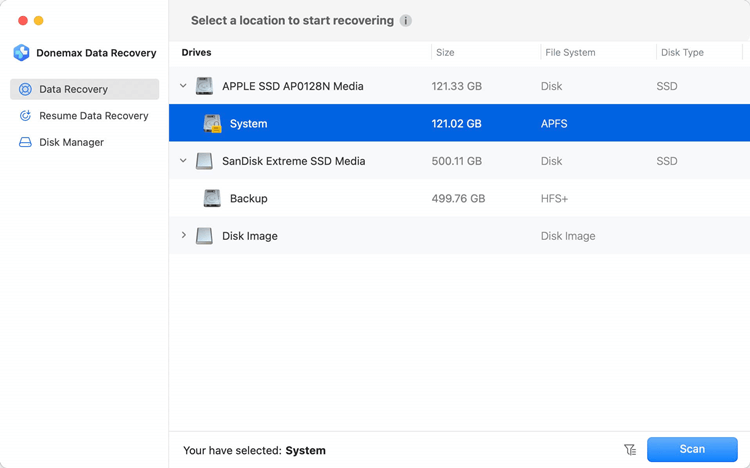
- Go to the official website, download, and install Donemax Data Recovery for Mac for Mac.
- Launch the application and select the disk or partition where the lost files were located.
- Choose between a quick scan or deep scan and start the recovery process.
- Preview the recoverable files and select those you wish to restore.
- To prevent overwriting current data, choose "Recover" and save the files to a separate location.
4. Stellar Data Recovery for Mac

In the data recovery business, Stellar Data Recovery is a reputable name that provides a free version for Mac users. The program can retrieve lost or erased data from a variety of storage media, such as SD cards, USB drives, SSDs, and hard disks.
Key Features:
- Comprehensive File Recovery: Stellar supports the recovery of a wide range of file types.
- Deep Scan for Thorough Recovery: The deep scan feature deeply searches the storage device for lost files, making it ideal for complex recovery scenarios.
- Disk Imaging: Stellar allows users to create a disk image of the storage device, which can be used for data recovery without risking further damage to the drive.
- Preview Option: Users can preview recoverable files before restoring them, ensuring they only recover the files they need.
How to Use Stellar Data Recovery:
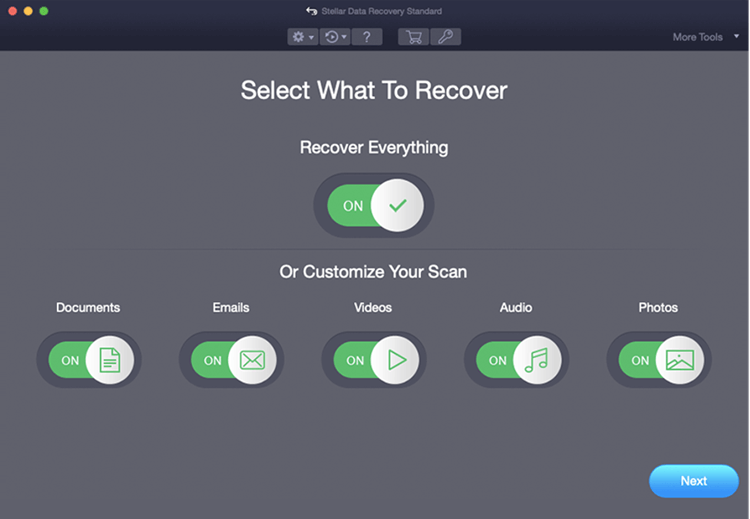
- Download and install Stellar Data Recovery for Mac from the official website.
- Launch the application and select the type of files you want to recover.
- Choose the disk or partition to be scanned and start the deep scan.
- Preview the recoverable files and select those you wish to restore.
- Click "Recover" and save the files to a different location.
5. M3 Mac Data Recovery Free

M3 Mac Data Recovery Free is another reliable data recovery tool designed specifically for Mac users. It offers both quick and deep scan options, making it suitable for various data loss scenarios.
Key Features:
- User-Friendly Interface: M3 Mac Data Recovery Free has a simple and intuitive interface that makes it easy for users to recover lost files.
- Deep Scan for Comprehensive Recovery: The deep scan feature deeply searches the storage device for lost files, recovering data from formatted drives, lost partitions, and more.
- Support for Various File Systems: M3 supports the recovery of data from HFS+, APFS, FAT32, and NTFS file systems.
- Preview Option: Users can preview recoverable files before restoring them.
How to Use M3 Mac Data Recovery:
- Download and install M3 Mac Data Recovery Free from the official website.
- Launch the application and select the drive or partition where the lost files were located.
- Choose between a quick scan or deep scan and start the recovery process.
- Preview the recoverable files and select those you wish to restore.
- Click "Recover" and save the files to a different location.
Step-by-Step Guide: How to Perform a Deep Scan Recovery on Mac
Run a Deep Scan:
- Choose a free deep scan data recovery software from the list above.
- Install the software following the provided instructions.
- Select the affected drive or partition.
- Launch the deep scan and watch for the procedure to finish (the size of the disk and the speed of the software will determine how long this takes).
- Preview the recovered files and save them to a secure location.
Tips for Maximizing Recovery Success:
- Avoid using the affected drive until recovery is complete.
- To prevent overwriting current data, recover files to an other drive.
Tips for Preventing Future Data Loss on Mac:
- Regular Backups: Use Time Machine or cloud storage for regular backups. You also can use a disk cloning software to create a full bootable clone backup for your Mac.
- Enable File Versioning: Turn on file versioning features to maintain multiple versions of important files.
- Use Reliable Antivirus Software: Protect against malware that can corrupt files or disks.
- Keep macOS Updated: Regular updates prevent vulnerabilities that could lead to data loss.
Conclusion
Deep scan recovery is an essential tool for retrieving lost data on your Mac. While several free options exist, choosing the right one depends on your specific needs, the type of files you are trying to recover, and your comfort with technical tools. All Free Data Recovery are all viable options, each with unique strengths and limitations. For best results, use the tools immediately after data loss and follow the tips outlined to prevent future data loss.
Try one of these free tools today, and don't forget to share your experiences to help others in similar situations!

Do Your Data Recovery for Mac
Do Your Data Recovery for Mac, one of the best Mac data recovery software, can help you easily and completely recover deleted, formatted or lost files from Mac HDD/SSD, external HDD/SDD, USB drive, memory card, digital camera, or other storage devices.


