Recover Deleted or Formatted Data from Samsung X5 SSD
Run Do Your Data Recovery to scan the Samsung portable SSD X5 and get all deleted, formatted, lost files back.
Home > Hard Drive Solutions for Mac
NTFS for Mac tool can help you quickly enable NTFS support on Mac. You can download DoYourData NTFS for Mac tool to help you enable writable for Samsung portable SSD X5 which has NTFS file system. Then you can use the Samsung portable SSD X5 on any Mac or Windows PC without any limitation, no data loss.
![]() Updated by Justin Kenny on February 26, 2024
Updated by Justin Kenny on February 26, 2024
Quick Navigation:
“Hi, I don’t know why my Samsung portable SSD X5 is not working on my Mac. It is mounting, but I can’t move anything from the Mac to it. How to solve this issue?” - Jerry
Do you find it frustrating that your Samsung X5 SSD has turned into a digital brick on your Mac, preventing you from editing or saving anything? Do not worry; you have found the help that will turn your digital despair into relief! Let's say you're ready to get creative, but suddenly, your Samsung X5 SSD thinks it wants to take a read-only vacation. Not yet, though. Don't let your anger set in.
This easy-to-understand guide will help you figure out why your SSD is acting up and give you simple ways to get it to read and write normally again. Let’s see how to fix Samsung portable SSD X5 read-only or not working on Mac.
Before you look at the answers, you should know why your Samsung X5 SSD might be giving you a read-only error on your Mac. This issue might be caused by several things, such as problems with the file system, mistakes with permissions, or even hardware problems. Finding the root reason is very important for implementing a good solution.
Check for a physical link between your Samsung X5 SSD and your Mac to start troubleshooting. Make sure that both the SSD and the Mac are safely connected to the USB-C or Thunderbolt cable. Try connecting with a different cable or port to ensure no connectivity problems.
Make sure that your Mac and your Samsung X5 SSD can work together. Check out the information that Samsung gives you about system needs and compatibility. SSDs may need special drivers or firmware updates to work properly on macOS.
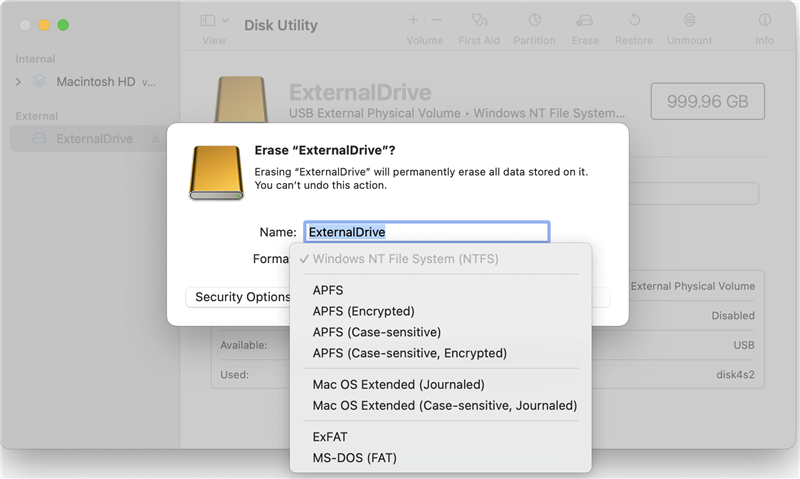
macOS and external drives may not work well together using different file systems. The Samsung X5 SSD may be set up with the NTFS file system, which works with Windows and is not compatible with macOS. Check the file system and ensure your Mac can handle it.
Here are the steps you need to take to fix the read-only issue on your Samsung X5 SSD.
1. Go to your Mac and open Disk Utility. You can use Spotlight to look for it or go to Applications > Utilities > Disk Utility.
2. From the list on the left, pick out your Samsung X5 SSD.
3. Pick up the "First Aid" tab.
4. Click "Run" to check and fix the rights on the Disk.
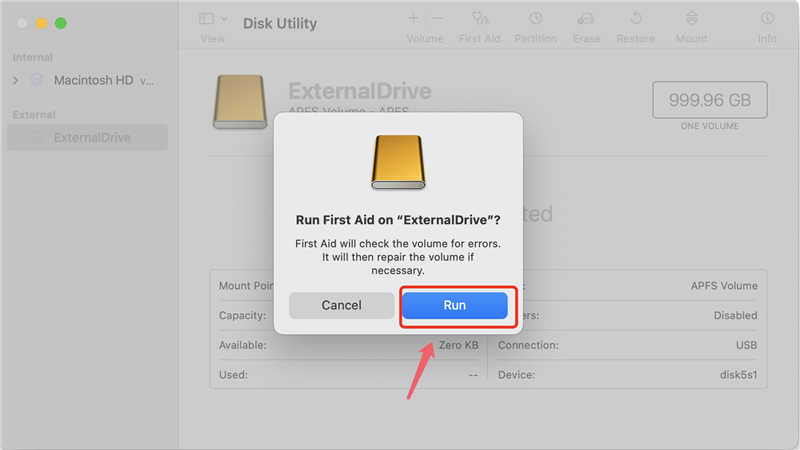
It will check the Samsung X5 SSD for permission problems and fix them if it finds any. Check to see if the read-only problem is still there after the process.
Some system problems, like those with external drives, can be fixed by resetting the Non-Volatile Random Access Memory (NVRAM) or Parameter RAM (PRAM).
Samsung might release software updates to fix bugs or improve things with other devices. Go to the Samsung website for firmware changes just for the X5 SSD. If there are directions, follow them to update the firmware.
If you’ve lost data due to erasing the Samsung portable SSD X5 or running First Aid on the SSD, you can use data recovery app to get lost data back.
Recover Deleted or Formatted Data from Samsung X5 SSD
Run Do Your Data Recovery to scan the Samsung portable SSD X5 and get all deleted, formatted, lost files back.
As we know that NTFS for Mac tool can enable users to read-write NTFS drive on Mac without any limitation, you can use the NTFS Samsung portable SSD X5 on Mac without formatting.
Step 1. Download and install the best Samsung NTFS driver for Mac - DoYourData NTFS for Mac. It can help Mac users to read-write NTFS drive within 1 click.
Step 2. Connect Samsung portable SSD X5 to your Mac and open DoYourData NTFS for Mac. Then select the Samsung portable SSD X5, click on Enable Writable button. Follow the wizard to add NTFS read-write support on your Mac.

It can be annoying when your Samsung X5 SSD on Mac has a read-only problem, but if you follow the right steps to fix it, you can regain full access to your external storage. You can get around the read-only problem and make sure your Samsung X5 SSD and Mac work well together by checking the hardware connections, making sure they are compatible, and fixing disk permissions or reformatting as needed. If the problem still happens after these steps, you might want to contact Samsung's customer service for more help.
Don’t want to reformat your Samsung portable SSD X5 because you don’t want to lose data on the SSD? Don’t worry, you can try NTFS for Mac tool to help you mount Samsung portable SSD X5 on Mac and add NTFS read-write support on your Mac. Then you can read-write data to the Samsung portable SSD X5 without any limitation.
1. How to fix Samsung portable SSD X5 read-only on Mac?
Two effective solutions to fix Samsung portable SSD X5 read-only on Mac:
2. How to fix Samsung portable SSD X5 not mounting on Mac?
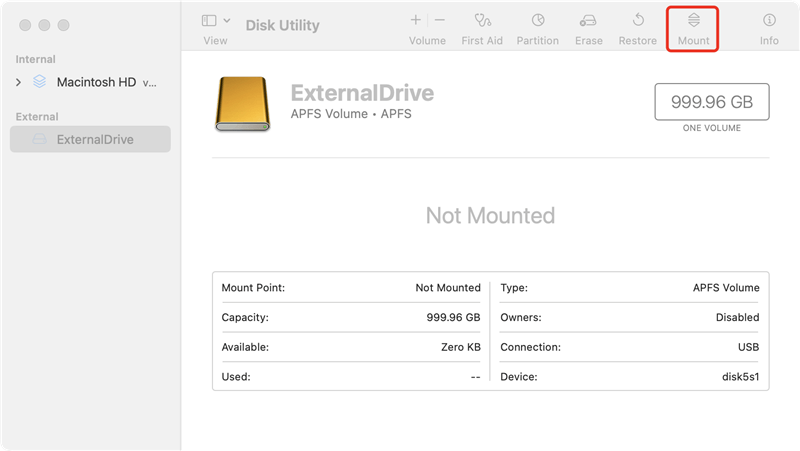
Connect the Samsung portable SSD X5 to your Mac, find it in Disk Utility.
Select the Samsung portable SSD X5, click on Mount button. If Mount button is grayed out, click on First Aid button.
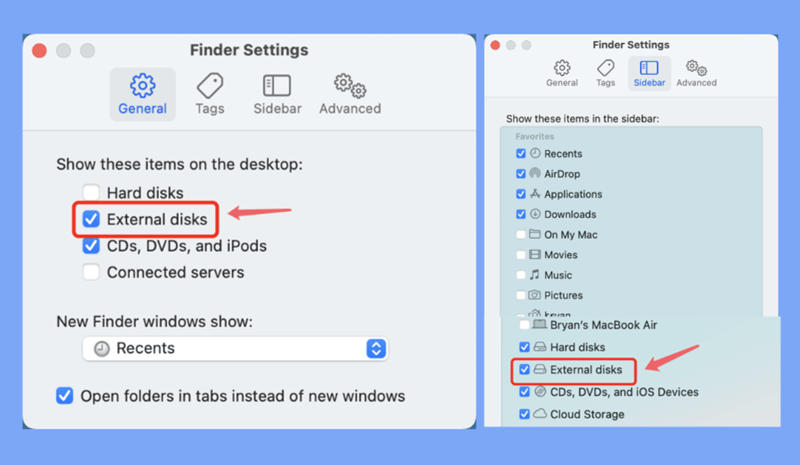
3. Samsung portable SSD X5 is recognized by Disk Utility, not showing up on Mac, how to fix it?
4. How to recover lost data from an erased Samsung portable SSD X5 on Mac?
Fixing Samsung portable SSD X5 read-only on Mac may delete all data stored on the SSD, follow the steps below to get all lost data back.
Step 1. Download and install Do Your Data Recovery for Mac, connect the Samsung portable SSD X5 to your Mac.
Step 2. Open Do Your Data Recovery for Mac from Launchpad, then select the Samsung portable SSD X5 to start data recovery.

Step 3. Click on Scan button to deeply scan the Samsung portable SSD X5.

Step 4. Once the scan is completed, preview and recover lost files.

Written & Updated by Justin Kenny
Justin Kenny is a writer & editor of DoYourData. He joined DoYourData in 2016 and focuses on writing articles about Windows data recovery, Mac data recovery, external device data recovery, hard drive clone, data erasure, Mac cleanup, computer issue fixes, etc. He is a super fan of Apple devices and is big on testing new digital device and system utility software.