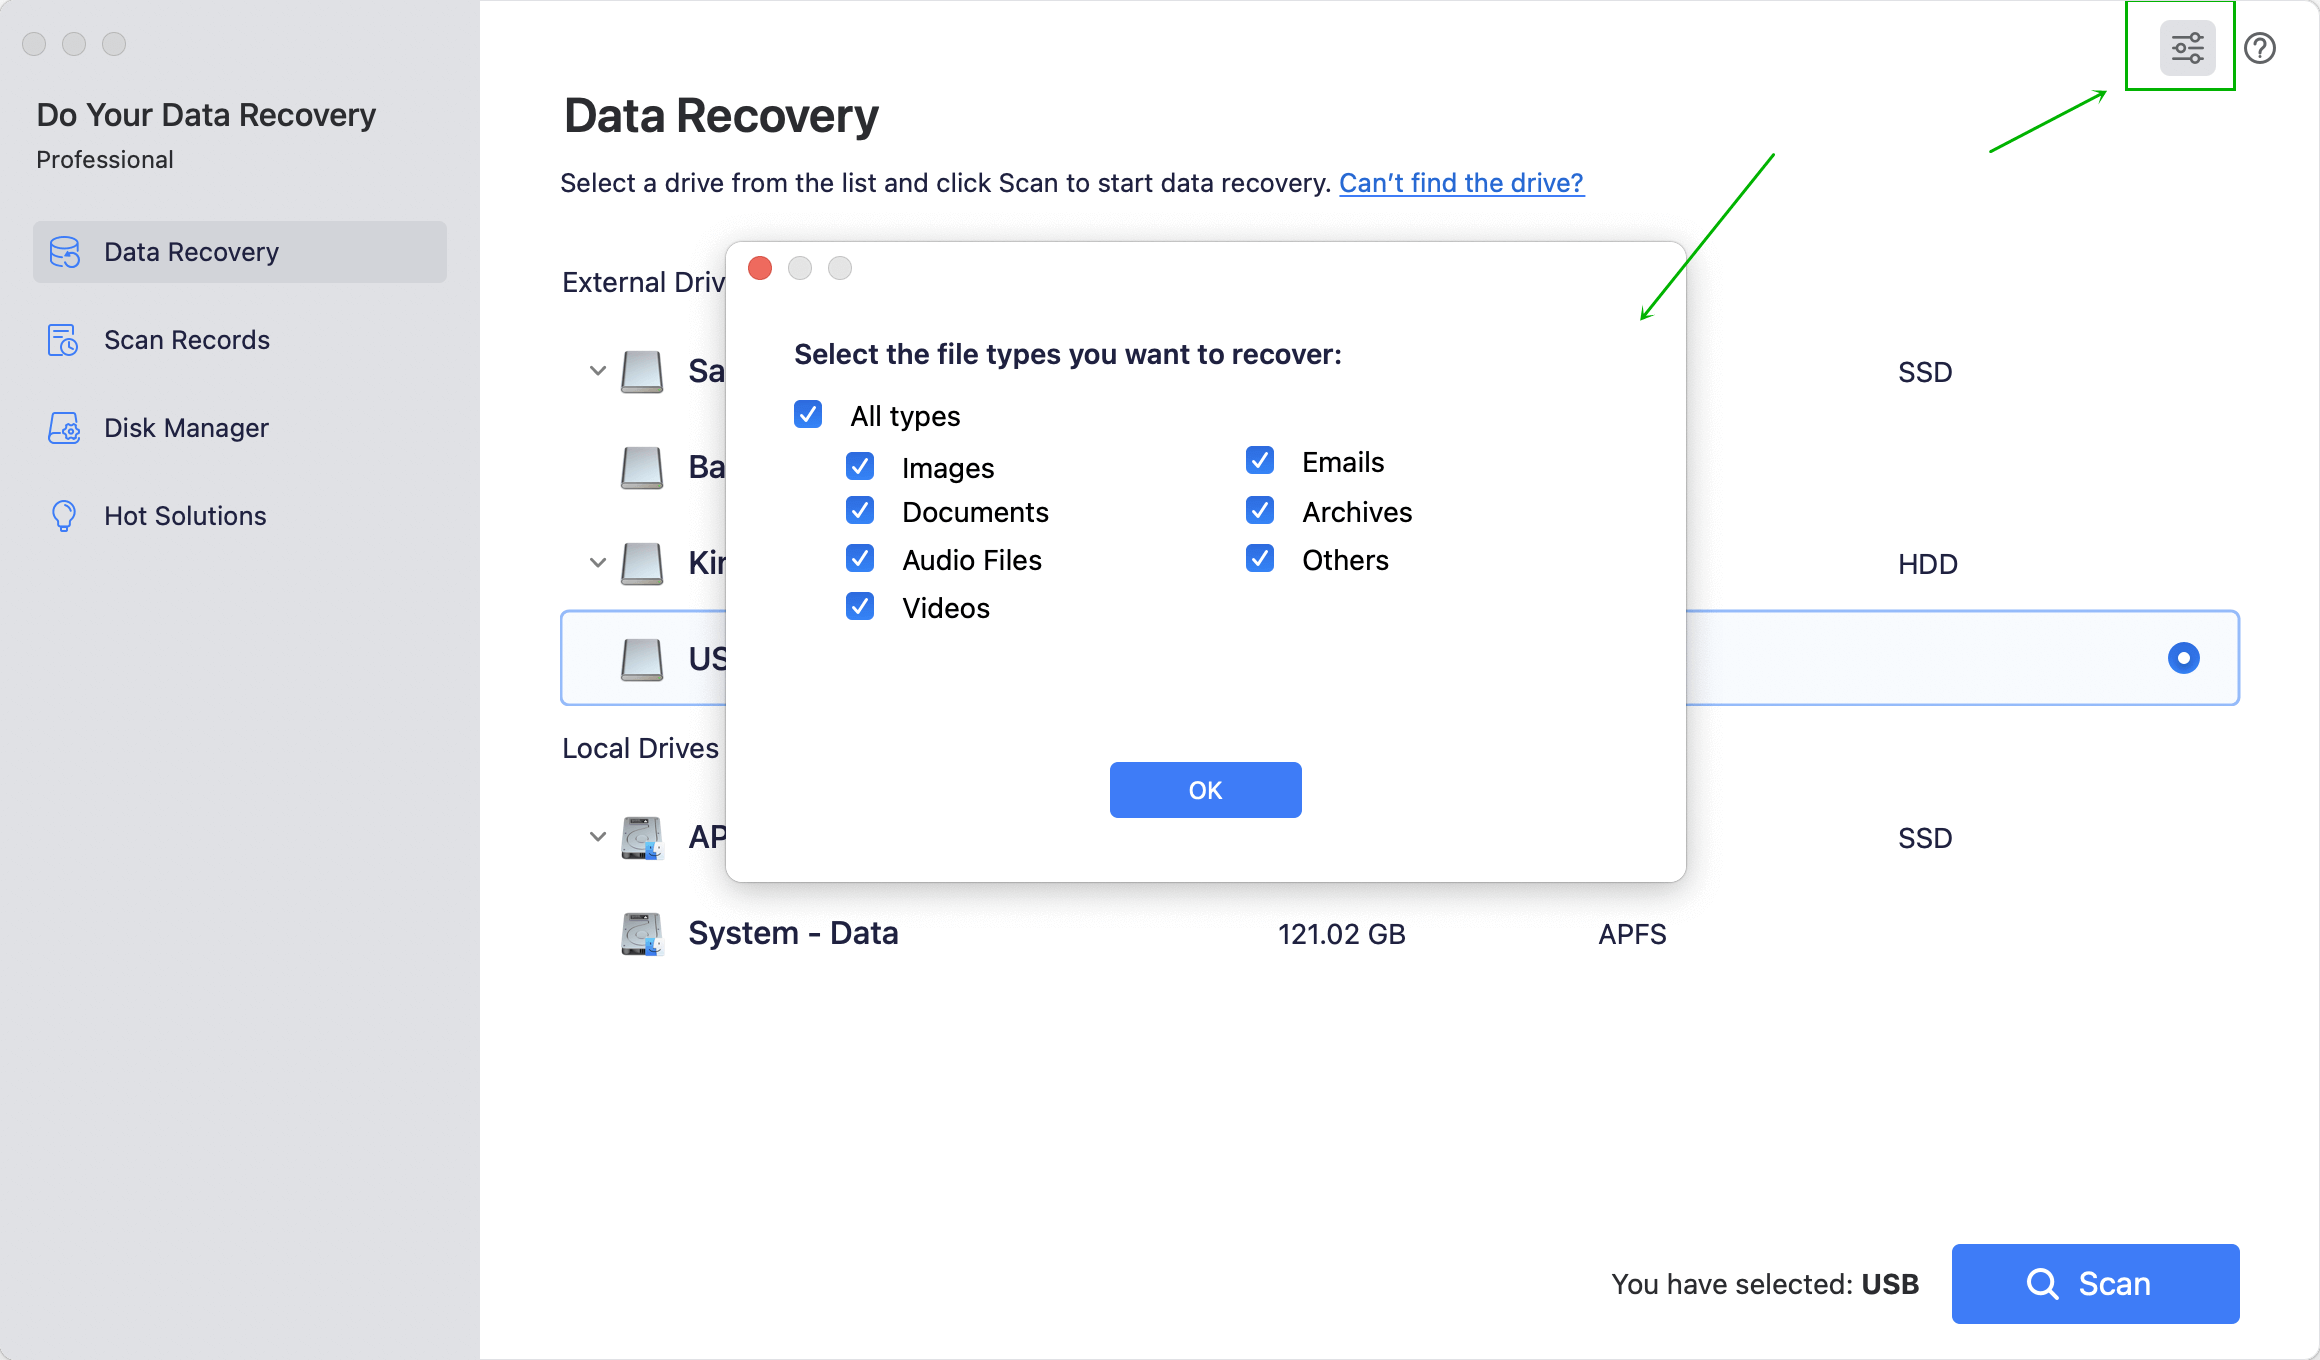
Recover Formatted Hard Drive on Mac
The quick way to recover lost data from formatted USB drive, external hard drive, SD card on Mac.
Home > Hard Drive Solutions for Mac
It is not difficult to format an external hard drive or USB flash drive to NTFS on Mac. For example, you can download and install DoYourData NTFS for Mac, then open it. The Format tool can help you format the disk drive or external device to NTFS file system. It also can help to enable writable for all NTFS drives on Mac.
![]() Updated by Justin Kenny on January 8, 2024
Updated by Justin Kenny on January 8, 2024
Quick Navigation:
Are you sick of Mac-Windows file compatibility issues? Do format restrictions prevent you from managing data on external hard drives or USB drives? Stop worrying! Learning how to format hard disks and USB drives to NTFS on your Mac can alter everything. Imagine easily transferring huge files between Mac and Windows without read-only constraints. It opens you to a new world of data management flexibility and convenience!
We'll walk you through the procedure in simple words in this guide. By the conclusion, you'll know how to format external disks or USB flash drives to NTFS, permitting Mac and Windows file exchange and simplifying your digital life. Come on, let's maximize your storage devices!
NTFS has many benefits, such as the ability to compress files, support for huge file sizes, security rights, and more. Windows operating systems mostly use it. Unfortunately, NTFS-formatted disks do not have full write functionality in the default macOS installation. Because of this restriction, although reading data from an NTFS disk on a Mac is possible, adding, removing, or editing files on the drive requires additional software or formatting it to a macOS-compatible format.
NTFS for Mac tool is a utility which is designed to add NTFS read-write support on Mac. It means, after enabling writable for NTFS drives, you can read-write NTFS drives on Mac without any limitation.
DoYourData NTFS for Mac is an easy-to-use NTFS for Mac tool. It can help you quickly enable read-write for NTFS drive on Mac and it also can help you format the external hard drive or USB flash drive to NTFS on your Mac.
Step 1. Download and install DoYourData NTFS for Mac.
Step 2. Open DoYourData NTFS for Mac and connect the external hard drive or USB flash drive to your Mac.
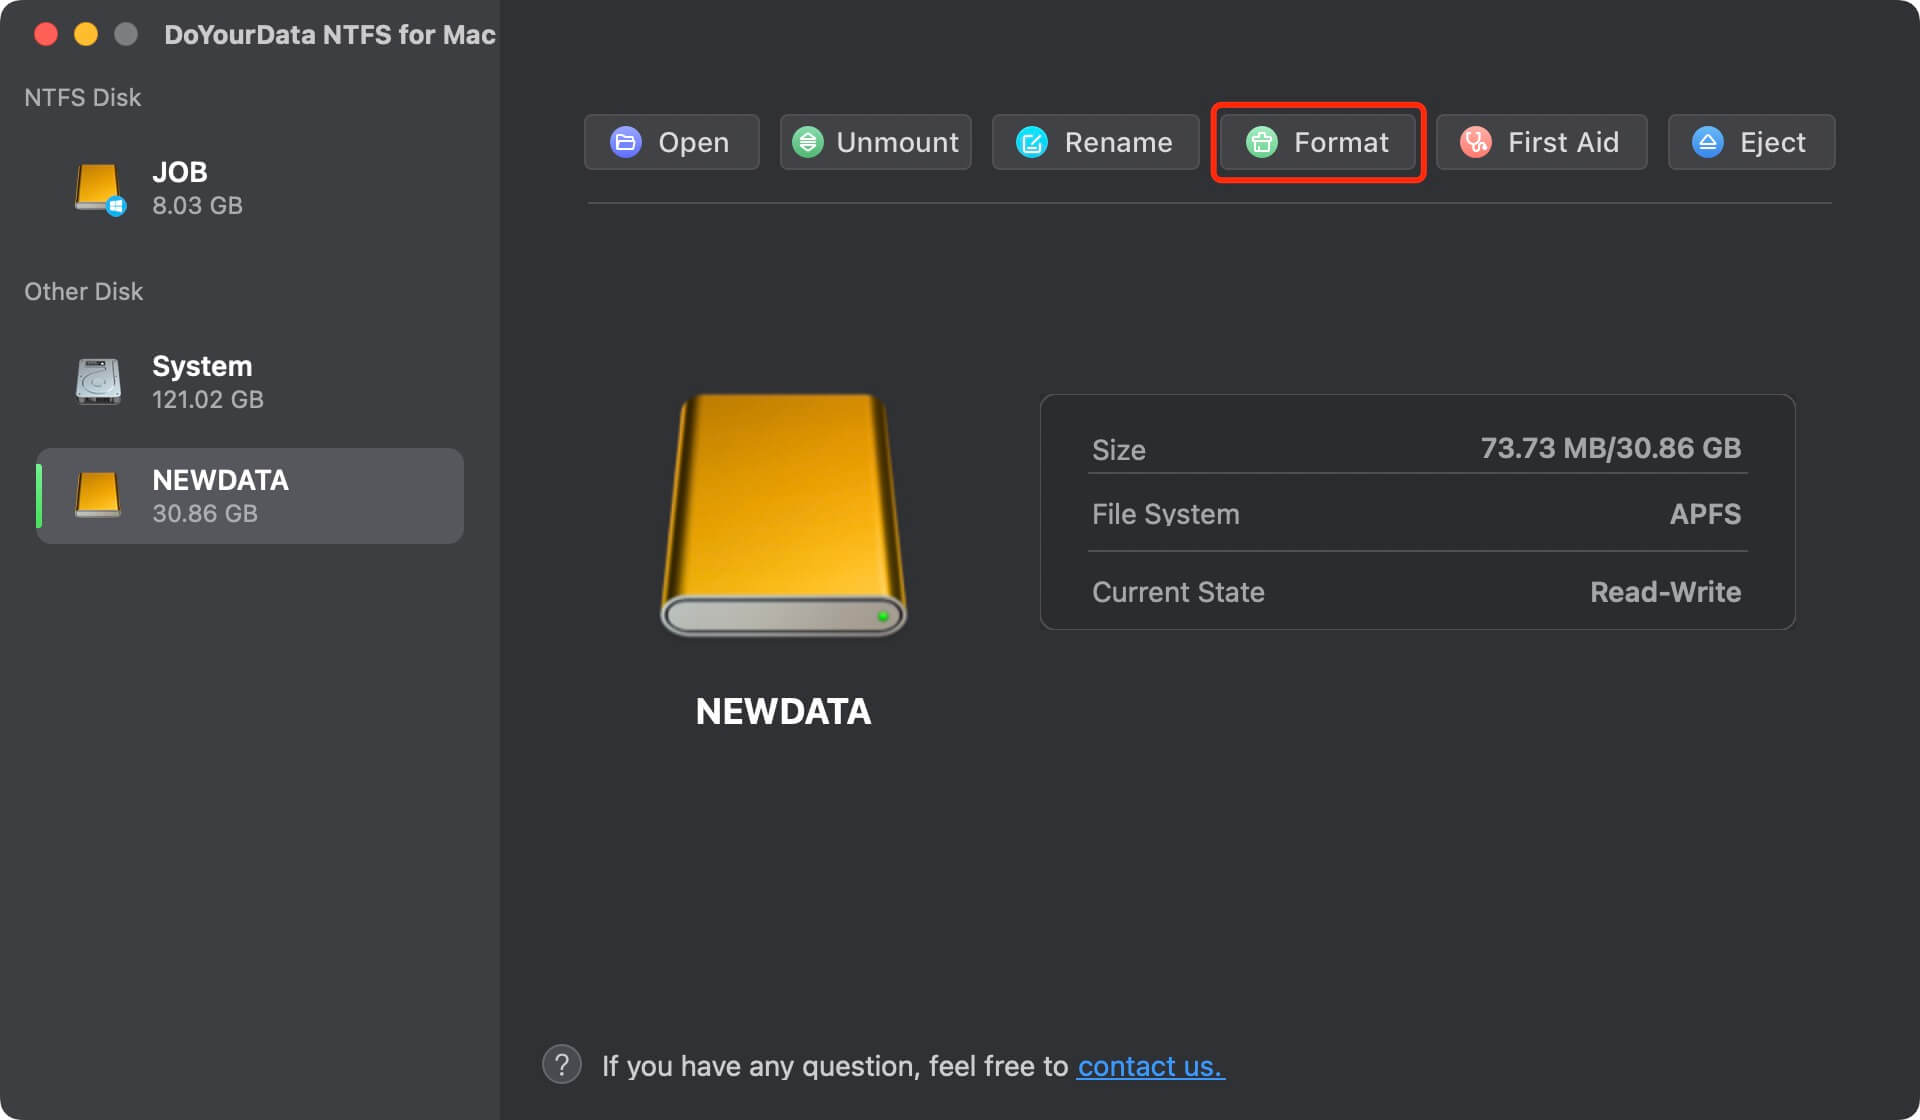
Step 3. Select the external hard drive or USB flash drive, click on Format button. Then select the NTFS as the file system.
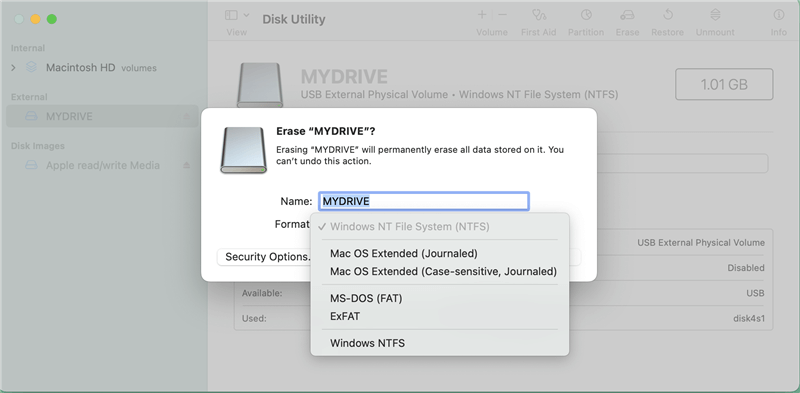
Step 1. Erase and Format to NTFS:
Here are the procedures to format the drive once your Mac has the NTFS write functionality enabled:
Step 2. Pick a Name and Format
Step 3. Format Check
You can check if the drive has been formatted to NTFS once formatting is finished:
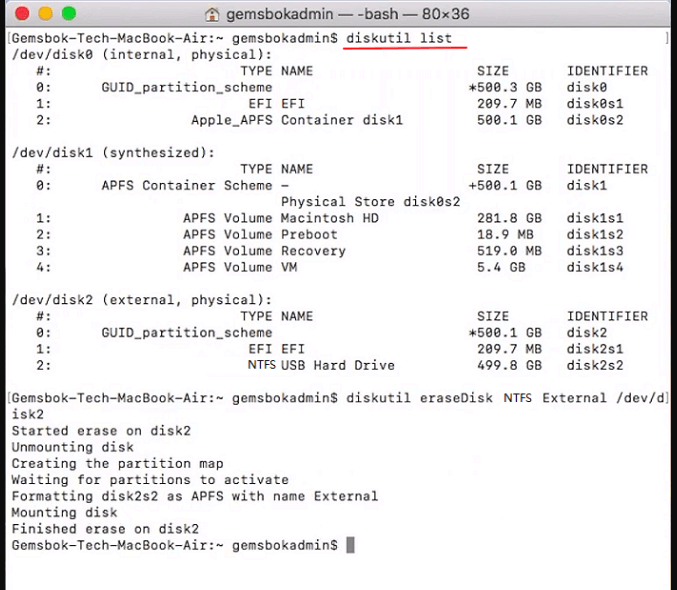
If you can not format the external hard drive or USB flash drive to NTFS by using Disk Utility, just try Terminal to force it to be formatted to NTFS file system.
Step 1. Go to Applications > Utilities > Terminal, open Terminal.
Step 2. In the Terminal, type diskutil list and then hit the enter button.
Find the external hard drive or USB flash drive you want to format to NTFS.
Step 3. Enter diskutil eraseDisk NTFS "disk name" command to format your drive to NTFS.
Replace "disk name" with the name that you want to give to your formatted drive. Also, you need to replace with the exact location of your drive. You can get the location name from step 2.
Please make a full backup before you format your external hard drive or USB flash drive to NTFS file system. If you have lost data and don’t have a backup, you can use a Mac data recovery app to help you unformat the drive.
Recover Formatted Hard Drive on Mac
The quick way to recover lost data from formatted USB drive, external hard drive, SD card on Mac.
Normally, formatting an external hard drive or USB flash drive is something that most of Mac users don’t think about since NTFS file system is compatible with macOS. However, if you have an NTFS for Mac installed on your Mac, you can use it to enable writable for NTFS drives and can format any hard drive to NTFS. Then you can use the NTFS external hard drive or USB flash drive on both Windows and macOS.
Never move forward without first making a backup of any important data. You may successfully format your drives to NTFS on your Mac by following the procedures indicated in this guide and using reputable third-party software for NTFS compatibility. It will provide complete read and write capabilities across multiple operating systems.
Written & Updated by Justin Kenny
Justin Kenny is a writer & editor of DoYourData. He joined DoYourData in 2016 and focuses on writing articles about Windows data recovery, Mac data recovery, external device data recovery, hard drive clone, data erasure, Mac cleanup, computer issue fixes, etc. He is a super fan of Apple devices and is big on testing new digital device and system utility software.