Quick Navigation:
- 1. Can macOS High Sierra Write to NTFS?
- 2. Types of NTFS drivers for macOS High Sierra
- 3. How to enable NTFS Read-write support on macOS High Sierra?
- 4. FAQs about macOS High Sierra NTFS driver
In Windows, NTFS is the file system. Your external hard drive for the Mac will be read-only because it can only read NTFS drives on a Mac. Thankfully, a plethora of NTFS software for Mac allows us to read and write NTFS files without problems.
DoYourData NTFS for Mac, the famous NTFS for Mac software, is fully compatible with macOS High Sierra or later macOS operating systems.
Can macOS High Sierra Write to NTFS?
There's no need to worry, though. You can't use a Mac to create files on NTFS drive directly. Apple's Macs can use the NTFS file system, although this feature is disabled by default.
Therefore, if you enable those preferences or settings, you can write data to NTFS drive on macOS High Sierra. However, this could be a complicated and risky task due to the unreliability of Apple's NTFS format writable support.
As a solution to this issue, there are now many high-quality NTFS drives for Mac and powerful programs to mount NTFS external disks on a Mac. These methods may allow NTFS Write on Macs. In short, High Sierra has support for writing to NTFS volumes.
Types of NTFS drivers for macOS High Sierra in the market
Paid Third-Party Drivers:
Using a paid third-party NTFS driver on a Mac is one of the several ways to write NTFS volumes on macOS High Sierra. These premium options are straightforward to implement and, in theory, perform better than their free counterparts. They provide superior performance and control over the NTFS drive's stored files. For instance, you may use DoYourData NTFS for Mac, which works with macOS High Sierra.
DoYourData NTFS Driver:
As a famous Mac utility developer, DoYourData offers reliable NTFS for Mac solution - DoYourData NTFS for Mac. It will smoothly and quickly install on current macOS versions. If you're willing to spend a little money for this function, it's the greatest choice because it actually "just works."
With the free drivers listed below, you won't have to fumble with terminal commands to mount partitions manually, automatically mount partitions insecurely, or deal with potential corruption. If you require this capability, spending money on quality software is worthwhile.
Free Third-Party Drivers:
You can download and install a free, open-source driver to enable writing to NTFS volumes on a Mac. System Integrity Protection is a new macOS 10.11 El Capitan feature that complicates installation. It's slower than premium alternatives and can compromise security by automatically mounting read/write NTFS disks.
FUSE for macOS:
Although this approach is free, it is less secure and involves a lot of work. You'll need to temporarily disable System Integrity Protection and swap out one of Apple's built-in tools with a more vulnerable binary to attack to have your Mac automatically mount NTFS volumes in read-write mode. Thus, this approach poses a security concern.
If you don't mind using the Terminal, you can manually mount NTFS volumes in read-write mode using FUSE. Although it takes more labor, this is more secure. Although this approach is free, it is less secure and involves a lot of work. You'll need to temporarily disable System Integrity Protection and swap out one of Apple's built-in tools with a more vulnerable binary to attack to have your Mac automatically mount NTFS volumes in read-write mode. Thus, this approach poses a security concern.
How to enable NTFS Read-write support on macOS High Sierra?
No need to format your NTFS drive, just immediately install the reliable macOS High Sierra NTFS driver - DoYourData NTFS for Mac. Then you can use it to enable NTFS support on macOS High Sierra.
Step 1. Download and install DoYourData NFTS for Mac. After installing, open it.
Step 2. Connect the NTFS disk to your Mac, it will be recognized by DoYourData NTFS for Mac automatically.
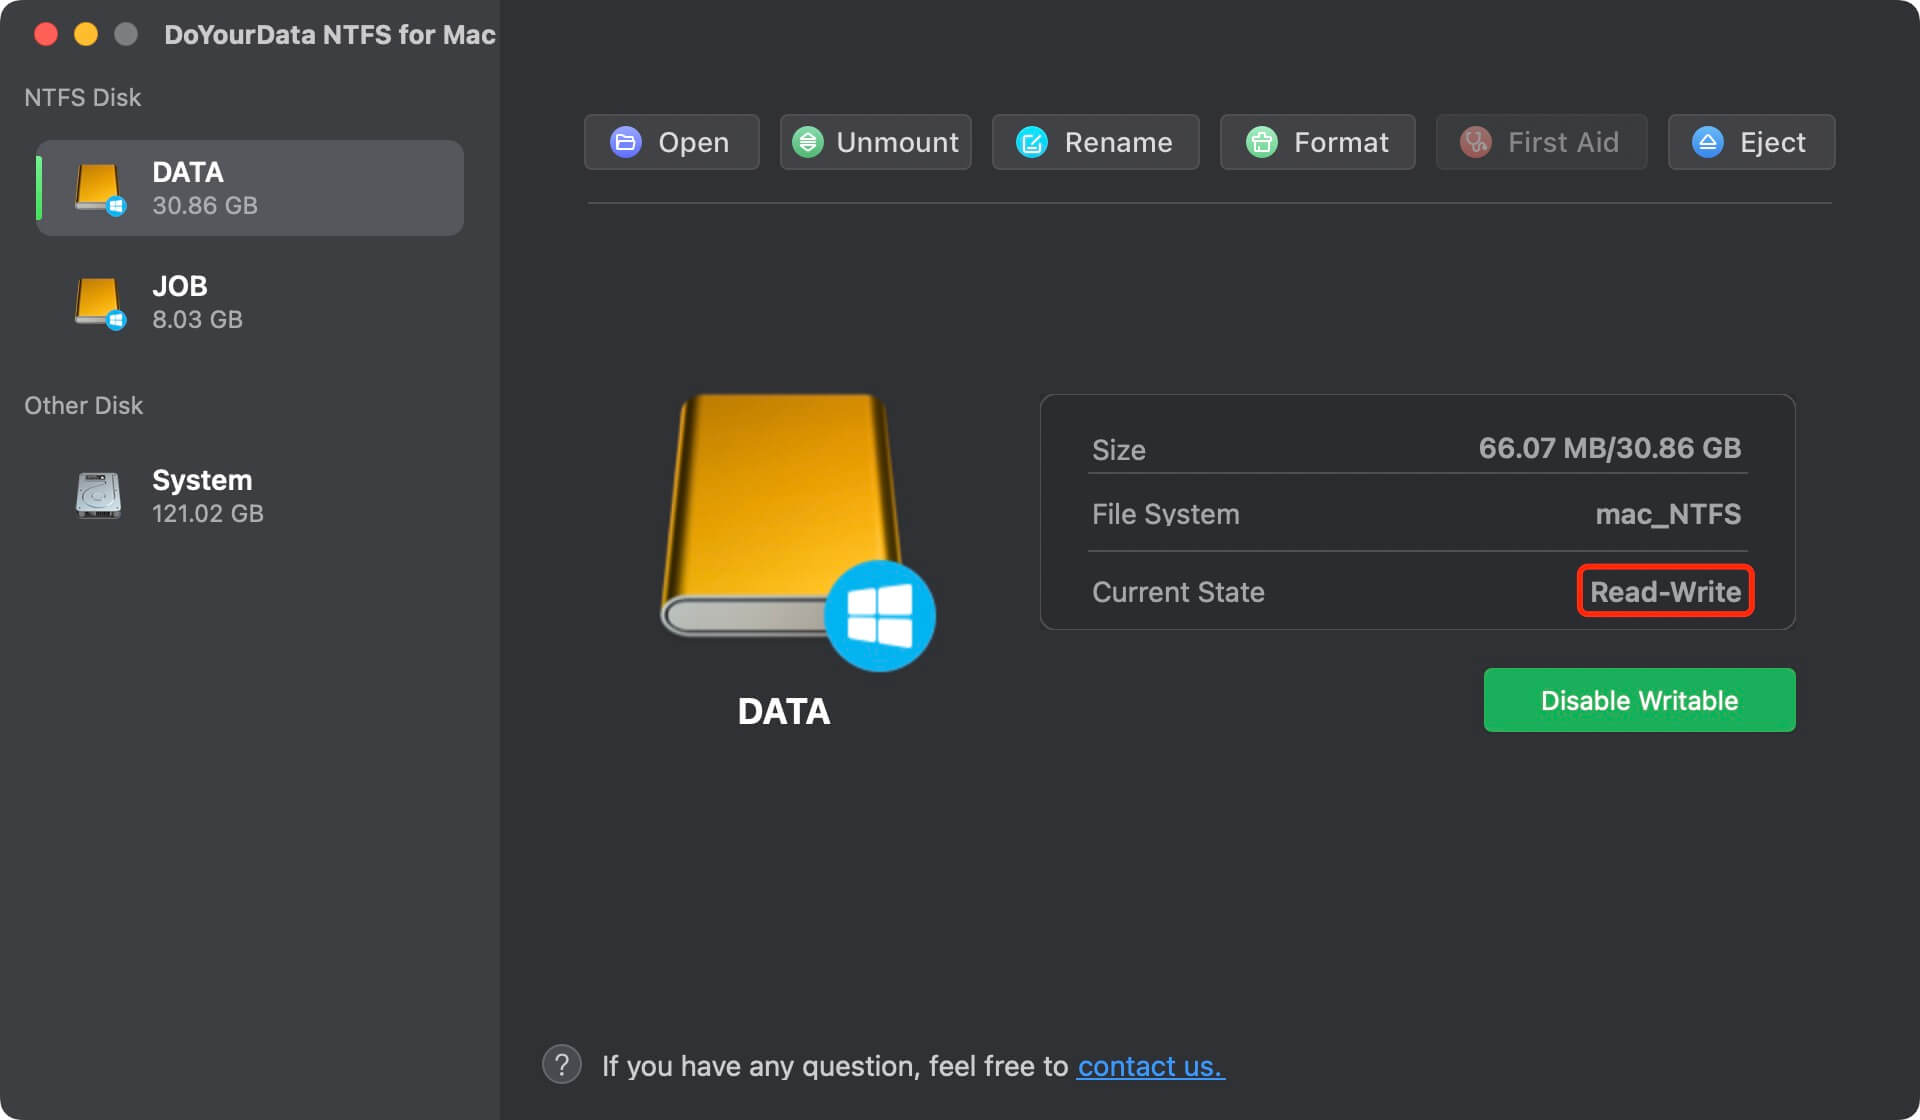
Step 3. Select the NTFS disk and click Enable Writable. It will quickly grant full read-write access to all NTFS drives on your Mac.

Now, you will see the status of the NTFS disk becomes Read-write. It means you can write data to the NTFS disk or delete/add/save/create/move/modify/rename files on the NTFS disk without any limitation.
FAQs about macOS High Sierra NTFS driver
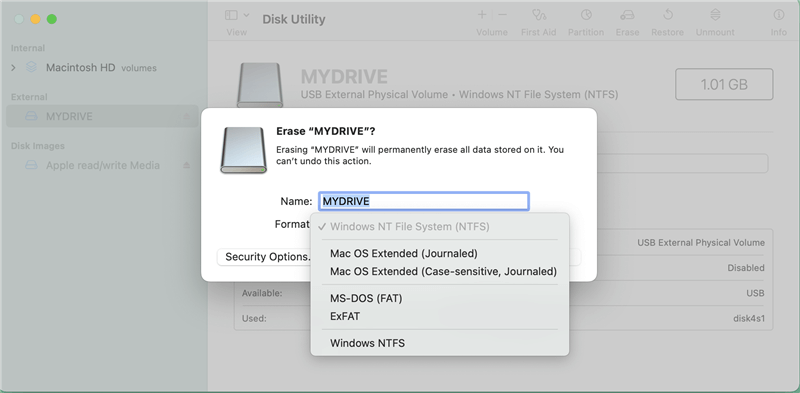
Here are the steps you'll need to do to use this approach to write to NTFS drives on macOS:
- First, launch Disk Utility by searching for it in Spotlight.
- Second, select the "Erase" tab for the Drive you want to work on in Disk Utility.
- Next, choose "ExFAT" from the menu and click the "Erase" button. If you follow the on-screen instructions, you can finish up quickly.
- DoYourData NTFS for Mac
- Fuse for macOS
- Donemax NTFS for Mac
- Tuxera NTFS for Mac
- Paragon NTFS for Mac
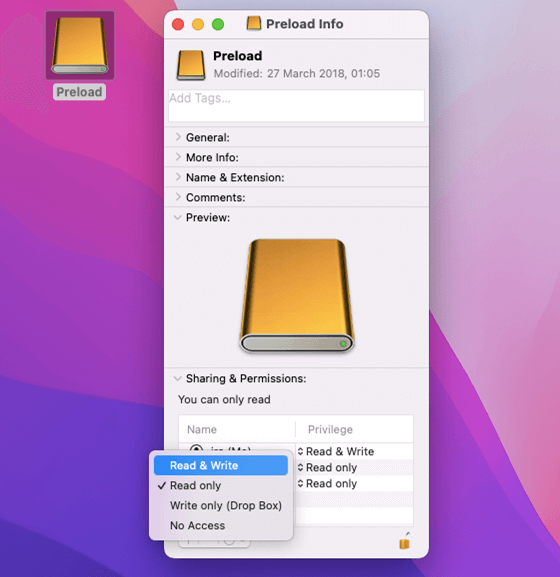
Secondly, click the drive icon and choose Get Info. Then check if it is read-write or read-only for your account. You can reset the drive to read-write.
Final Words:
macOS High Sierra does not support NTFS read-write by default. If you want to write data to an NTFS external hard drive on macOS High Sierra, you can download and install the reliable NTFS driver - DoYourData NTFS for Mac. It will quickly enable writable for NTFS drives on Mac and mount external hard drive, repair any damaged drive on Mac.
Another way to make a NTFS drive be compatible with macOS High Sierra is to format the drive to ExFAT/FAT/Mac OS Extended. Please back up your files before erasing the NTFS drive with Disk Utility.