The reliable Mac data recovery software to recover deleted or lost files.
Free TrialDeleting anything on your Mac is never dangerous because you can always return it to the Trash and recover any deleted documents. However, there are times when you want to delete specific files permanently. Then empty the Trash to delete your data permanently.
What if Mac's Trash refuses to empty? The Trash folder may not open itself due to system errors. So, today I'm going to address this issue and assist you in clearing Trash on Mac.
Reasons Why You Are Unable To Empty Trash On Mac
- You are running an out-of-date operating system.
- The file you are attempting to delete from Trash is currently in use.
- Trash’s operation is being hampered by installed software or applications.
- Permissions issues.
- The files have been locked.
How to empty Trash on Mac?
An outdated operating system is sometimes the first reason why some system applications do not run smoothly. If you can't empty your Trash on Mac, ensure your macOS is up to date.
If your Mac is running the most recent operating system version, but Trash is still acting up, try the following fixes.
Fix 1: Restart your Mac
Won't trash empty on your Mac? It's possible that something in Trash is still being used. It could be a file or a component of the application. You must end all active processes on your Mac to resolve the issue. A simple restart of your MacBook should solve the problem.
Go to the top menu and select the Apple icon.
To restart your Mac, select Restart.
This will force any apps that are still running to close. Now try emptying the Trash.
Fix 2: Use the Option key to empty the Trash
If you can't open the Trash to delete everything inside, you can do so from the Dock. By pressing the Option key, you can access options and empty the Trash without opening the folder.
Here’s how you do it:
In the Dock, look for the Trash icon.
Hold the Option (or Shift) key and double-click the Trash icon.
Select Empty Bin.
When the pop-up window appears, confirm.
I hope that helped you empty the Trash. If not, proceed to the following solutions.

Fix 3: Use Safe mode
Safe mode prevents your Mac from loading specific software during startups, such as login items and system extensions not required by macOS. Using Safe mode, you can see if any apps or software are interfering with regular Trash operation.
Go to the top menu and select the Apple icon.
Select Restart.
Hold down the Shift key while your Mac restarts.
When the Apple logo and progress bar appear, release the key. In the upper-right corner of your screen, you should see “Safe Boot.”
You've now entered Safe Mode on your Mac, meaning no third-party applications or startup items will be loaded.
You should be able to empty the Trash as usual and then restart your Mac to return to normal mode.
Fix 4: Force empty Trash on Mac using Terminal
You must exercise caution when using this option. On a Mac, entering the wrong command could delete much more than just the Trash.
Open Terminal should be accessible via Spotlight Search or Utilities > Terminal.
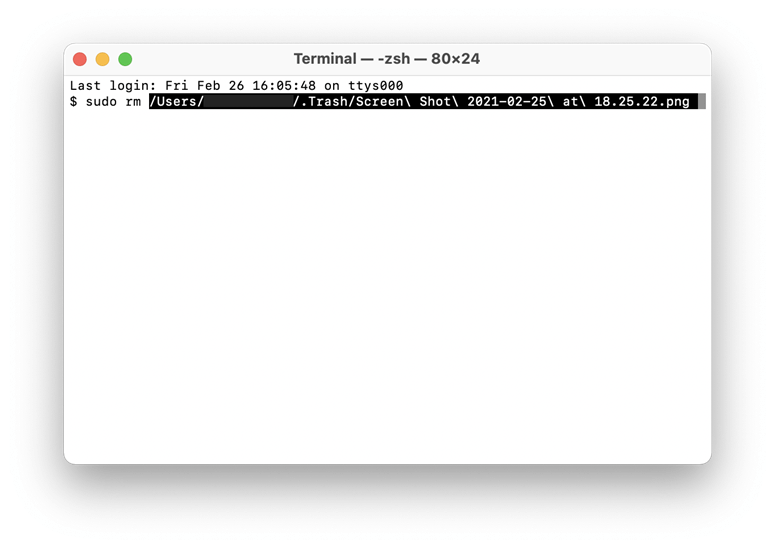
Once the Terminal is open, type sudo rm followed by a space, and do not press Enter (this is critical).
Now, in the Dock, open Trash and drag and drop files from the Trash into the Terminal window.

Now press the Enter key.
Enter your password again to confirm, then press Enter.
Now press the Enter key to empty the Trash.
Finally, you can empty the Trash by repairing disk permissions. This could be the reason you can't open it in the first place.
Fix 5: Mac won't empty Trash because the files are in use; how to fix it?
If you click the Empty button in the Trash folder, you may receive an error message stating that the operation cannot be completed because the item is in use.
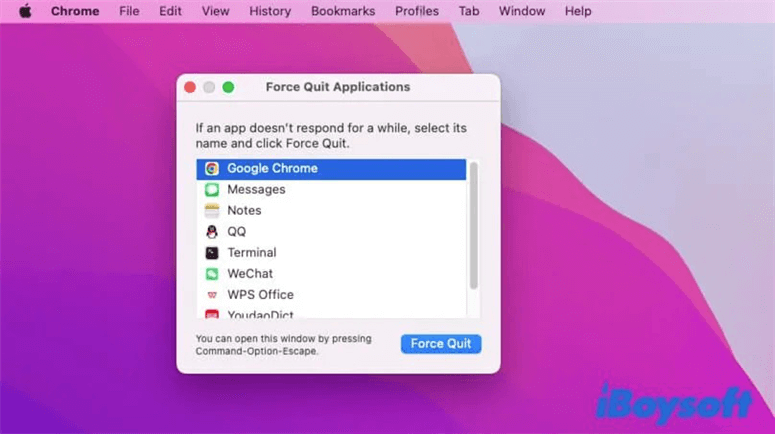
Close or Force Quit the document, DMG files, apps, videos, or other files if you still use them (Apple menu > Force Quit). Then you can successfully empty Trash.
However, in rare cases, the files you've moved to the Trash folder are used in the background by some programs or operational processes. It is difficult to determine which programs or processes are accessing the files, let alone close them.
In that case, a simple Mac startup can assist you in terminating all of your Mac's running processes. Go to the Apple menu and select Restart. After that, you can resolve the Mac Trash won't empty problem. If this method solves your issue, please tell your friends about it.

Fix 6: Check if your files are locked
If you can’t empty the Trash, or Bin, as it’s now known, it could be because your files are protected from deletion.
If you Control + click on any file, you’ll find the option to lock it under the Get info menu.
So go ahead and open the Bin and look for files that will not be deleted.
Control + click the file and select Get Info.
Uncheck the Lock checkbox now.
Check to see if the trash can is empty this time.
You are now fully knowledgeable about Trash on Mac. I hope you found this article valuable. Stay tuned for more helpful hints!
Fix 7: How to empty Trash on Mac if you don’t have permission?
Maybe you want to empty the Trash on Mac, but it tells you you don't have permission. This is because you are not Mac's administrator and do not have full read and write access to some of the files in Trash.
But don’t worry; you can change your permissions and resolve the MacBook Trash won’t empty issue.
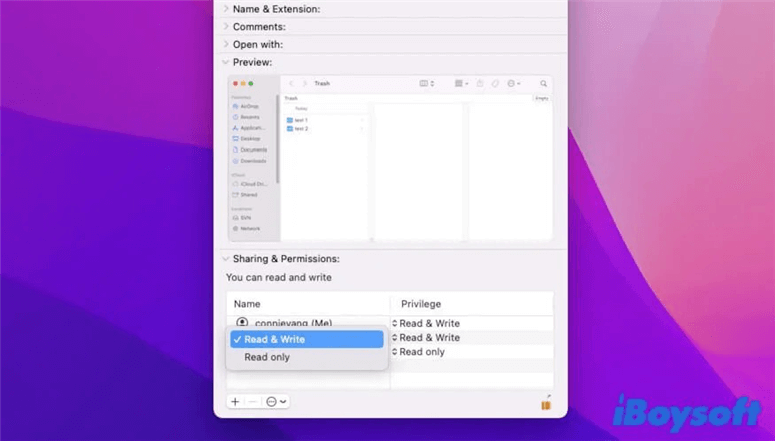
Get Info by right-clicking the file in the Trash.
Expand the Sharing & Permissions tag to see if you can access this file.
Enter the admin account by clicking the lock icon in the bottom right corner.
Change your reading and writing privileges.
Repeat the preceding steps for any other files you do not have read or write permission.
You can now empty your Trash on your MacBook Pro, Air, Mini, or other models.

Conclusion: This Is How You Empty the Trash on Mac
Emptying your Trash can help keep your Mac clean and uncluttered. It frees up disk space, making your Mac run more smoothly. Hopefully, this article has assisted you in emptying the Mac Trash.
DoYourData Products
DoYourData Super Eraser for Mac
Permanently shred files or wipe hard drive to prevent data recovery on Mac.
Free TrialClone HDD, SSD, Mac OS, external disk, USB drive, and more under Mac OS.
Free Trial