Clone to back up your Mac
How to Clone Hard Drive on Mac? [Intel-based/Apple silicon Mac Supported]. Read more >>
How to permanently erase everything on Mac? There are some necessary steps to follow. You first need to sign out the logged accounts and services first, then reset the system or wipe the hard drive directly. After that, you still need to wipe the personal data permanently to make sure it's safe to sell the Mac or give it away.
![]() Updated by Shirly Chen on October 8, 2024
Updated by Shirly Chen on October 8, 2024
Quick Navigation:
For many reasons, like getting ready to sell your Mac, fixing software problems that won't go away, or just starting over, you may need to delete everything on Mac. This guide will show you how to do everything, ensuring your data is safe and your Mac is returned to its original settings.
You will learn to delete your startup disk, sign out of important services, reinstall macOS and wipe personal data permanently. Following these steps will ensure your Mac is clean, safe, and ready for its next use, whether for you or someone else.
If you want to delete everything on your Mac successfully, do it step-by-step. We have written a step-by-step guide on deleting things on a Mac without losing info you don't want to.
If you don't want to lose important files or papers, you might want to make a copy first. You can either back up your files by hand or use Time Machine on your Mac to do the same thing.
Taking a manual backup
That is the simplest way to keep your information safe. Just connect something outside your Mac, like a USB or hard drive. Then, copy and paste data from the Mac's internal drive to the external drive by hand. This method will take longer but let you choose which information to save.
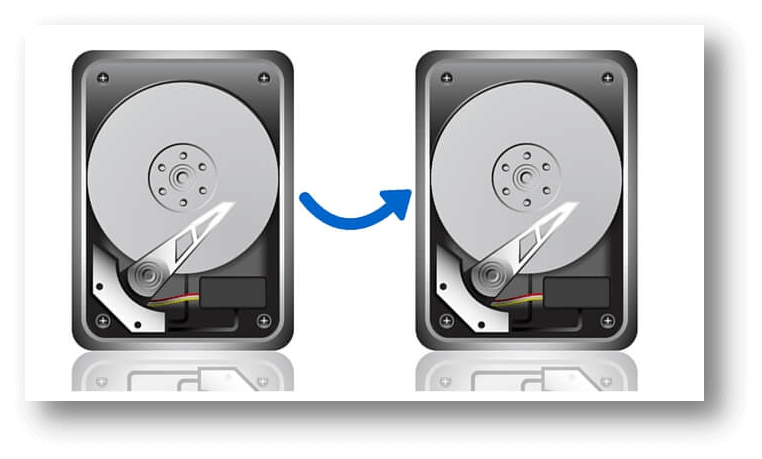
The best way to manually back up the Mac is cloning the entire hard drive directly. We suggest you use the professional cloning software DoYourClone for Mac. It can clone the entire Mac and create a bootable copy for your Mac as full backup.
Clone to back up your Mac
How to Clone Hard Drive on Mac? [Intel-based/Apple silicon Mac Supported]. Read more >>
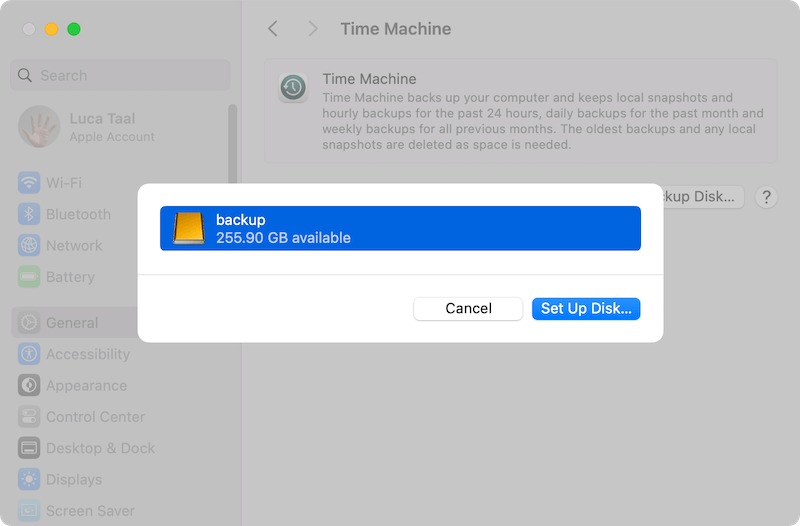
Using Time Machine
Time Machine is a built-in Mac tool that automatically backs up our computers. Any portable or flash drive can be used as a Time Machine drive. Start Time Machine on your Mac and ensure the backup is turned on. Wait a while because Mac regularly backs up its files on the connected drive. Just ensure the outside source has enough space to keep your files.
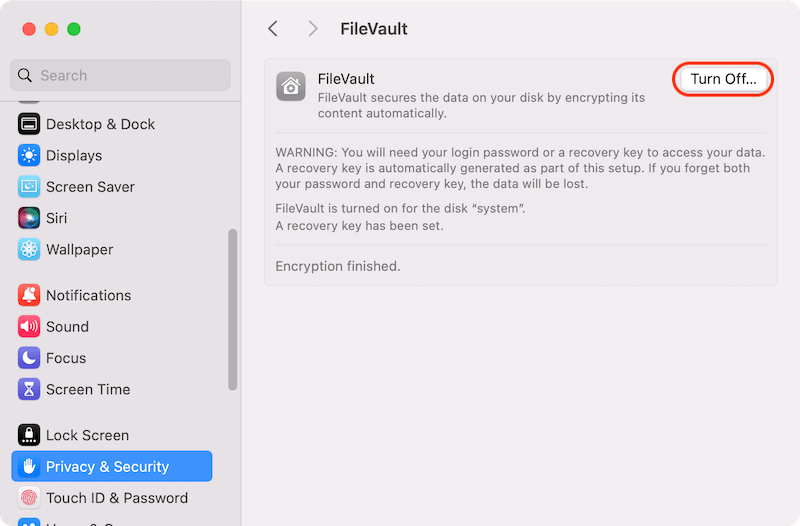
The Mac has a built-in tool called FileVault that lets us encrypt the hard drive. Users must prove who they are before accessing the files if FileVault is turned on. That being said, turning the function on could make deleting files on a Mac hard. FileVault should be turned off before you learn to delete things on a Mac.
iCloud is an important of a Mac. You can back up your iOS devices and share them with your Mac with iCloud. If you want to sell your Mac, you should stop iCloud from accessing it. The other person won't be able to get to the synced info on your iOS device this way. It will also stop people from using your iCloud account on your Mac, keeping you safe.
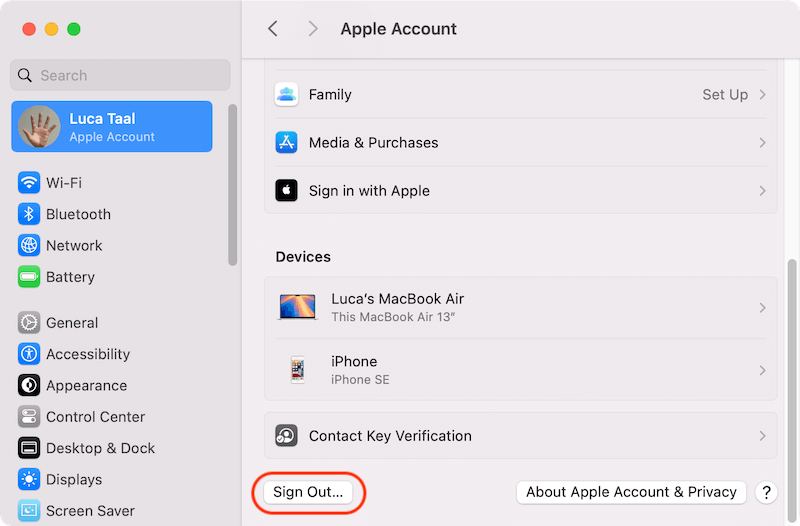
So you should also log out of your iCloud account on your Mac. Click Apple Menu > System Settings, click on your avatar to enter the Apple Account. If you are already logged in, you can see your iCloud account information. Scroll down to the bottom of the windows, click the "Sign Out" button to make sure you want to leave your iCloud account.
Like with iCloud, you can also deauthorize accounts for the Music (or iTunes for old Mac operating systems), TV app, iMessage, Find My, and other services. Also, if you have paired your Bluetooth devices to the Mac, you can also check and unpair them.
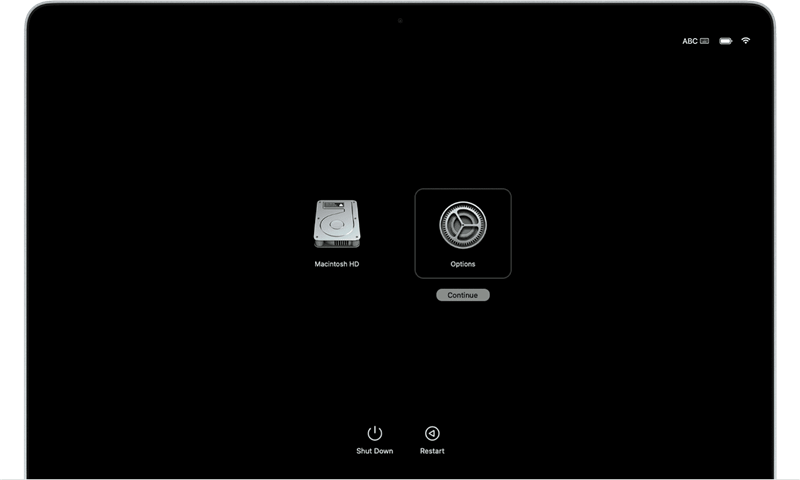
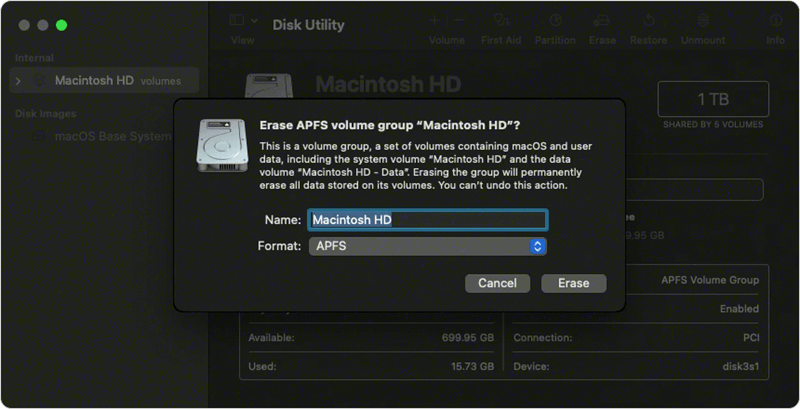
You are now ready to delete everything you have saved on your Mac. It is better to wipe the hard drive than delete individual files completely. That will surely delete everything you have saved on your Mac at once. Follow these steps to remove everything on your Mac.
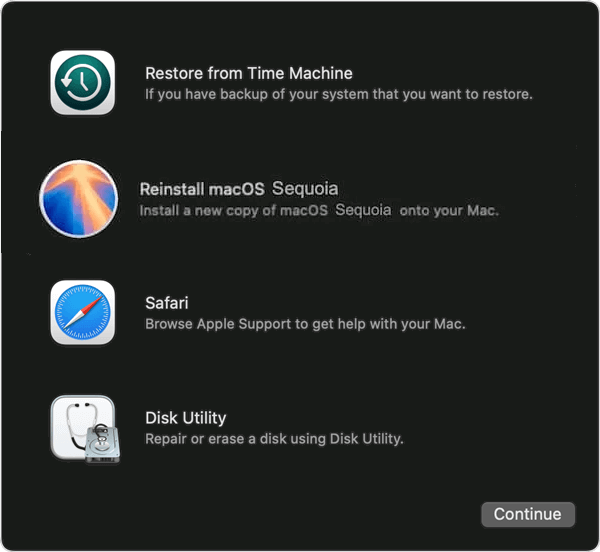
In the end, you can reinstall the macOS after remove everything from the hard drive. This will keep your information safe and bring your system up to date with the latest software. It will also fix the OS if it has been broken before. Here is a quick and easy way to update your computer's macOS.
After erasing the hard drive in Disk Utility under Recovery Mode, you can quit Disk Utility and go back to the previous screen. To finish the update, click "Reinstall macOS" and follow the simple step-by-step instructions.
📎 Tips: You can also reset the system directly and choose to remove everything from Mac to replace the above Step 4 and Step 5. Here are the steps to reset the macOS:
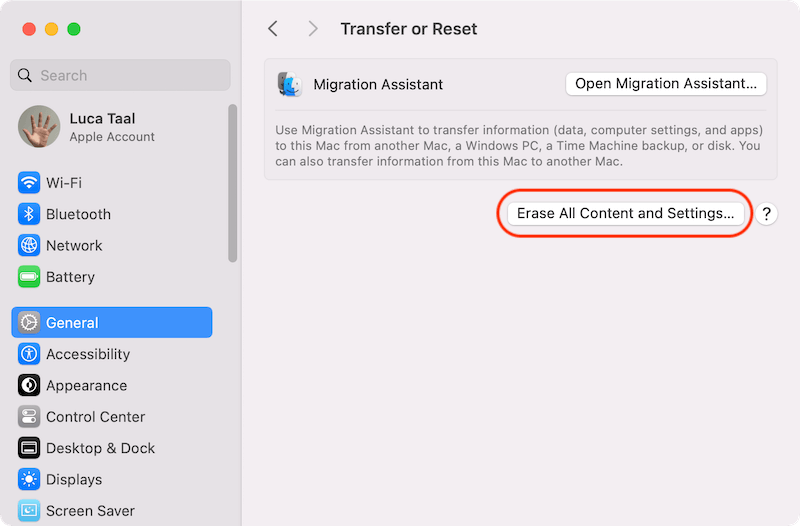
Click the Apple menu > System Settings > Transfer and Reset. Click "Erase All Content and Settings" button.
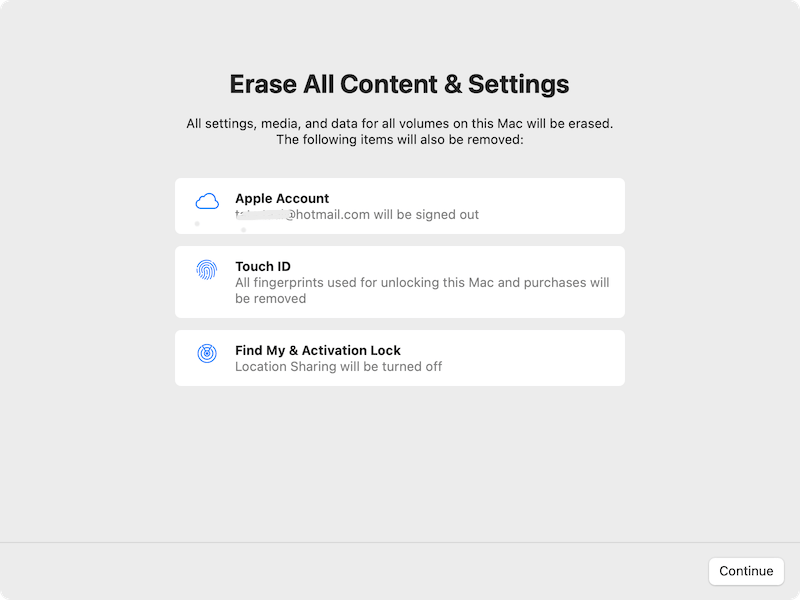
It will erase all settings, media, data and all volumes on your Mac. You can just click Continue button to reset the Mac.
If you just want to keep your cleaned Mac for further use by yourself, the above steps are enough. However, if the Mac will be sold or gave away, that's not enough. Even though the personal data on the Mac was removed, the data are recoverable for professional Mac data recovery software.
To ensure the removed data is unrecoverable in any way, it's necessary to wipe the removed data permanently by reliable data erasure software, like DoYourData Super Eraser for Mac. The software can wipe the removed data, existing files, or volume permanently to avoid data recovery.
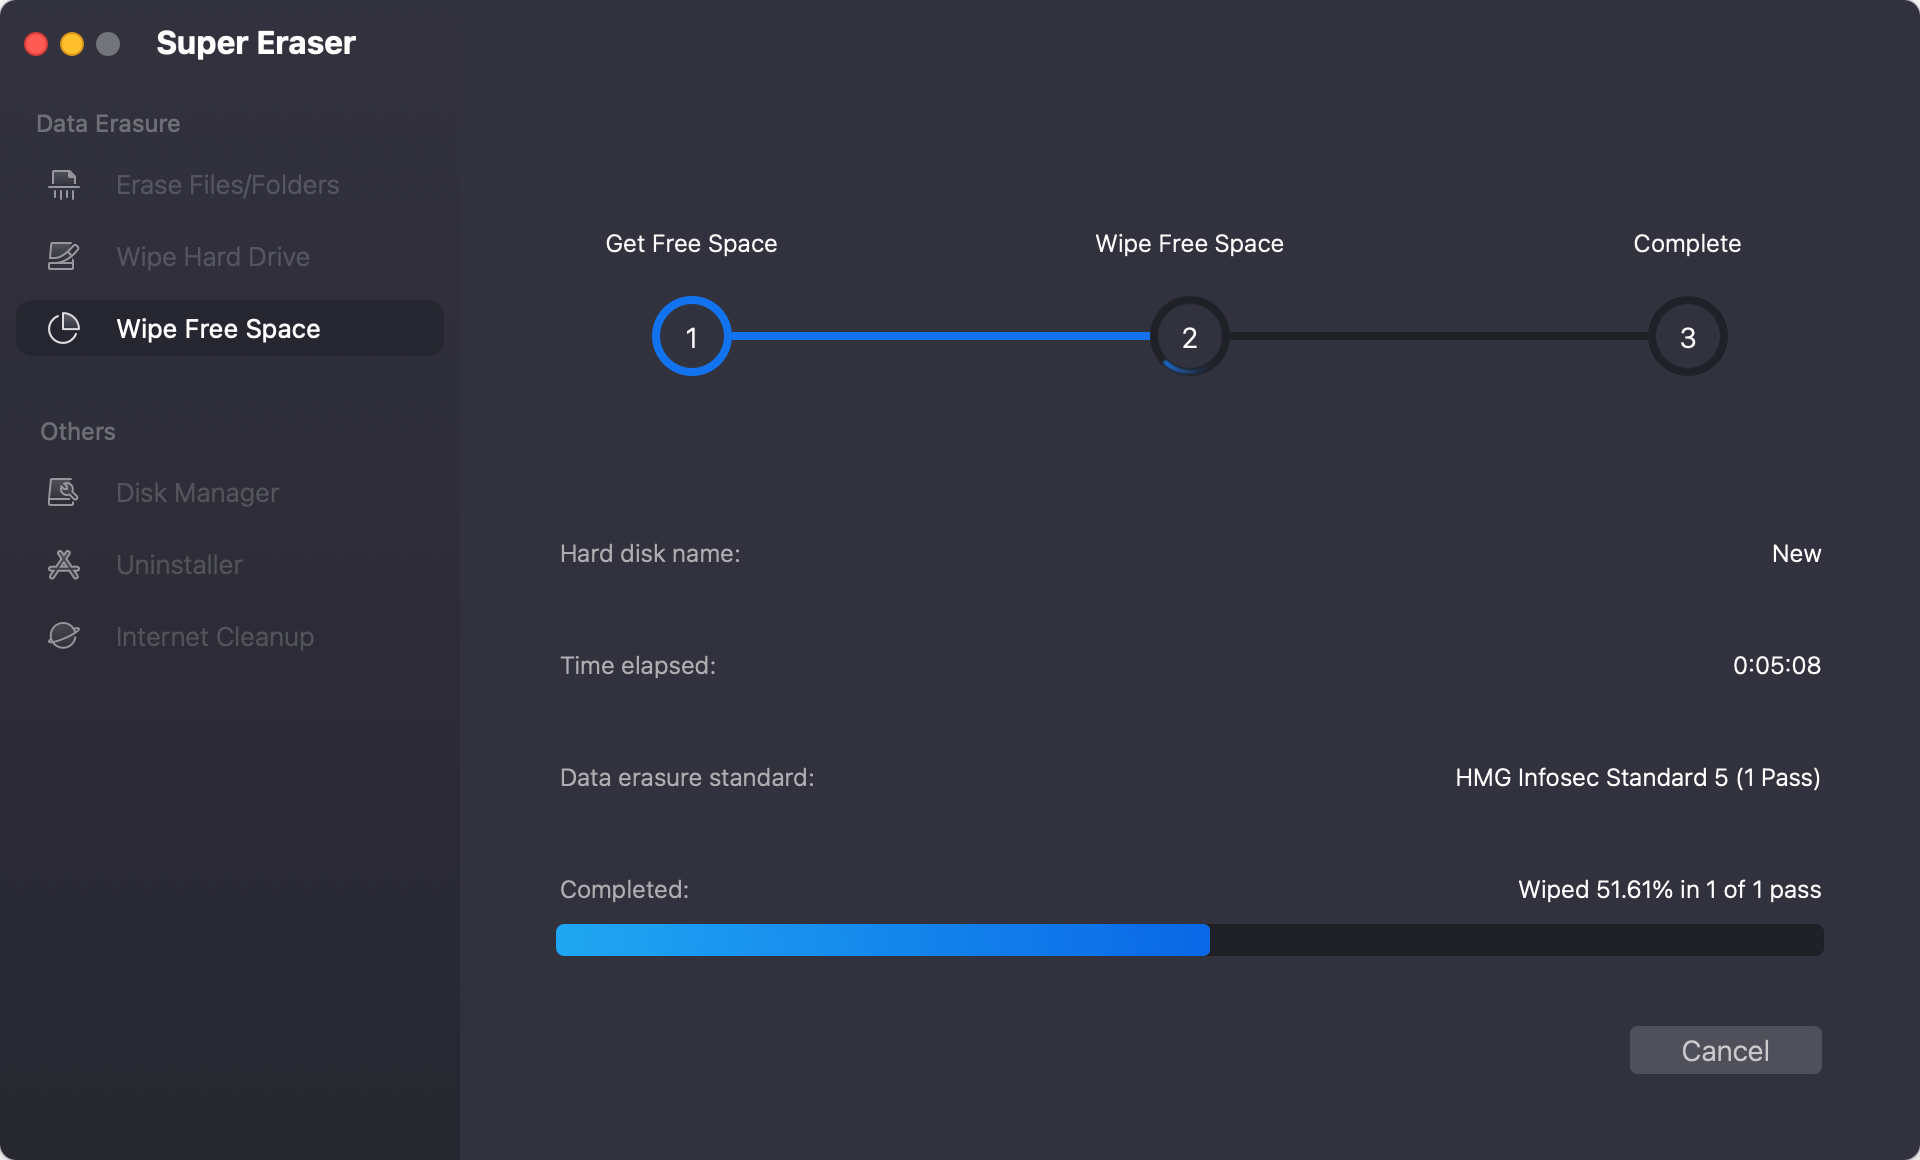
After reinstalling or resetting the Mac, you can then use the software to wipe the free space of the Mac drive to ensure all the removed personal data will not be recoverable in any way. Here is how to handle the software to wipe the free space of the drive.
Step 1. Download and install the data wiping software on your Mac. Run the software from launchpad (or run the software from Finder > Applications).
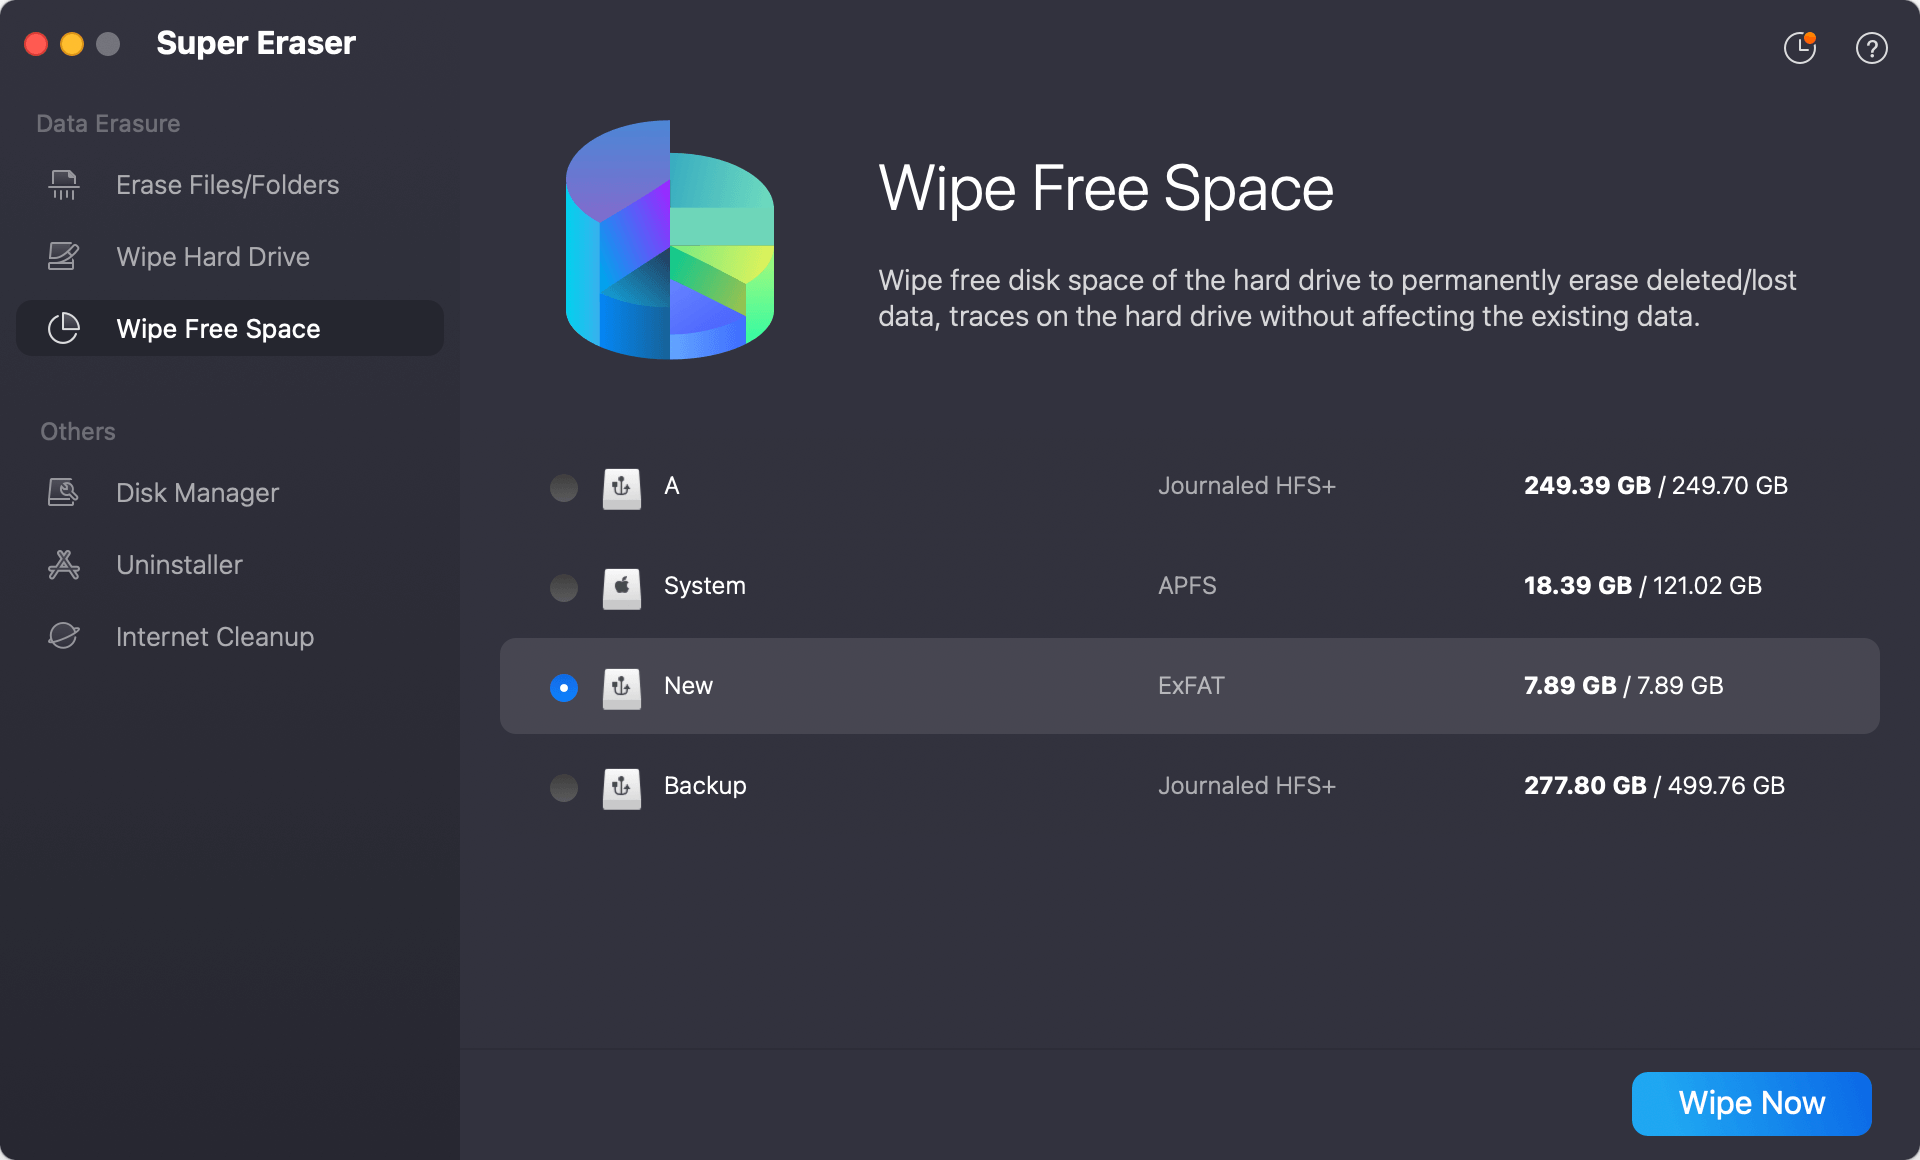
Step 2. Select the mode Wipe Free Space and select the internal Mac system hard drive, click on Wipe Now.
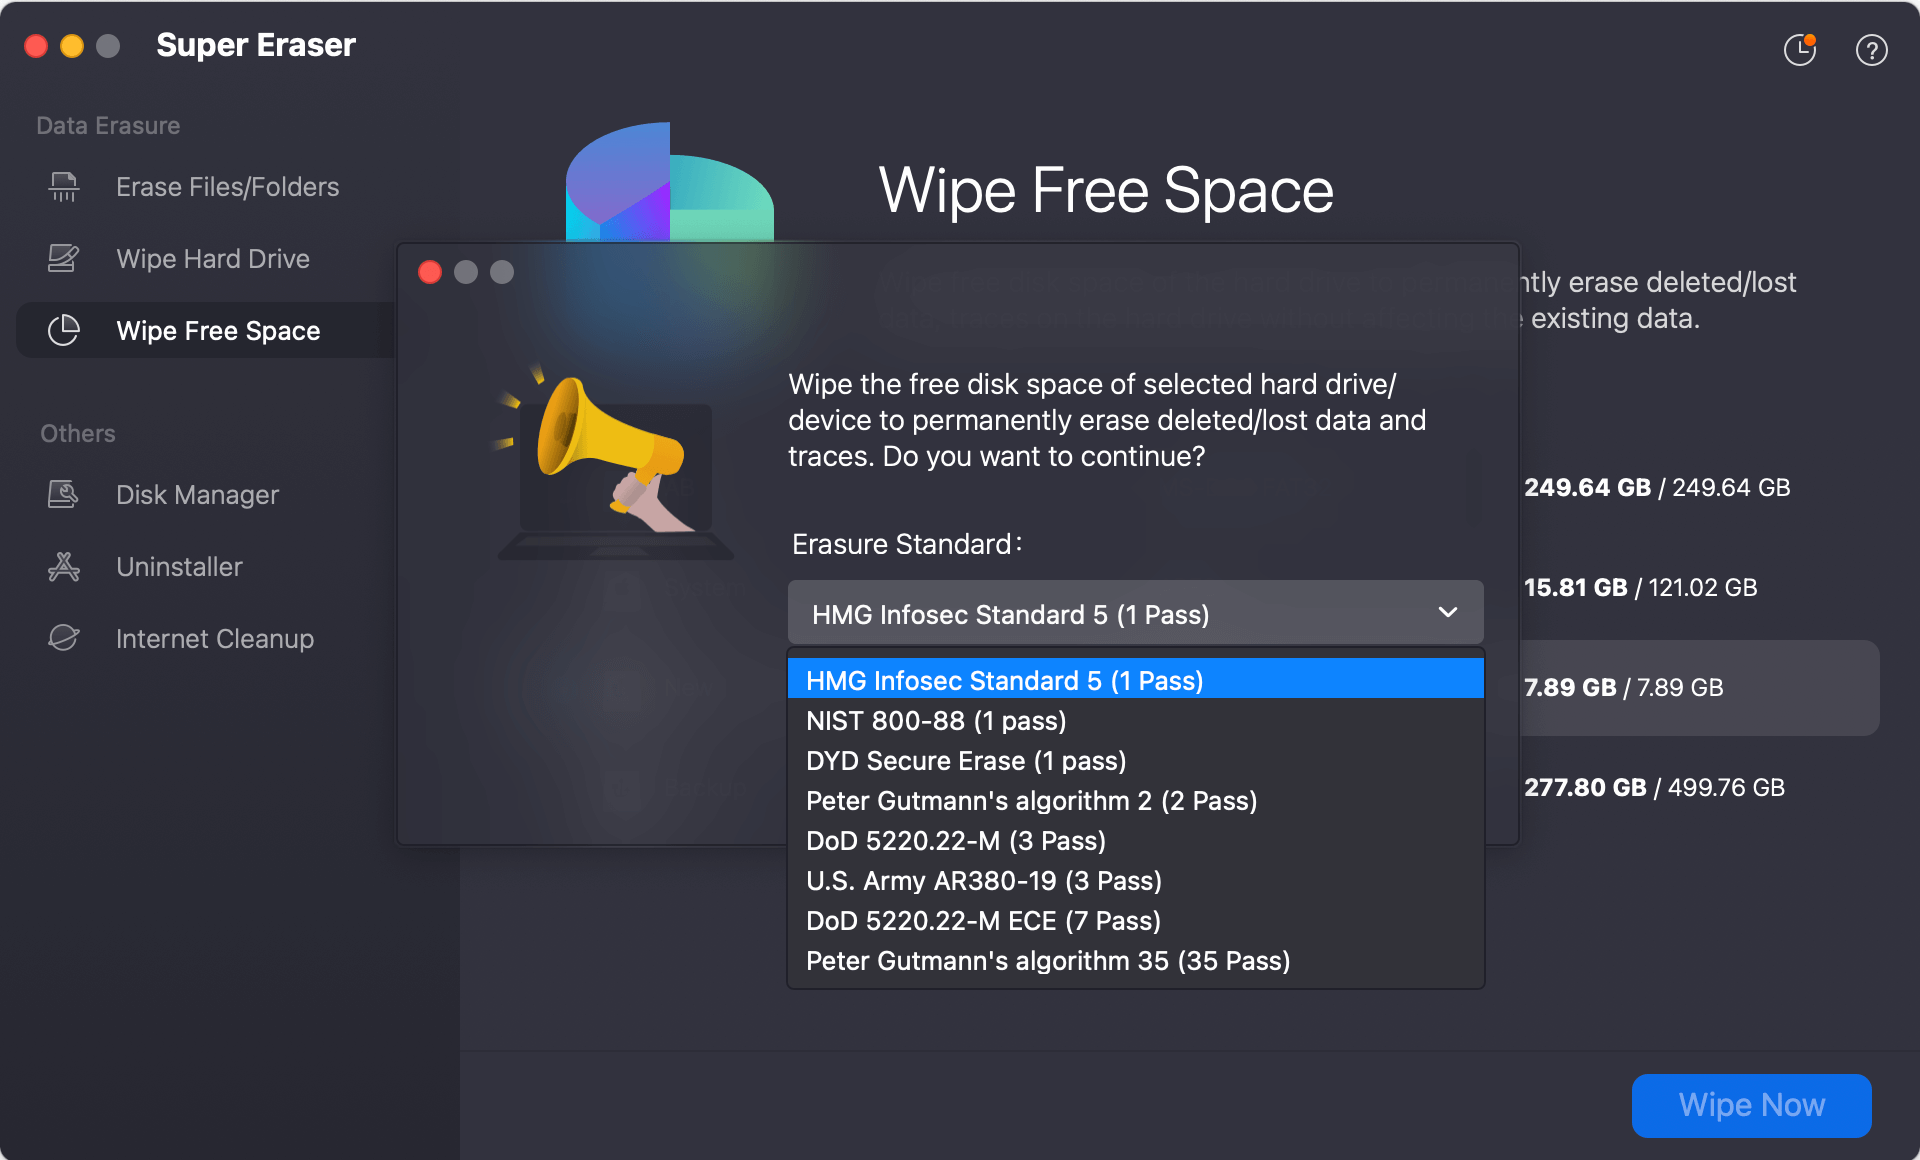
Step 3. You will need to select a data erasure standard at this step. You can click the drop-down list to see all the supported data erasure algorithms, select one and click Continue.
Step 4. It will take some time to finish the data wiping process depending on the disk size and data erasure algorithm you choose.
After wiping the free space of the Mac drive, you can then use any data recovery software to scan the drive. You will find that no software can find any previous personal data from the drive.
Also, the software offers the other 2 mode which can help you shred existing files/folders, or you can use the software to wipe an entire non-system drive, like an external hard drive, USB flash drive, memory card, etc.
If you take the right steps, deleting everything on your Mac can be easy. Following the above steps will help you safely and successfully erase your Mac, whether you're getting ready to sell it, fixing problems, or want to start over.
To delete and restart macOS, back up your files, log out of important services, and carefully follow the steps to wipe the data. That will ensure your Mac is clean, safe, and ready for its next adventure, whether that's a new owner or a fresh start for you.
1. Steps to erase everything on a Mac.
Here are the steps to erase everything on a Mac as follows:
2. Is the data recoverable after resetting or reinstalling macOS?
Yes, the data is still recoverable after resetting or reinstalling the macOS. With professional Mac data recovery software, it's possible to recover the lost data in such a case.
3. How to wipe data permanently on Mac and avoid data recovery?
To ensure the data on Mac is wiped permanently and cannot be recovered in any way, it's essential to wipe the data with reliable data erasure software, like DoYourData Super Erasure for Mac. The software offers 3 modes to wipe data or volume:

DoYourData Super Eraser for Mac
DoYourData Super Eraser for Mac is a 100% safe, powerful and easy-to-use data erasure program. It offers certified data erasure standards including Peter Gutmann, U.S. Army AR380-19, DoD 5220.22-M ECE to permanently erase data from Macs and external devices, making data recovery be impossible.
Written & Updated by Shirly Chen
Shirly Chen has been writing data recovery, data erasure articles for DoYourData over 4 years. She has been working as a professional website content writer & editor for quite a long time. She also writes articles about disk clone, Mac optimization, disk backup, etc.