Methods to back up Mac data
Back up Mac data with Time Machine or create full and bootable copy with DoYourClone for Mac.

Quick Navigation:
In the digital age, where capturing moments has become second nature, the possibility of accidentally deleting precious photos can be a nightmare. Mac users, despite having a robust operating system, are not immune to this common problem. Whether it's a slip of the finger or a mistaken decision during a photo-cleaning spree, losing cherished photos can be heart-wrenching. There are several methods, including free options, that can help you undelete photos for free on a Mac. This article will explore these methods, offering a step-by-step guide to recover your lost memories without spending a dime.
Prior exploring some free recovery methods, it is necessary to know how macOS handles file storage. When a file, such as a photo, is deleted on a Mac, it is not erased from your system completely. Rather, the space allotted to that file is given to another file in the system. Until new data overwrites this space, the deleted file remains recoverable. This is why it's crucial to act quickly after realizing that you've deleted important photos.
Mac users primarily store photos in two ways: within the Photos app or in the file system (such as the Desktop or a specific folder). The recovery methods can vary slightly depending on where the photos were stored before deletion. We'll cover the methods suitable for both scenarios.
The first line of defense against accidentally deleted photos is the Trash bin. When you delete a photo on a Mac, it is moved to the Trash, where it remains until you empty the Trash. This gives you a window of opportunity to recover your photos without needing any specialized Mac data recovery tools.
To recover photos from the Trash:
1. Open the Trash by clicking its icon on the Dock.
2. Look through the files in the Trash to locate the pictures that were removed.
3. To return the selected photographs to their original position, click right on them and select "Put Back".

It's essential to note that if you've emptied the Trash, the files will no longer be accessible through this method. However, this doesn't mean all hope is lost; other recovery methods can still help.
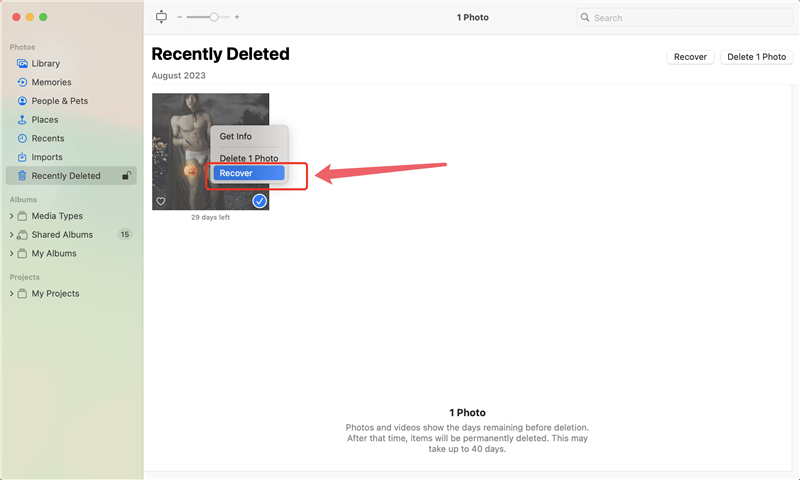
For those who use the Photos app to manage their images, there's a built-in safeguard against accidental deletion. When you delete a photo from the Photos app, it isn't immediately removed from your library. Instead, it is moved to the "Recently Deleted" album, where it remains for 30 days before being permanently deleted. During this time, you can easily restore the photo.
To recover photos from the "Recently Deleted" album:
1. Open the Photos app and click on the "Recently Deleted" album in the sidebar.
2. Browse through the photos to find the ones you want to recover.
3. Select the photos and click the "Recover" button to restore them to your library.

If the 30-day window has passed, or if you've manually emptied the "Recently Deleted" album, the photos will be permanently deleted from the Photos app. However, there are still other methods to explore.
Time Machine, macOS's built-in backup solution, is another powerful tool for recovering deleted photos. If you have Time Machine set up and have been regularly backing up your system, you can restore photos that were deleted from your Mac.
To recover photos using Time Machine:
1. Attach your Mac to the Time Machine backup drive.
2. Access the original folder containing the erased pictures.
3. In the menu bar, click the Time Machine icon and choose "Browse Time Machine Backups."

4. To locate a backup that includes the lost pictures, scroll down the timeline on the right side of the screen.
5. Select the photos you want to restore and click "Restore" to bring them back to their original location.

Time Machine is incredibly useful, but it only works if you've been regularly backing up your Mac. If you haven't set up Time Machine or if your backup is outdated, you might need to try other methods.
When the Trash is emptied, the "Recently Deleted" album is cleared, and there are no Time Machine backups, data recovery software becomes the next viable option. Fortunately, several free data recovery tools are available for Mac users that can help recover deleted photos.
1. PhotoRec: It is an open-source data recovery tool that specializes in recovering lost photos and other media files. It works by ignoring the file system and searching for underlying data. This makes it particularly effective for recovering files even after the Trash has been emptied. While the interface is not the most user-friendly, its powerful recovery capabilities make it a top choice for tech-savvy users.
2. TestDisk: Often bundled with PhotoRec, It is another open-source tool that focuses on recovering lost partitions and making non-booting disks bootable again. While it's not specifically designed for photo recovery, it can be helpful if the deletion was a result of a partition loss.
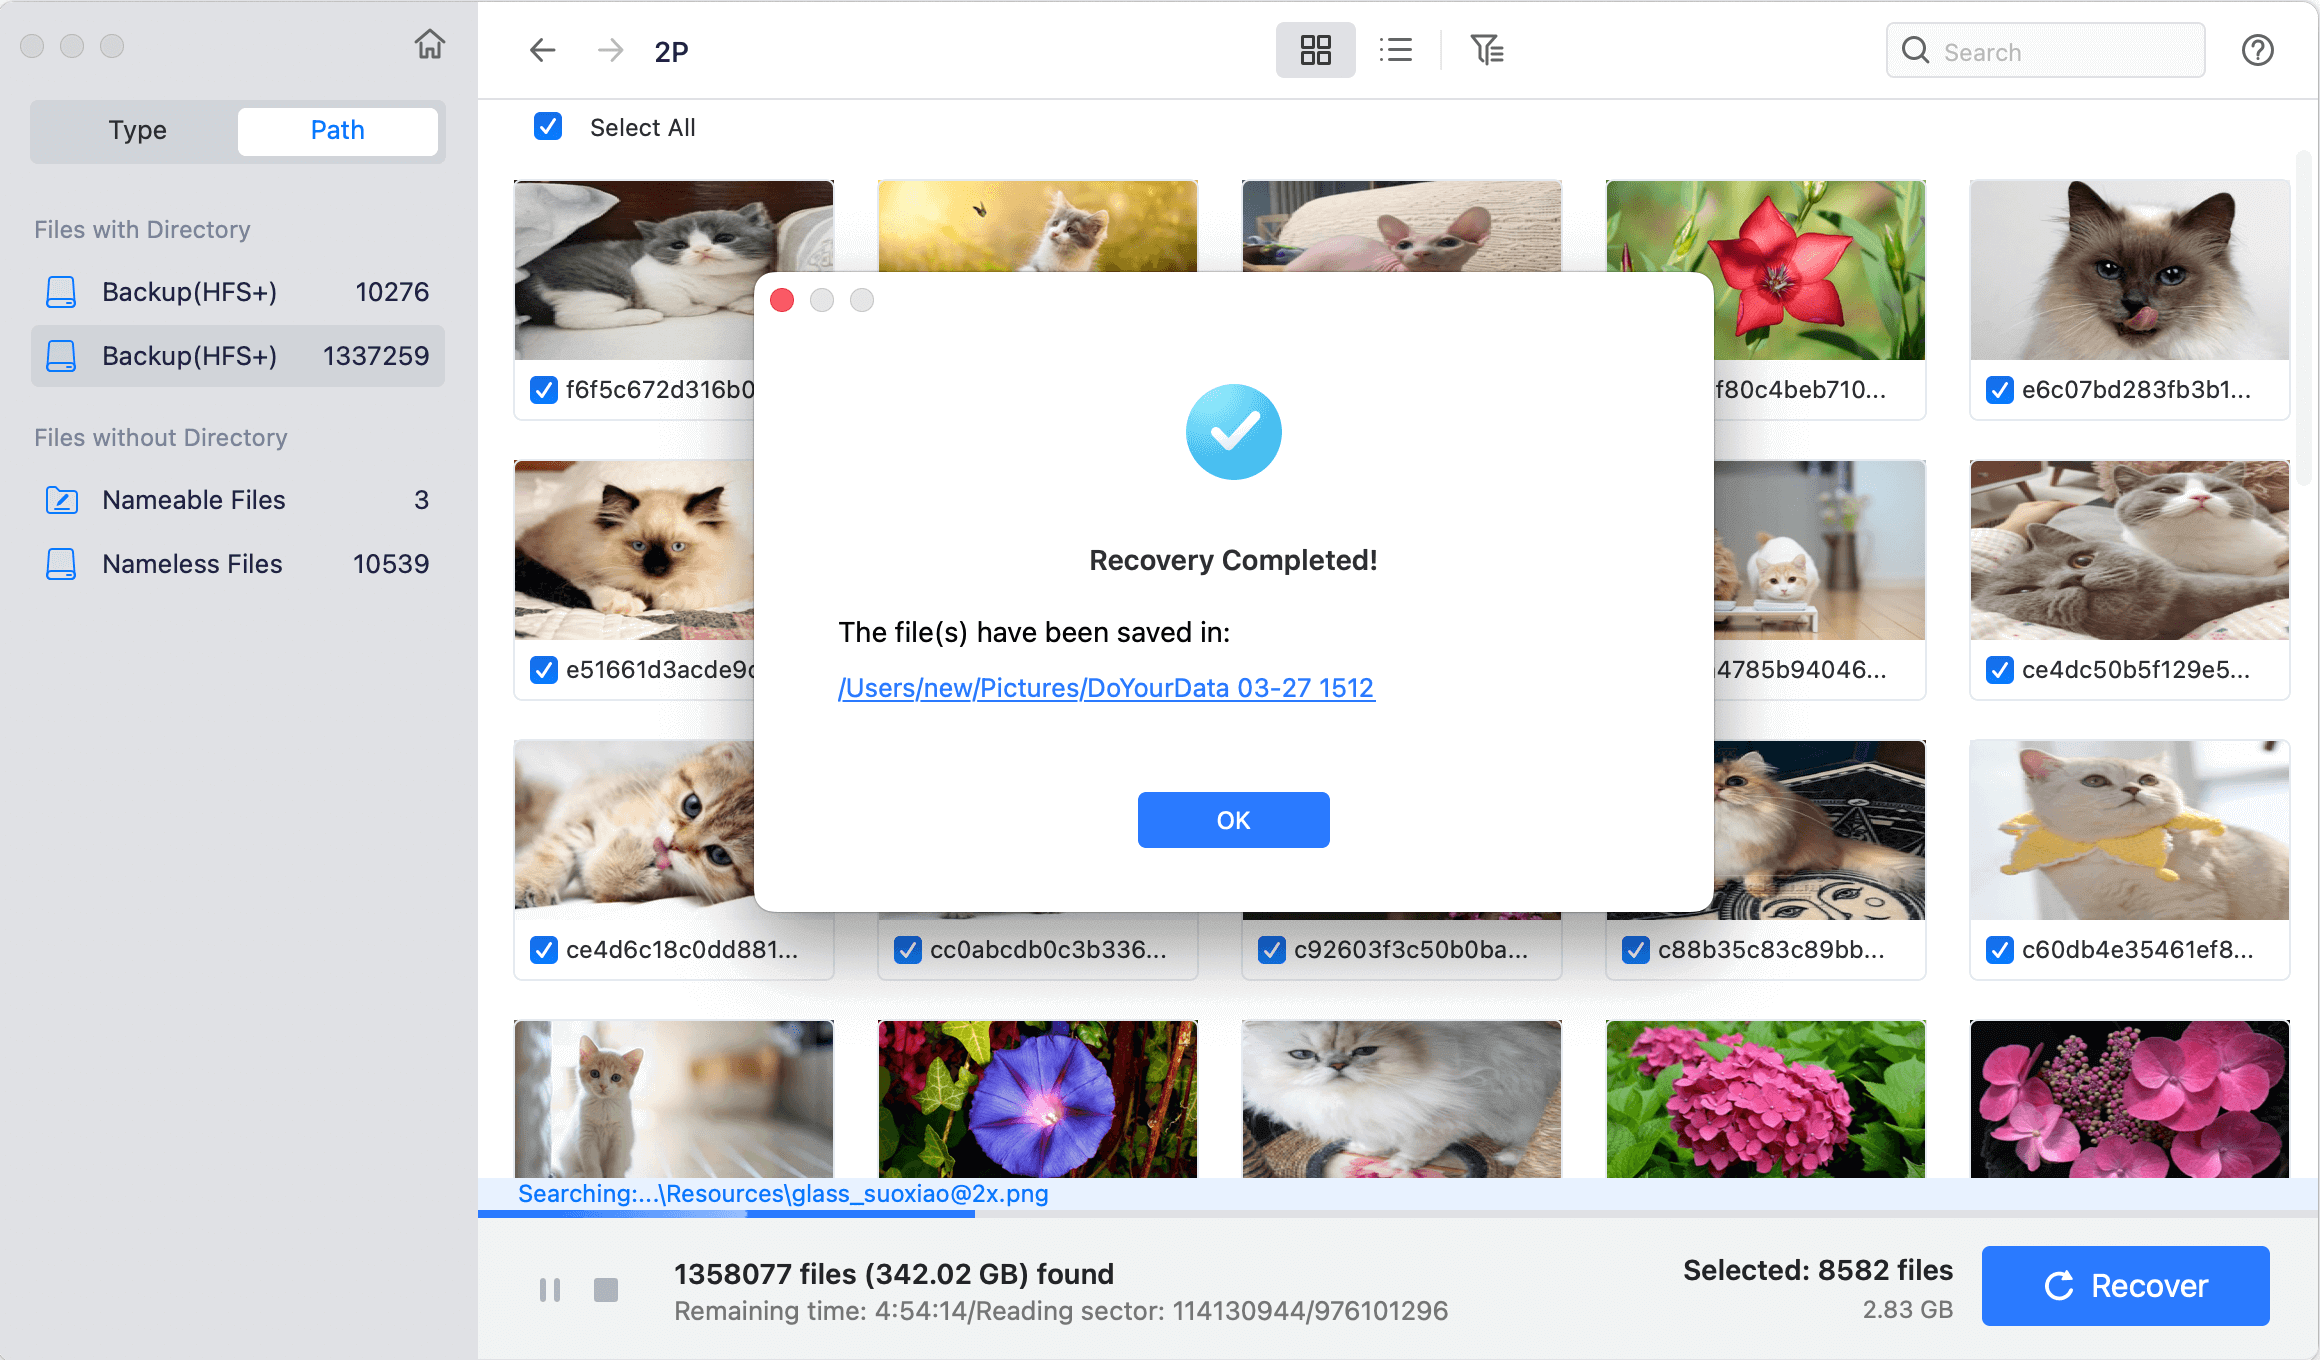
3. Do Your Data Recovery for Mac Free: It offers a free version that allows you to recover up to 1GB of data, which is generous compared to other free recovery tools and it is often enough for recovering a small number of photos. The software is user-friendly, with a simple interface that guides you through the recovery process. Do Your Data Recovery supports various file formats and can recover photos from multiple storage devices. This makes it a reliable option for photo recovery.
To recover deleted or lost photos for free with the software Do Your Data Recovery for Mac, follow the general steps below:
Step 1 . Download the software first and follow the wizard to install it to your Mac.
Step 2 . Run the software and it will list all the storage devices on Mac. Check and select the drive where you deleted the photos.

Step 3 . To begin the recovery task, just click the Scan button and the software will start to search for the lost photos by deeply scanning the drive.

Step 4 . Browse through the list of found files to locate the deleted photos. You can also double-click a photo to preview it and confirm if it's recoverable.

Step 5 . Select the photos you wish to recover and follow the prompts to save them to a safe location other than the original drive where you deleted the photos.

📍 Note: It's important to note that you should avoid saving recovered files to the same location from which they were deleted, as this could overwrite other recoverable data.
With the increasing reliance on cloud storage, many Mac users store their photos on services like iCloud, Google Photos, or Dropbox. These platforms often have their own recovery options that can save the day if your photos are deleted from your local storage.
iCloud Photos: If you use iCloud Photos, your deleted photos are automatically moved to the "Recently Deleted" folder in iCloud, where they remain for 30 days. You can restore them directly from iCloud.com or through the Photos app on any of your Apple devices.
To recover photos from iCloud:
1. Enter your Apple ID to log in at iCloud.com.
2. Select the "Recently Deleted" album by clicking on Photos first.
3. Choose the pictures you wish to get back and press "Recover."

Google Photos: Google Photos also moves deleted photos to the "Trash" for 60 days before permanently deleting them. You can restore them from the Trash via the Google Photos app or website.
To recover photos from Google Photos:
1. Open Google Photos on your Mac or visit photos.google.com.
2. Navigate to the "Trash" folder in the sidebar.
3. Select the photos you want to recover and click "Restore."

Dropbox: Dropbox has a similar feature, allowing you to recover deleted files from the "Deleted Files" section within 30 days (or 180 days for Dropbox Business users).
To recover photos from Dropbox:
1. Access your Dropbox account online.
2. Select the "Deleted Files" option from the side menu.
3. Choose the deleted photos you wish to have restored from the list and click "Restore."
Cloud-based recovery is particularly useful if you accidentally delete photos from multiple devices, as these platforms synchronize your changes across all connected devices. However, like other methods, there's a time limit for recovery, so it's essential to act quickly.
While it's reassuring to know that you can recover deleted photos, prevention is always better than cure. Here are some tips to minimize the risk of losing photos in the future:
1. Regular Backups: Set up Time Machine or another backup solution to ensure your photos are regularly backed up. Consider using multiple backup methods, such as an external hard drive and a cloud service, for extra security.
Methods to back up Mac data
Back up Mac data with Time Machine or create full and bootable copy with DoYourClone for Mac.
2. Use Cloud Storage: Store your photos in cloud services like iCloud, Google Photos, or Dropbox. These services offer version history and recovery options, making it easier to retrieve deleted photos.
3. Organize Your Photos: Regularly organize your photo library to avoid accidental deletions. Use albums, folders, and tags to categorize your photos, making it easier to manage them.
4. Be Cautious with Deletions: Always double-check before deleting photos, especially when using the Photos app or file system. Consider enabling the confirmation prompt for deletions if you tend to delete files accidentally.
5. Enable FileVault: FileVault encrypts the contents of your Mac's startup disk, adding a layer of security. While it doesn't prevent data loss, it protects your photos from unauthorized access if your Mac is lost or stolen.
Accidentally deleting photos on a Mac can be distressing, but with the right knowledge and tools, recovery is often possible. Whether you're using built-in features like the Trash and Time Machine or turning to free Mac photo undelete software, you have several options to get your photos back. By acting quickly and following the steps outlined in this article, you can maximize your chances of successful recovery.
Moreover, adopting preventive measures such as regular backups, cloud storage, and careful photo management can help you avoid future losses. Remember, while technology provides powerful recovery tools, being proactive about data protection is the best way to keep your memories safe. Whether you're a casual photographer or someone who stores thousands of photos on your Mac, these practices will ensure that your cherished moments are always within reach.

Do Your Data Recovery for Mac Free
Do Your Data Recovery for Mac, one of the best Mac data recovery software, can help you easily and completely recover deleted, formatted or lost files from Mac HDD/SSD, external HDD/SDD, USB drive, memory card, digital camera, or other storage devices.
