Quick Navigation:
- Why Clone A Hard Drive on macOS Sierra?
- Clone Hard Drive On macOS Sierra Using DoYourClone for Mac
- Clone Hard Drive on macOS Sierra with CCC
- Conclusion
- FAQs About Cloning Hard Drive on macOS Sierra
"People often store a lot of important data, so they always try to protect these files and one of the best ways is making a data backup so that we can protect them from future issues. These issues may be caused due to different reasons, including damaged, corrupted, or deleted devices, system crash, human errors, formatted drive, and others. It is possible to back up different kinds of data such as photos, videos, word documents, audios, contacts, e-mails, notes, music files, PDF files, and more. Here, we will show you how to easily clone hard drive and back up data on macOS Sierra."
Cloning a hard drive is important for people who want to add more room, make a full backup, or set up a standard configuration on multiple computers. This process ensures that all your data is copied perfectly for macOS 10.12 Sierra users. It includes your operating system, apps, and personal files.
Clone backup is a simple way to protect your data from sudden system crashes, save space on your hard drive, or get multiple Macs ready for release. The process is easy and quick with disk cloning tools.
This guide covers everything you need to know to clone a drive on macOS Sierra, including how to do it correctly at every step. Let us look at the most important steps and tools you need to clone your macOS Sierra hard drive.
Why Clone A Hard Drive on macOS Sierra?
🕒 Backup and Recovery
Making a full backup is one of the main reasons to clone a hard drive. If your hardware fails, you delete something by accident, or your system crashes, a cloned drive will let you quickly get your system back to the way it was before without losing any data.
 Upgrading Storage
If your current hard drive is getting too small, you can easily add more room by cloning it to a bigger one. This way, you won't have to reinstall macOS or any apps.
🖥️ System Deployment
Cloning a hard drive with a setup that is already set up can save time and effort when setting up new systems or restoring machines to their original state for businesses or people who manage multiple Macs.
Preparation Before The Cloning Process:
It's important to ensure your system is ready before you start cloning. This preparation ensures that the cloning process goes smoothly and successfully, reducing the chance of problems and making the process more efficient.
- Backup Your Data
Even though the main point of cloning is to make a full backup, you should still back up your data beforehand using Time Machine or another safe backup service. This extra safety step protects your data against any problems that might come up during the cloning process that you didn't see coming. Your important data is safe because you have a second backup and can recover it if necessary. - Clean Up Your Drive
It is important to clean up your drive before cloning. Get rid of files, programs, and data you don't need immediately. It not only cuts down on the data that needs to be copied, which speeds up the process, but it also helps the cloned drive run at its best. An empty drive is easier to handle and less likely to make mistakes when cloning. - Check Disk Health
For the cloning process to go smoothly, you must ensure that the parent and target drives are healthy. On macOS, use the Disk Utility tool to check and fix errors on the disk. Do some tests to see if there are any bad sectors, file system failures, or other problems that might be stopping the cloning process. Disk Utility can usually fix any problems that are found.
Clone Hard Drive On macOS Sierra Using DoYourClone for Mac
DoYourClone for Mac is an easy-to-use, safe and powerful disk cloning application which is fully compatible with macOS Sierra and other macOS operating systems.
DoYourClone for Mac
- Clone HDD, SSD, USB drive, SD card on macOS Sierra.
- Create a full bootable clone backup on macOS Sierra.
- Make ZIP or DMG disk image backup for macOS Sierra.
This macOS Sierra cloning software offers three modes to help in backing up data or cloning hard drive on macOS Sierra:
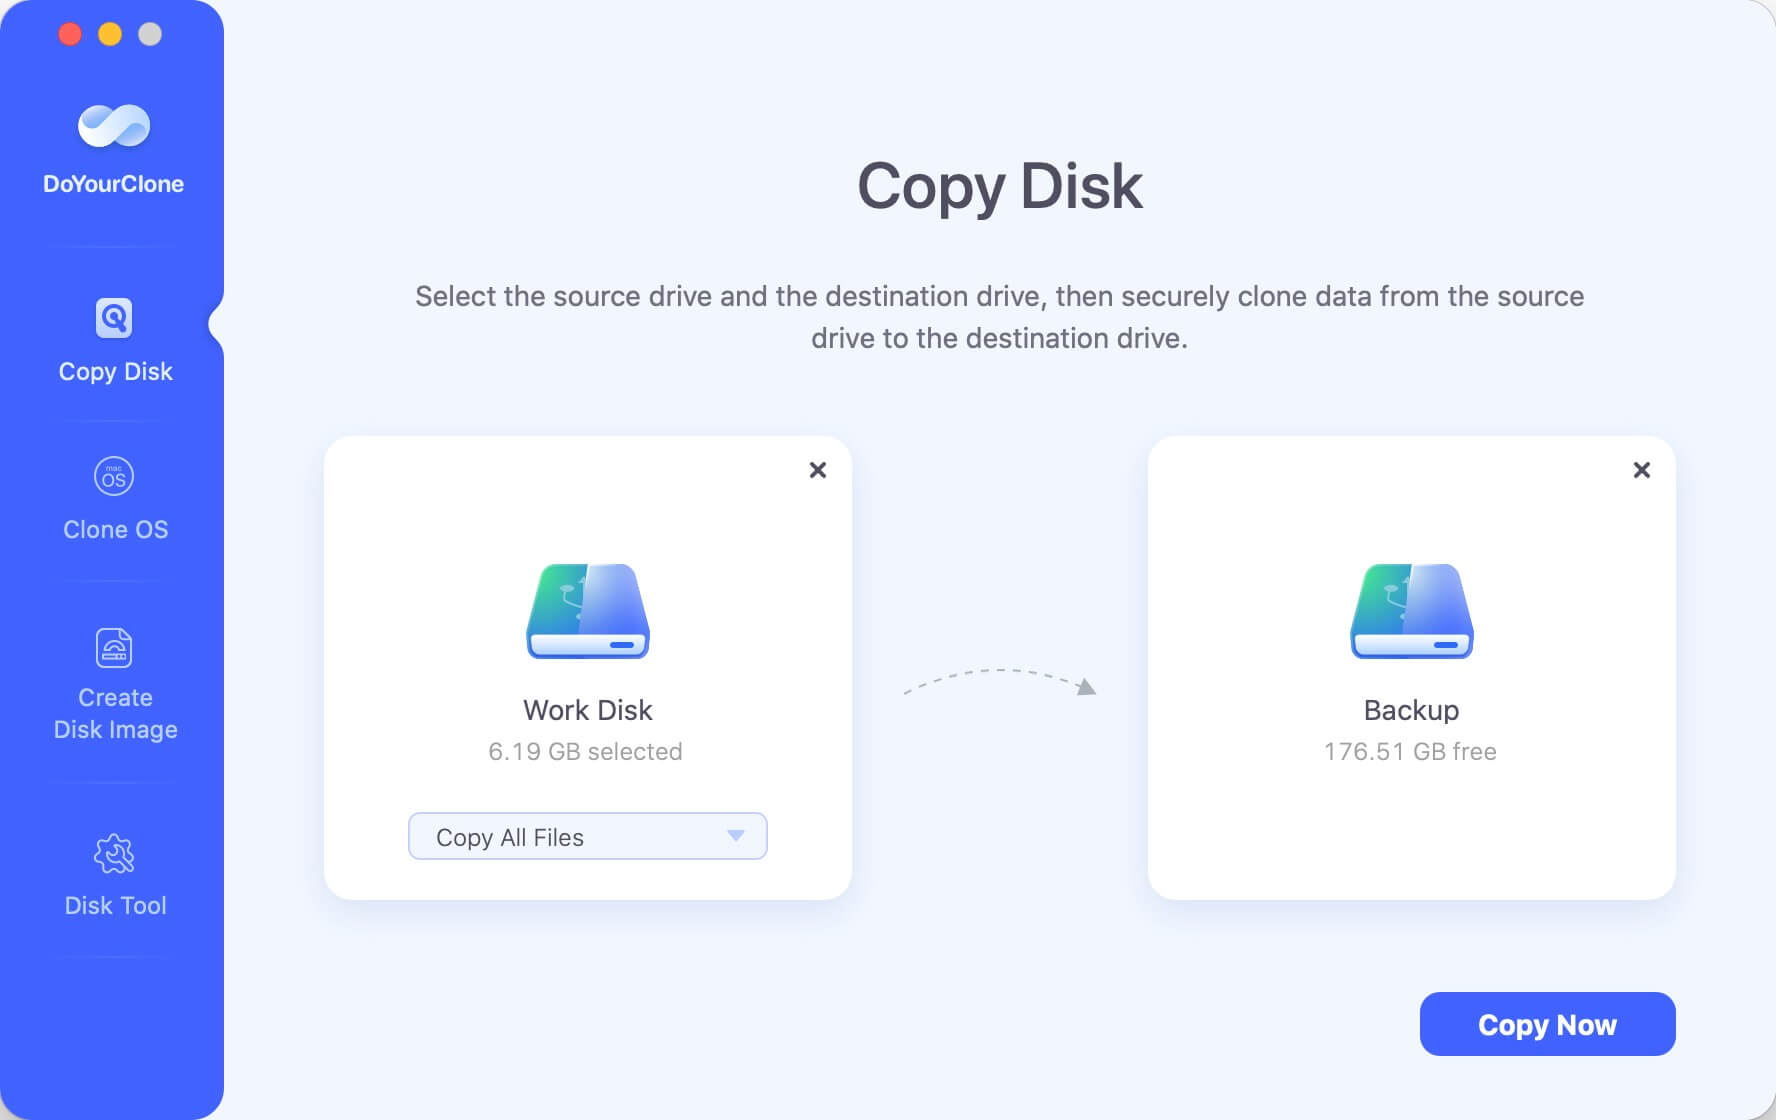
Mode 1: Copy Disk
It can copy data from one hard drive to another drive. Just select the source drive and the destination drive. Then click on Clone Now button to back up files from the source drive to the destination drive.
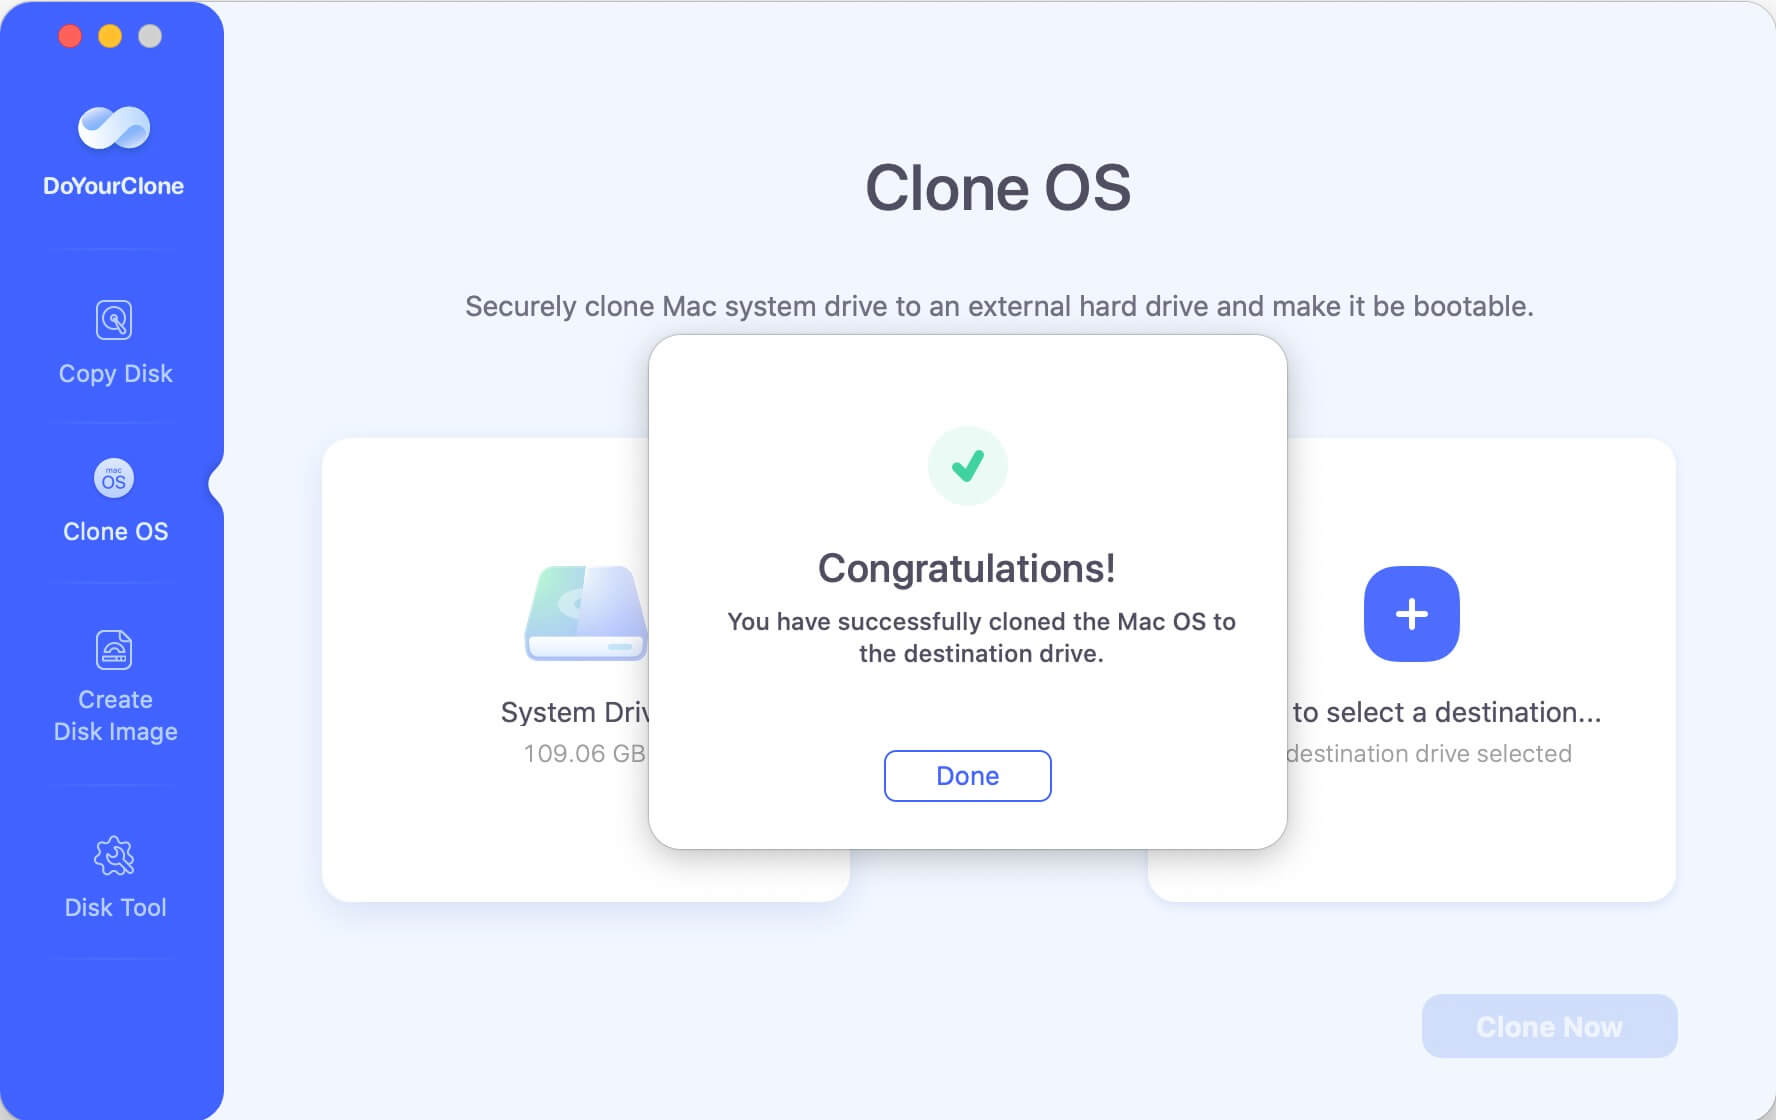
Mode 2: Clone OS
It can clone everything of the Mac internal drive to an external hard drive and make a full bootable clone backup.
The startup disk has been selected as the source drive, you just need to connect an external hard drive to the Mac and select it as the destination drive. Then click on Clone Now button.
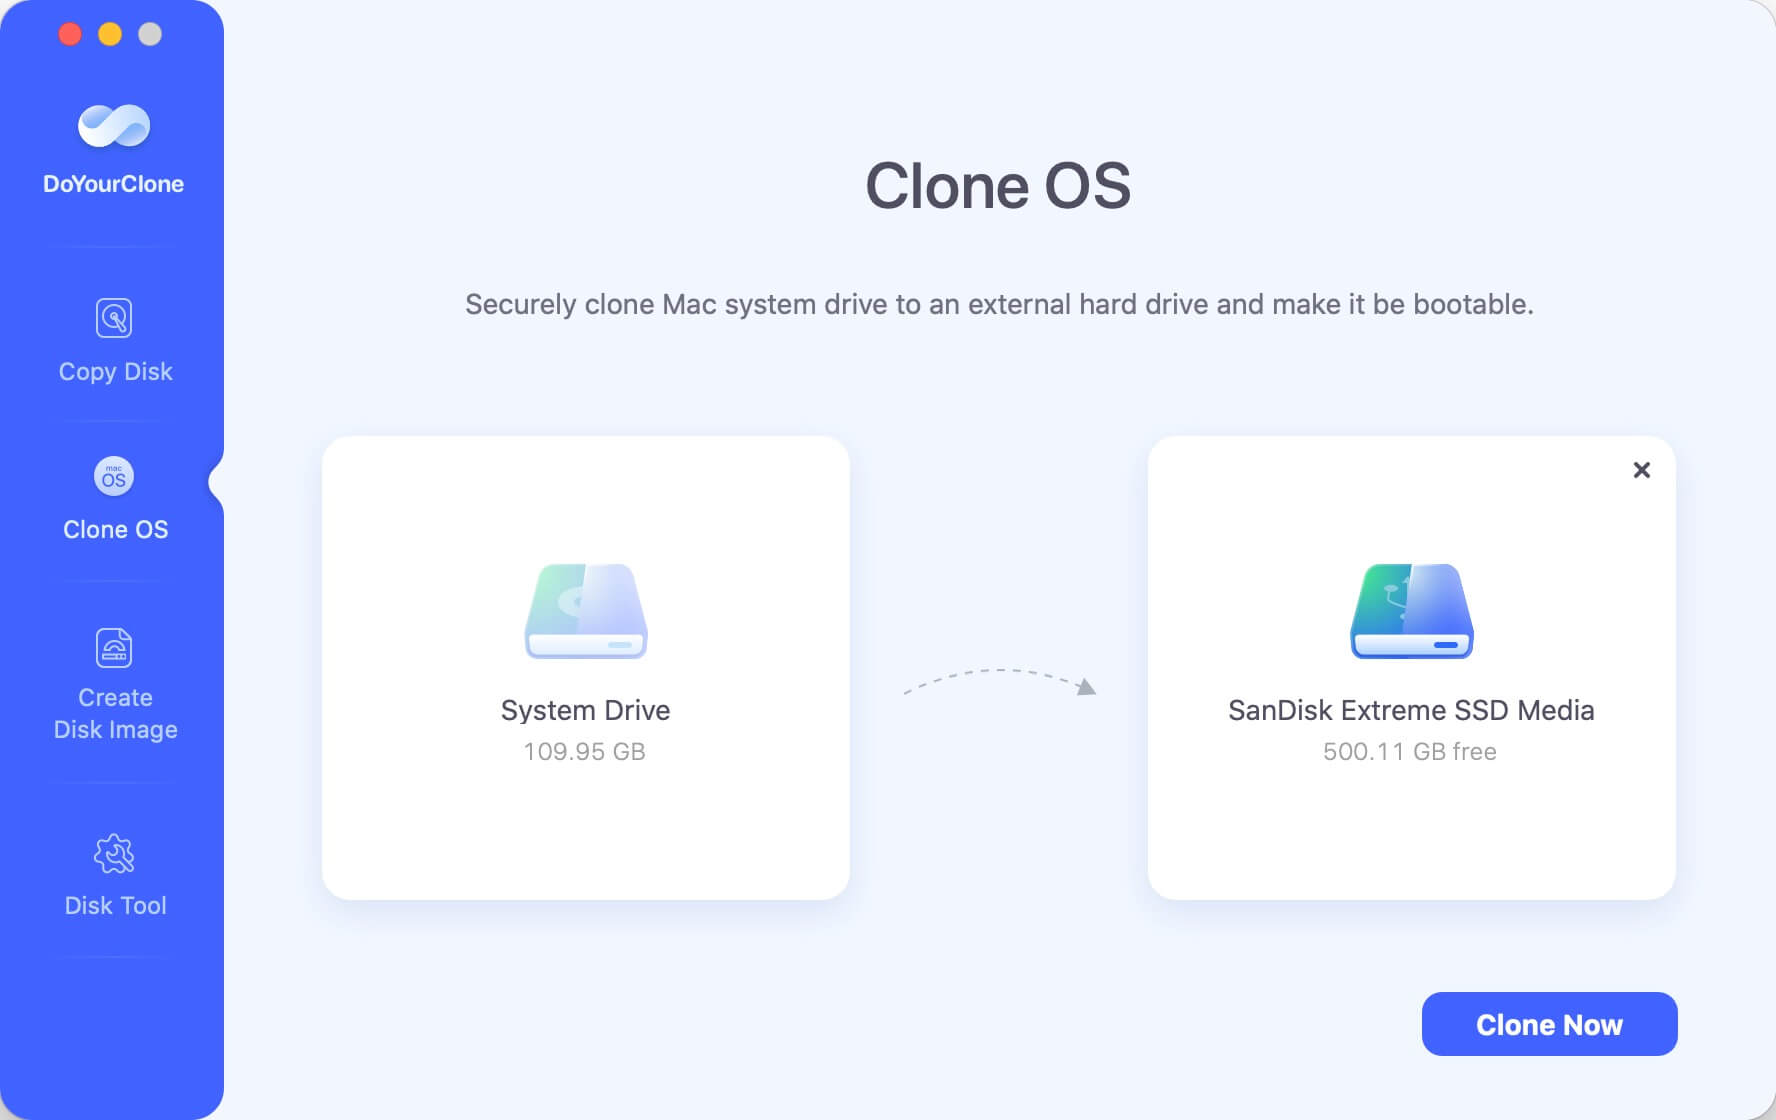
It will clone all data including macOS Sierra, user files, settings, apps and other data from the Mac internal drive to the external hard drive, creating a full bootable clone backup.
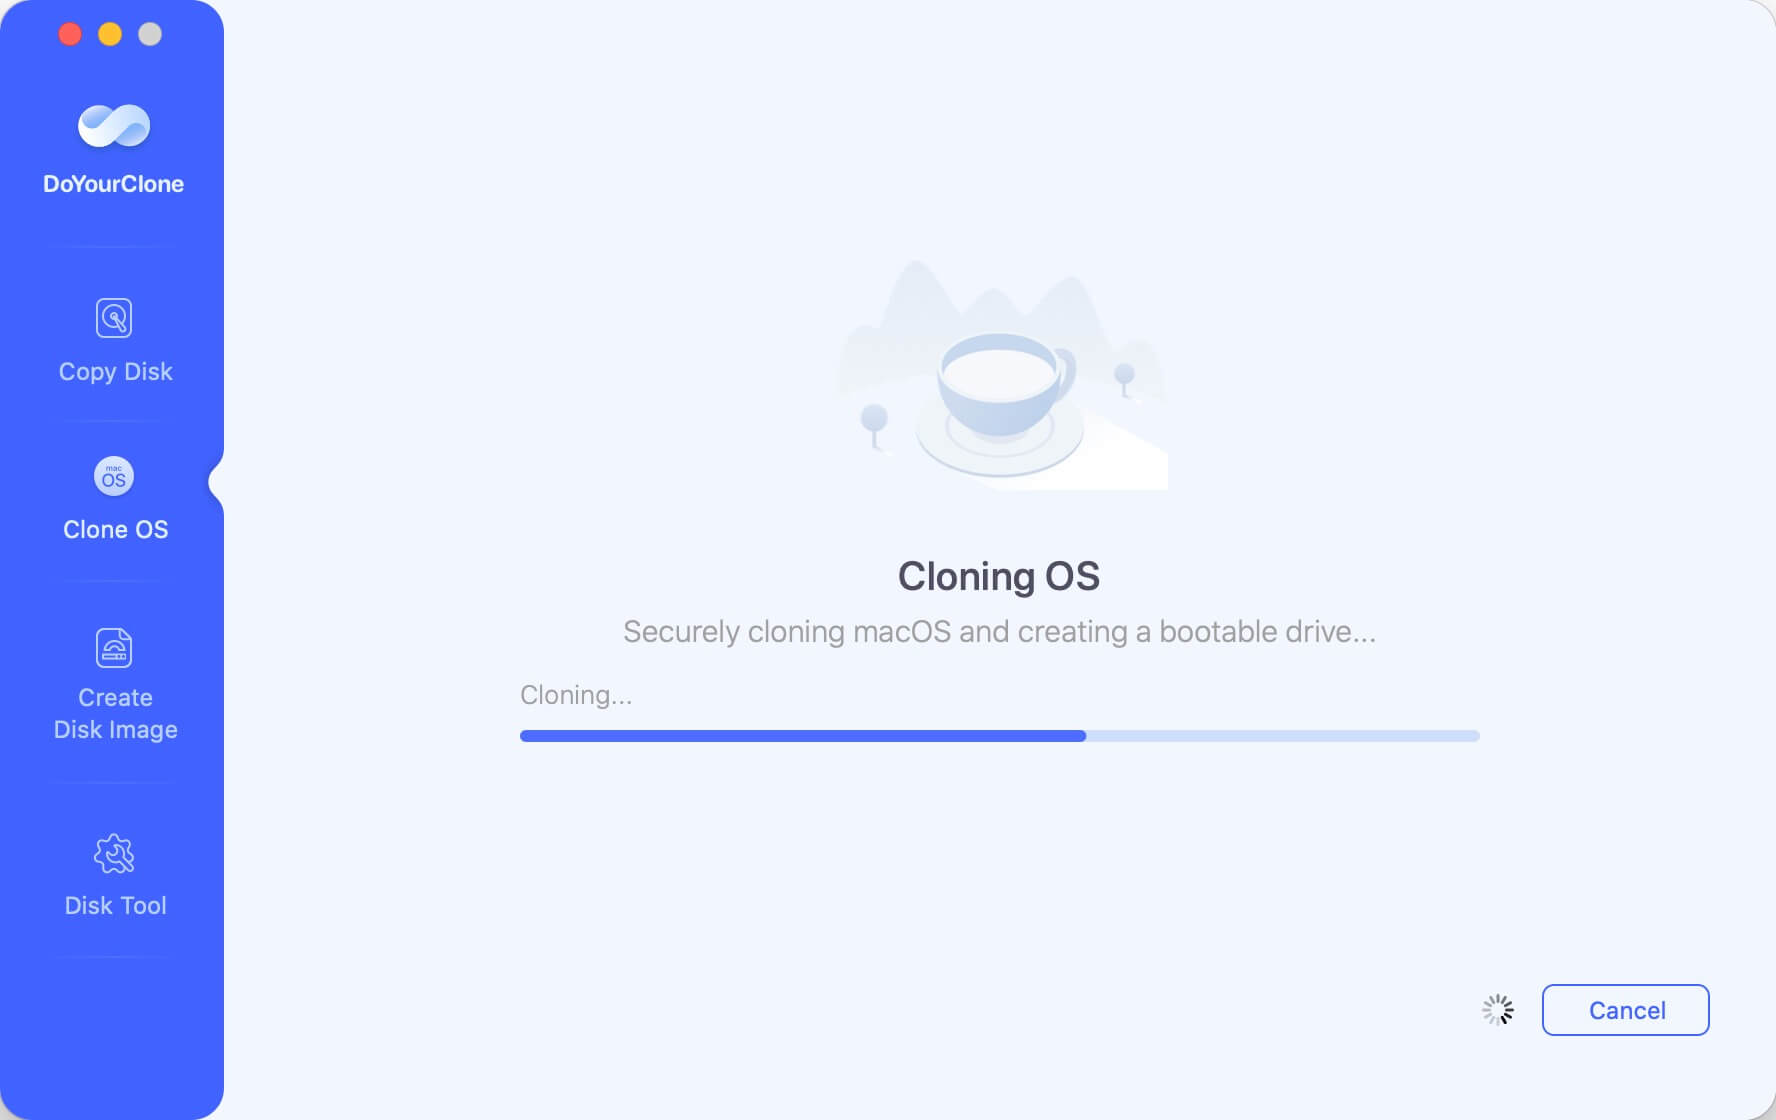
Once the process gets finished, you can check the cloned data on the external hard drive and set the external hard drive as a new startup disk on any Mac.
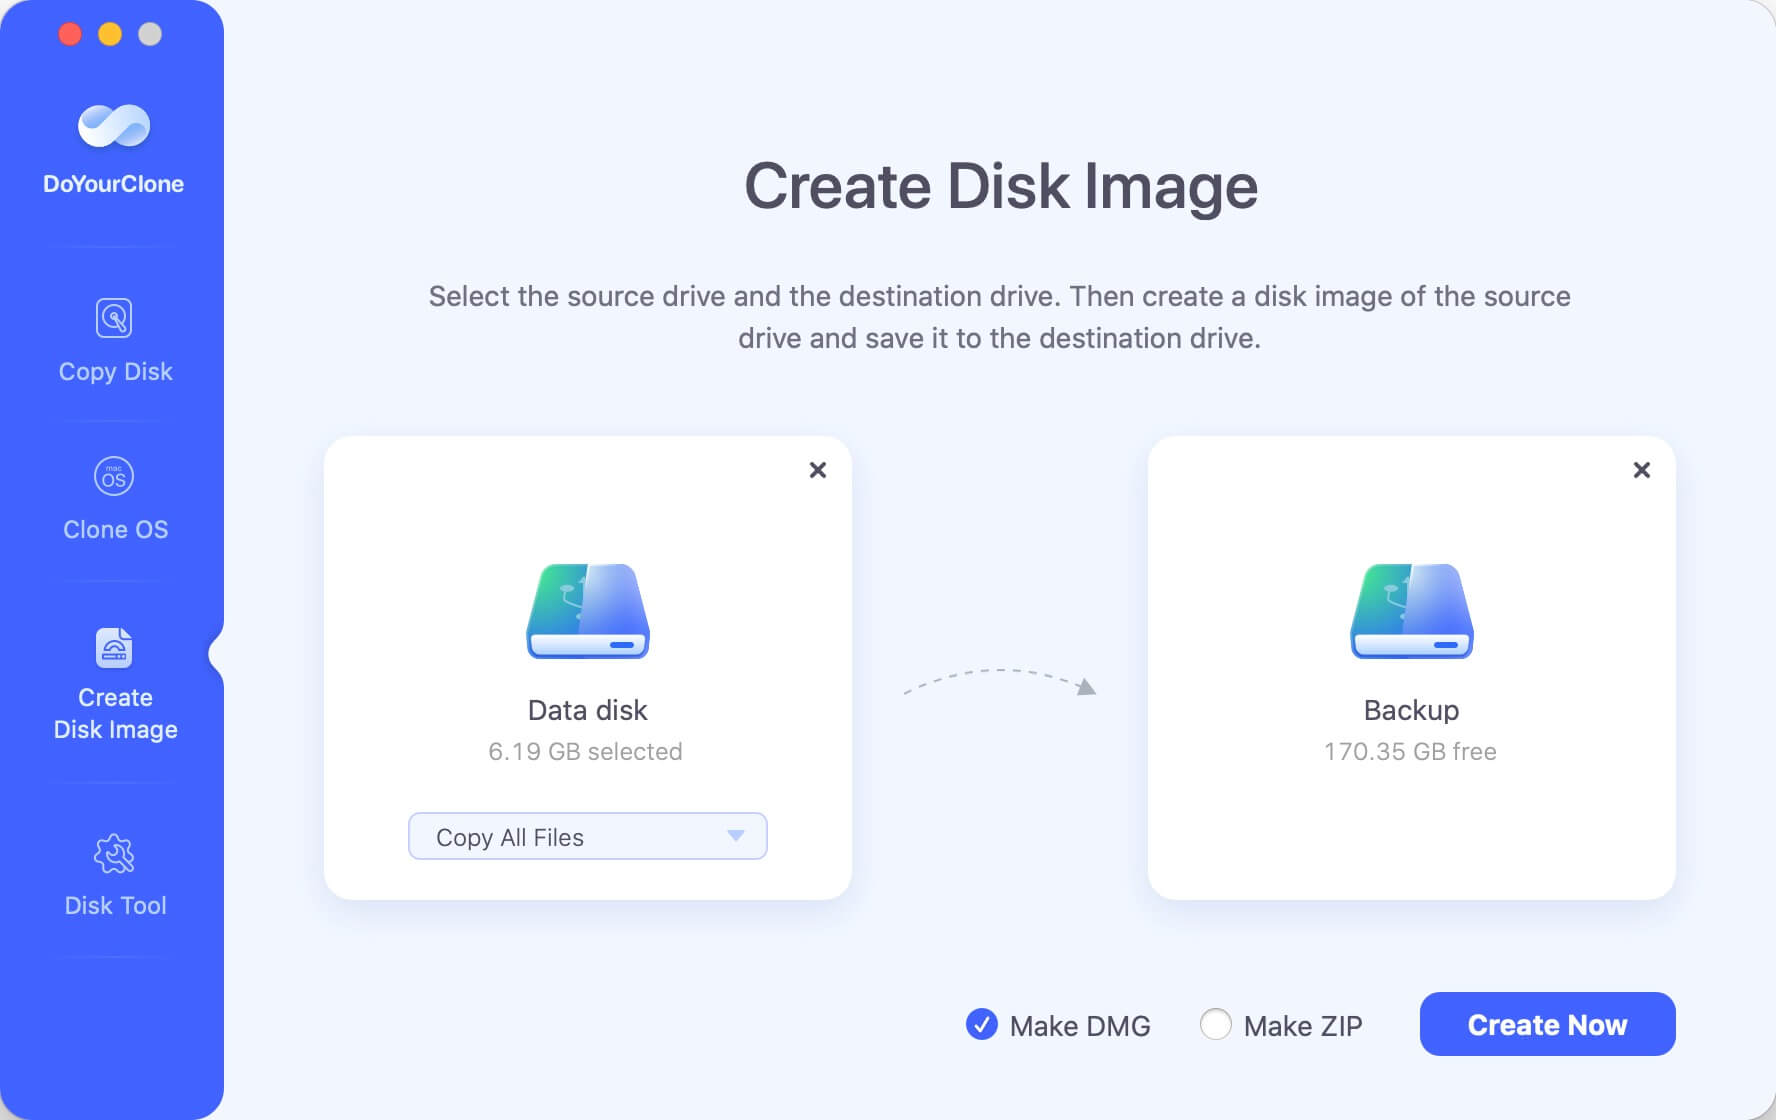
Mode 3: Create Disk Image
Select the source drive and the destination drive, click on Create Now button to create a disk image backup of the source drive and save the backup to the destination drive.
Clone Hard Drive on macOS Sierra with CCC
Carbon Copy Cloner (CCC) is a powerful and easy-to-use tool for macOS users who want to make exact copies of their hard drives. Here are the steps you need to take to use CCC to make a copy of your hard drive:
Step 1: Download and Install.
Go to the page for Carbon Copy Cloner. Get the most recent version of the program. Open the installer package when the download is done and follow the on-screen directions to put CCC on your Mac. After setting up the Carbon Copy Cloner, open it in the Applications area.
Step 2: Choose the Source and Destination Drives.
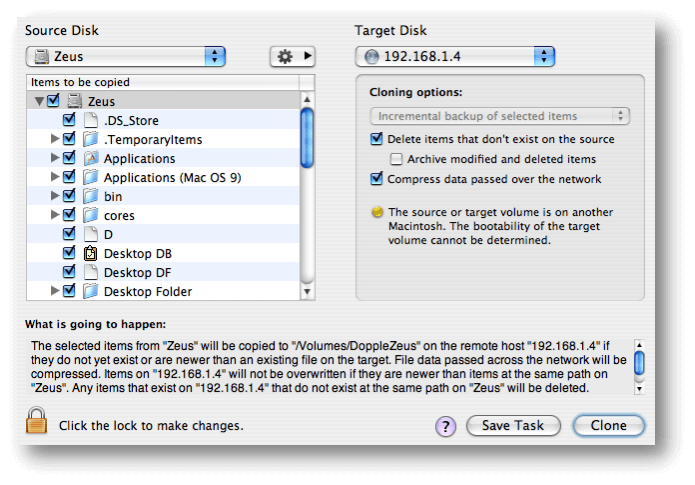
The main CCC interface has three main areas: Source, Destination, and Task Name. Then, click on the "Source" box and pick the drive you want to copy. It is usually the hard drive inside your Mac. Next, click on the "Destination" box and pick the drive where you want to save the copied data. Make sure this drive is hooked to your Mac and mounted correctly.
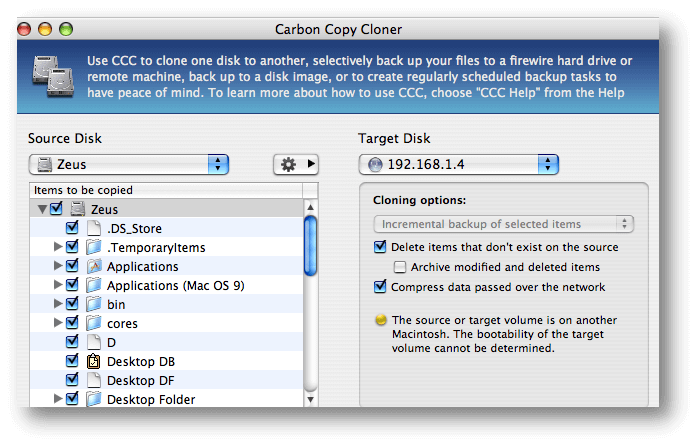
Step 3: Configure Cloning Options.
Carbon Copy Cloner lets you clone in several ways. Make sure to choose "All Files" in the cloning options for a full copy. You can click the "Task Plan" button to change how the cloning works.
You can leave out certain files or folders here, which can help if you only want to copy a small amount of data. You can set regular save times by clicking the "Schedule" button. You can set up this function to automatically back up your files.
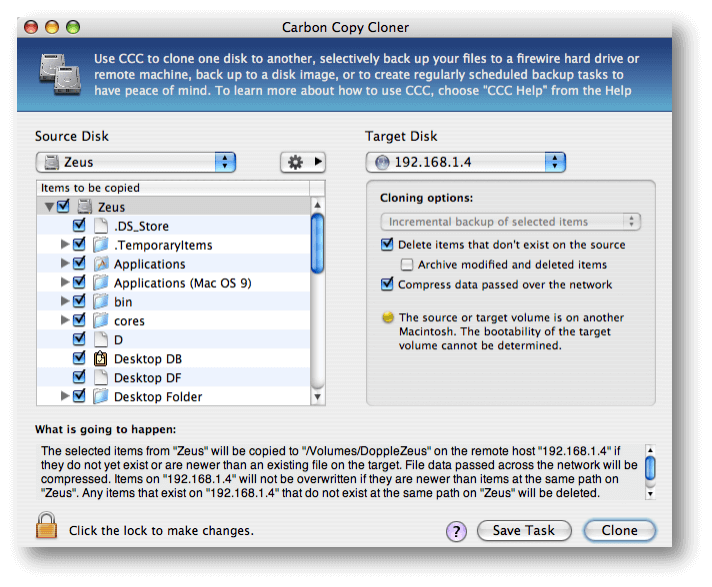
Step 4: Prepare the Destination Drive.
Ensure the destination drive is formatted properly before you start cloning. It needs to be set up as "APFS" or "Mac OS Extended (Journaled)." You can reformat the drive with Disk Utility if it is not formatted properly. It's important to remember that reformatting will delete all the data on the new drive, so make a copy of any important files first.
Step 5: Start the Cloning Process.
To begin the cloning process, click the "Clone" button after everything is set up and ready. Carbon Copy Cloner will show you a progress bar and an idea of how long it will take to finish.
How long the cloning process takes will depend on how fast your drives are and how much data you want to copy. If you don't want to mess up the cloning process, don't use your Mac too much during that time.
Step 6: Verify the Clone.
Checking to see if the clone worked is important after the copying process is done. Start up your Mac again and hold down the Option key while it does so. It will take you to the Startup Manager. Pick the cloned drive from the list of usable drives and press Enter. Ensure your Mac starts up properly and you can access all your files and programs on the cloned drive.
Conclusion:
Cloning a hard drive on macOS Sierra is important for backing up files, adding more storage, and setting up a system. With tools, the process is easy and quick. You can make sure your data is safe and your system is ready for anything by carefully following the steps, which include getting your drives ready, setting up the cloning choices, and checking the clone.
Your Mac will run quickly, and your data will be safe if you make regular backups and check the health of your drives. Accept the cloning process to make your digital life better and easily protect your important data.
FAQs About Cloning Hard Drive on macOS Sierra
1. How to create a full bootable clone backup for macOS Sierra?
DoYourClone for Mac can help you make bootable clone backup for macOS Sierra:
- Download and install DoYourClone for Mac, run it.
- Connect an external hard drive to the Mac.
- Choose Clone OS mode, then select the external hard drive as the destination drive.
- Click on Clone Now button.
- Clone all data from the Mac to the external hard drive and create full bootable clone backup.
2. What is the best cloning software for macOS Sierra?
Here are 5 tools can help you clone hard drive on macOS Sierra:
- DoYourClone for Mac
- Carbon Copy Cloner
- SuperDuper!
- Donemax Disk Clone for Mac
- AweClone for Mac
3. Can I use Disk Utility to clone data on macOS Sierra?
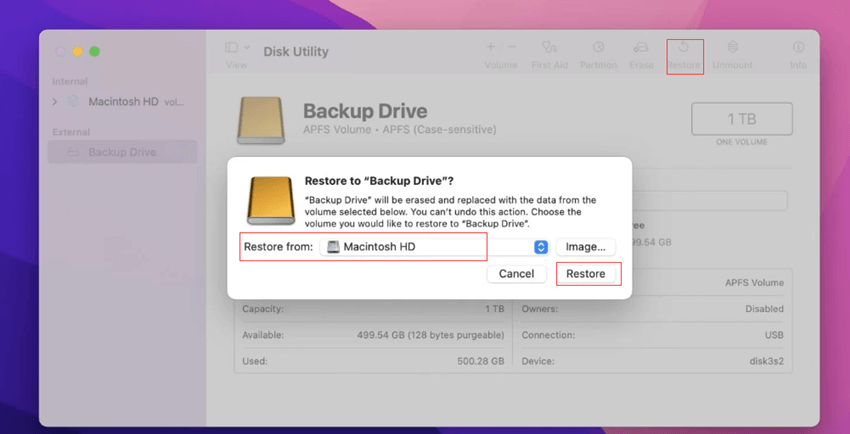
Just connect an external hard drive to your Mac, then open Disk Utility, select the external hard drive, select Restore from, select the startup disk, then click on Restore button.
4. How to back up data with Time Machine on macOS Sierra?
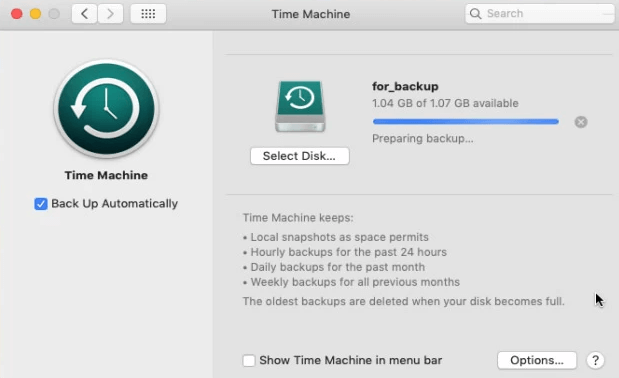
First of all, connect an external hard drive to your Mac, you may need to format it to Mac OS Extended.
Then click Apple logo > System Preferences, find and open Time Machine. Then select the external hard drive as the backup disk, and start to back up all data from your Mac to the external hard drive.
DoYourClone for Mac
DoYourClone for Mac, one of the best Mac disk cloning software, can help you clone HDD, SSD, external storage device on Mac, upgrade HDD to SSD, create full disk image backup, etc. It also can clone everything from your Mac to an external HDD/SSD and create a full bootable clone backup. 100% safe and easy-to-use.