Easily clone hard drive, copy disk drive, create disk image on macOS Big Sur.
Quick Navigation:
- Easily Clone Hard Drive with DoYourClone on macOS Big Sur
- Clone Hard Drive Using Disk Utility on macOS Big Sur
- Back Up macOS Big Sur with Time Machine
- Conclusion:
"Hi, after installing macOS Big Sur, I am trying to backup my data to an external hard drive. Is there any disk cloning software can help me clone my Mac SSD to the external hard drive?" - Katina

If you are also finding out a way to back up data from macOS Big Sur to an external hard drive, here is the right place. There are different methods can be adopt for macOS Big Sur data backup, including disk image, hard drive clone, or other advanced backup solutions.
In this page, we will outline 3 simple ways to back up data to external hard drive on macOS Big Sur. First, with the reliable disk cloning software for macOS Big Sur, DoYourClone for Mac, it's able to copy data, create disk image, or create bootable clone for entire Mac drive. Also, you can use the macOS built-in tools, like Time Machine and Disk Utility to back up or clone data on macOS Big Sur. Following this write-up to generate a full and successfully backup for your macOS.
Easily Clone Hard Drive with DoYourClone on macOS Big Sur
DoYourData software offers powerful, safe and easy-to-use disk cloning software for macOS Big Sur. If you wan to clone hard drive or backup data on macOS Big Sur, just download DoYourClone for Mac.
This powerful disk cloning software can help you clone HDD, SSD, USB flash drive, memory card, digital device. It also can help you create a disk image of a hard drive after upgrading to macOS Big Sur. (DoYourClone for Mac is also support for other macOS versions and OS X versions, download it by clicking on download button below.)
DoYourClone for Mac
- Create bootable clone backup for macOS 11 or other macOS versions.
- Create disk image on Mac.
- Clone SSD, HDD, USB flash drive, external disk on Mac.
DoYourClone for Mac is an easy-to-use disk cloning software. It can help you easily and quickly clone your hard drive from one location to another. It offers two modes to help you clone hard drive on macOS Big Sur.
Mode 1. Copy hard drive on macOS Big Sur.
Copy Disk mode is able to help you 1:1 copy data from one hard drive to another hard drive. Now, we will show you how to use this mode to help you clone hard drive on your macOS Big Sur Mac machine.
Step 1. Choose source drive and destination drive.
Choose mode Copy Disk, this mode will help you easily copy data from the source drive to the destination dive. It will copy all data from the source drive to the destination drive by default. You also can selectively clone your data to the destination drive.
Just select the source drive and destination drive.
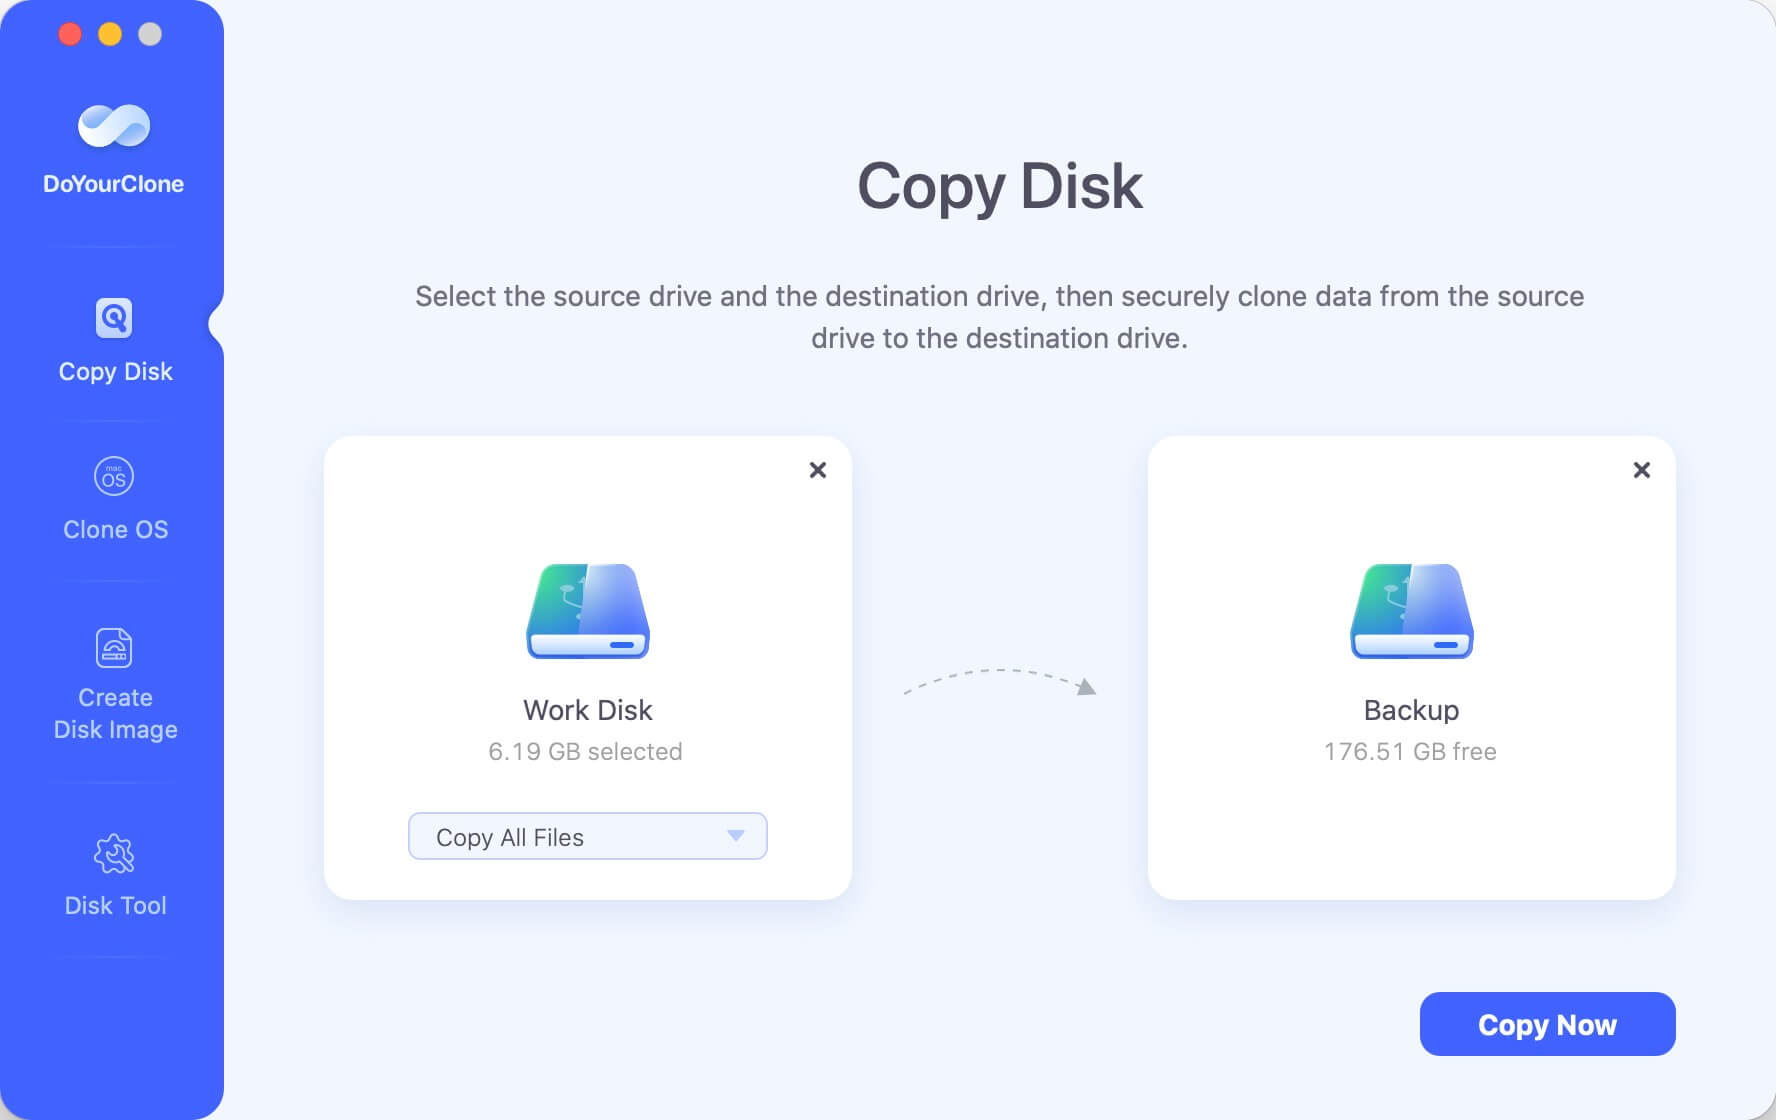
Step 2. Copy the source drive data to the destination drive.
Just click on Copy Now button to copy data from the source drive to the destination drive. The software will create a folder on the destination dive to save the cloned data.
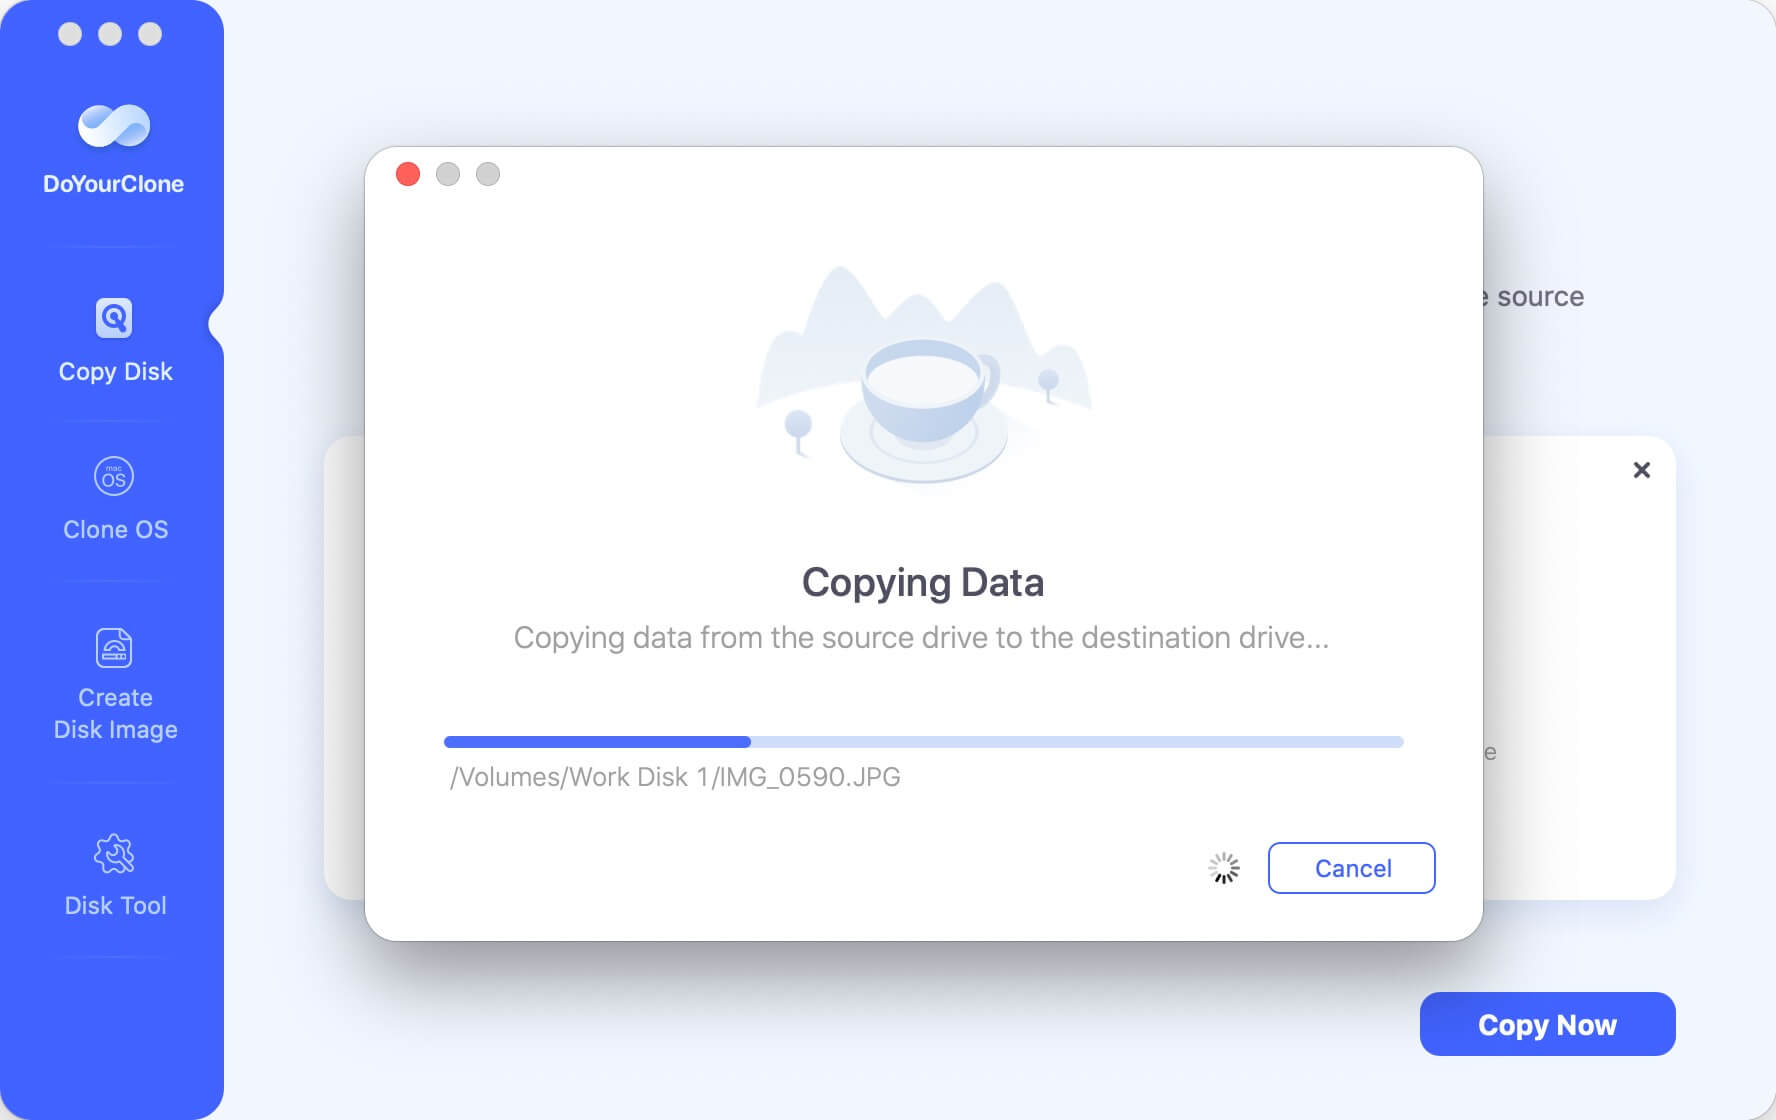
Once the cloning process gets finished, you can check the cloned data on the destination drive.
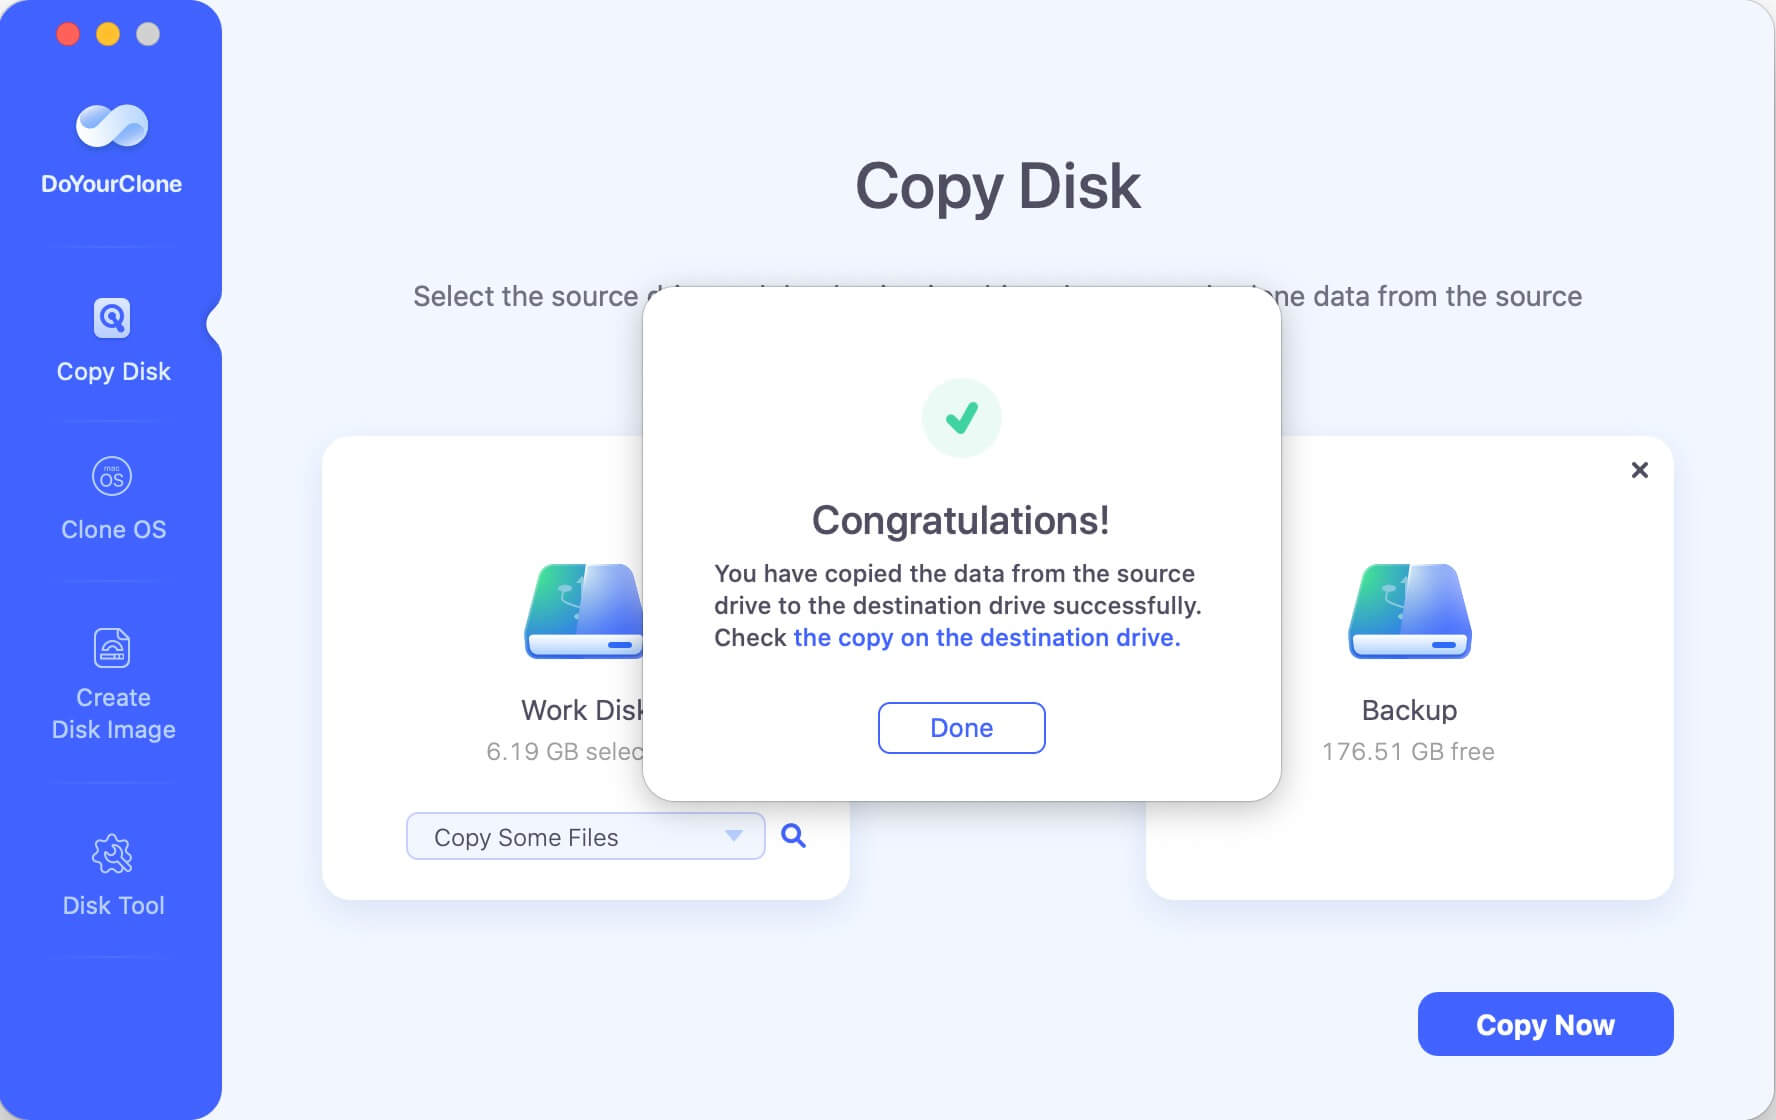
Mode 2. Create bootable clone for macOS Big Sur
By using the Clone OS mode, you can create a bootable copy of macOS Big Sur. The cloned drive will be bootable directly. You can use the cloned drive as startup disk to replace the original one if you are planning to change the startup disk. Or you can use the cloned drive to boot another Mac.
🔖 Tips: This option will overwrite the destination disk, so it's better to use an empty external hard drive as destination to avoid data loss.
Connect the destination disk to the macOS Big Sur machine and then following the steps to create a bootable clone backup.
Step 1. Select the destination drive.
The system drive of macOS Big Sur will be selected as source by default in this mode, you don't need to change it. Just select the empty external hard drive as destination.
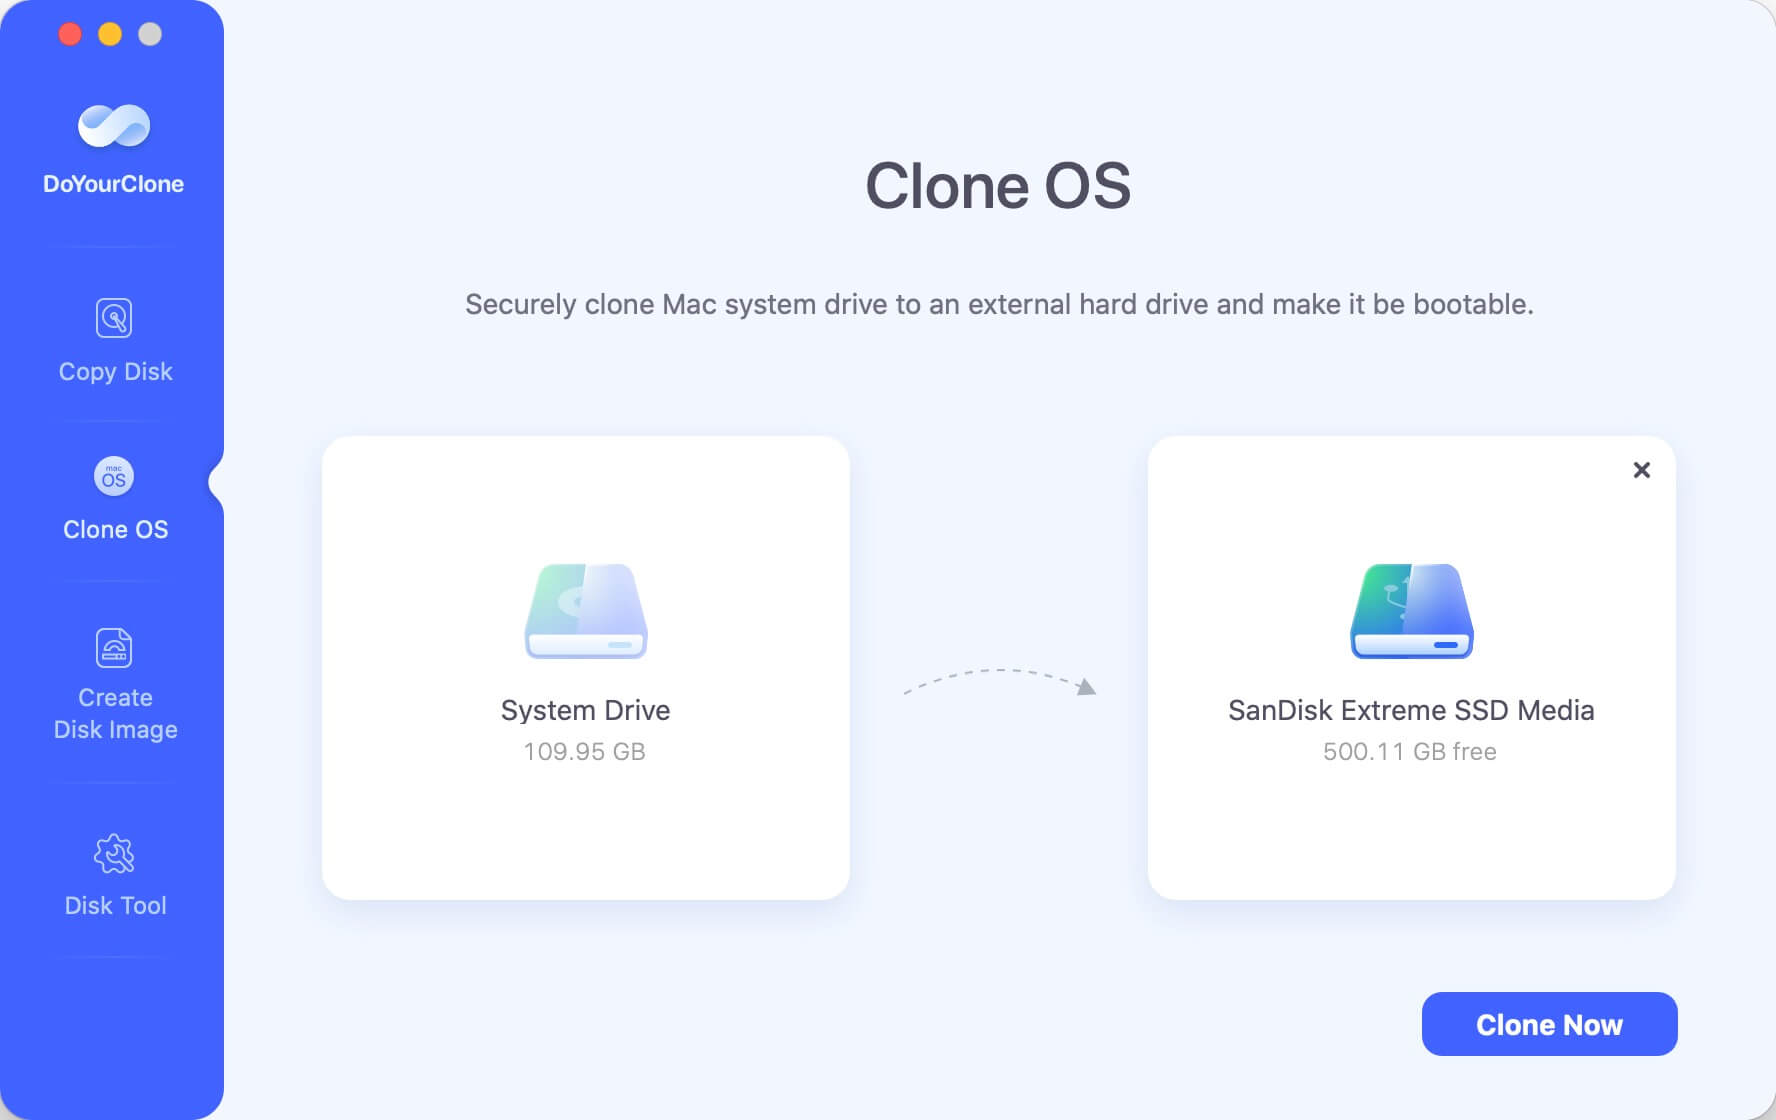
Step 2. Start to create bootable clone.
Click the "Clone Now" button and then the software will start to clone everything, including system data, user files, settings and installed programs to the destination disk.
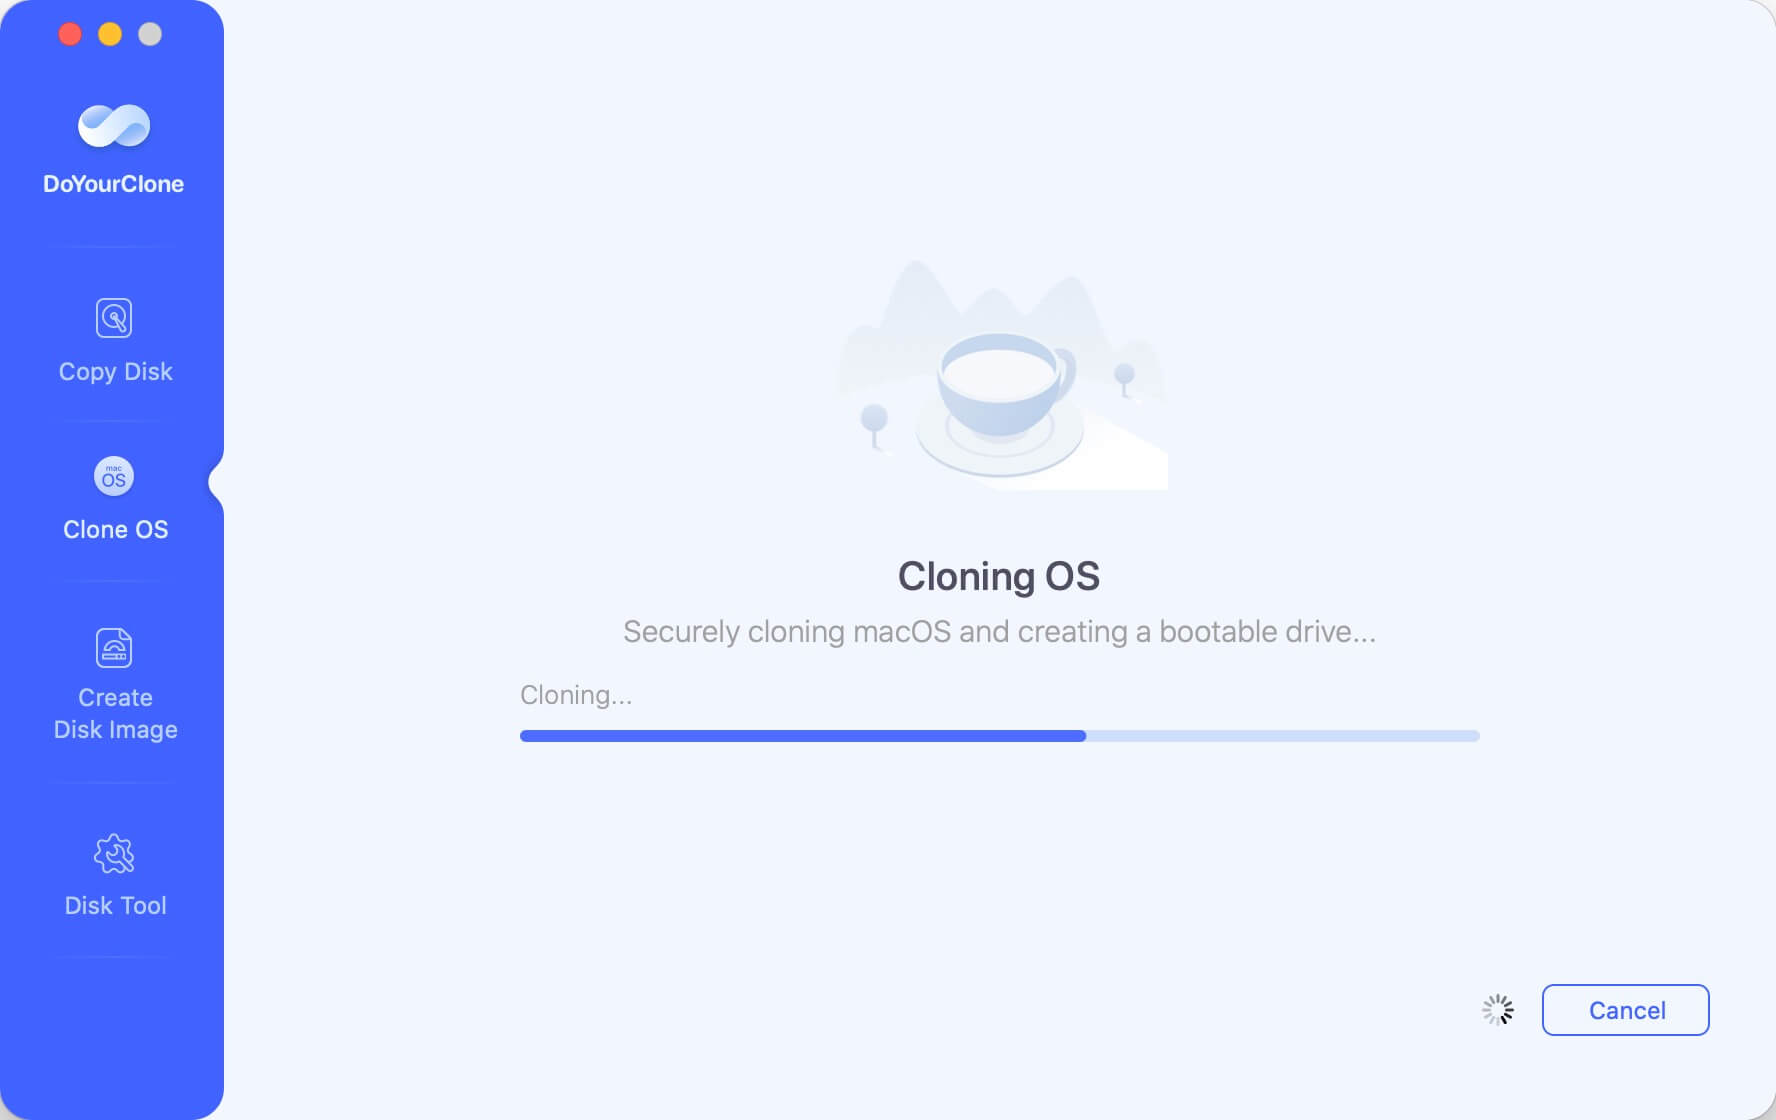
After the cloning process is finished, you can access the cloned drive to check the files and verify if the files were copied successfully. Then you can change the startup disk and boot from the cloned bootable external hard drive.
For more detail information, just check this guide: make a full bootable clone for macOS Big Sur >>
Mode 3. Create a disk image on macOS Big Sur.
Create Disk Image mode is able to help you create a zip or dmg disk image of the source drive and save it to the destination drive.
Step 1. Choose source drive and destination drive.
Choose mode Create Disk Image, then select the source drive and destination drive. Then this mode will create the disk image of the source drive and save the disk image to the destination drive.
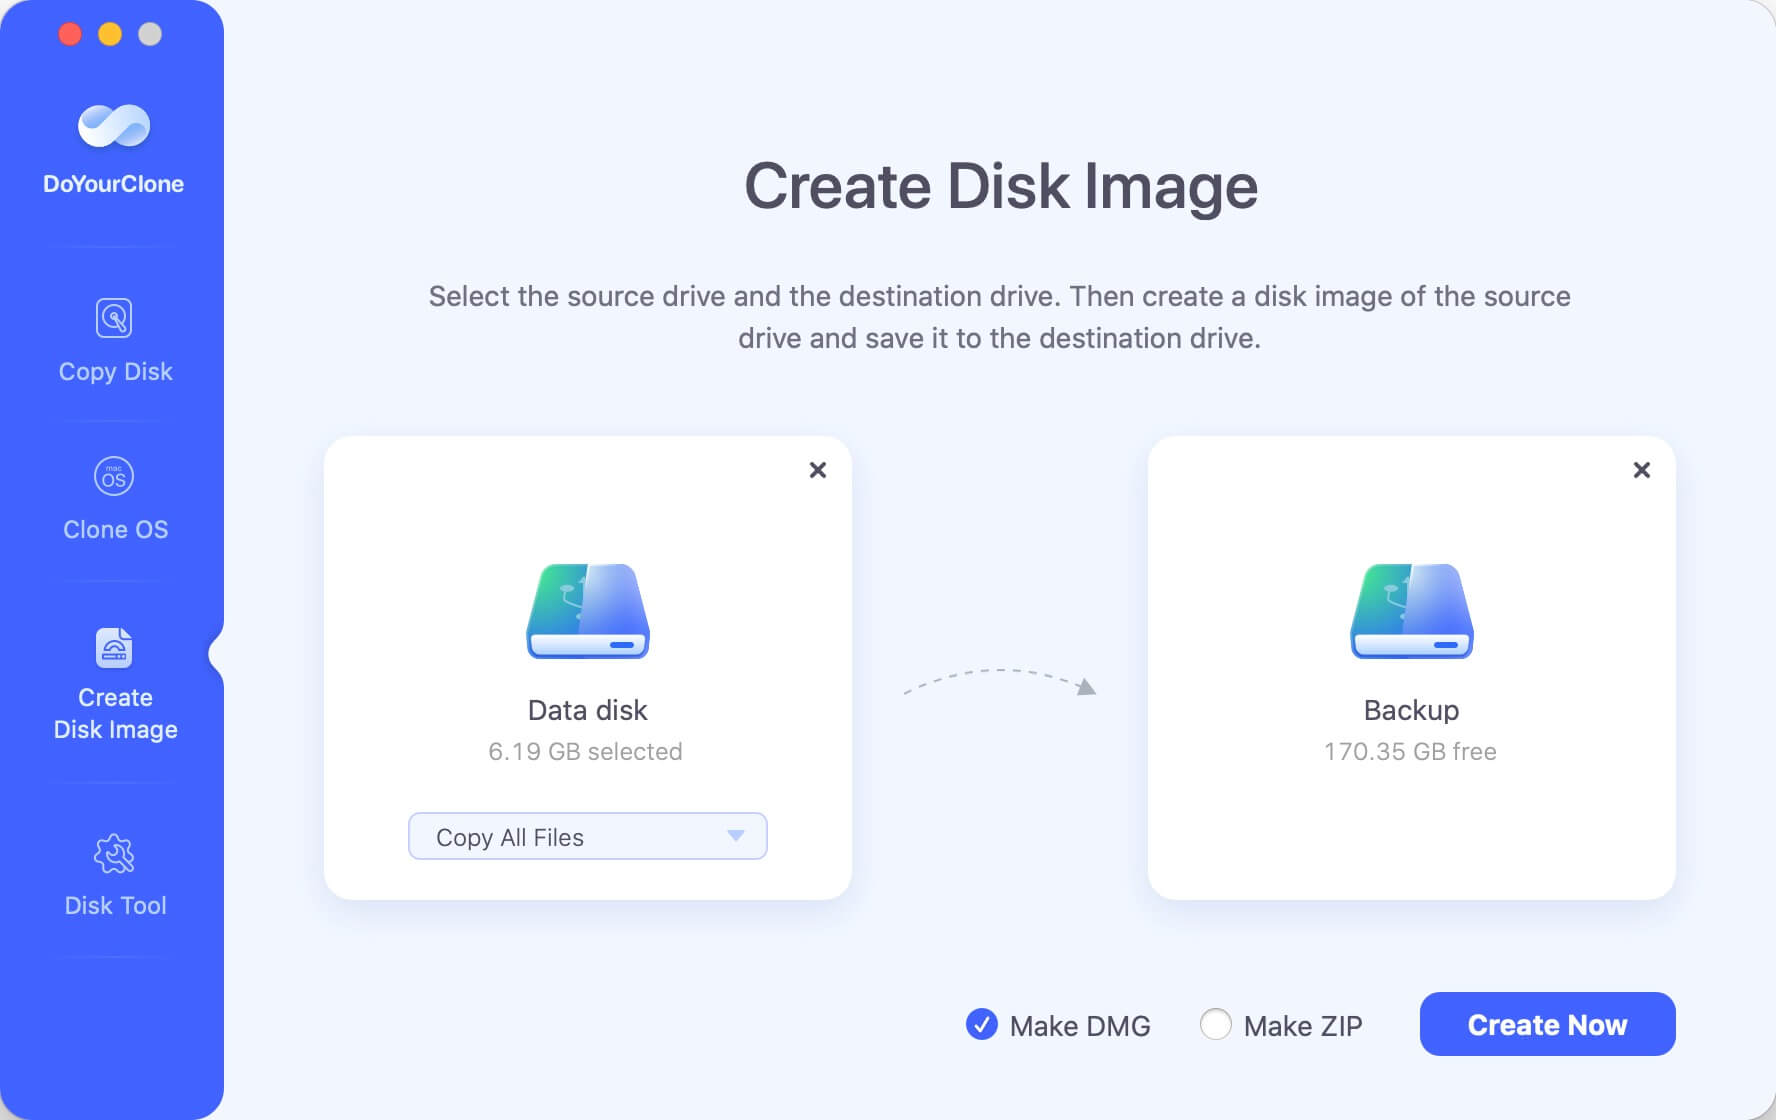
Step 2. Create disk image.
Click on Create Image button to start create a disk image of the source drive and save it to the destination drive.
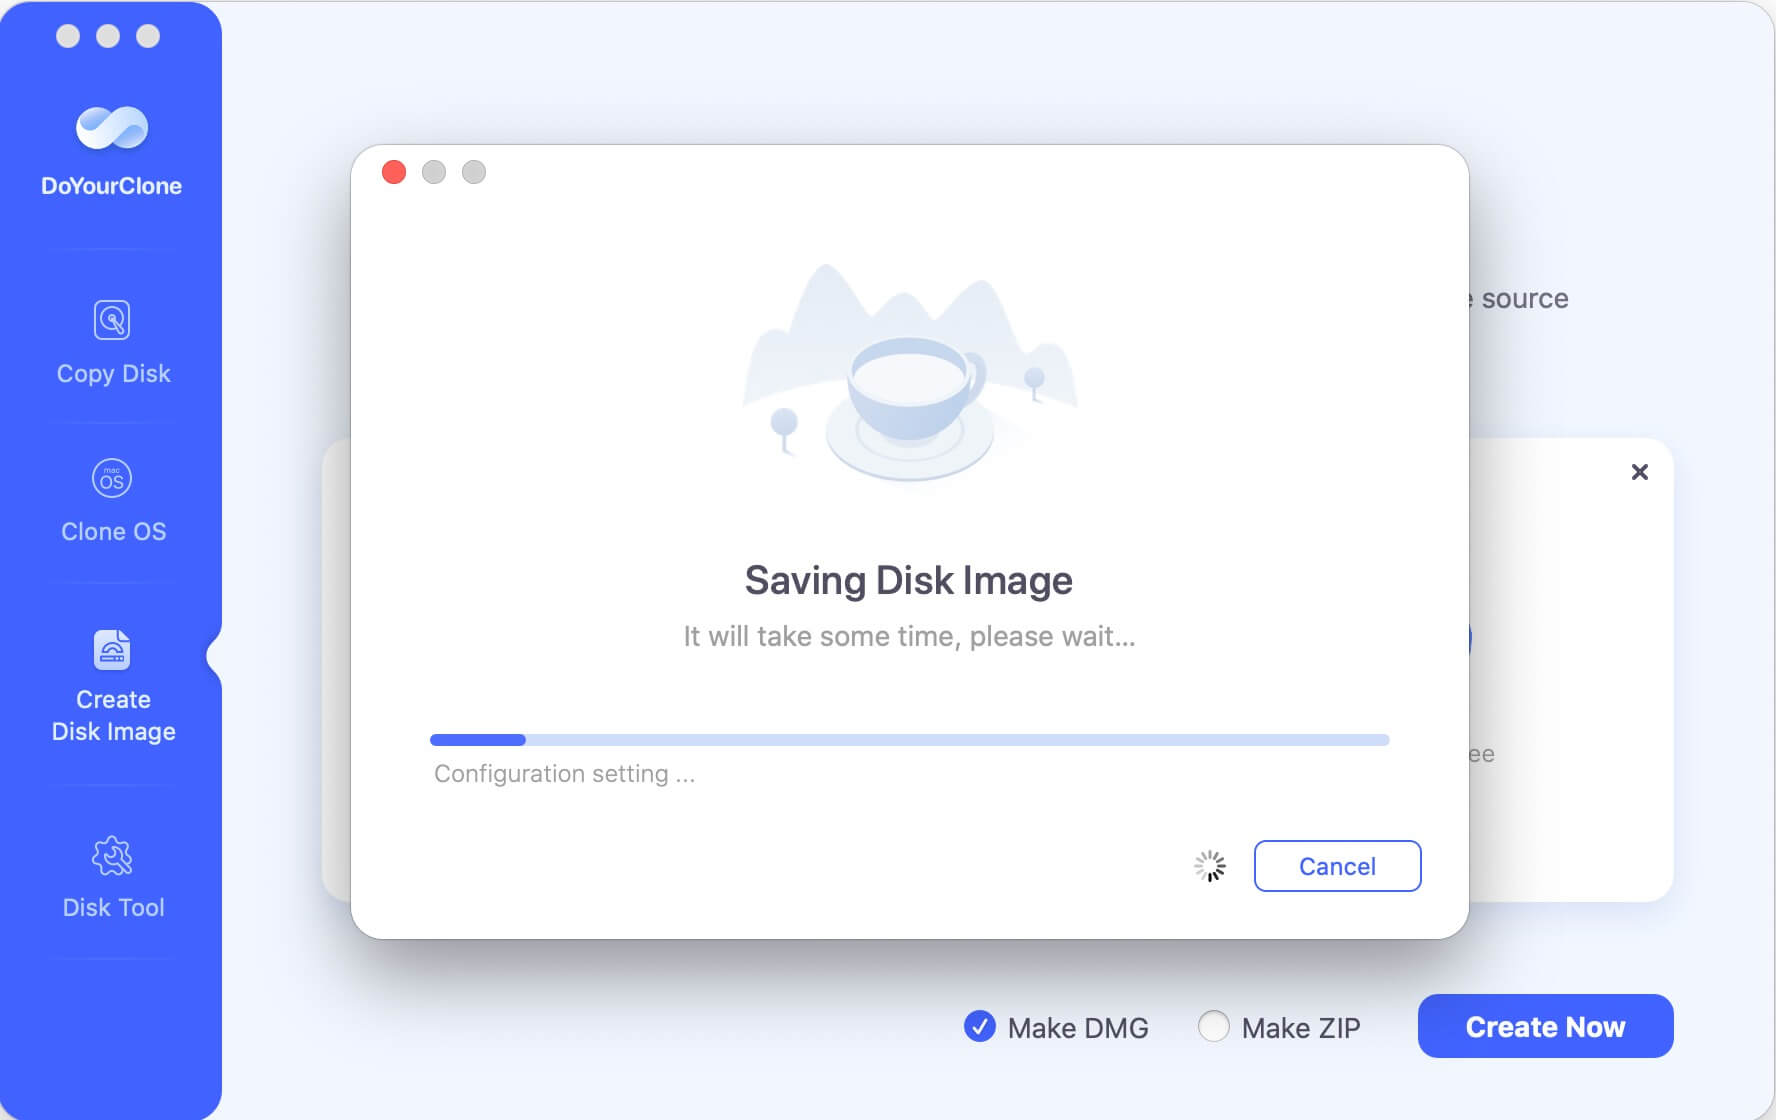
Once the process gets finished, you can check the disk image on the destination drive.
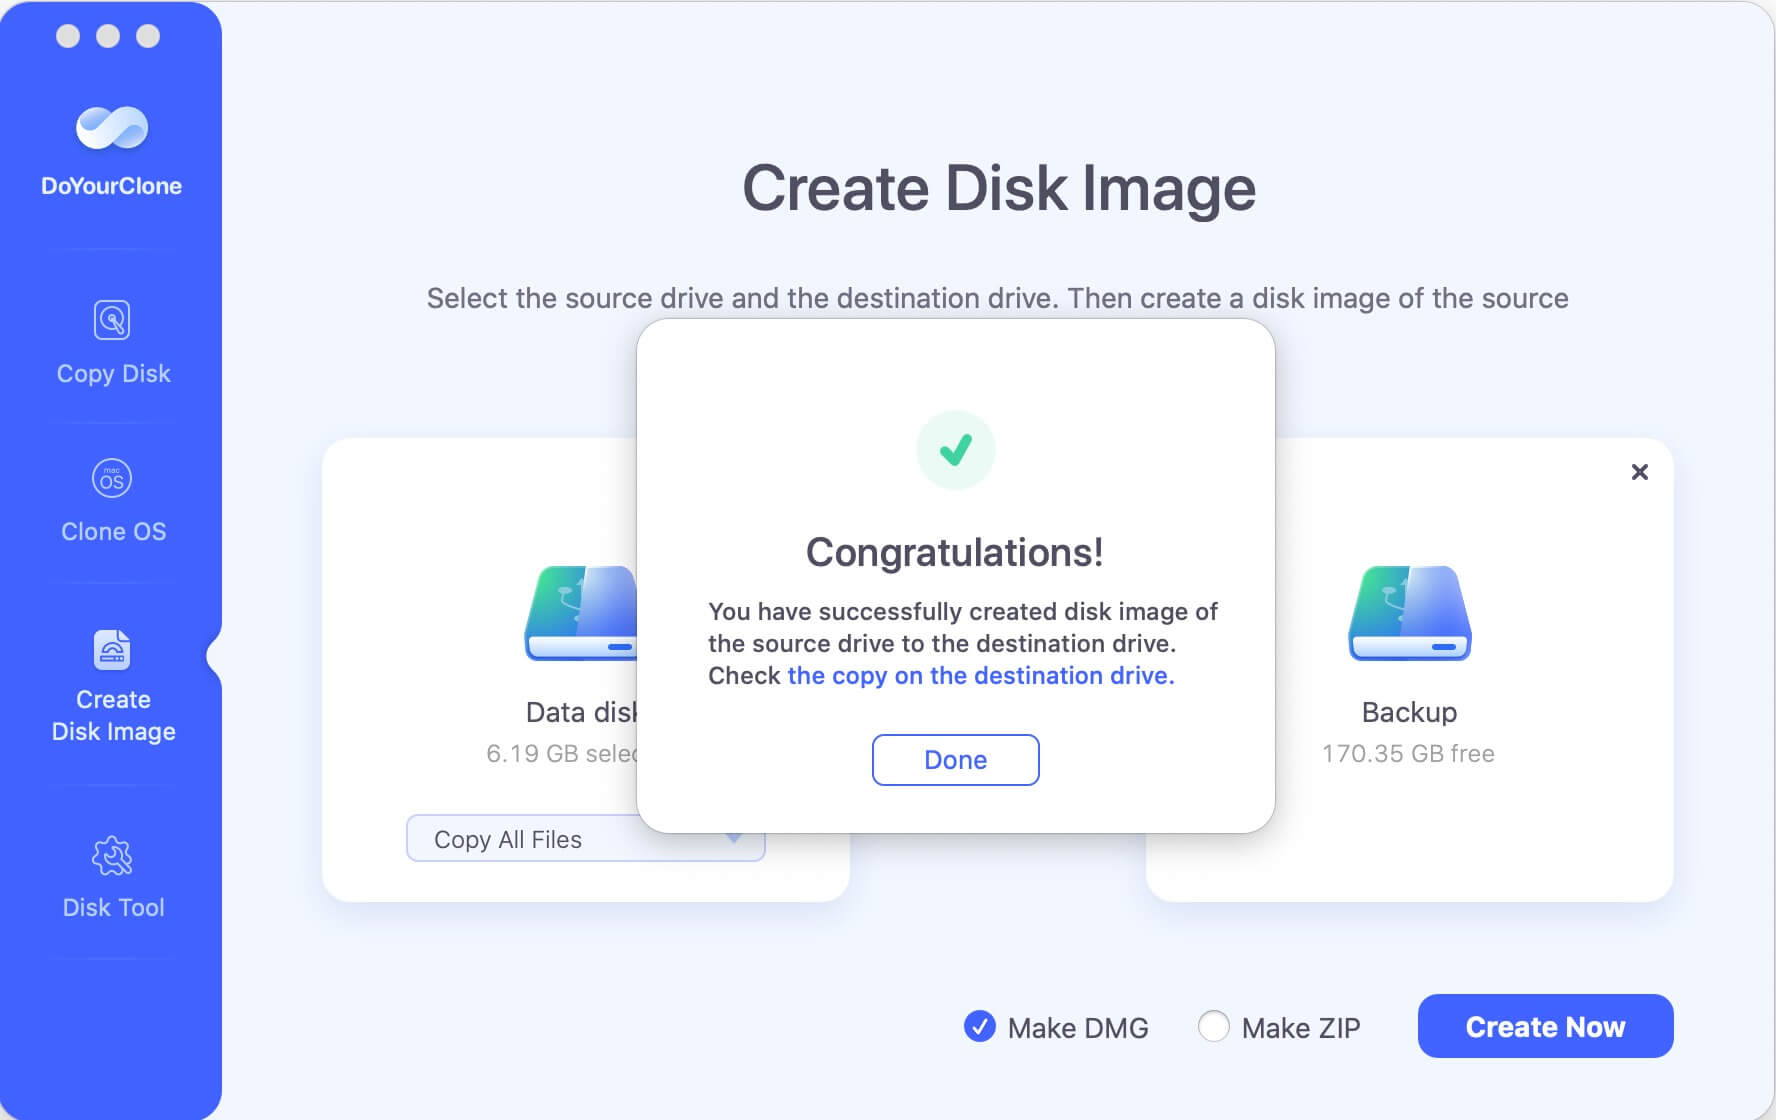
As you've seen, DoYourClone for Mac can help you securely and easily clone hard drive on macOS Big Sur. It can help you easily clone a Mac SSD to an external hard drive after upgrading to macOS Big Sur. Actually, this software can help you clone any type of HDD, SSD, memory card, USB flash drive under macOS Big Sur. When you lose your data from the source drive, you can restore the data from destination drive or disk image.
Clone Hard Drive Using Disk Utility on macOS Big Sur
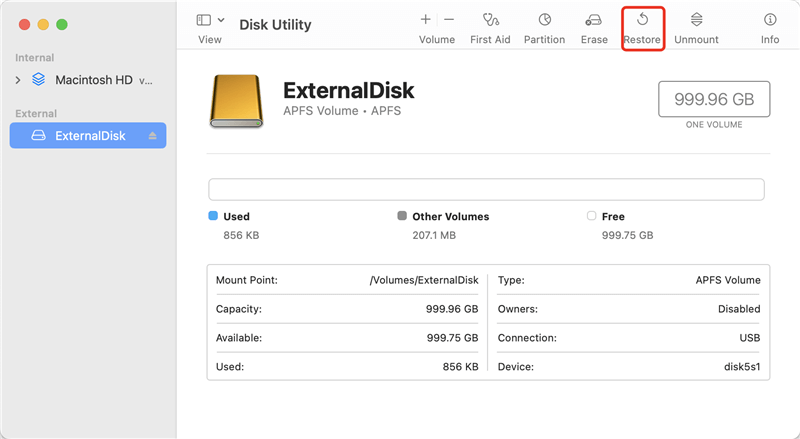
macOS also offers the free and system built-in tool Disk Utility, you can also clone the data from a hard drive to another one. The tool is also easy to operate and clone hard drive. Here is how:
Step 1. Open Disk Utility and select an empty external hard drive (the destination drive) first. Click "Restore" button at the top of the Disk Utility interface.
Step 2. In the popup window, choose the source drive in the "Restore from" drop down list. Click "Restore" button in the popup to start the disk cloning process.
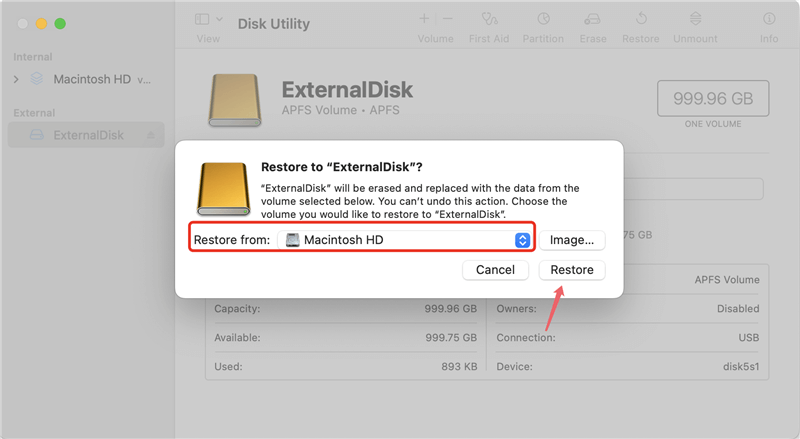
Please note that when cloning APFS volumes, there might be issues in some cases based on many users' feedback. Also, it would be problem to make bootable clone for system drive for some systems. If you unfortunately failed to clone the hard drive successfully with Disk utility, you can download and try the third-party disk copy application DoYourClone for Mac.
Back Up macOS Big Sur with Time Machine
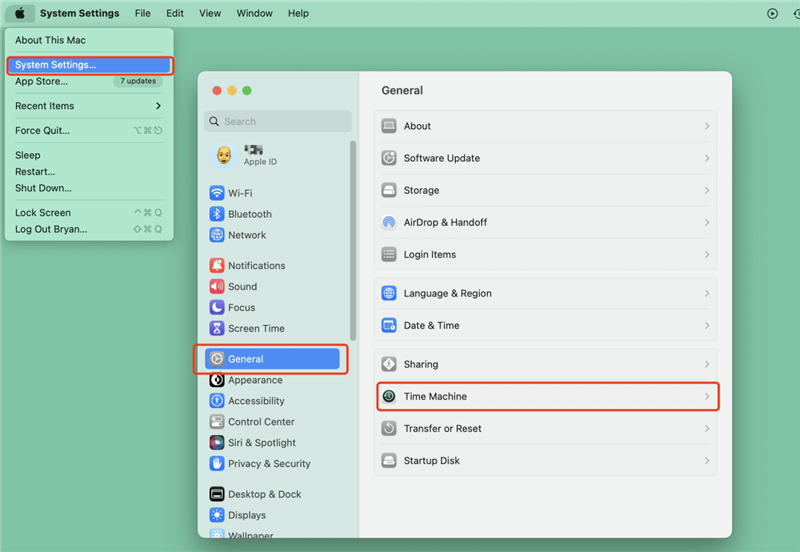
If you don't want to clone the hard drive, you can also use Time Machine to back up the files to an external hard drive on macOS Big Sur. Following the steps to create Time Machine backups:
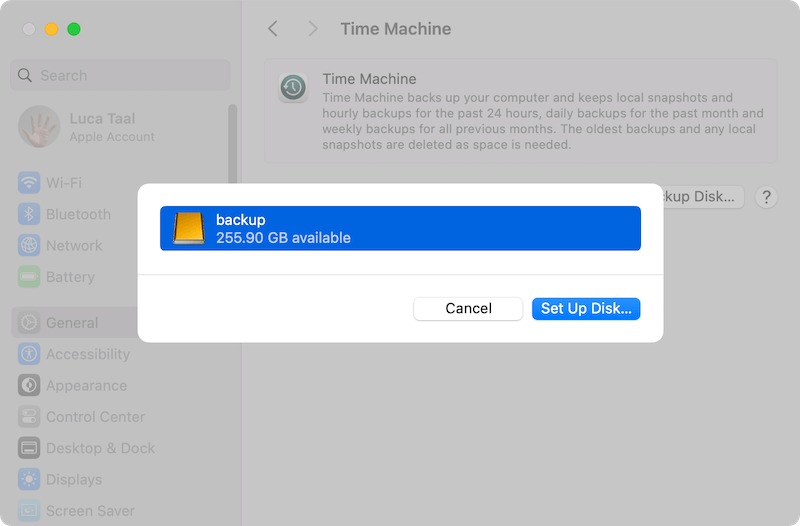
Step 1. Click Apple Menu and select "System Settings", then click "General" and choose "Time Machine" option.
Step 2. Click the button "Add Backup Disk" to select the external hard drive as destination. Please note that the external drive will be formatted if you set up the backup the first time. Ensure to use an empty disk.
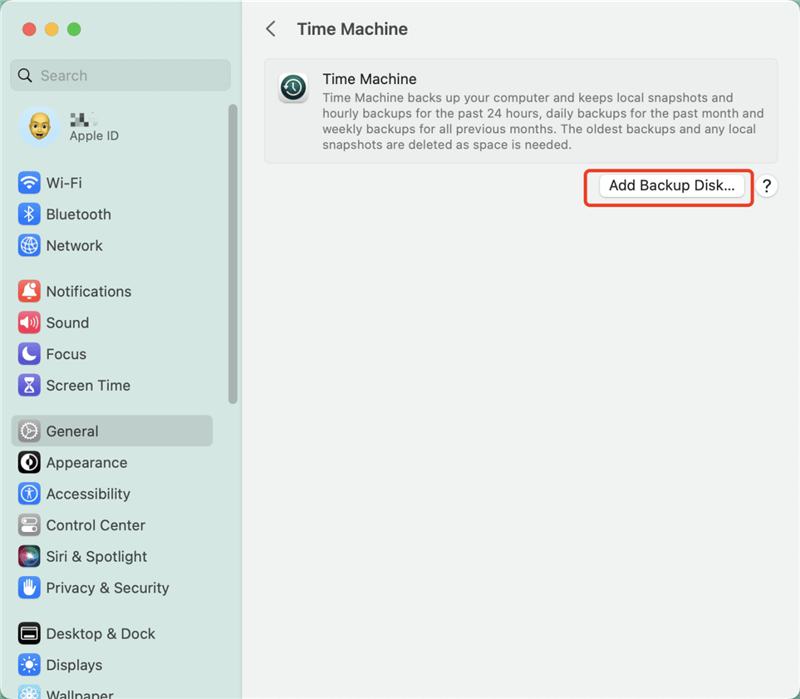
Step 3. Choose the drive and click "Set Up Disk" button to start. It will start the first full backup within 2 minutes. It will take some time to create a full backup the fist time. In the future, it will create incremental backups for modified or newly added files. You can also change the schedule settings by clicking on "Options" button if you want.
Conclusion:
Backing up data on macOS Big Sur or other systems is very important for data security. A full backup can help your restore the files and system in emergency cases.
To generate reliable backups for macOS, you can use Time Machine to back up the files regularly. Or use Disk Utility or the software DoYourClone for Mac to make complete and even bootable clone for the macOS.
DoYourClone for Mac
DoYourClone for Mac, one of the best Mac disk cloning software, can help you clone HDD, SSD, external storage device on Mac, upgrade HDD to SSD, create full disk image backup, etc. It also can clone everything from your Mac to an external HDD/SSD and create a full bootable clone backup. 100% safe and easy-to-use.