How to Downgrade macOS Sonoma to Ventura or Other Versions?
If you want to downgrade from macOS Sonoma or Sonoma beta to macOS Ventura, Monterey, Big Sur...you can follow this guide to roll back to previous macOS version. You'd better make a full backup of your Mac before upgrading or downgrading with disk cloning software, such as DoYourClone for Mac.
![]() Updated by Anderson on February 25, 2025
Updated by Anderson on February 25, 2025
Quick Navigation:
- 1. Preparations for Sonoma-to-Ventura downgrade
- 2. Methods to downgrade macOS Sonoma to Ventura
- 3. Conclusion:
- 4. FAQs about downgrading macOS Sonoma
Do you wish to roll back to a previous macOS version without losing any of your data because of problems with the current macOS Sonoma? After installing the macOS Sonoma update, many Mac users have experienced problems, including screen freezes and system crashes. However, you need not fret! This article shows some tried-and-true techniques to roll back from macOS Sonoma to the more stable and secure macOS Ventura or other versions.
Preparations for Sonoma-to-Ventura downgrade
Some data may lose after a downgrade for a variety of reasons. Do Your Data Recovery for Mac can be used in such a situation to assist you in retrieving any lost information.
Many Mac users attribute their data integrity to this robust program that allowed them to downgrade from Sonoma to Ventura. So it can easily handle this test. Data from internal/external storage media, Mac storage media, SD cards, and more can be successfully recovered using this utility. It's compatible with many file types to upload any media or file.
Backup all your data:
It is essential to back up your Mac data before attempting a downgrade from macOS Sonoma. That is because the downgrading procedure will delete all of your current information. Several options exist to help you reliably back up your information. Time Machine is not advised for this backup since restoring from a backup created in macOS Sonoma will also restore the Sonoma operating system.
The alternative is to copy the data onto a portable storage device by hand, such as an external hard drive. Cloud services like iCloud and Google Drive provide easy and safe online backup solutions.
Disk cloning software is the easiest method to make a full backup of your Mac. Before you upgrading to macOS Sonoma or downgrading from Sonoma, you can use disk cloning software - such as DoYourClone for Mac to make a bootable clone backup with everything on your Mac.
DoYourClone - Reliable Disk Clone Software
- Create an exact bootable clone for Mac.
- Copy Mac hard drive to external hard drive.
- Make ZIP or DMG backup fro any hard drive.
Now, we will show you how to make a bootable clone backup for your Mac:
Step 1. Connect an external hard drive to your Mac and open DoYourClone for Mac from Launchpad. Choose disk cloning mode - Clone OS.
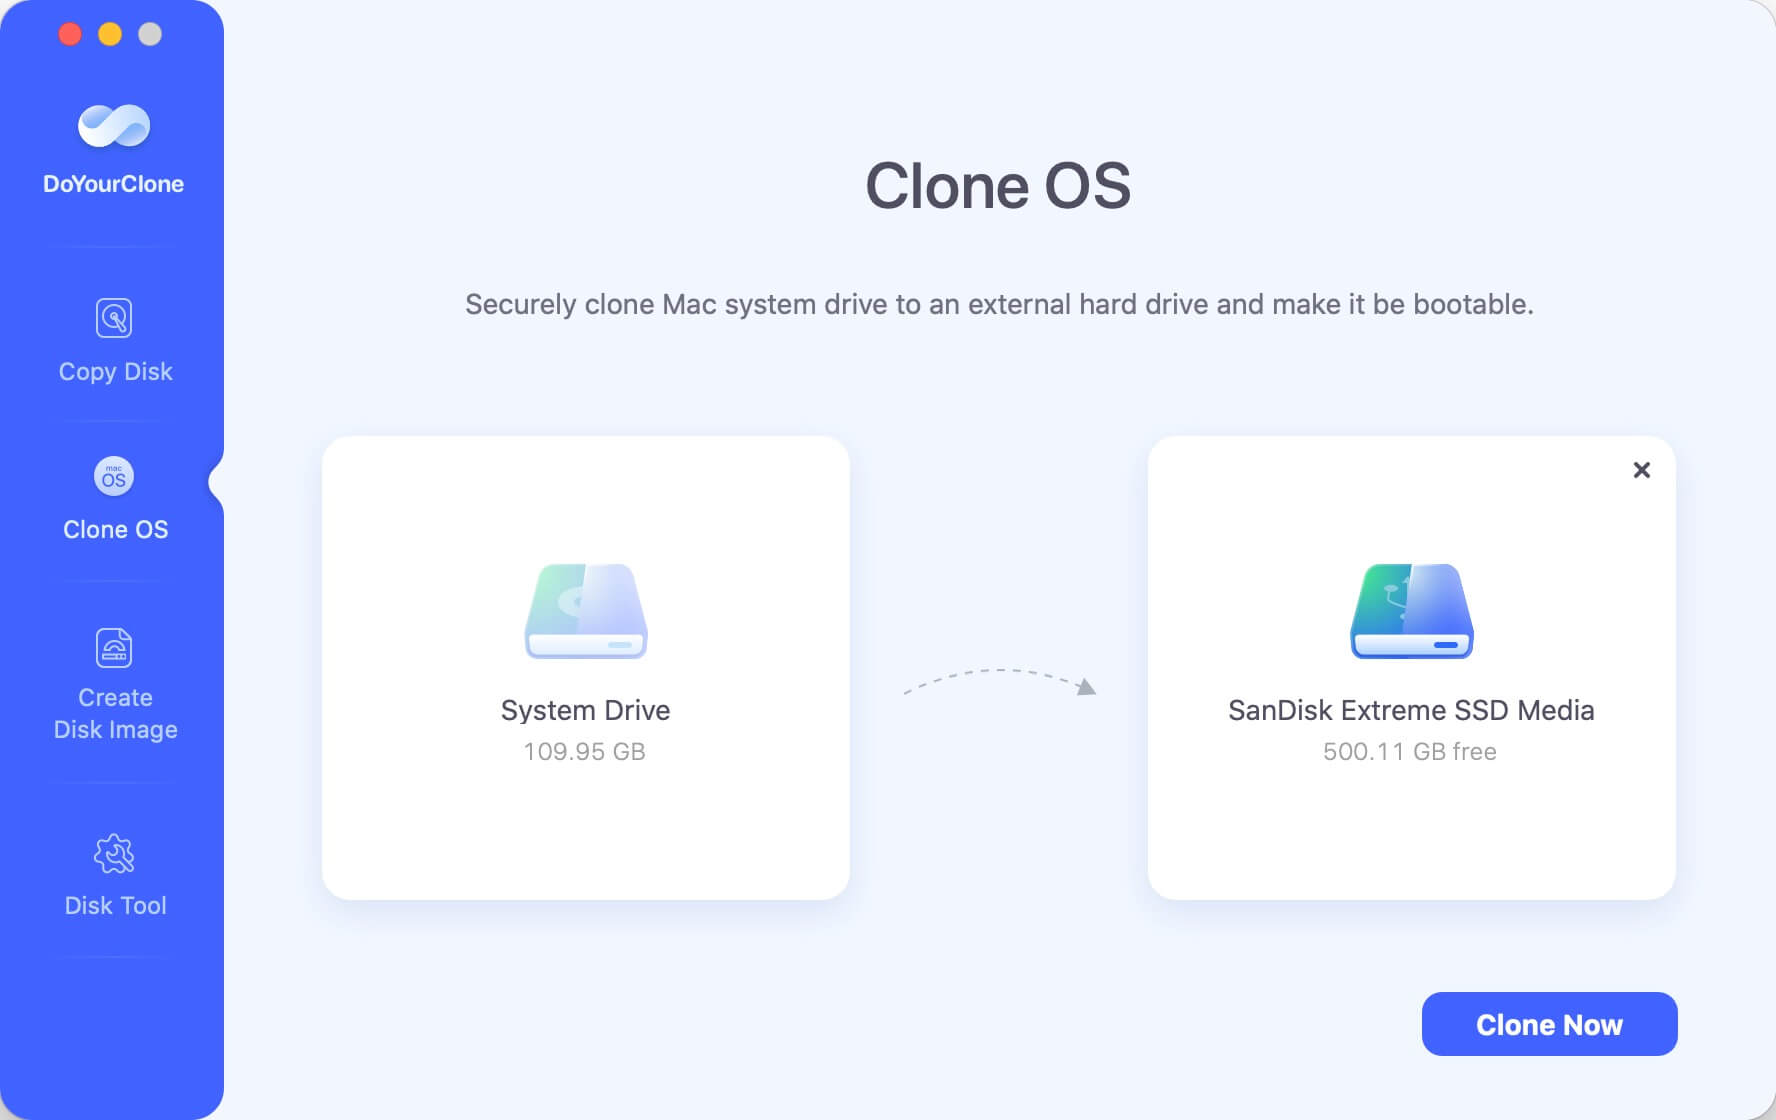
Step 2. Select the external hard drive as the destination drive. Then click on Clone Now button to clone everything including macOS, user files, documents, settings, apps from the Mac startup disk to the external hard drive.
📌 Tips: When cloning the hard drive in this mode, the destination disk will be overwritten. Ensure to back up or move the important files to another safe place if necessary. Otherwise, using an empty external hard drive as destination.

What can the bootable clone do?
- Restore lost files if you lose files on your Mac.
- Connect the external hard drive to any Mac and set it as the boot drive.
- Restore macOS data in macOS Recovery mode.
Methods to downgrade macOS Sonoma to Ventura
macOS Sonoma downgrade using Time Machine Backup:
While Time Machine's primary usage is restoring lost files and data, it may also be used to roll back to an earlier version of the operating system and other system settings. Downgrading can be made much easier if an earlier Time Machine backup exists from before the update.
Using Time Machine, here's how to roll back from macOS Sonoma to Ventura:
- First, restart your Mac after plugging in the external storage device where the Time Machine backup is stored.
- On Intel-based Macs, you can access Recovery Mode by pressing and holding "Command + R". To access the Options menu on an Apple Silicon Mac, press and hold the "power" button, then choose Options and click Continue.
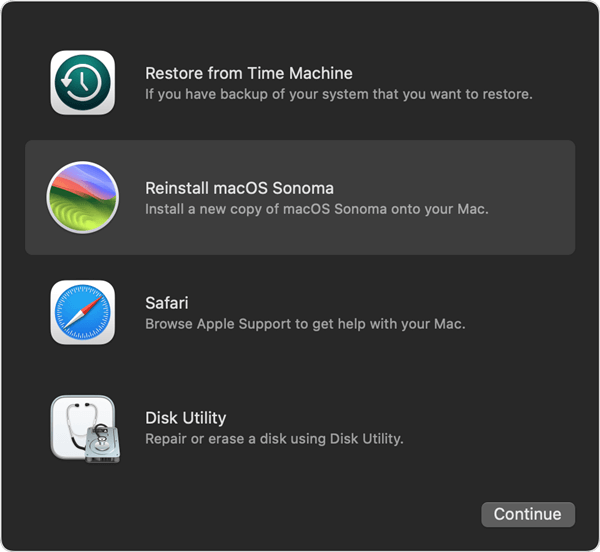
- Click "Restore From Time Machine Backup" and "Continue."
![Downgrade macOS Sonoma to Ventura]()
- When the next window appears, click "Continue" once more to proceed.
- Choose the backup disk as the Restore Source.
- A window showing your backup history will open. Select the most recent backup you made before installing the new macOS (you can tell which macOS version the backup was created in).
After rolling back to an earlier macOS version, you can access any new data by referring to a separate backup.
Using macOS Recovery, revert to macOS Ventura:
If you are using a Intel based Mac, you can use the Internet macOS recovery technique to roll back to macOS Ventura from macOS Sonoma if you don't have a Time Machine backup or if the backup fails to operate throughout the restoration process.
Please note that a wired keyboard (or the on-screen keyboard) and a reliable internet connection are prerequisites for this method.
- Turn off your Mac.
- Now boot up while holding down one of these three keyboard shortcuts until the Apple logo appears.
- Command + R to reinstall the current version of macOS.
- By pressing Option + Command + R, you will be upgraded to your hardware's most recent macOS version.
- To reinstall the operating system that came with your Mac or the most recent stable release, press Shift-Option-Command-R.
- Then, after typing in the password, click the Continue button.
- Select Reinstall macOS, click Next, and carry on from there.
- Just follow the on-screen prompts and decide which disk to flash.
- When prompted, type in your Mac's password to unlock the drive.
- Hold off until the installation is complete.

Don't close the lid or put your Mac to sleep while it's working. That may cause your Mac to restart multiple times, the progress bar to appear and disappear, or even the screen to go completely black.
Create bootable USB installer to reinstall Ventura
You can also create a bootable USB installer for macOS Ventura. Then use the bootable USB to boot up the Mac and install the system to upgrade from macOS Sonoma. Here are the steps:
1. Download the installation package of Ventura from the App Store or trusted website.
2. After the macOS Ventura installation package is downloaded, don't click Open. If the installer open and run automatically, running, you can stop and quit it. Now you should now have a Ventura installer in the Applications folder.
3. Plug in an empty USB flash drive or external drive and name it 'Ventura installer' or any other name as you want.
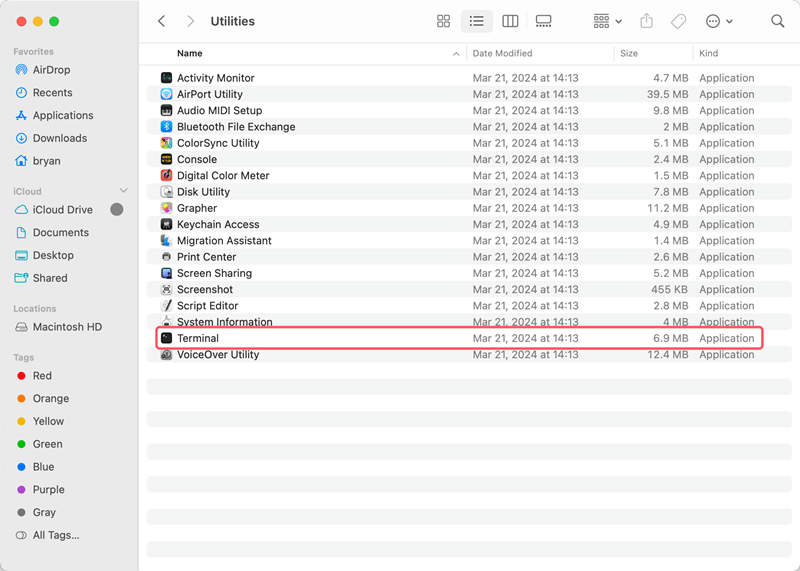
4. Open Terminal from Applications and then Utilities.
5. Type this command: sudo /Applications/Install\ macOS\ Ventura.app/Contents/Resources/createinstallmedia --volume /Volumes/MyDrive [note that MyDrive in the command is to be replaced with the name of your USB drive].

6. Press Return to start, then it will create a bootable USB installer of macOS Ventura. When Terminal reports that the installer has been created successfully, quit Terminal.
Restart the Mac and press Power or option key while the Mac starting until you see the startup disk list screen appears. Select the Ventura Installer and follow the wizard to finish the installing.
Conclusion:
It is feasible to roll back to a previous macOS version from macOS Sonoma and perform a clean installation of Ventura. The downgrade process can be successfully implemented with some careful preparation and execution. If you want to downgrade from Sonoma to Ventura without losing data, use the above-mentioned techniques.
If you have lost data, you can try to recover it with Do Your Data Recovery for Mac or restore lost files from previous backups. It is recommended to make a backup before you upgrade to macOS Sonoma or downgrade from Sonoma to Ventura.
FAQs about downgrading macOS Sonoma
1. Why downgrade macOS Sonoma?
Due to different reasons, some users might want to downgrade macOS Sonoma to a previous macOS:
- Mac is slow after upgrading to macOS Sonoma. New features and improvements of macOS Sonoma don't make that worthwhile if the Mac became slower or less stable than before.
- App instability. If some regularly used apps cannot run normally on the new system, it's better to downgrade the system to the old system.
- Personal preference. You may want to downgrade back to previous version if you don't like the macOS Sonoma as it cannot run the way as you want.
2. What should to do before downgrade Sonoma?
First, it's essential to back up the needed files to a safe place.
Second, get the Time Machine backup drive ready if you have backed up the old system.
Third, if you decide a fresh installing for the previous version, create a bootable USB installer.
3. How to create a bootable clone for macOS before upgrading the system?
It's a good solutions to create a bootable clone before you upgrade macOS. If there were issues happen while upgrading, you still have the chance to restore the files and system. Also, if the updated new systems is not wanted, quickly go back to the previous system with the clone backup.
To create bootable copy of macOS, do as follows with DoYourClone for Mac.
- Download and install the software on your Mac.
- Select "Clone OS" mode to clone the macOS drive.
- Choose an empty external drive as destination.
- Start the clone and move everything to external drive and make it bootable.

DoYourClone for Mac
DoYourClone for Mac, one of the best Mac disk cloning software, can help you clone HDD, SSD, external storage device on Mac, upgrade HDD to SSD, create full disk image backup, etc. It also can clone everything from your Mac to an external HDD/SSD and create a full bootable clone backup. 100% safe and easy-to-use.
Written & Updated by Anderson
Anderson is a big fan of computer technology. He joined DoYourData in 2018 and has been writing 200+ articles about disk clone, data recovery, computer technology, data erasure, Mac system optimization, etc. He loves music, movie, and reading. In his spare time, he’s studying music and playing tennis.