Safely Remove the External Hard Drive, USB Drive, and SD Card on Mac
![]() Ricky Lin updated on February 20, 2024
Ricky Lin updated on February 20, 2024
Quick Navigation:
- Why Does Safely Remove?
- How to Safely Remove External Storage Device on Mac?
- Tips for Safe Ejection
- Recover Lost Data Due to Improperly Ejecting the External Device on Mac
- Conclusion
Have you ever quickly pulled out an USB drive and asked yourself, "Does it matter?" It's not a surprise: it does! You could hear your portable hard drive saying, "I wasn't done saving that file!" Our guide on safely removing external storage devices from your MacBook will help you avoid data problems. It's like saying goodbye to a friend before they leave with a wave. You don't just have to do this; your MacBook tells you, "Hold on, I've got this." Ensure your files are safe and sound on your computer before you say goodbye to your USB drive, external HDD, or SD card. These easy steps will help you do that. Are you ready to improve the way your MacBook acts? Let's jump right in!

Why Does Safely Remove?
Many people may not understand why they must safely remove portable storage devices from their MacBooks. In the past, unplugging a device seemed safe. But now, operating systems use caching and write-buffering to improve the speed at which data is sent. When you copy or move files to an external device, the operating system might not write the data immediately. Instead, it might keep the data in a temporary cache to speed things up.
When you safely remove a storage device, the operating system clears the cache and ensures all of its data has been written to the external device before you unplug it. If you pull out a USB or external hard drive too quickly and don't properly remove it, you could lose data, damage the drive, or even cause it to stop working.
How to Safely Remove External Storage Device on Mac?
Step 1: Close Applications and Files.
It's important to close any programs or files using your external storage device before you eject it. It includes pictures, files, and anything else saved on the external device. All their files are properly closed when you close these programs, and no reading or writing activities are ongoing.
Step 2: Save Your Work.
Before starting the dumping process, ensure you have saved your work. When you save your work, changes that haven't been saved are put to the external storage device. It keeps you from losing data.
Step 3: Locate the External Storage Device Icon.
On the desktop of your MacBook, you'll see icons for external storage devices that are linked. Find the icon that goes with the gadget you want to remove. It could be an SD card, a USB drive, or a portable hard drive.
Step 4: Use the Eject Option.
To get to a menu, right-click or control-click on the picture of the external storage device. Press the "Eject" button on the menu.

Instead, drag the device's icon to your Dock's Trash button. The ejection process starts when this move is taken.

Step 5: Wait for Confirmation.
Wait for your MacBook to tell you it's safe to remove the external storage device after you choose the "eject" choice. You might see a message on your screen telling you removing the device is safe. One more thing is that the gadget icon might disappear from the desktop.
Step 6: Physical Disconnect.
Once you get the proof, you can safely remove the external storage device from your MacBook. To remove a USB drive or portable hard drive, gently pull it out of the USB port. To remove an SD card, gently push it in a little and slowly pull it out.
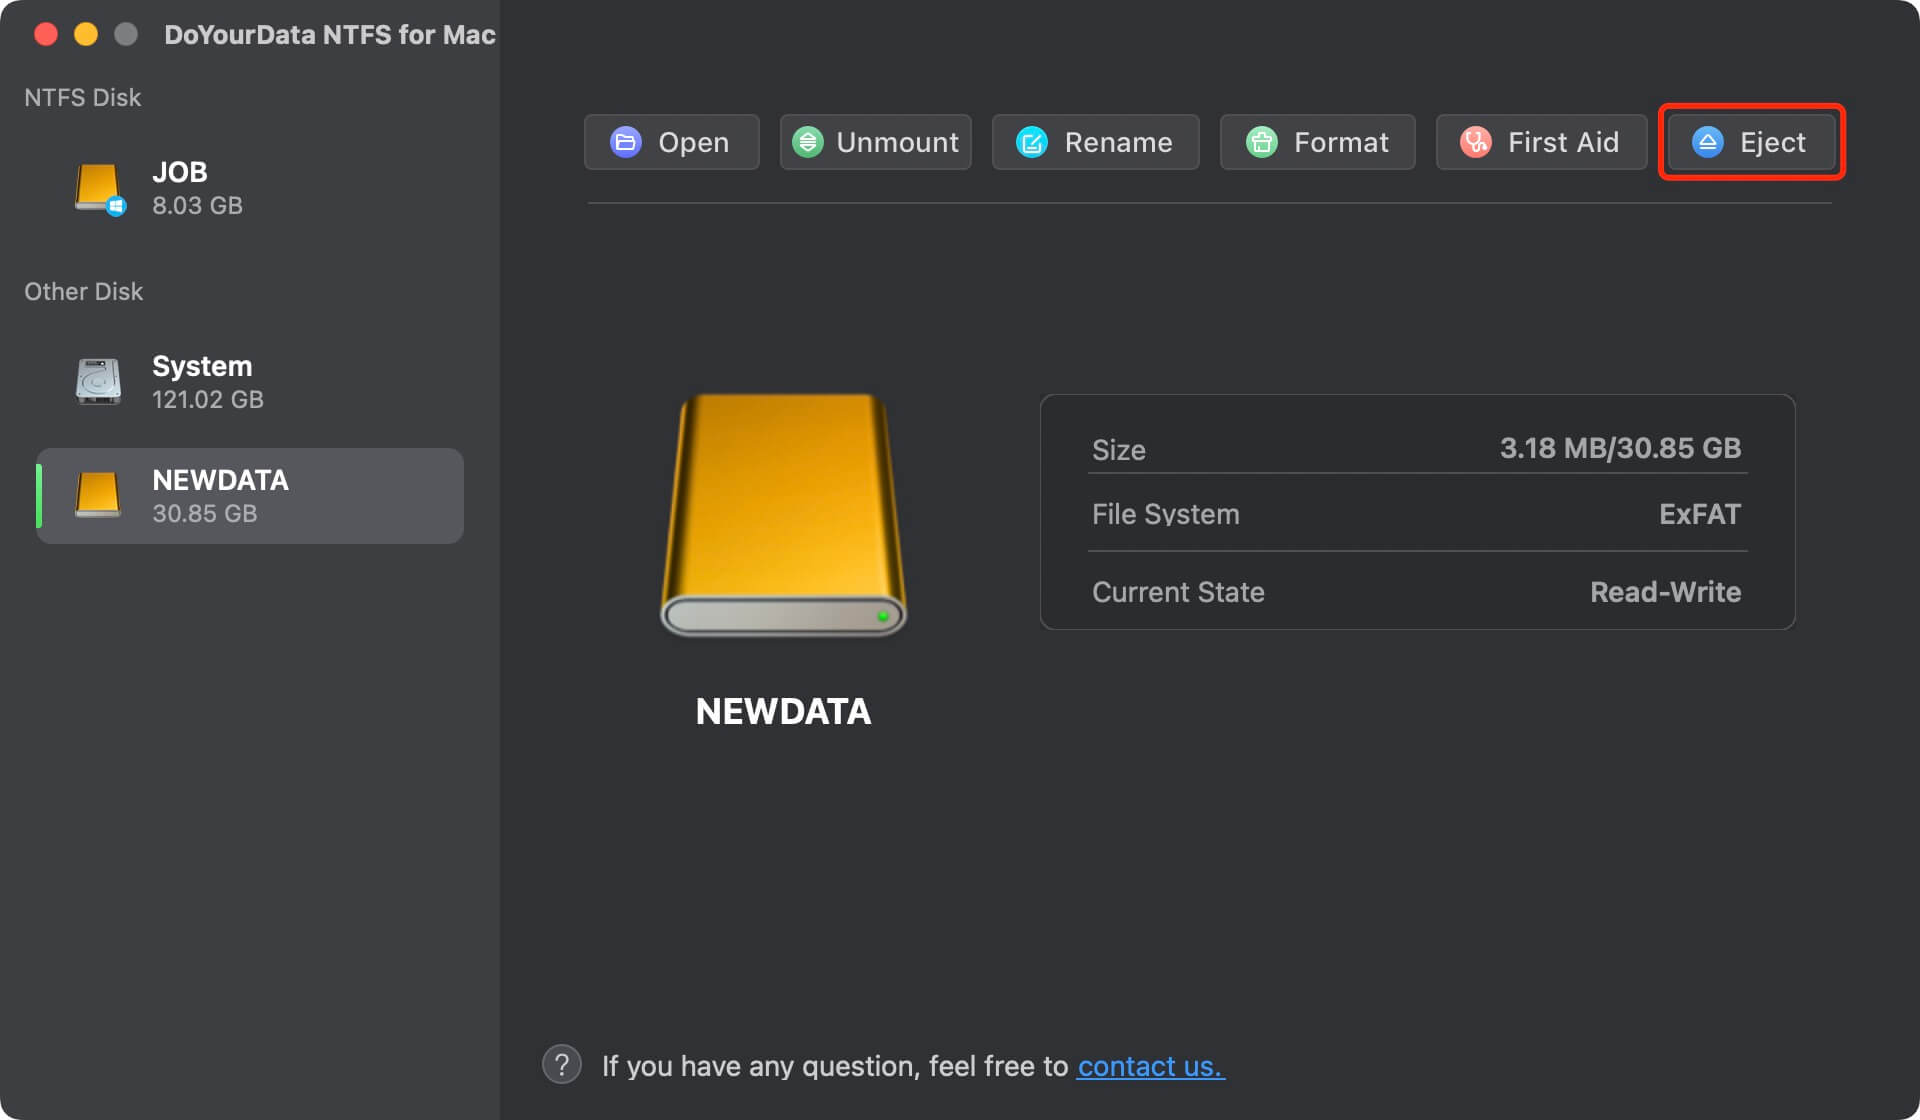
If you have a disk management tool - such as DoYourData NTFS for Mac installed on your Mac, just open this app, find the external storage device, and click on Eject button to safely remove the device from your Mac.
Tips for Safe Ejection:
- Use the Eject Option Always: Instead of simply unplugging the device, make it a habit to use the "Eject" button. It ensures the operating system finishes all of its tasks before unplugging.
- Check for Active Processes: Before ejecting, ensure no tasks or apps are currently using the external storage device. It helps keep data from getting damaged by processes that are still going on.
- Wait for Confirmation: To be patient is key. Before directly disconnecting the storage device, you should always wait for the confirmation message or icon to go away. If you hurry, you might lose the info.
- Avoid Force Ejection: If your MacBook says a device is in use and can't be removed, don't forcibly eject it. Instead, find the app or process that is using the device and close it. Then, try ejecting again.
- Check Power Status: Some external hard drives need a different power source. Before taking the external hard drive from your MacBook, ensure it is properly turned off or unplugged.
Recover Lost Data Due to Improperly Ejecting the External Device on Mac
If you just plug out the USB device from your Mac, it may cause file system crash, data loss, files unsaved, etc. Don’t panic, here is the method to help you recover lost data from the external USB storage device after unsafe remove of your device on Mac.
Step 1: Download and install the data recovery app - Do Your Data Recovery for Mac. Then open this app from Launchpad. Make sure the external device is connected to your Mac.
Step 2: You will see all internal drives and external devices on the main interface. Jus select the external device where you lose your data.

Step 3: Click on Scan button to deeply scan the device. It will find all erased files, deleted/formatted files, unsaved files, existing files, etc.

Step 4: Once the scan is completed, just preview the recoverable files. Then select the wanted files and save them.

Conclusion:
Taking out external storage devices from your MacBook safely is important to keeping your data and devices healthy. If you follow the simple steps in this guide, the ejection process will go smoothly, and there will be less chance of data loss or hardware damage. Safe ejection habits will help you have a smooth and reliable computing experience, protect your important files, and make your external storage devices last longer.
If you have lost data due to removing your device on Mac in unsafe way, you can use a data recovery app - such as Do Your Data Recovery for Mac to help you get lost data back.
Written & Updated by Ricky Lin
Ricky Lin is an senior editor of DoYourData who lives in Adelaide, Australia. He is interested in writing technology articles related with data recovery, computer issue fixes, disk clone, iPhone data recovery, video edit, Mac optimization, etc. He Joined DoYourData in 2019 and have written 500+ articles to help both Windows users and Mac users to solve data or computer problems.
Hot Articles
- Fix External Hard Drive Read-Only Issue on Mac
- How to Wipe Trash Bin on Mac?
- Recover Lost Data from WD (Western Digital) External Hard Drive on Mac
- Fix External Hard Drive Not Showing Up on Mac
- How to Wipe SD Card on Mac?
- Mount and Unmount the External Hard Drive on the Mac
- Run First Aid on Mac to Repair Disks
- Fix Can't Save Files to An External Hard Drive on Mac
- (Solved) External SSD Not Detected in Disk Utility on Mac
- Why Can't Format A Hard Drive To NTFS on Mac? Can We Fix It?