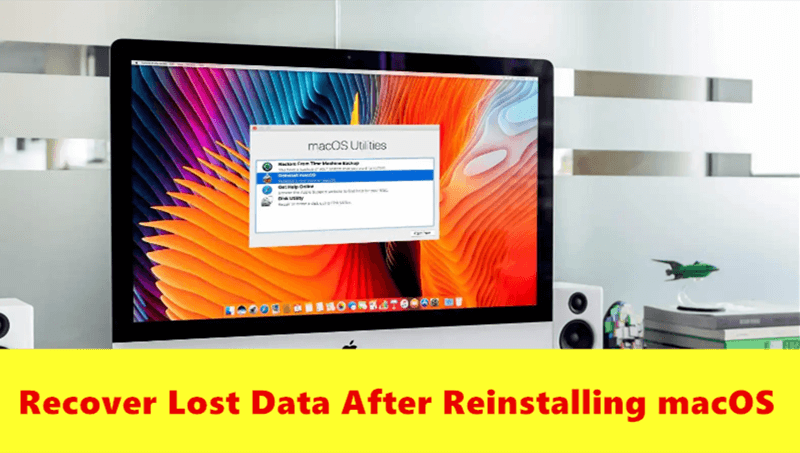
Is it possible to recover data after macOS reinstall or reset?
After macOS reinstallation or factory reset, there is still a chance to get back the lost files with reliable recovery tool.
Quick Navigation:
For those who want to safely delete private data, free up disk space, or prepare a Mac to sell or donate, permanently erasing data on macOS Big Sur is necessary. Moving files to the Trash and then emptying them doesn't completely remove the data; the data stays on the disk until it is replaced.
This guide looks at several ways to permanently delete data on macOS Big Sur, such as removing all personal files by a factory reset, using third-party software and using advanced Terminal instructions to wipe removed data permanently.
These methods ensure no one can get your data back, protecting your privacy and safety. This guide shows you the steps you need to take to effectively erase data permanently on macOS Big Sur, no matter how experienced you are.
It's important to know how data deletion works on macOS before looking at the methods:
If you want to make sure all personal files in macOS Big Sur will be removed and wiped permanently, you can follow this guide to accomplish the task completely.
It would help if you did a few important things before factory restarting your macOS Big Sur. This will protect your data and ensure the rest of the process goes smoothly.
Backup Important Data
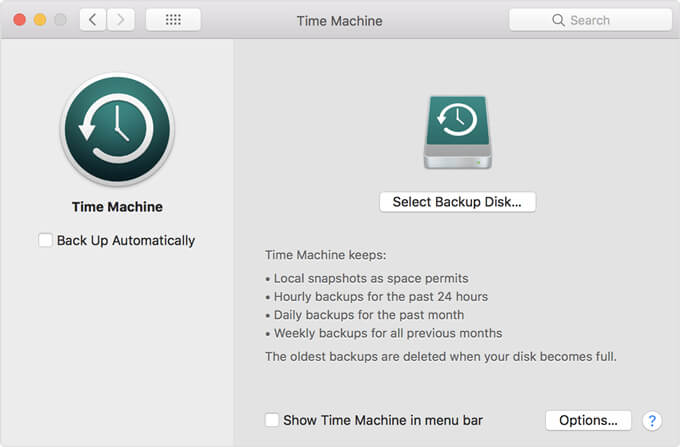
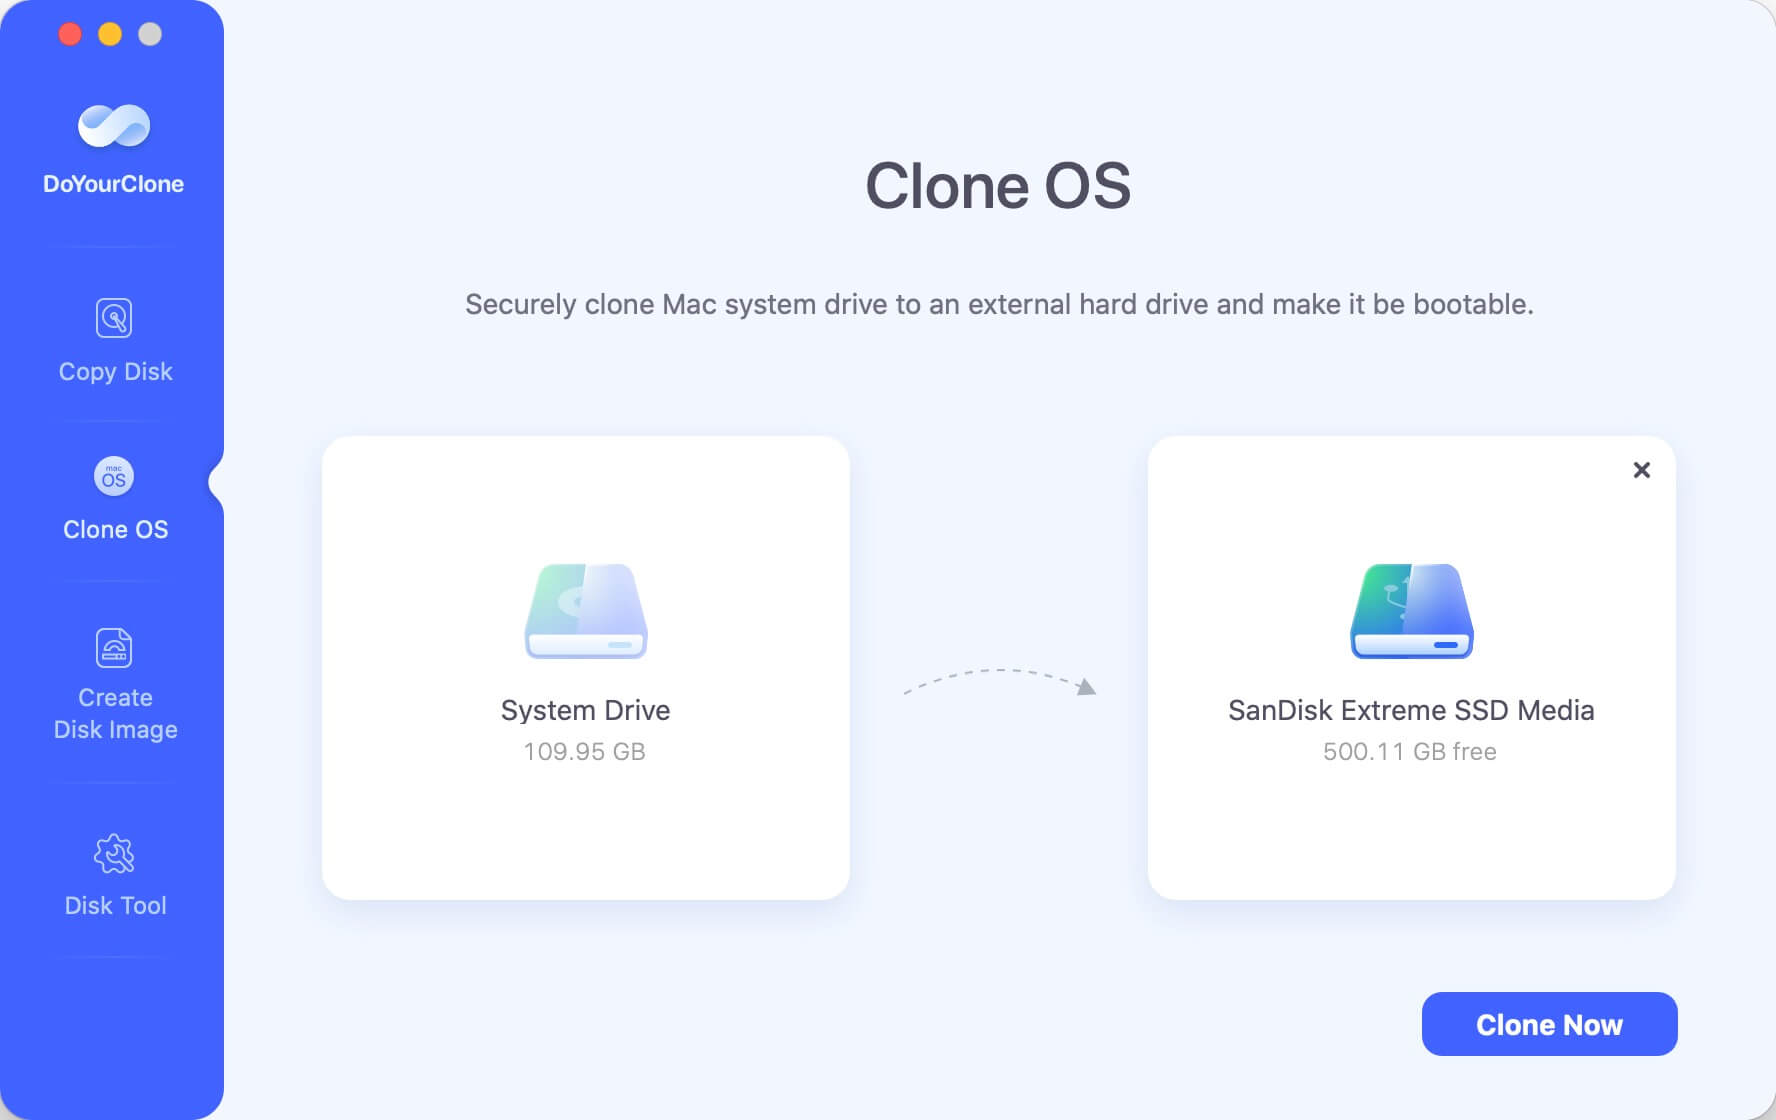
Making copies of your important files is the first and most important step. Losing important files like pictures, documents, or app data can be upsetting but can be avoided at all costs. To keep your things safe, use the following steps:
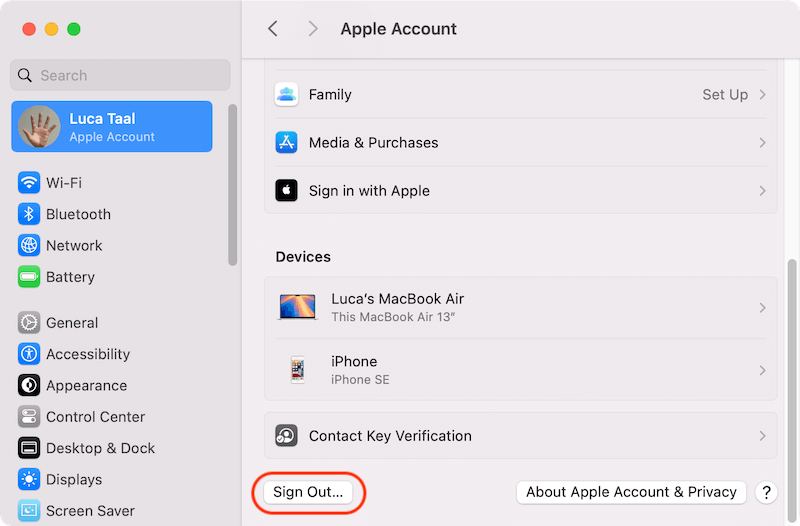
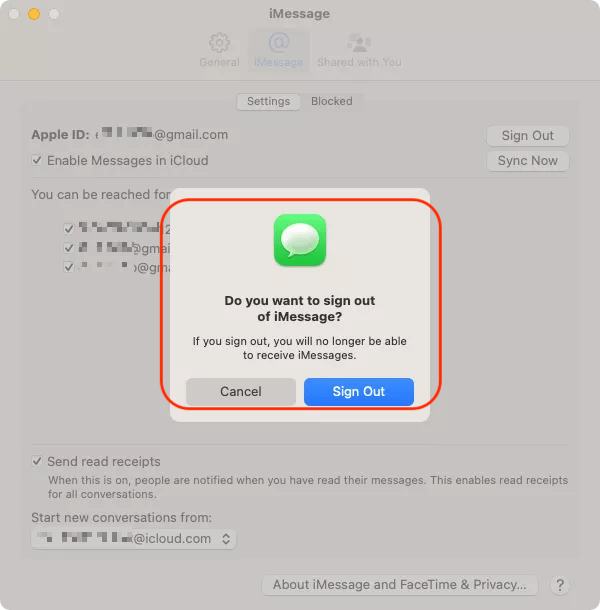
Sign Out of Apple Services
Sign out of all Apple services so that other people can't access your personal information or buy things with your Account:
Deauthorize iTunes (Music):
It's important to remove your computer's authorization from iTunes or Music, especially if you've reached the limit of devices that can use your Apple ID. To stop authorizing: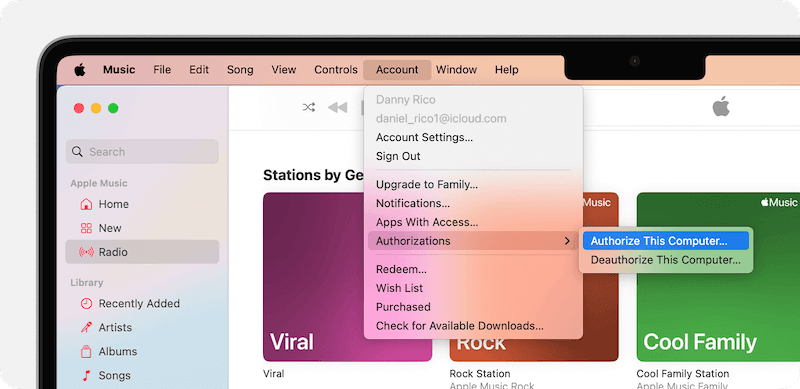
If you follow these steps, your Big Sur data erasure will go as smoothly and safely as possible. It will give your Mac or its new owner a fresh start.
As it's impossible to wipe a Mac system drive directly, to ensure all the personal data will be wiped, first you can factory reset the macOS Big Sur. During the process, you can choose to format the drive in Recovery Mode to ensure all the files are removed. Then you can wipe the free space of drive to ensure all files will be wiped. Here you can do as follows to start a factory reset:
Step 1. Get into Recovery Mode
For Apple Silicon Mac: Press and hold on Power button until you will the boot drive screen, select Options and click Continue.
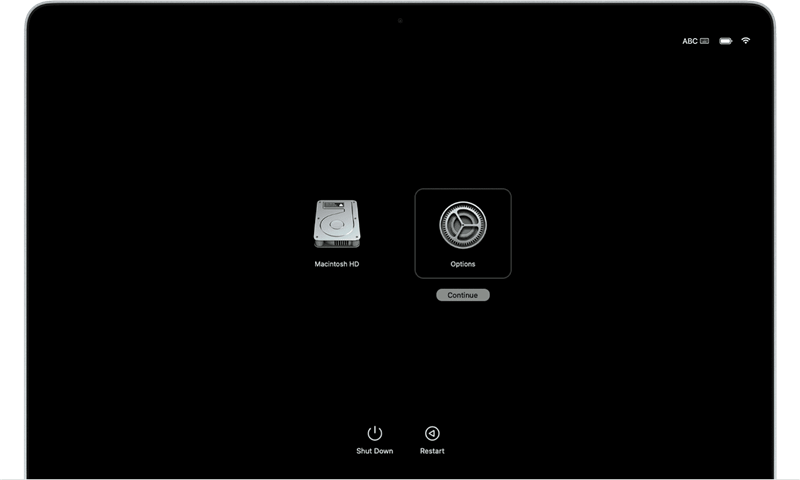
For Intel Mac: Start the Mac and press Command + R keys to get into Recovery Mode.
Step 2. Format the Mac drive with Disk Utility.
Click the Disk Utility option to open it from the macOS Recovery Utilities screen.

Here you can format the Mac drive. Select the drive and click Erase button and continue the formatting process.
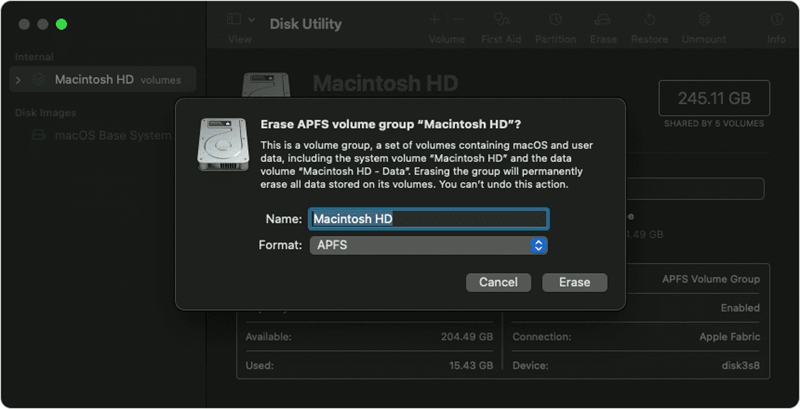
Step 3. Reinstall macOS Big Sur.
Exit Disk Utility and go back to the macOS Recovery Utilities screen, choose Reinstall macOS Big Sur and follow the wizard to reinstall the system directly.
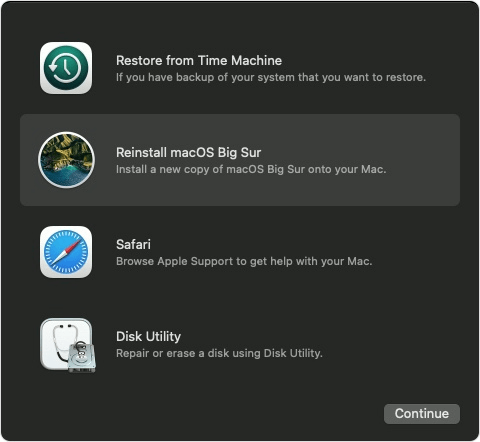
After the process is done, a new fresh copy of macOS Big Sure is installed and all the previous personal data, system settings, applications are removed or reset.
After a factory reset, all your personal data was removed. However, it's not enough if the Mac will be delivery to another hand. The removed data would be recovered with professional data recovery software, at least part of the data.
Is it possible to recover data after macOS reinstall or reset?
After macOS reinstallation or factory reset, there is still a chance to get back the lost files with reliable recovery tool.
To ensure the data will not be recovered, it's necessary to wipe the removed data permanently. Here we will introduce 2 methods to wipe the deleted files on macOS Big Sur.
One of the best ways to delete files on macOS Big Sur is to use DoYourData Super Eraser for Mac. In between 1 and 35 passes, it can help you safely and fully delete data on macOS Big Sur. The software can help you delete data from a portable hard drive, memory card, USB flash drive, digital camera, and other devices for good.
After a factory reset on macOS Big Sur, the software can help you wipe the removed files permanently to keep your privacy information safe. What's more, the software can also be used to shred individual files or folder, or wipe an entire drive to erase all data.
That is the guide you need if you only want to delete data already removed on MacOS Big Sur during factory reset.
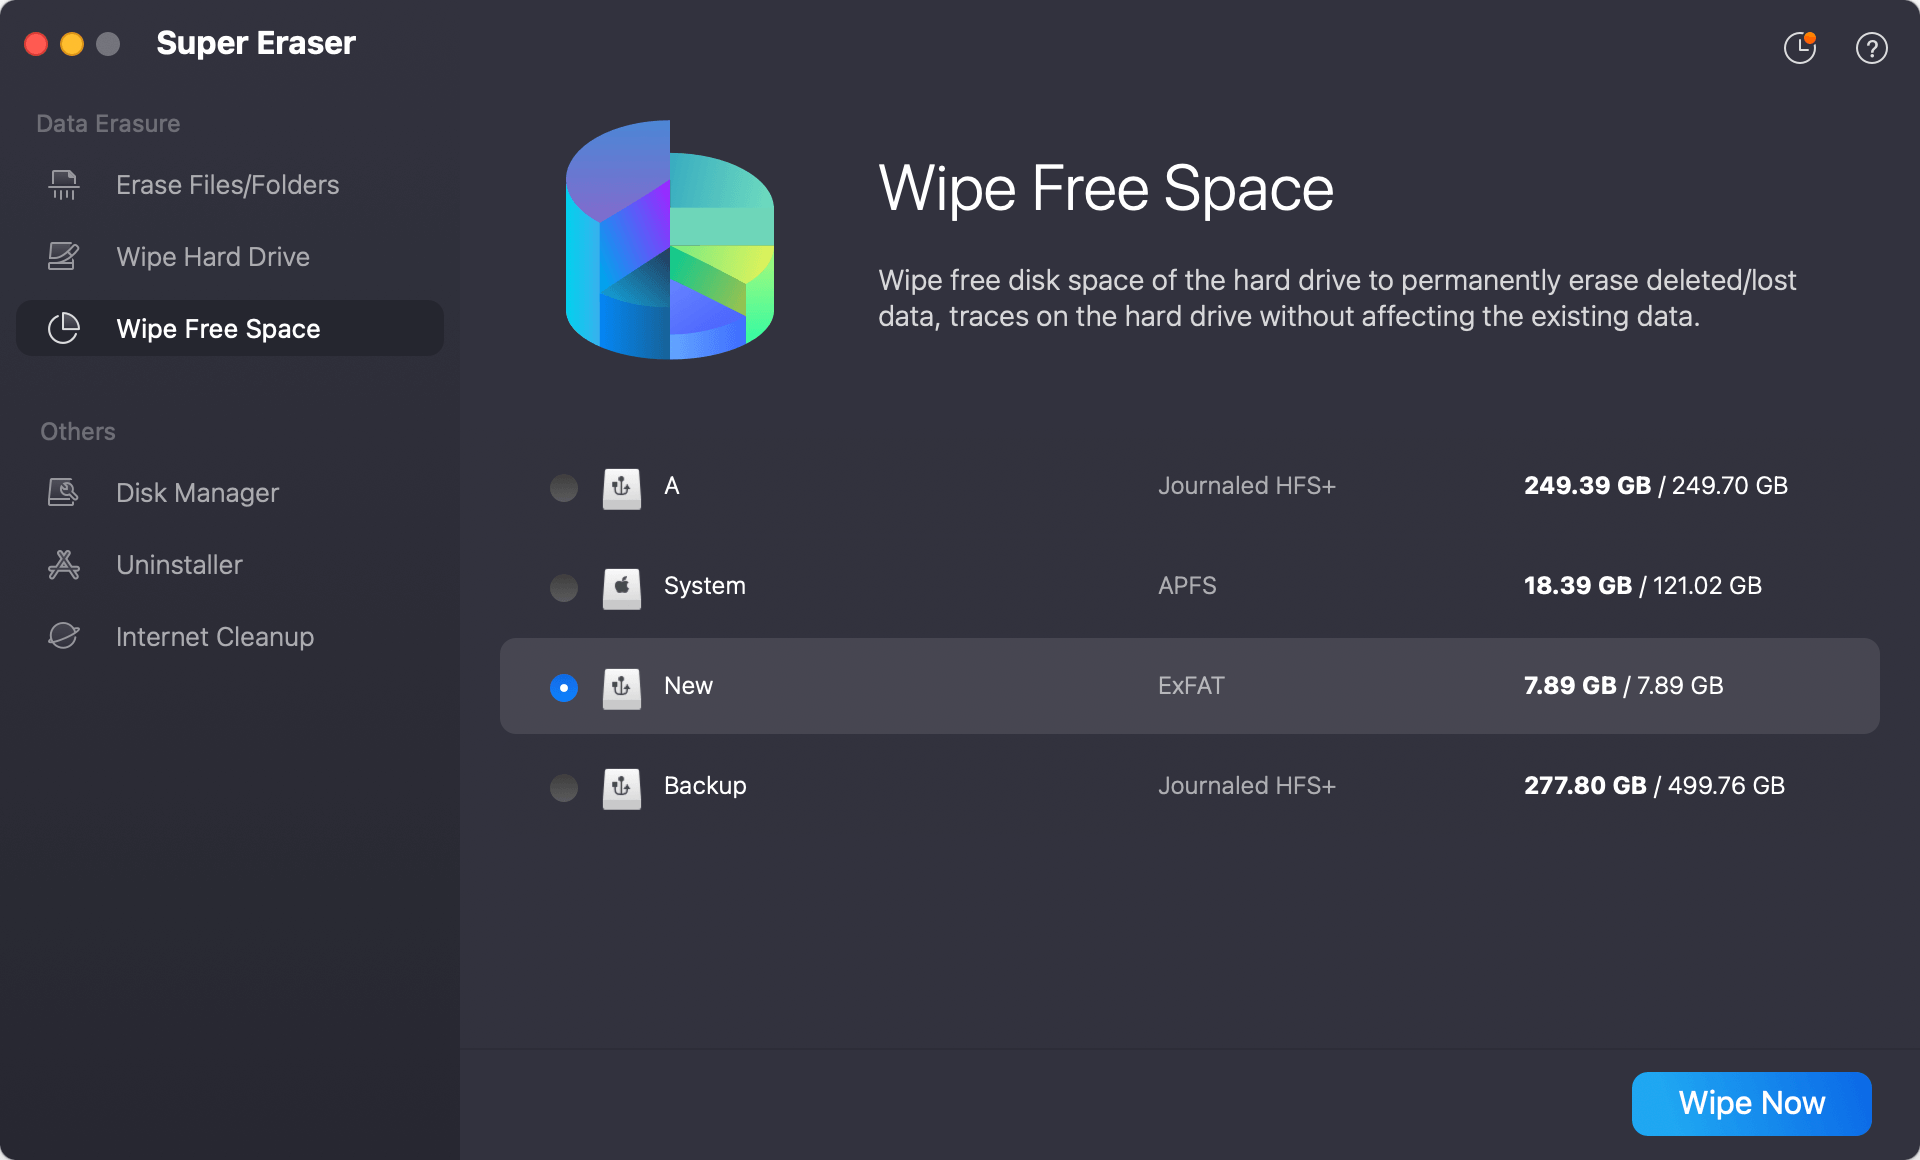
Step 1: On your Mac, open DoYourData Super Eraser for Mac and choose the "Erase Free Space" data-erasing mode. Select the Mac drive form the device list and click "Wipe Now" button.
Step 2: Select a data erasure standard from the drop-down list. Different data erasure standards offer different security level. If you want to be more safe, you can select one with more passes, however it will take more time.
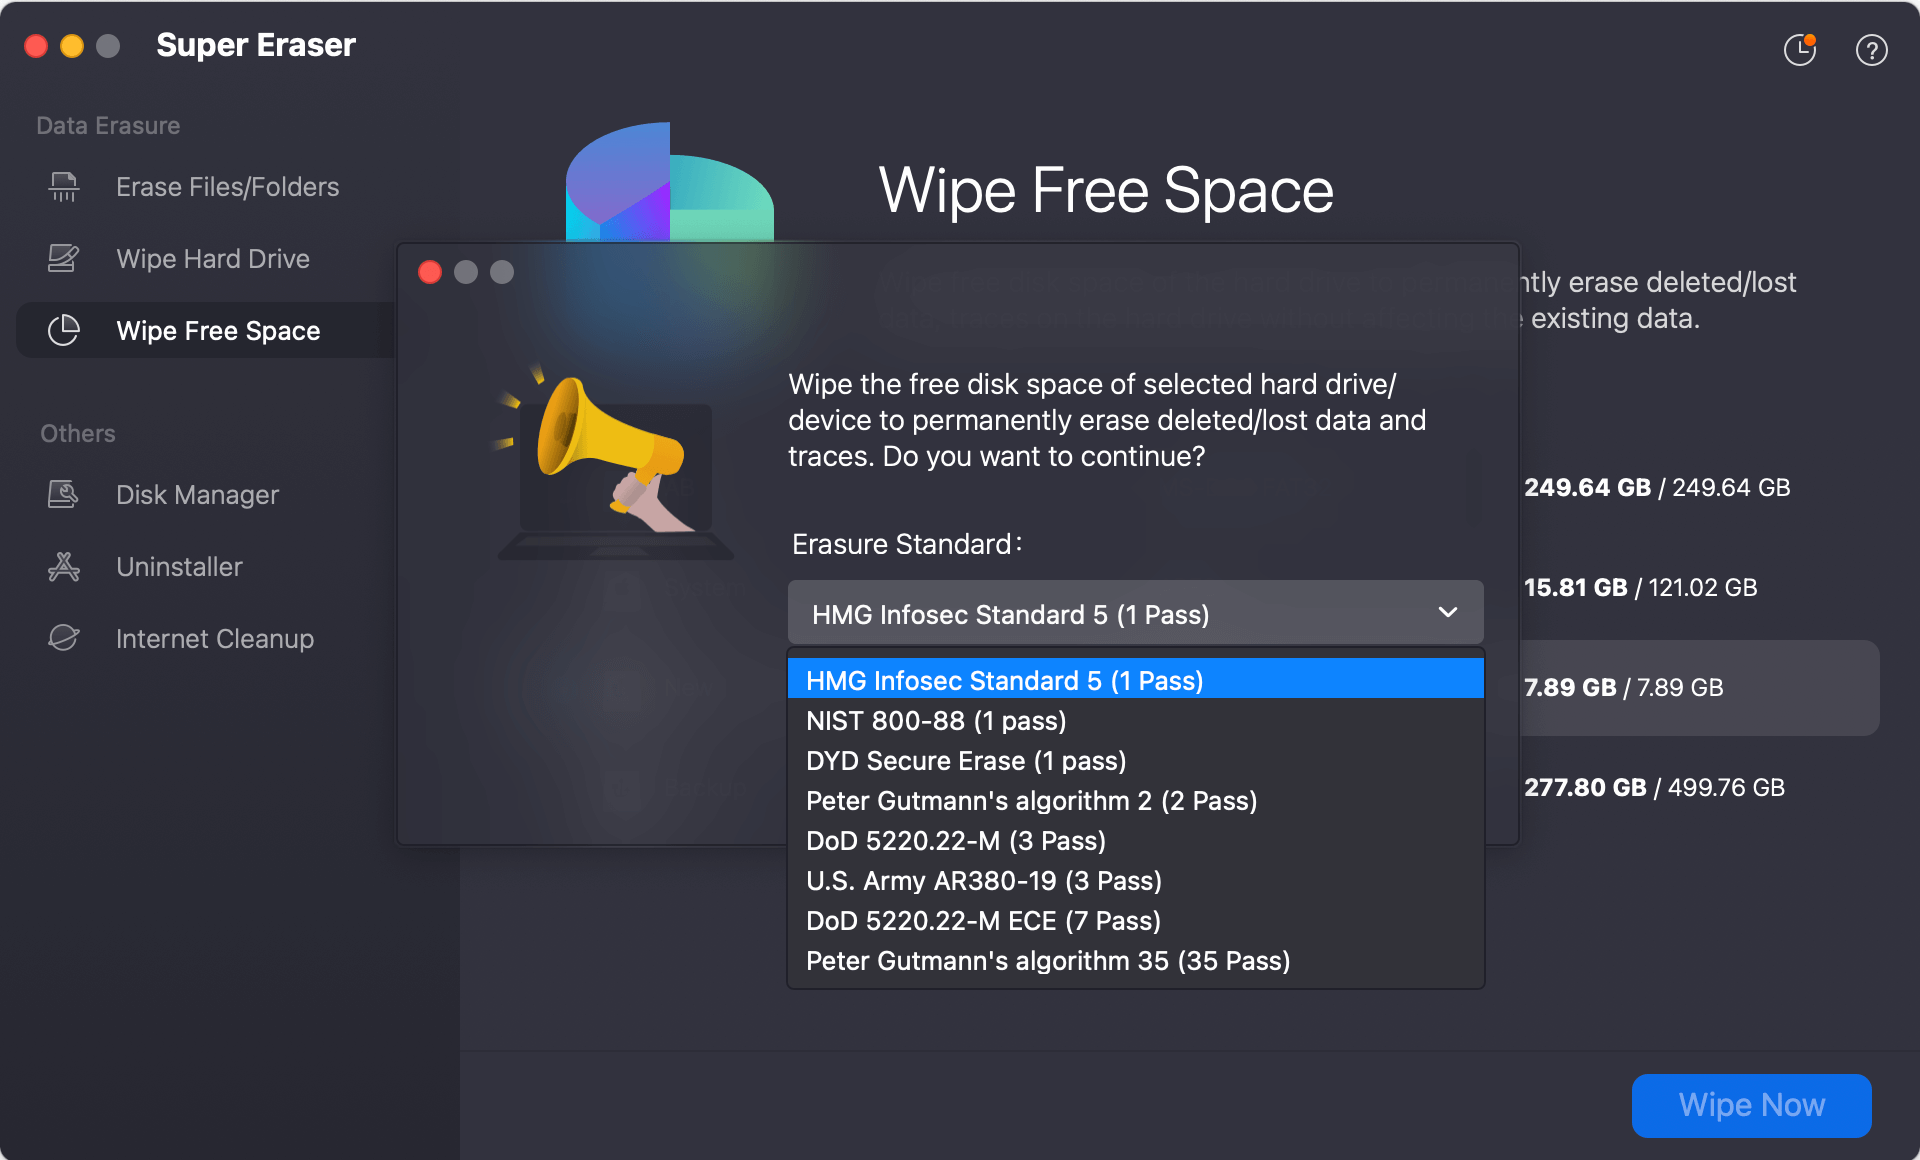
Step 3: Click the "Continue" button to eliminate all the free room on the hard drive. All data that is wiped will be gone for good. The data that is already on the hard drive will not be lost.
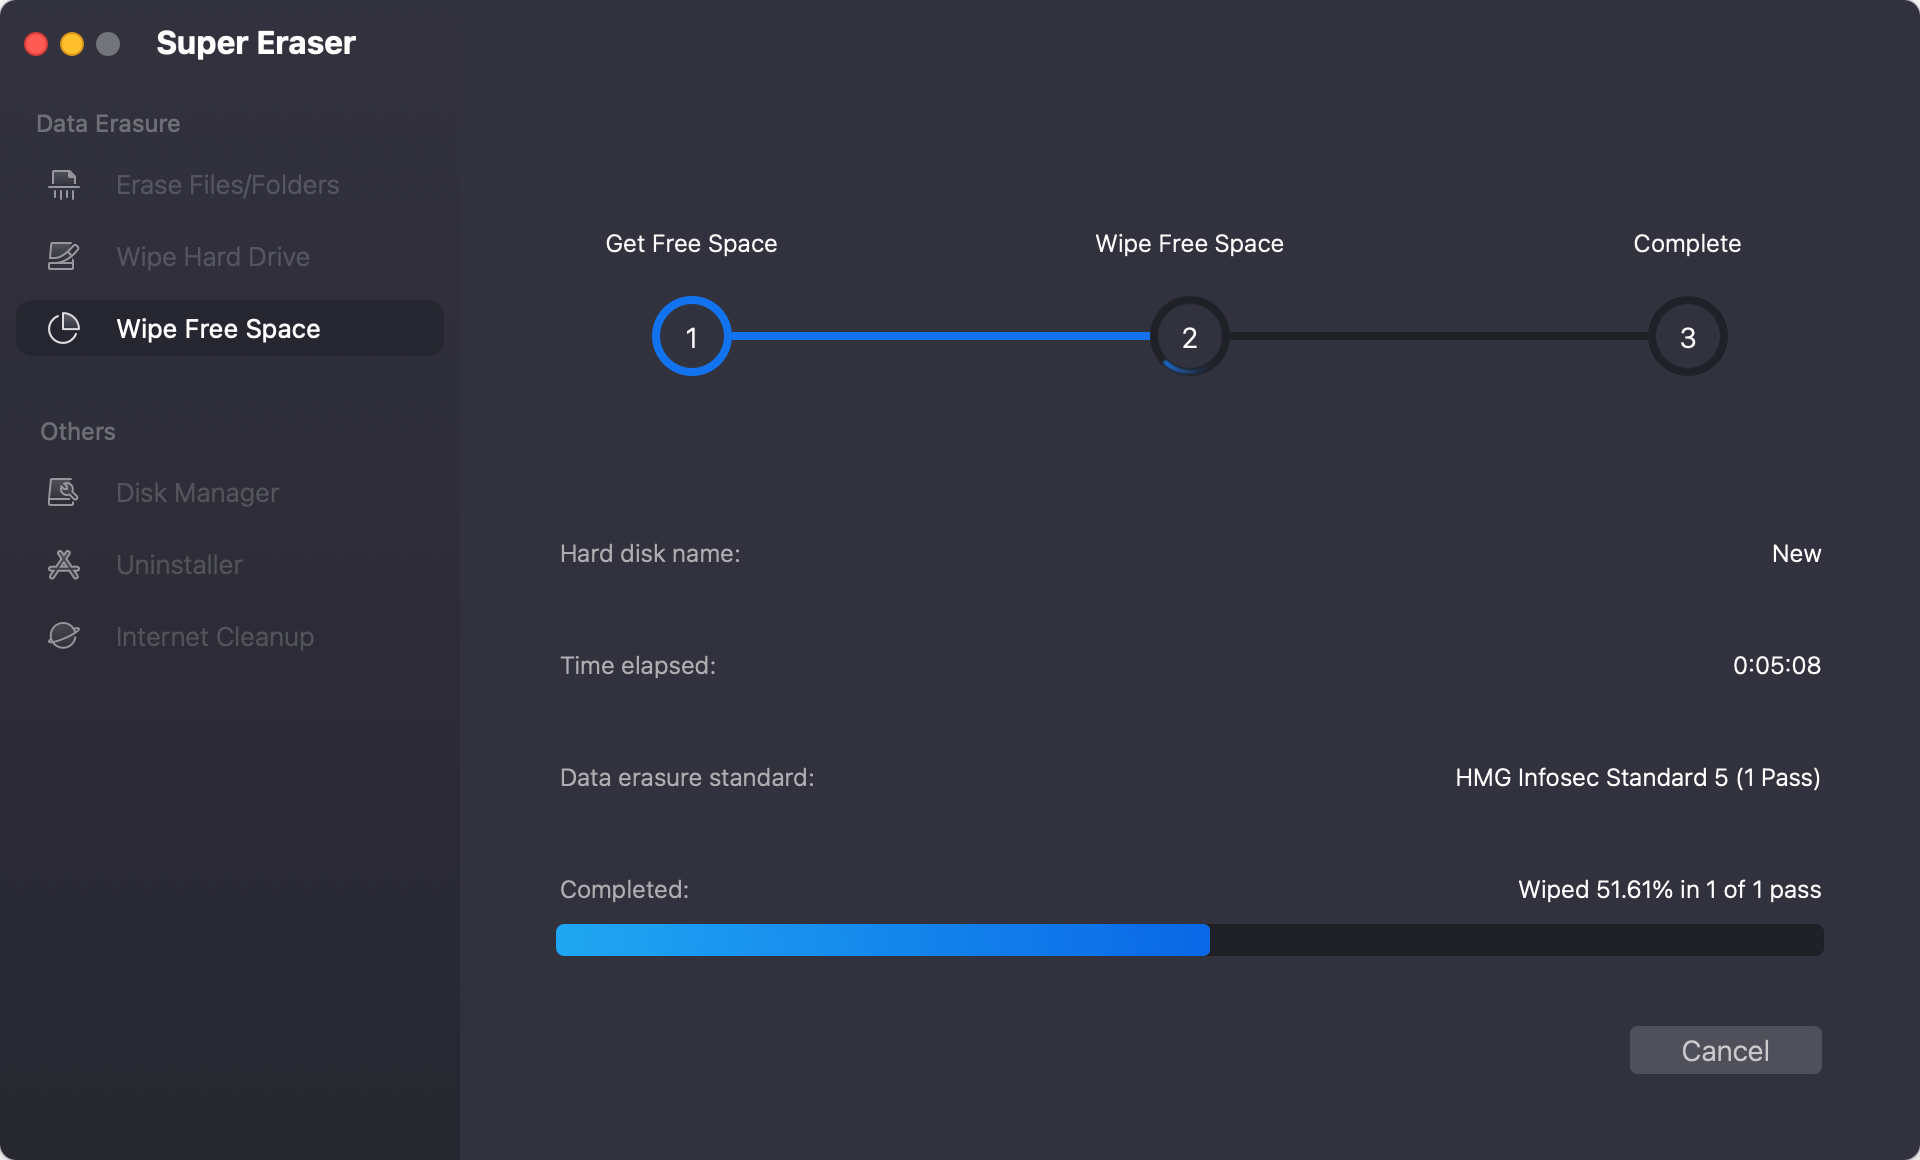
With the system built-in tool Terminal, you can also wipe the free space of the drive, making it impossible to return deleted files. Do these things:
1. Go to Applications > Utilities > Terminal.
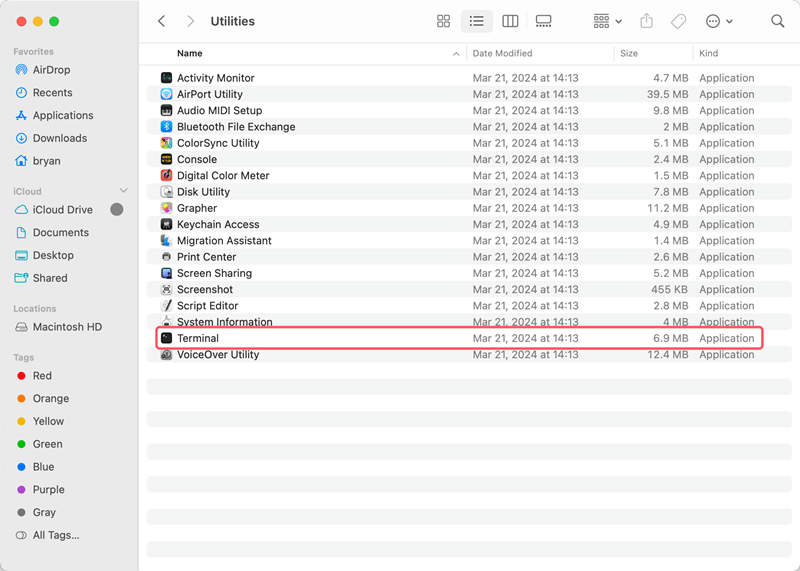
2. Use the following command to list all the drives on the Mac:
diskutil list

Check the listed disks and locate the drive which you want to wipe data. Remember the disk number of the drive.
3. Wipe the free space of the drive with the following command.
diskutil secureErase freespace 4 /device/disk0
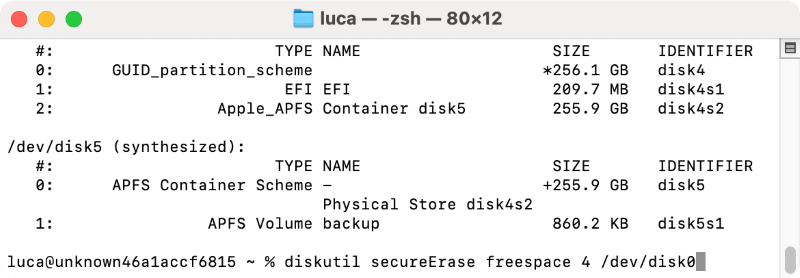
Ensure to include "freespace" in the command. With the parameter, it will only wipe the free space of the drive. Replace "/device/disk0" with the right number of your drive.
The number "4" is the erasure security level. You can replace it with a different option: 0, 1, 2, 3 depending on your need. If the Mac will be sold or donated, it's better to choose the most security level 4.
This process erases everything removed on your drive, so you can't get back things that you deleted from the drive.
Use data recovery tools to ensure you have deleted your data for good.
To protect your privacy and ensure private information can't be recovered, you must permanently delete MacOS Big Sur data. You can safely delete your files by emptying the Trash using Terminal commands, third-party data erasure software.
Following best practices, like confirming deletions and encrypting data, makes it even safer. These methods are reliable ways to ensure your data can't be recovered, giving you peace of mind when handling your digital footprint, whether you're making room on your hard drive, keeping personal information safe, or getting your Mac ready to sell.

DoYourData Super Eraser for Mac
DoYourData Super Eraser for Mac is a 100% safe, powerful and easy-to-use data erasure program. It offers certified data erasure standards including Peter Gutmann, U.S. Army AR380-19, DoD 5220.22-M ECE to permanently erase data from Macs and external devices, making data recovery be impossible.
