How to recover deleted files on Mac?
With the software Do Your Data Recovery for Mac, it's easy to get back the deleted files on mac.
Quick Navigation:
Getting rid of Microsoft Office files on a Mac protects your privacy, makes room, and keeps your system clean. Putting things in the Trash doesn't mean they're gone permanently. This guide covers many safe ways to delete files, such as using built-in macOS features and third-party programs.

By doing these things, you can make sure that no one can get back your private files, which will protect your personal and business data. Whether you want to delete Word, Excel, or PowerPoint files, this guide will help you do it quickly and easily. You can be sure your documents will be permanently removed from your Mac.
Before you start the steps, it's important to know why you might want to delete files for good:
The common way to delete Microsoft Office documents on Mac is to move the files to Trash and then empty the Trash. But it's not safe to remove privacy or sensitive data in this way. Here is how:
1. Delete Microsoft Office Documents
You can delete files right from within the Word program. These steps will help you delete papers you don't want.
2. Emptying the Trash


3. Emptying the Office Cache
Microsoft Office programs keep temporary files and caches that may contain bits and pieces of your papers. By clearing these, you can help ensure all your papers are gone.
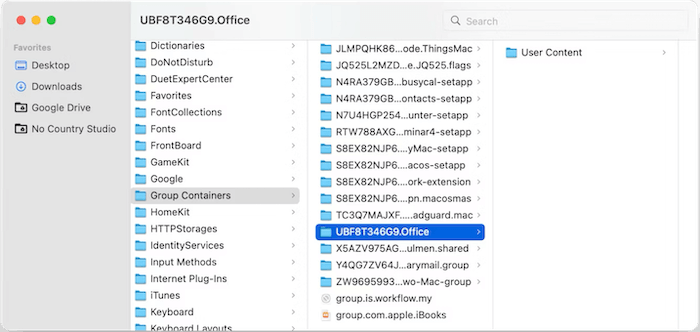
Even if you have emptied the Trash after deleting the Microsoft Office documents on Mac, the files are actually still on the drive before the data is overwritten by new data. So it's easy to recover the deleted files using professional data recovery software.
How to recover deleted files on Mac?
With the software Do Your Data Recovery for Mac, it's easy to get back the deleted files on mac.
To ensure the Microsoft Office documents will be removed permanently and cannot be recovered, you can try the following methods:
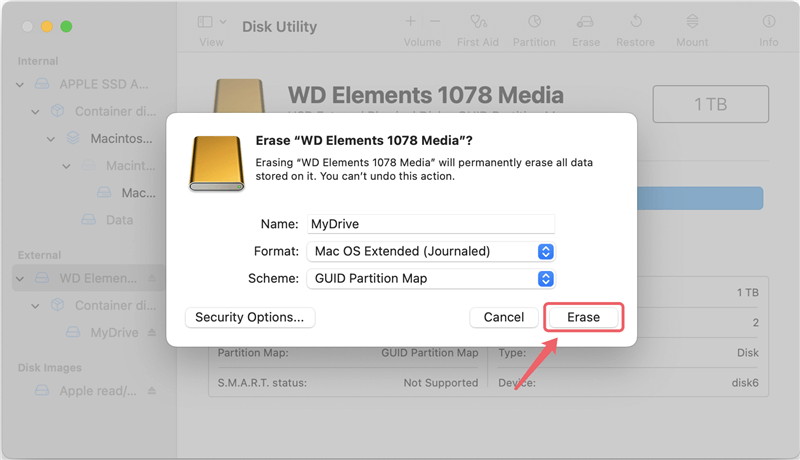
You can safely erase the drive with the Disk Utility to ensure that all files, including Microsoft Office documents, will be securely removed. Here are the steps:

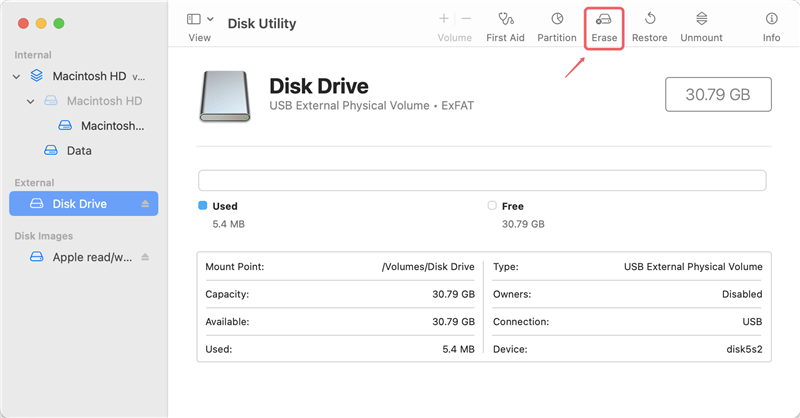
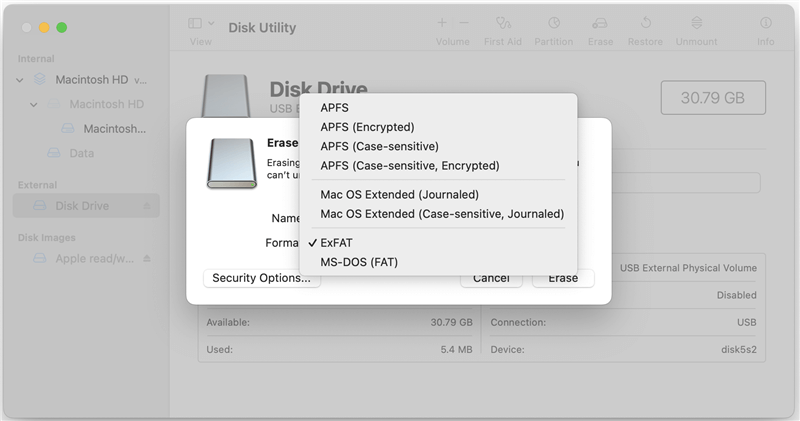
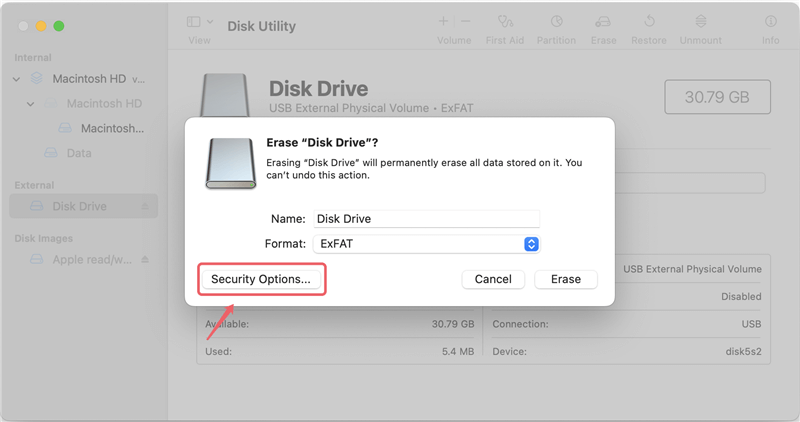

DoYourData Super Eraser for Mac has many different tools that can help you delete Microsoft Office files from your Mac permanently. Data recovery software cannot return any Microsoft Office files you use this powerful data deletion tool to delete. The Microsoft Office files will be lost forever after DoYourData Super Eraser for Mac deletes them.
You can follow the guide to shred Microsoft Office documents or any other files with a proper data erasure mode:
Option 1: permanently erase Mac Microsoft Office files.
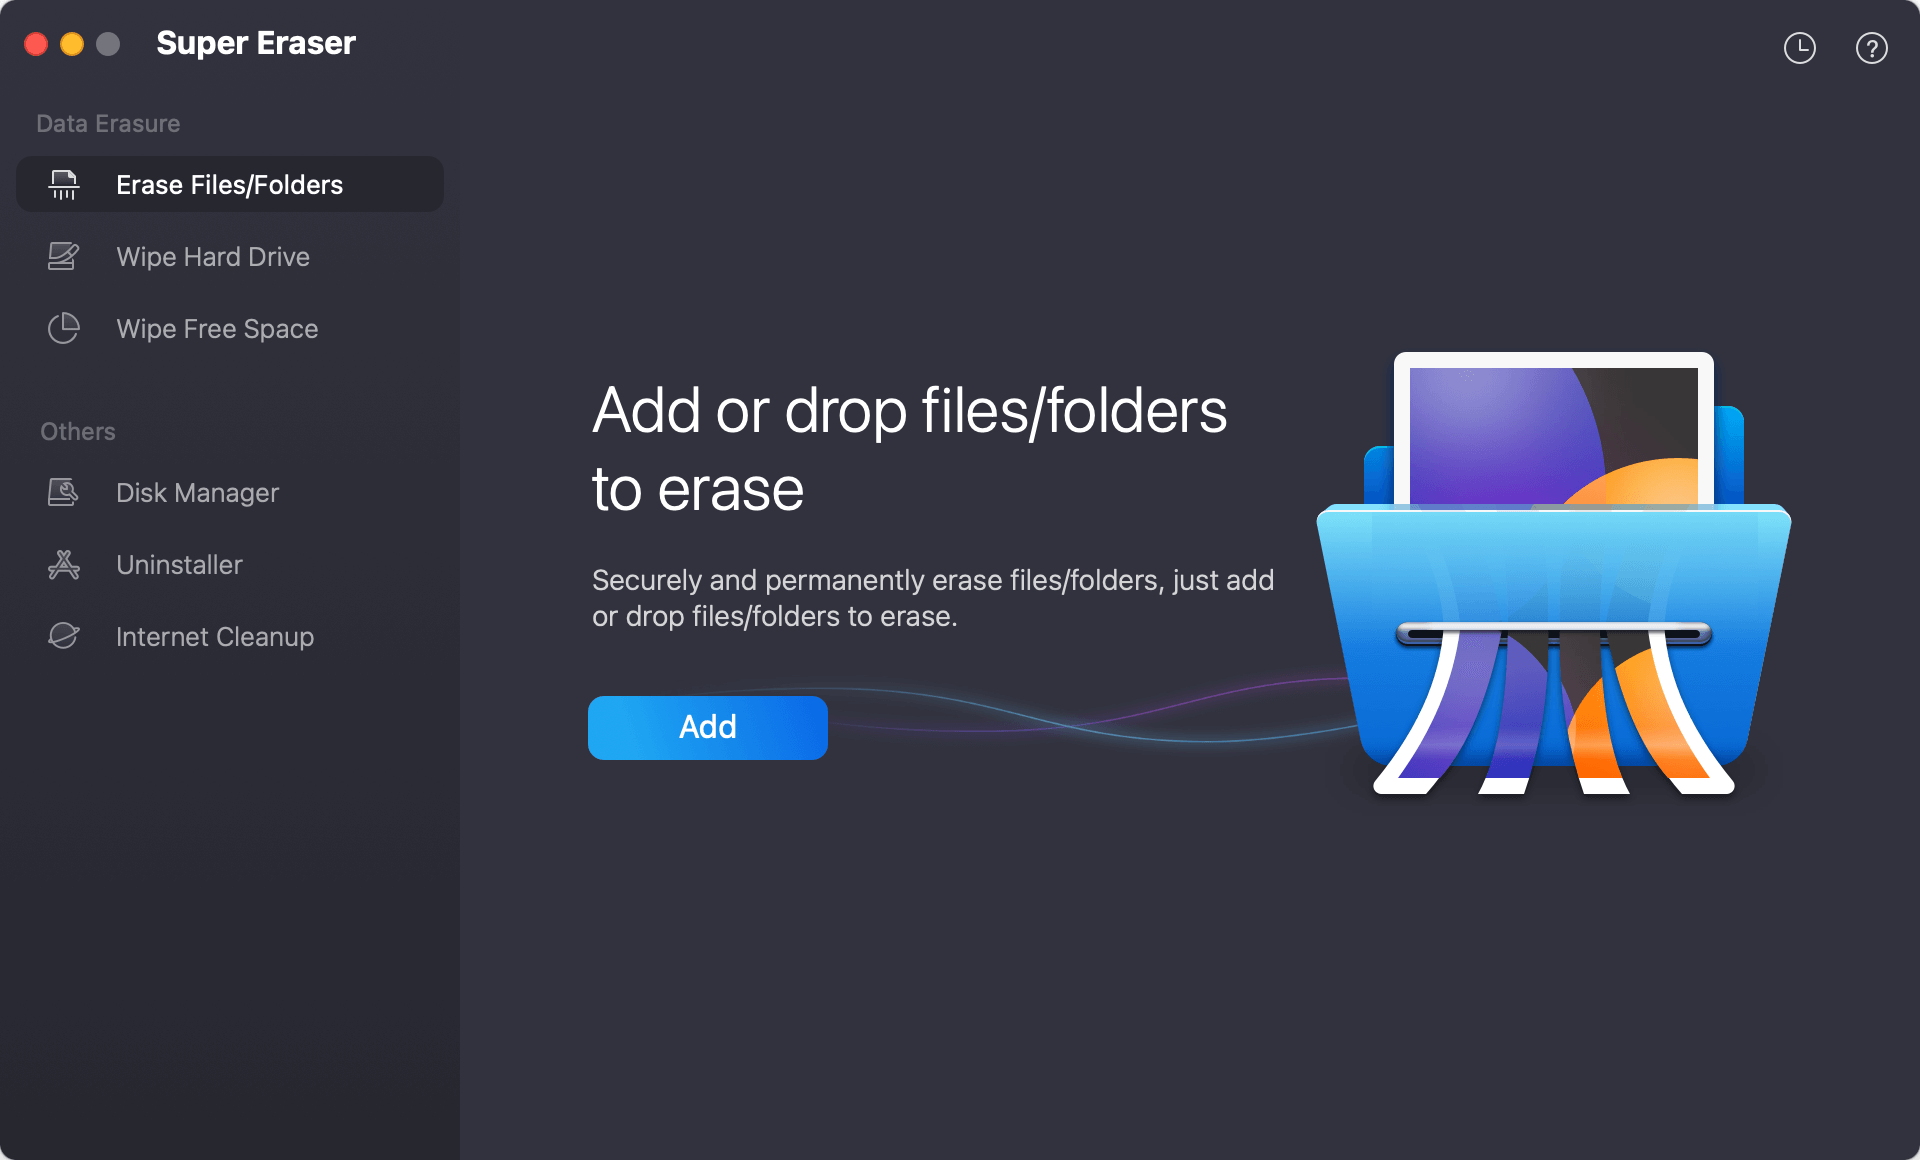
This "Erase Files/Folders" tool can help you get rid of Word, Excel, PowerPoint, and other Microsoft Office files on your Mac computer for good. To delete Microsoft Office files, you can do as follows:
1. Run the software and change to the mode "Erase Files/Folders" and click on Add button to select the Microsoft Office documents you want to shred permanently. You can also drag them onto the list.
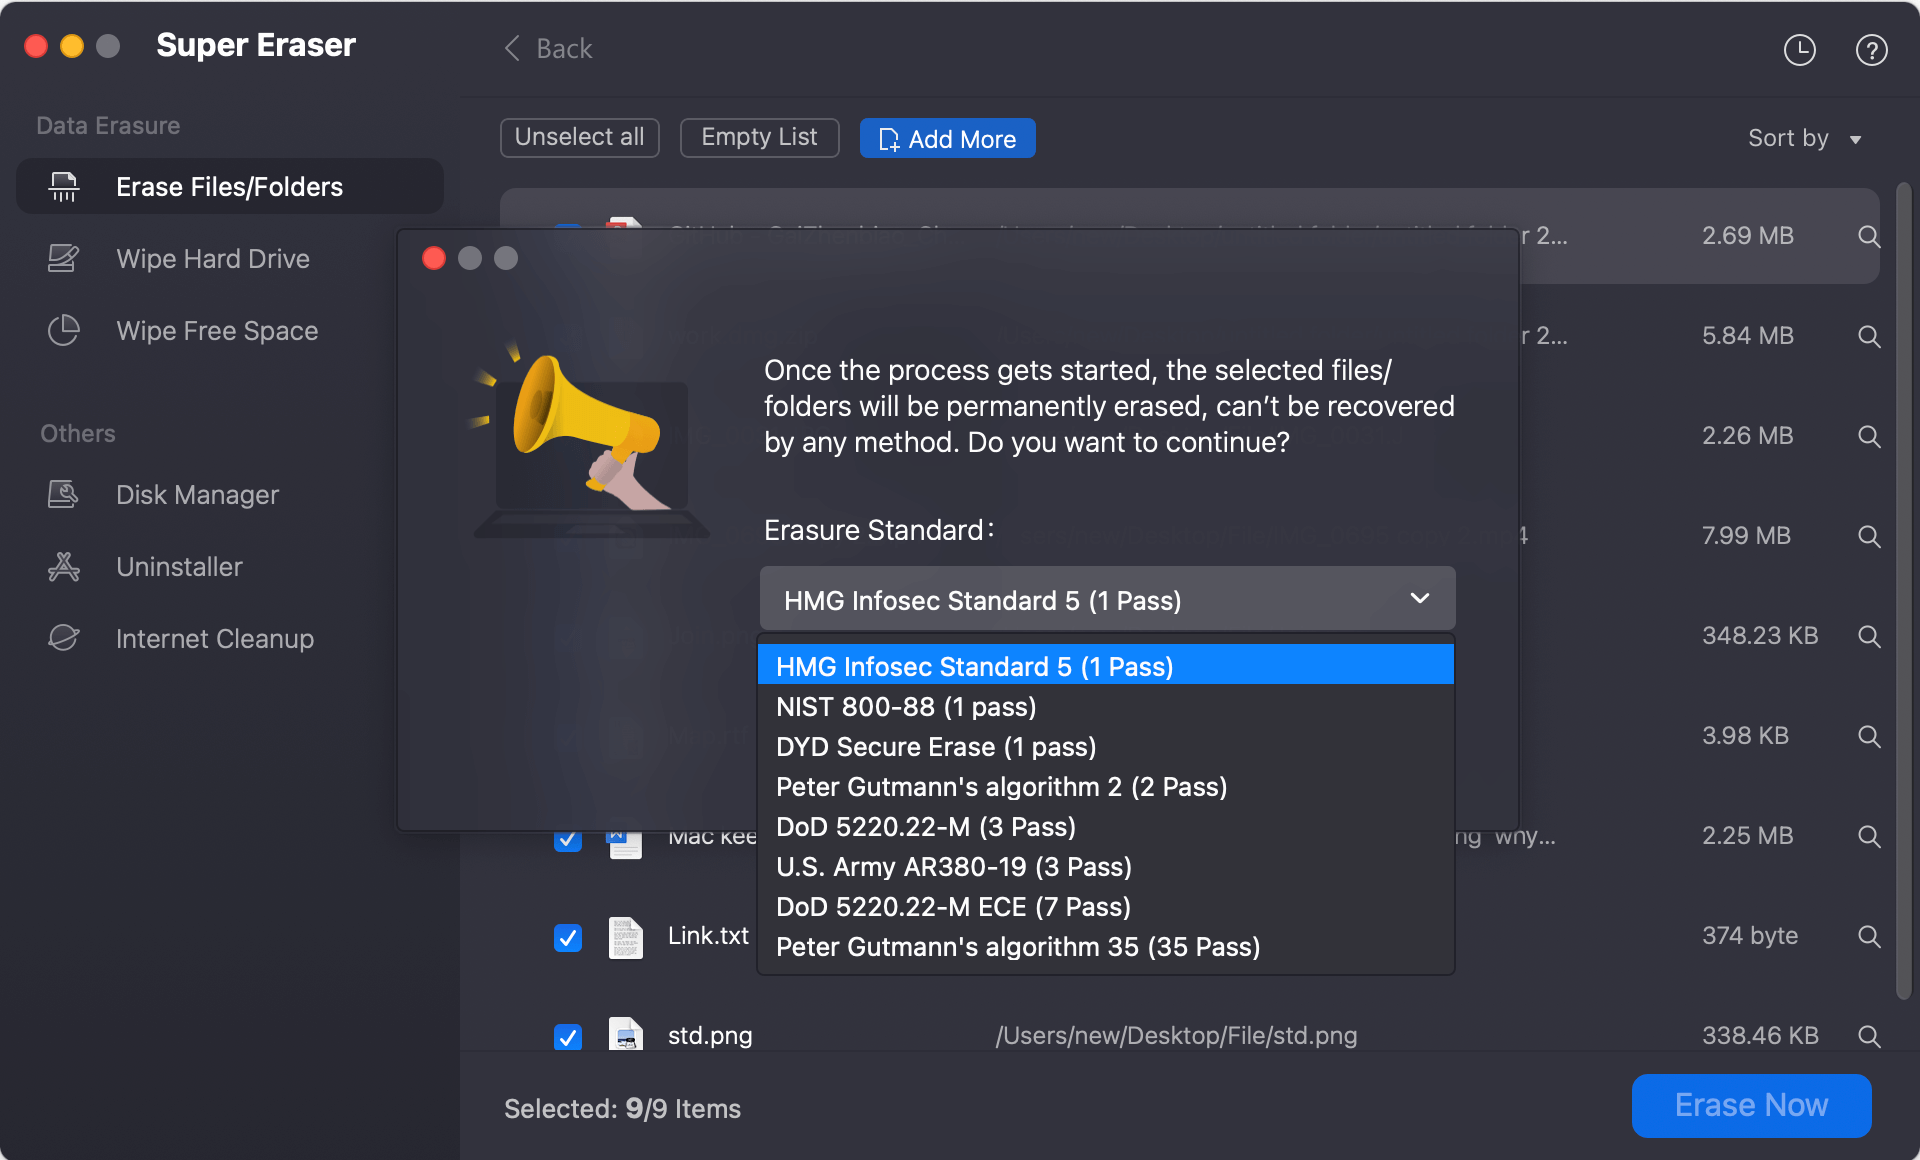
2. All the added files will be listed for confirmation. After confirming all the correct files are selected, just click the "Erase Now" button.

3. You can then select a data erasure algorithm to permanently clear certain Microsoft Office files from your Mac.
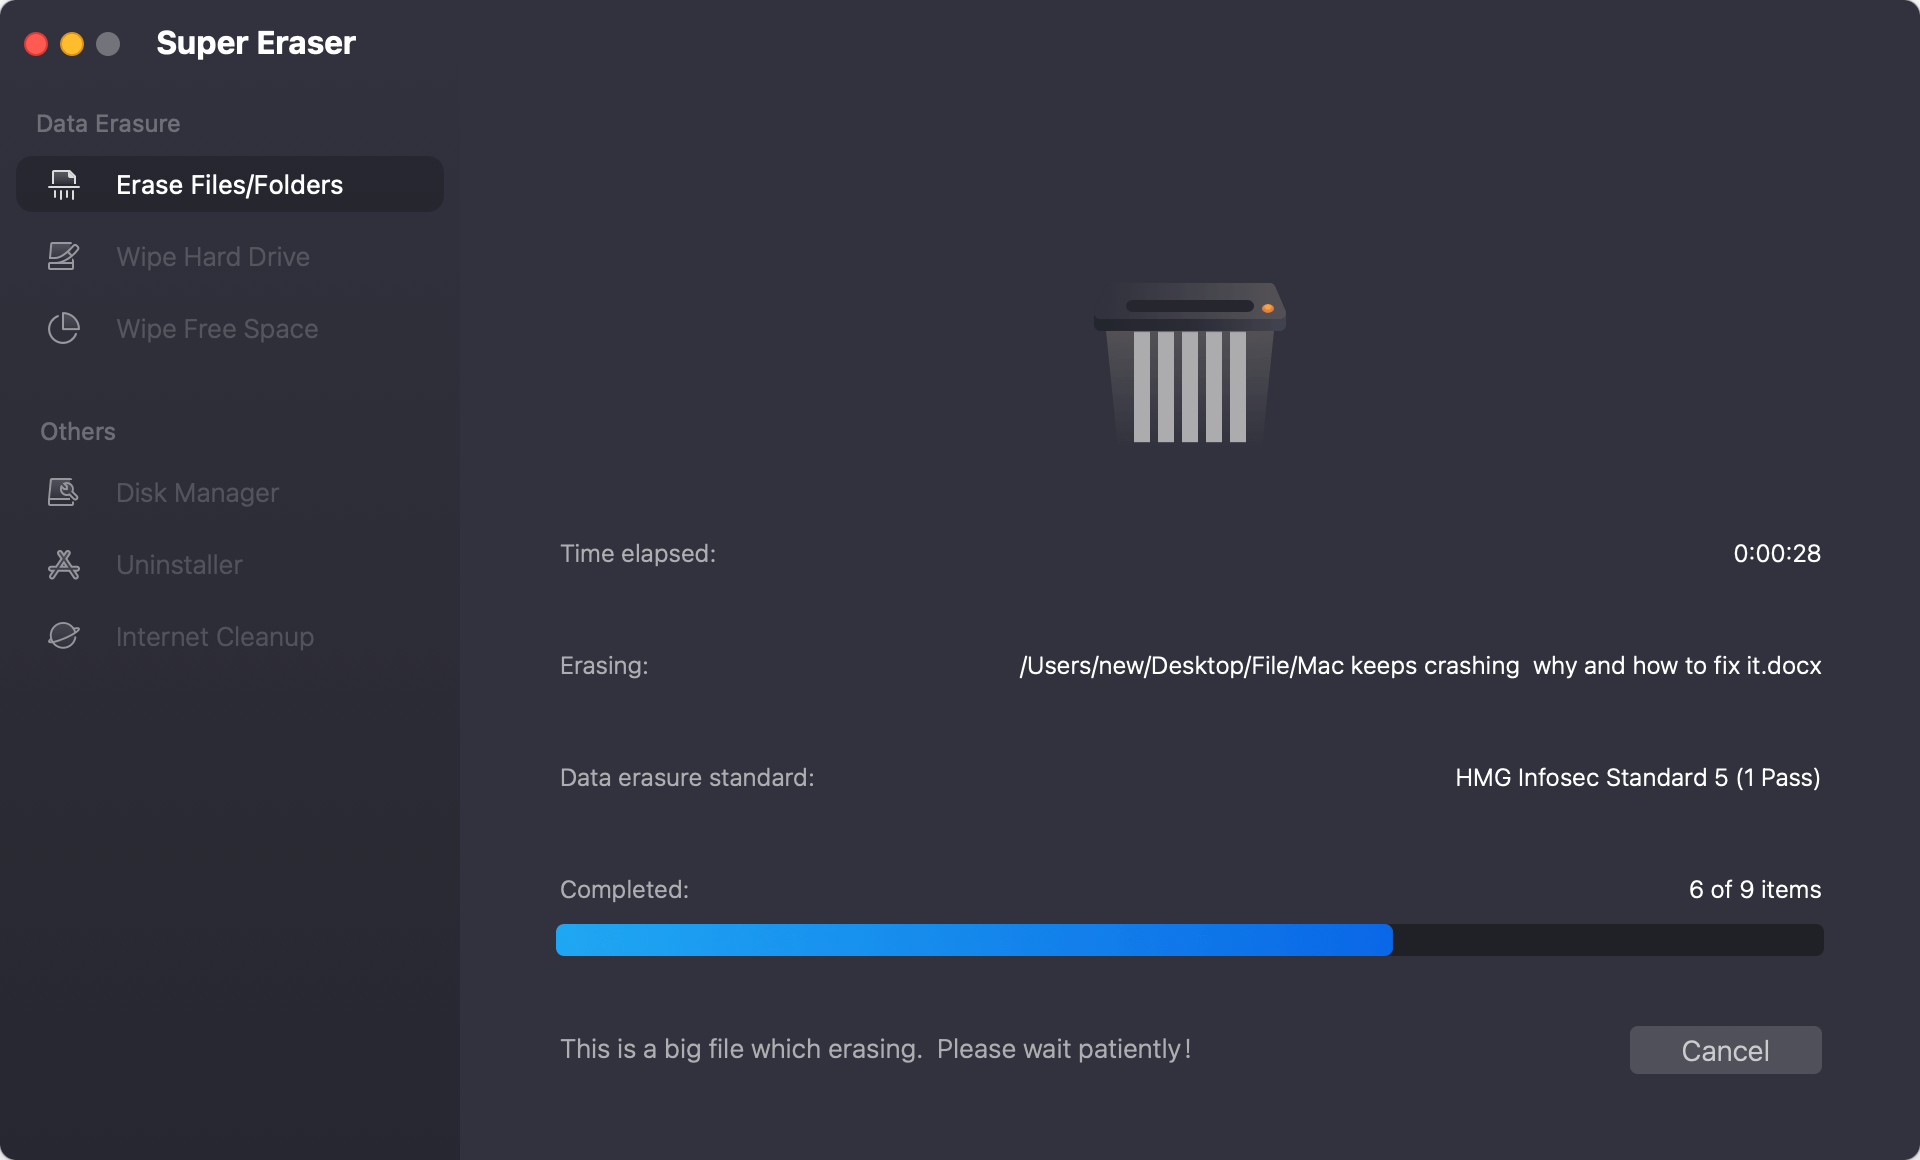
4. Start the file shredding process and it will take some time depending on the size of files you selected.
Option 2: delete all Mac Microsoft Office files.
This tool can erase a whole hard drive by using "Wipe Hard Drive." If you wipe a hard drive with this tool, you will lose all its data, including any Microsoft Office files. For example, if you store your Microsoft Office files on a portable hard drive, you can remove it to get rid of all the data on it.
Option 3: Delete Microsoft Office files you have lost or deleted forever on a Mac.

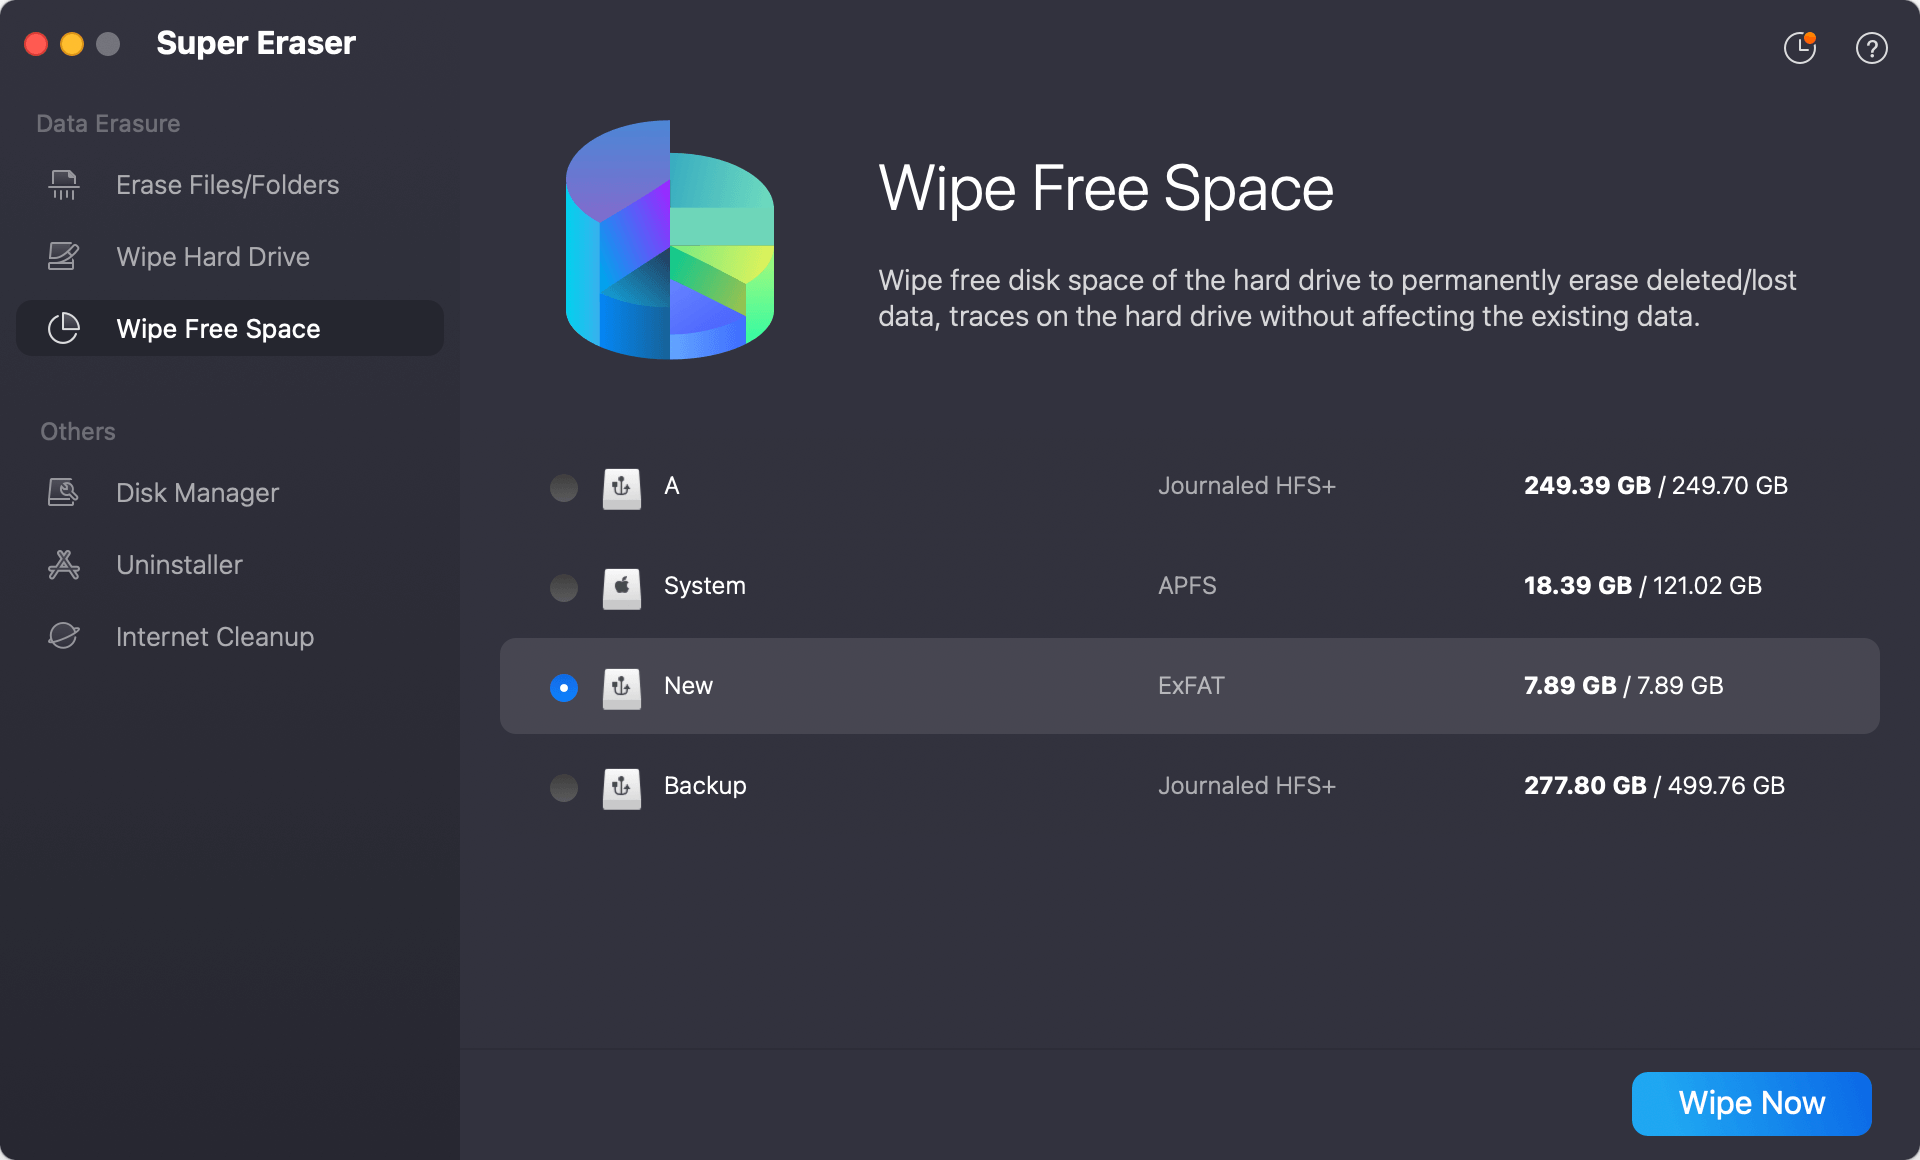
"Wipe Free Space" will help you eliminate the free space on the hard drive. Everything lost or wiped is kept on the free disk space. This tool will help you delete all the free room on your hard drive so that you never again see any deleted or lost data on your Mac. It includes removing any Microsoft Office files you have already deleted or lost.
After deleting Microsoft Office documents or any other files, you can also use Terminal to wipe the free space of the drive to ensure the deleted documents will not be recovered. Here are the steps:
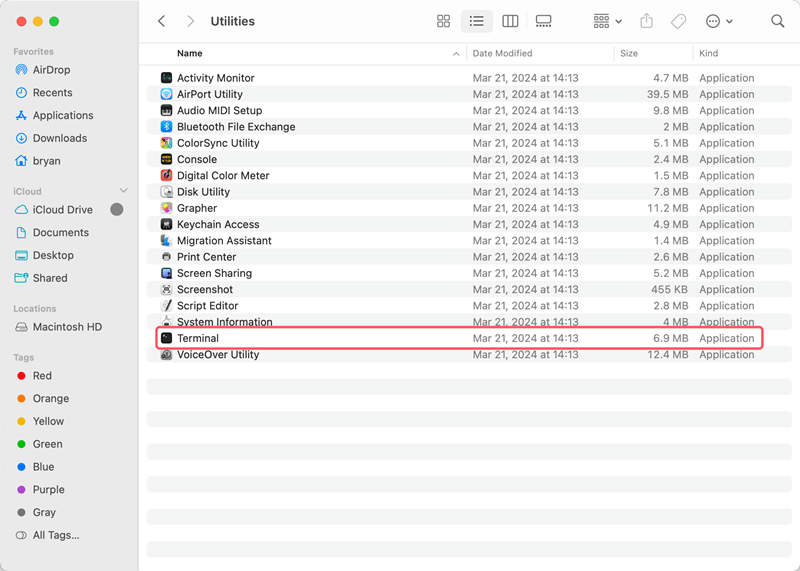
1. Open the Terminal app from the Applications > Utilities folder.
2. List the disks on the Mac with the command diskutil list

3. Then, type the following command at the prompt and press Enter.
diskutil secureErase freespace 4 /device/disk0
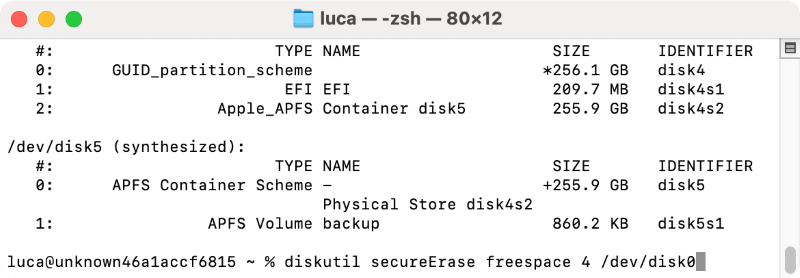
Make sure you include "freespace" in the command. This indicates you will only wipe the free space on the drive and not affect the existing files on the drive.
Replace "/device/disk0" with the correct disk number of your drive.
The number "4" indicates the erasure level performed. You can replace it with a different option from the following list:
When using Terminal, you need to be very careful. If you select the wrong drive or enter the wrong command, it would cause problems, like data loss. If you are not familiar with commands, it's better to use the easy-to-use third-party data wiping tools.
Moving files to the Trash cannot permanently erase Microsoft Office files on a Mac. However, you can ensure that no one can get your private files back by following the steps, which include using secure emptying methods and third-party file shredder tool and deleting all backups. This keeps your information safe and makes your system run better.
Whether you use built-in macOS features or extra tools, these steps will ensure your files are completely and forever erased, giving you peace of mind and a clean workspace.

DoYourData Super Eraser for Mac
DoYourData Super Eraser for Mac is a 100% safe, powerful and easy-to-use data erasure program. It offers certified data erasure standards including Peter Gutmann, U.S. Army AR380-19, DoD 5220.22-M ECE to permanently erase data from Macs and external devices, making data recovery be impossible.
