Back Up Data of macOS Sierra
Using Time Machine or DoYourClone for Mac to back up your Mac before wiping data. Read more >>
Quick Navigation:

Protecting your personal information is very important in this modern world, especially regarding your Mac. Erasing data on macOS 10.12 Sierra is an important step to take whether you want to sell your Mac, fix problems that won't go away, or start over. This process ensures that all your private information is gone, so the next person who uses the computer or nosy people can't find it.
From the first steps of getting ready to the final wipe, our complete guide will walk you through all the steps you need to take to delete your data safely. If you do these things, your information will be safe, and your Mac will be ready for its next journey. Read on to find out how to delete files safely on macOS 10.12 Sierra and feel at ease.
You might need to delete and wipe files permanently from your Mac running macOS 10.12 Sierra for several reasons. Here are some important situations in which you might need to do this important task:
Financial records, personal photos, and sensitive papers are just a few examples of personal and private data that could be at risk if not properly deleted. Ensuring your personal information is gone can help keep your name safe and stop people from entering your accounts without your permission.
Over time, program bugs, damaged files, and system junk can build up on your Mac and slow it down. These problems can be fixed by deleting all the files and installing macOS again. Starting over can help get your Mac back to how fast it was before you added all the junk and useless files.
If you erase all the data on your Mac before selling or giving it away, the new owner won't be able to access your files. A macOS that has been wiped and reinstalled makes the device more appealing to buyers because it gives them a fresh start.
If your Mac keeps having problems that usual troubleshooting steps can't fix, deleting all of your files and starting over can often fix these issues.
Third-party software like DoYourData Super Eraser can safely delete data on macOS 10.12 Sierra. This tool has advanced data wiping features that delete your files forever, so they can't be recovered. You can delete files on your Mac with Super Eraser software. Here's how to do it step by step.
Before you delete any files and wipe the data in macOS 10.12 Sierra, you should make sure your important data is backed up and the Mac is ready by:
Backup important data:
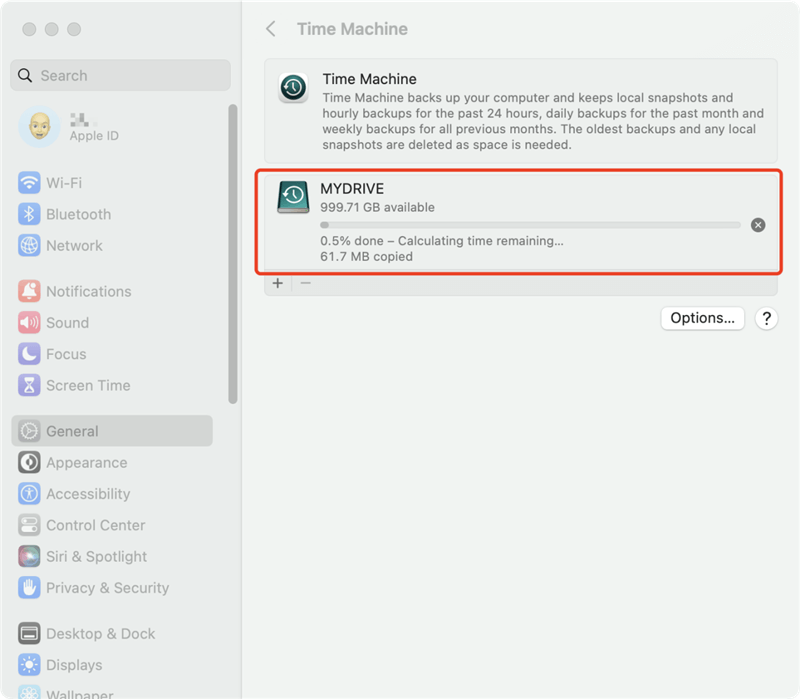
Connect a hard drive from outside your Mac. To make a copy of all your important files, use Time Machine or another backup tool. Make sure the file is finished and kept safely.
Back Up Data of macOS Sierra
Using Time Machine or DoYourClone for Mac to back up your Mac before wiping data. Read more >>
Sign out of accounts and services:
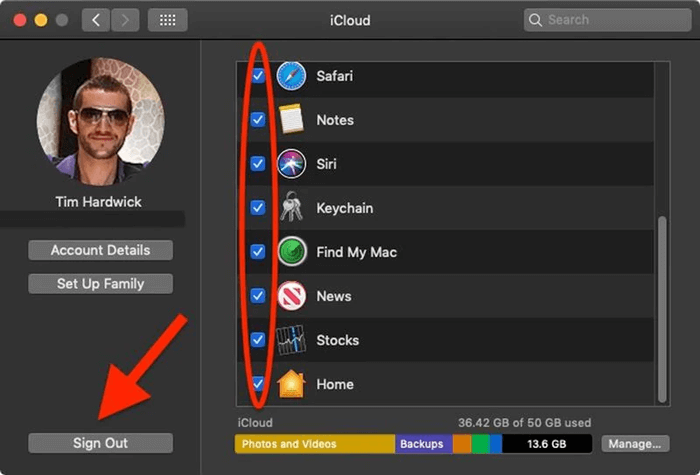
First, you can sign out your iCloud from your Mac. You can log out of iCloud by going to System Preferences, find iCloud option and click the Sign Out button.
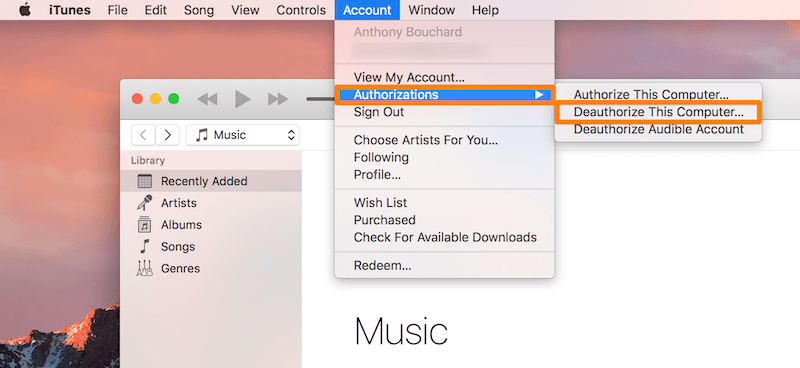
If you logged in iTunes, you can also try to deauthorize it. To stop iTunes from using your Mac, open iTunes and go to Account > Authorizations > Deauthorize This Computer.
Log out if you're already signed in to iMessage, FaceTime, or any other service on your Mac. Also, if any devices was paired to the Mac via Bluetooth, ensure to check and unpaired all the deceives.
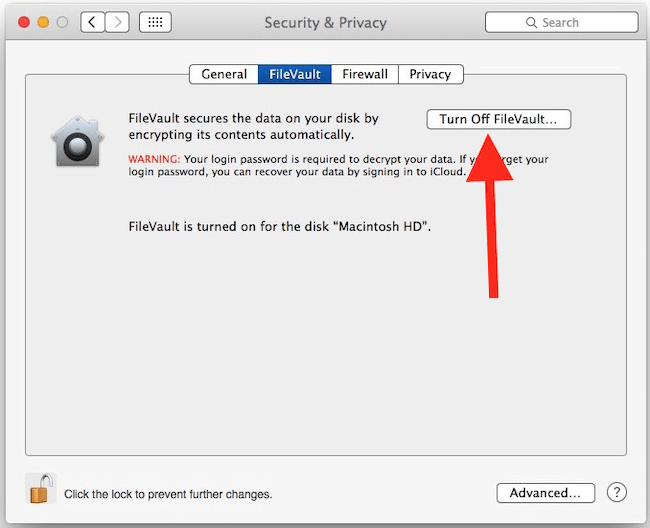
If you encrypted the Mac drive with FileVault enabled, ensure to turn it off. Go to the Apple menu > System Preferences, then select the Security & Privacy > FileVault tab, then click on the lock icon in the lower left corner of the window – authenticate with the administrator password as usual. Click the Turn Off FileVault button. Confirm that by choosing Restart & Turn Off Encryption.
Open the software file when the download is done. To put the software on your Mac, follow the steps on the screen. Launch Super Eraser from your Applications folder after the installation is complete.
Start up the Super Eraser app. The main interface will show you different ways to delete info. There are different ways to erase with Super Eraser, such as Erase Files/Folders, Wipe Free Space, and Wipe Hard Drive. If you choose "Erase Hard Drive," you will erase everything on the disk. The other modes can help you shred existing files or the removed/lost files on the drive.
If you are trying to wipe the system drive, it's not able to wipe the system drive directly while it's in use, we suggest you remove the personal files and applications manually first. Then wipe the free space of the system drive to ensure the removed data will not be recovered in any way. You can choose the mode Wipe Free Space.
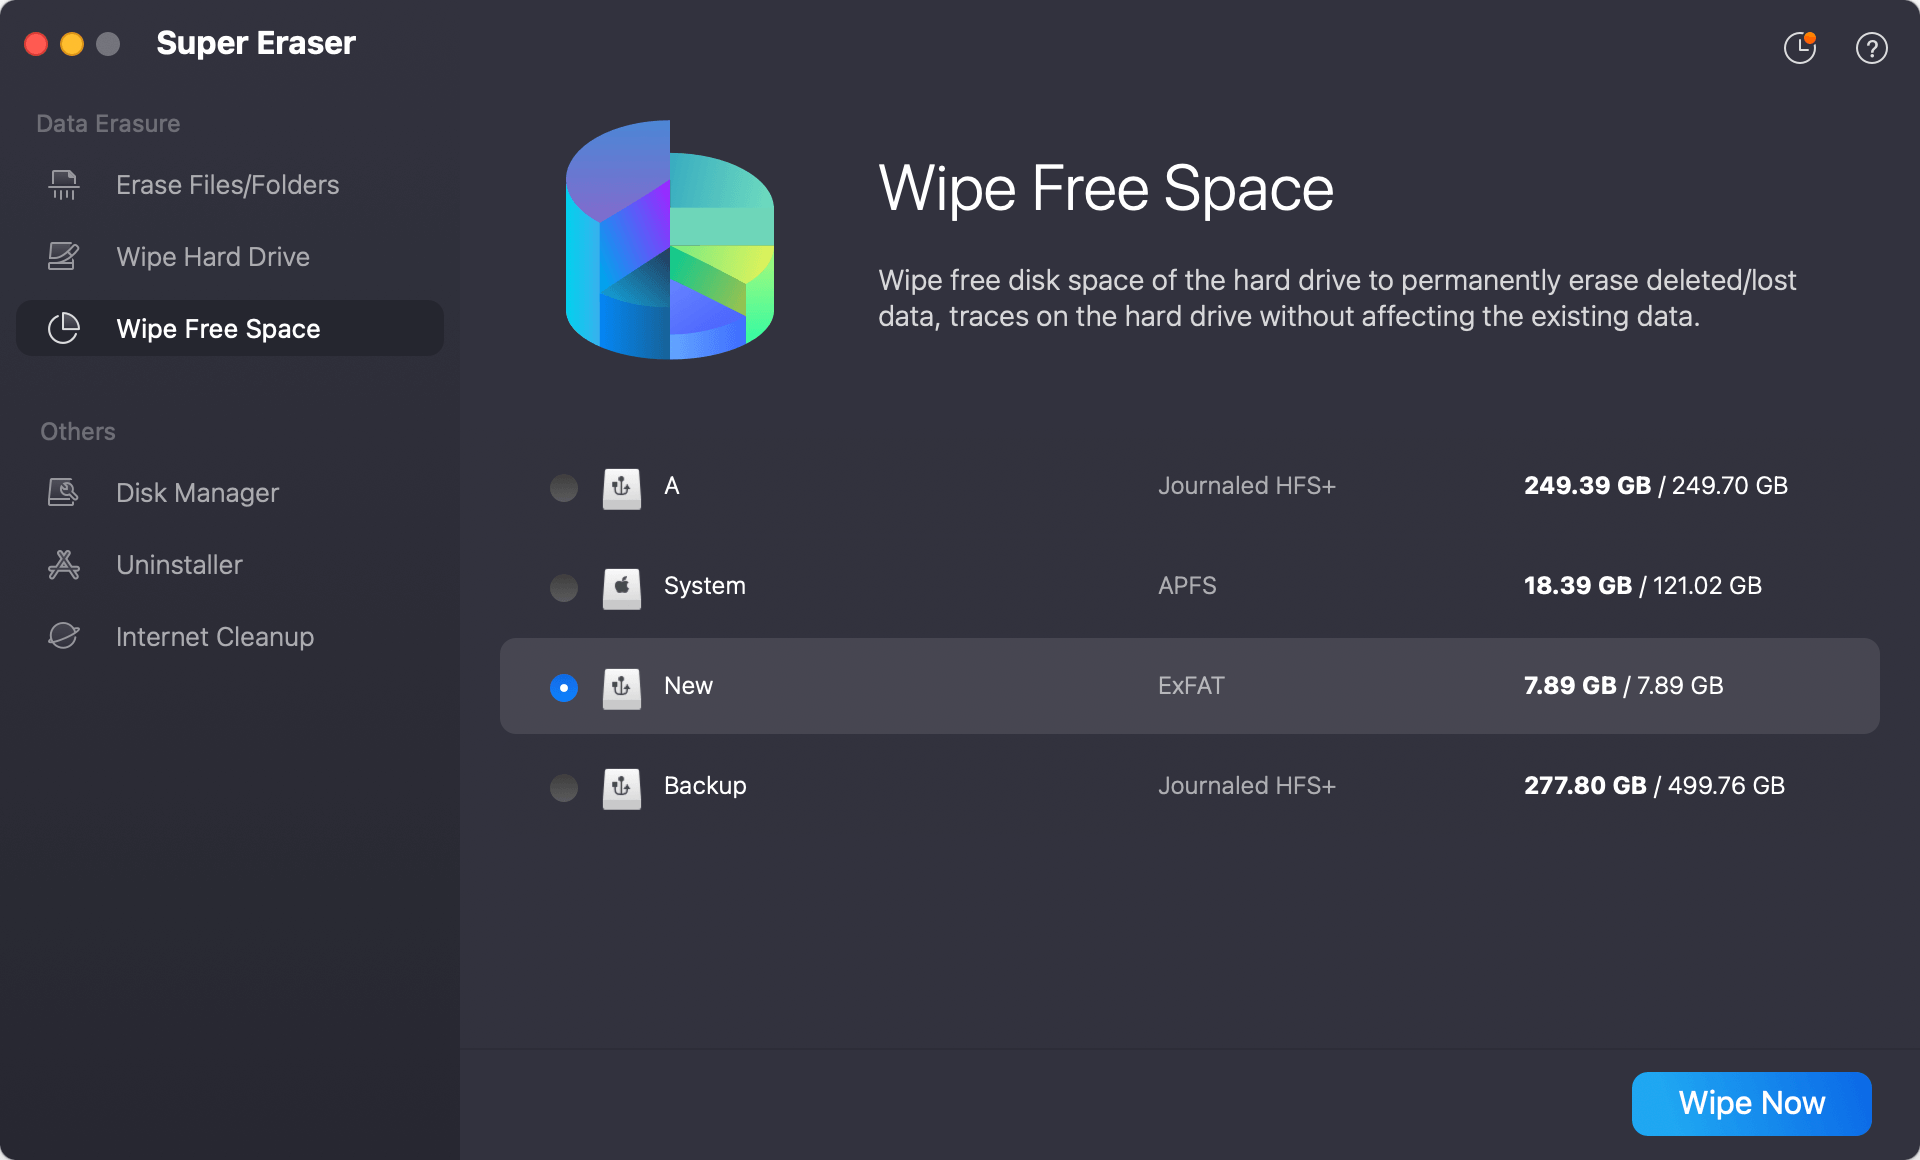
The screen will show you a list of drives you can use. Pick out the hard drive you want to wipe the free space, usually called "Macintosh HD" and click Wipe Now to get into the next step.
You can choose which erasure algorithm to use with Super Eraser. It decides how completely the data will be erased. There are multiple data wiping algorithms available, including: HMG Infosec Standard 5 (1-pass), NIST 800-88 (1-pass), DYD Secure Erase (1-pass), Peter Gutmann's algorithm 2 (2-pass), DoD 5220.22-M (3-pass), U.S. Army AR380-19 (3-pass), DoD 5220.22-M ECE (7-pass), Peter Gutmann's algorithm 35 (35-pass). If you choose the highest level of security to wipe data, it may take more time.
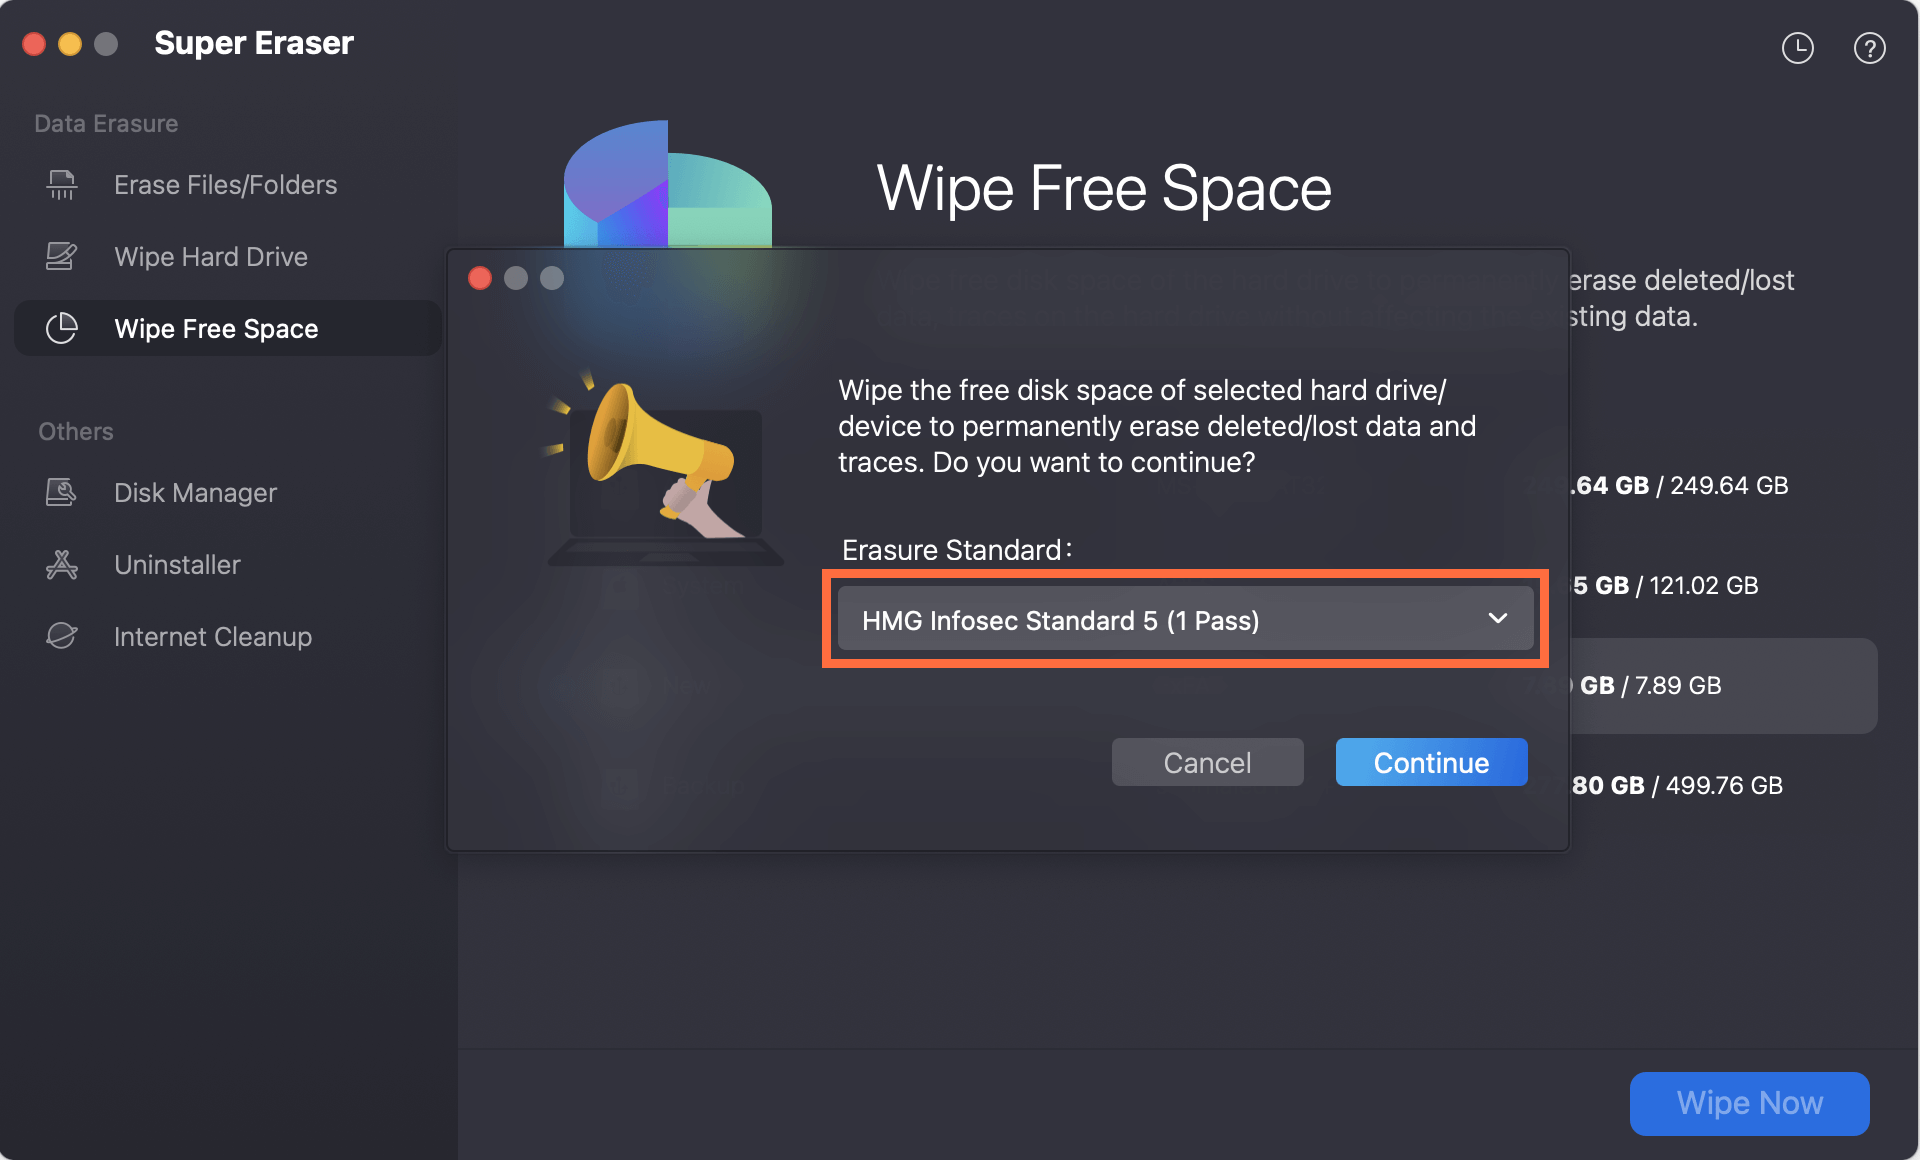
The data will be erased when you click the Continue button. There will be a warning message that asks you to confirm the action. Confirm to go ahead.
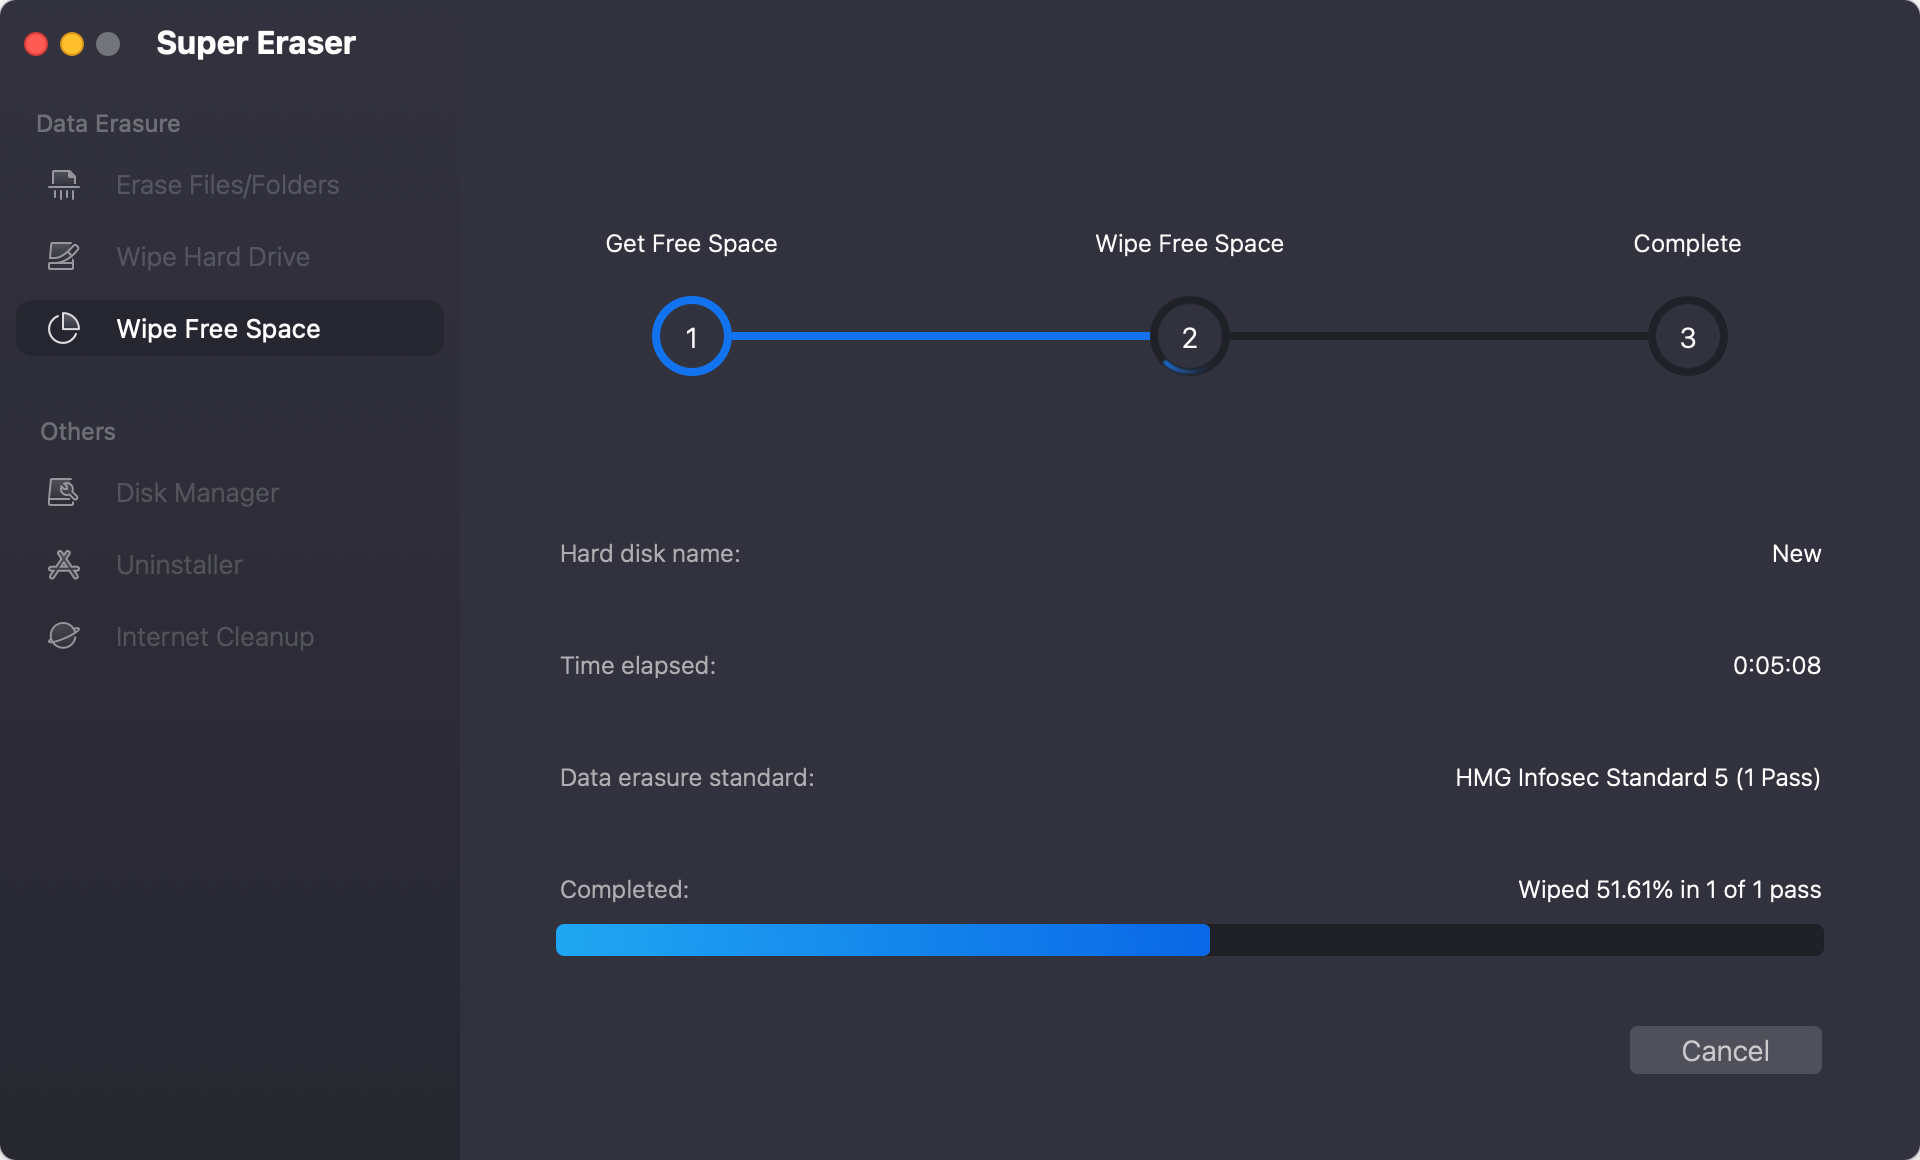
It could take a while to erase, based on how big the hard drive is and which algorithm is used. Super Eraser will show a progress bar that shows how far along the erasing process is.
Super Eraser will let you know when the process is complete. The removed data on your hard drive will be erased permanently, and no data will ever be found again even with any professional data recovery software.
Once your hard drive is clean, you'll need to reload macOS. Just start your Mac again, then press and hold Command + R until the Apple sign shows up. It will put your Mac into Recovery Mode when it starts up.
Pick "Reinstall macOS" from the list of utilities in the macOS Utilities window and click Continue. To reinstall macOS Sierra, follow the steps shown on the screen. This process will get a new copy of macOS from Apple's computers and put it on your hard drive after you wipe it.
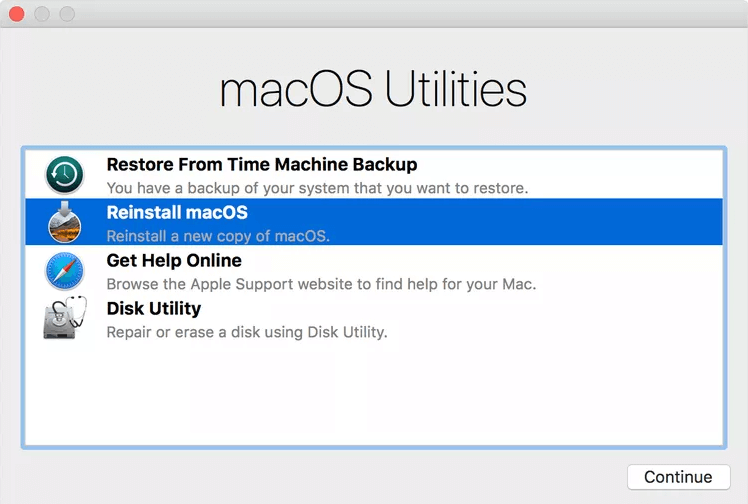
Your Mac will return to a setup guide when the installation is done. Your Mac will be set up as if it were brand new. You can shut it down if you're getting it ready for a new owner.
If you don't want to deleted the specified files manually, you can just reinstall or reset the macOS to ensure all the personal files, applications are removed during the process. Then use the same mode "Wipe Free Space" to wipe the drive.
What's more, if you just want to wipe some sensitive files in macOS Sierra, you can use the "Erase Files/Folders" mode to erase the individual files and folders. Also, if you are trying to wipe an external drive, pen drive, or SD card along with all the existing/deleted data, the "Wipe Hard Drive" mode is proper for you.
Using Super Eraser Software to erase data on macOS 10.12 Sierra is a safe and thorough way to ensure all of your personal information is gone. By doing what this guide says, you can keep your information safe, make your Mac run faster, and get it ready for someone else to buy it.
Each step will give you a fresh start and peace of mind. This process ensures that your data can't be recovered, protects your information, and makes your Mac more useful whether you're selling it, fixing problems that won't go away, or starting over.

DoYourData Super Eraser for Mac
DoYourData Super Eraser for Mac is a 100% safe, powerful and easy-to-use data erasure program. It offers certified data erasure standards including Peter Gutmann, U.S. Army AR380-19, DoD 5220.22-M ECE to permanently erase data from Macs and external devices, making data recovery be impossible.
