Quick Navigation:
- Why Erase a Mac Hard Drive?
- Preparing to Erase Your Mac Hard Drive
- How to Erase Your Mac Hard Drive?
- Permanently Erase Your Data with Mac Hard Drive Eraser
- Conclusion
What is Mac file eraser or Mac hard drive data eraser? It is a tool which is able to permanently erase data under Mac OS. If you think you can destroy your data by deleting + emptying trash, you are totally wrong. The deleted files can be easily recovered by free Mac data recovery software even you have erased the trash bin. And the formatted files also can be recovered after you format your hard drive using Disk Utility.
In most cases, we don't need to permanently erase our files or data, but at some special moments, it is very important for us to permanently destroy our private data. For instance, we should make sure all the sensitive data has been permanently erased before we sell/donate/give away/throw out our Macs or external storage devices.
Getting rid of files on a Mac hard drive and making data recover be impossible might seem hard, but it's not. To sell your Mac, fix system problems that won't disappear, or ensure all your private data is deleted, you must know how the process works.
You'll have peace of mind knowing that your private files are gone and your Mac is ready for a new start. This guide will show you what to do at every step, making the process easy and stress-free.
From important steps for getting ready to detailed instructions and things to think about after the erase, you'll feel confident that you can handle this important job. Are you ready to start? It's not hard to erase your Mac's hard drive. Follow these steps to ensure your data is safe and your device is ready for the next stage.

Why Erase a Mac Hard Drive?
You might need to erase your Mac's hard drive for several reasons. In the following situations, this method is very important:
Preparing for Resale:
Ensure the new owner can't access your files, apps, or settings. Get rid of all traces of your info to protect your privacy. Give the new person a blank slate to work with. It will make the switch easier.
Troubleshooting System Issues:
Fix performance issues that won't go away, such as slow speeds, crashes, or software bugs. Get rid of any program conflicts or damaged files that might be causing problems. Start with a clean version of macOS to make the system more stable.
Ensuring Data Security:
Delete private data from your Mac before you throw it away or sell it. Stop people from getting back personal data like financial records, photos, or business papers without your permission. Follow the security rules for getting rid of data in a business or legal setting.
Clearing Out Unwanted Data:
To make your system more organized, get rid of old files and other needless clutter. Remove files and programs you don't use to free up hard space. Start with a clean drive to get the most out of your Mac's speed.
Upgrading to a New System:
Get ready for a big system change or update on your Mac. Installing a new macOS version will ensure everything works well and is compatible.
Preparing to Erase Your Mac Hard Drive
You should do a few things before you erase your Mac's hard drive to ensure the process goes smoothly and safely.
Backup Your Data
If you erase your hard drive, all its information will be lost forever. Make sure you back up your info before you lose important files. You can back up your files with Time Machine, Apple's built-in backup tool, or with portable drives or cloud storage services, among other options.
Sign Out of iCloud and Other Services
Sign out of iCloud, iTunes, and any other accounts linked to your Mac to keep your Apple ID and other services from having problems. Your device will be safely disconnected from your accounts if you do this.
Deauthorize Your Mac from iTunes
If you've given your Mac permission to play iTunes material, you should take that permission away before you delete the data from the hard drive. This step will free up one of your limited permissions to use it on another device.
Disable Find My Mac
If you have Find My Mac turned on, turn it off so the erasing process goes smoothly. You can turn this feature off in the iCloud settings on your Mac.
How to Erase Your Mac Hard Drive?
After you've done the things that must be done, you can erase your Mac's hard drive. To make sure the process goes smoothly, follow these thorough steps.
Step 1: Restart the Mac in Recovery Mode
Restart your Mac in Recovery Mode to get the tools you need to delete your hard drive. Follow these steps:
- In the upper left part of your screen, click the Apple menu.
- Click on "Restart."
- Hold the Command and R keys simultaneously while your Mac restarts. If you are using a Mac with Apple silicon, press and hold Power button until your Mac boots into macOS Recovery mode.
- Let go of the keys when you see the Apple logo or a world spinning.
Step 2: Open Disk Utility
After your Mac starts up in Recovery Mode, you'll see the macOS Utilities window. You can get to Disk Utility, the tool you use to erase your hard drive, from this page. From the macOS Utilities window, choose "Disk Utility." Then click "Continue" to start Disk Utility.

Step 3: Select the Hard Drive to Erase
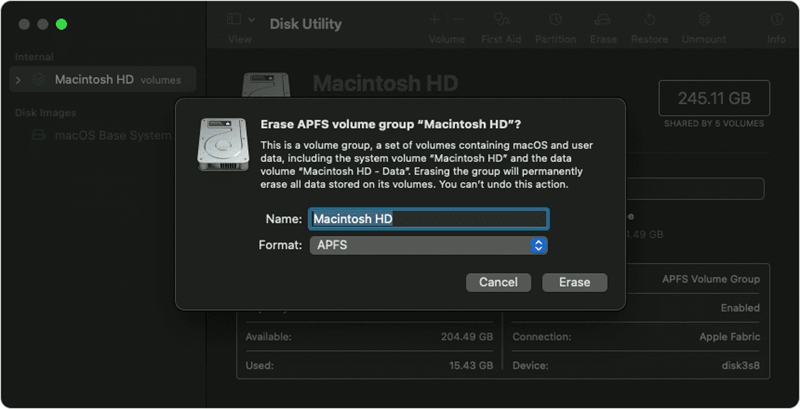
From Disk Utility, you can see a list of all the drives and folders linked to your Mac. Pick out the drive you want to erase. It is usually marked with "Macintosh HD" or something similar. Choose the drive you want to erase from the list on the side. Click the "Erase" button on the button bar.

Step 4: Choose Erase Options
If you click the "Erase" button, a new window with different ways to delete everything from your hard drive will appear. You must provide the format and name of the drive you deleted. Name something like "Macintosh HD" on your hard drive in the "Name" box.
Pick a file type for your drive. Most people should use "APFS" (Apple File System) for macOS 10.13 and later. To get older macOS versions, choose "Mac OS Extended (Journaled)." You can also choose encryption if your drive supports it for extra safety.
Step 5: Erase the Hard Drive
After choosing how to erase, you can clean the hard drive. To start, click the "Erase" button. Depending on your drive size and choices, it could take a while.
Step 6: Reinstall macOS
When you're done wiping your Mac clean, reinstall macOS to make it work again. Here's what you need to do to reinstall the OS:
- Go to the macOS Utilities window and choose "Reinstall macOS."
- To finish the installation, click "Continue" and follow the on-screen directions.
Note: The lost data which is erased by Disk Utility is not lost for good and it can be recovered by data recovery software.
Permanently Erase Your Data with Mac Hard Drive Eraser
If you want to permanently erase your data from your Mac, you need special Mac hard drive data eraser to help you. DoYourData Super Eraser for Mac is a reliable Mac hard drive eraser and it can securely & permanently shred files or erase data from Mac HDD/SSD, external hard drive, digital camera, USB flash drive, SD card, etc.
DoYourData Super Eraser for Mac
- Securely and permanently delete files on Mac.
- Wipe external hard drive, USB flash drive, SD card on Mac.
- Wipe deleted/lost files on Mac.
- 100% safe Mac hard drive eraser & file eraser.
This data eraser offers three modes to help you erase data on Mac:
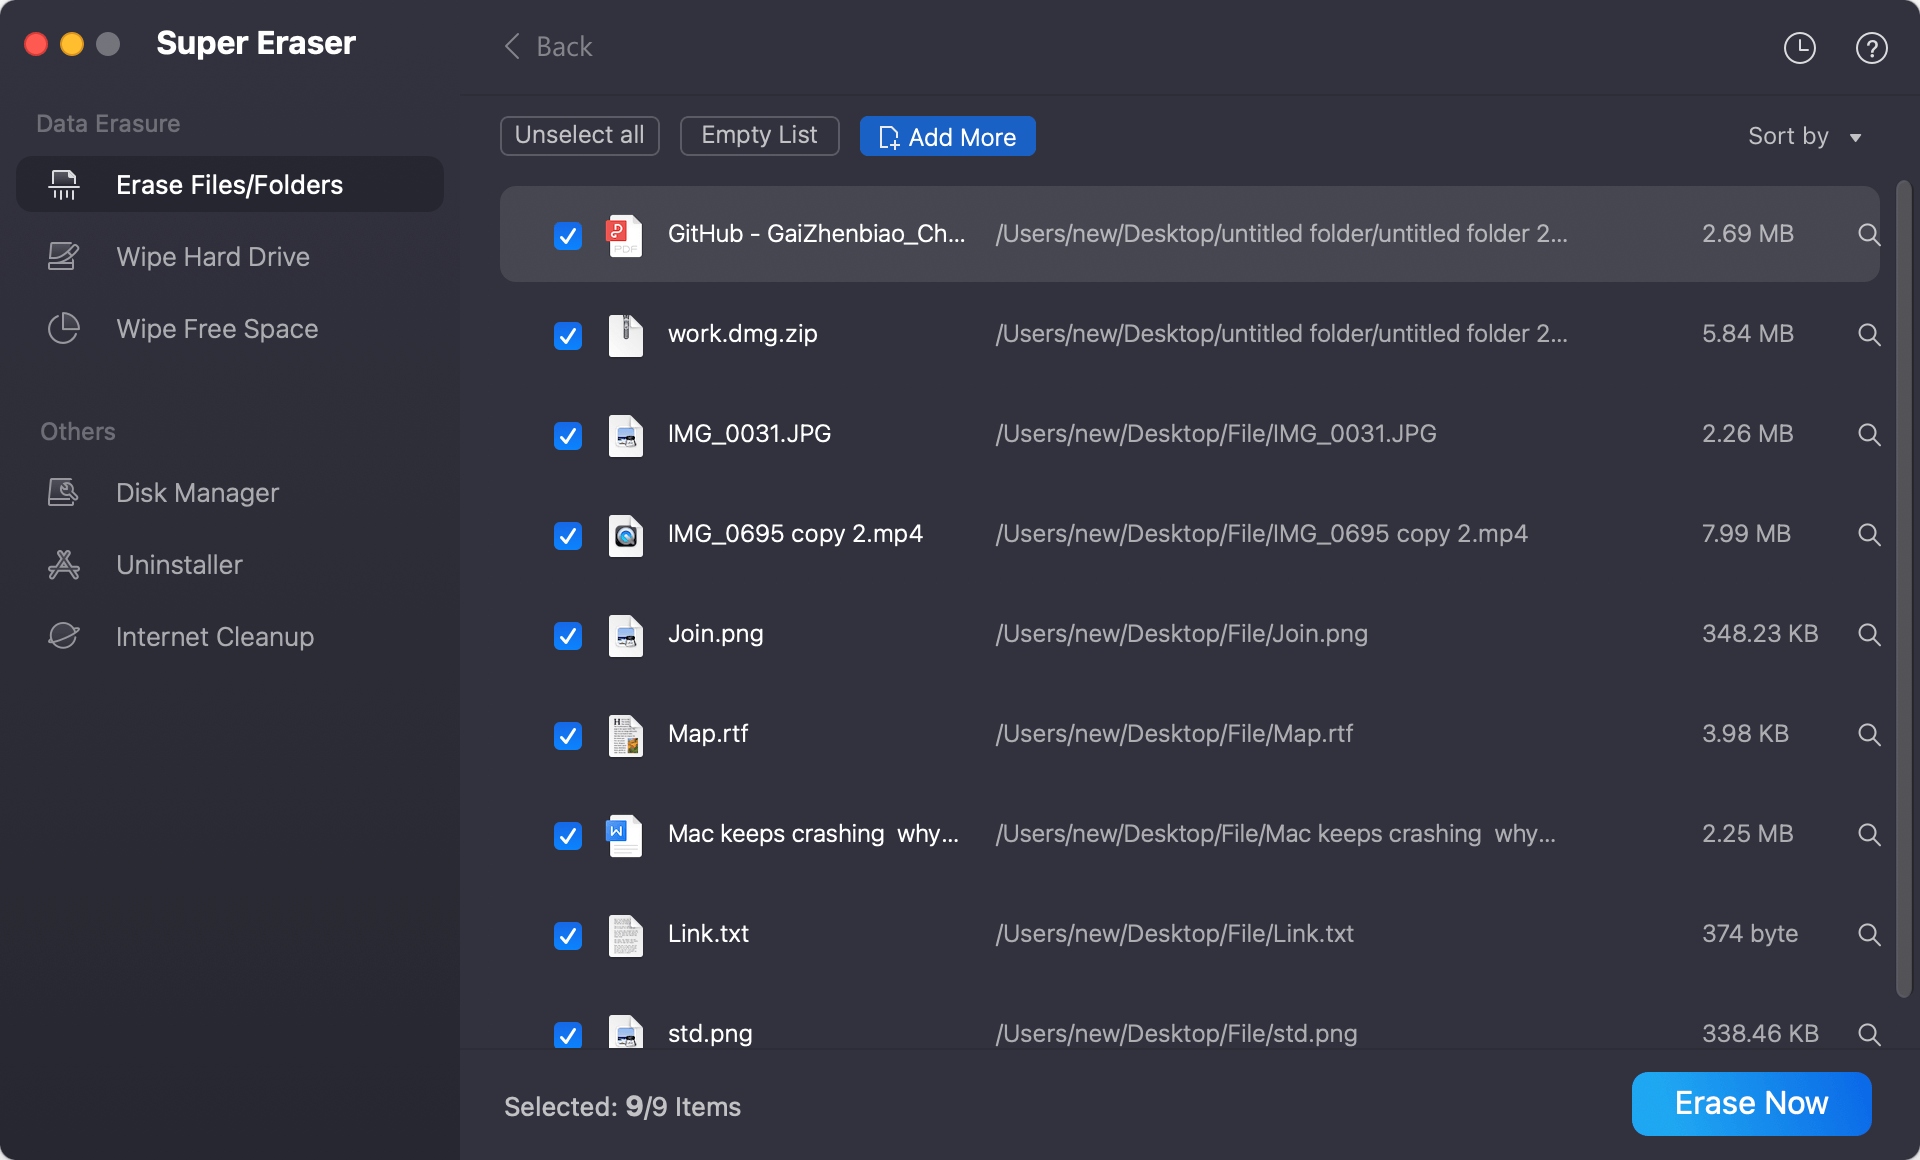
Mode 1: Erase Files/Folders.
It can securely and permanently erase files/folders from your Mac computer or external storage device. Just add files/folders, then click on Erase Now button to permanently erase them.

Mode 2: Wipe Hard Drive.
Select a hard drive, then click on Wipe Now button to permanently erase all data from the selected drive.

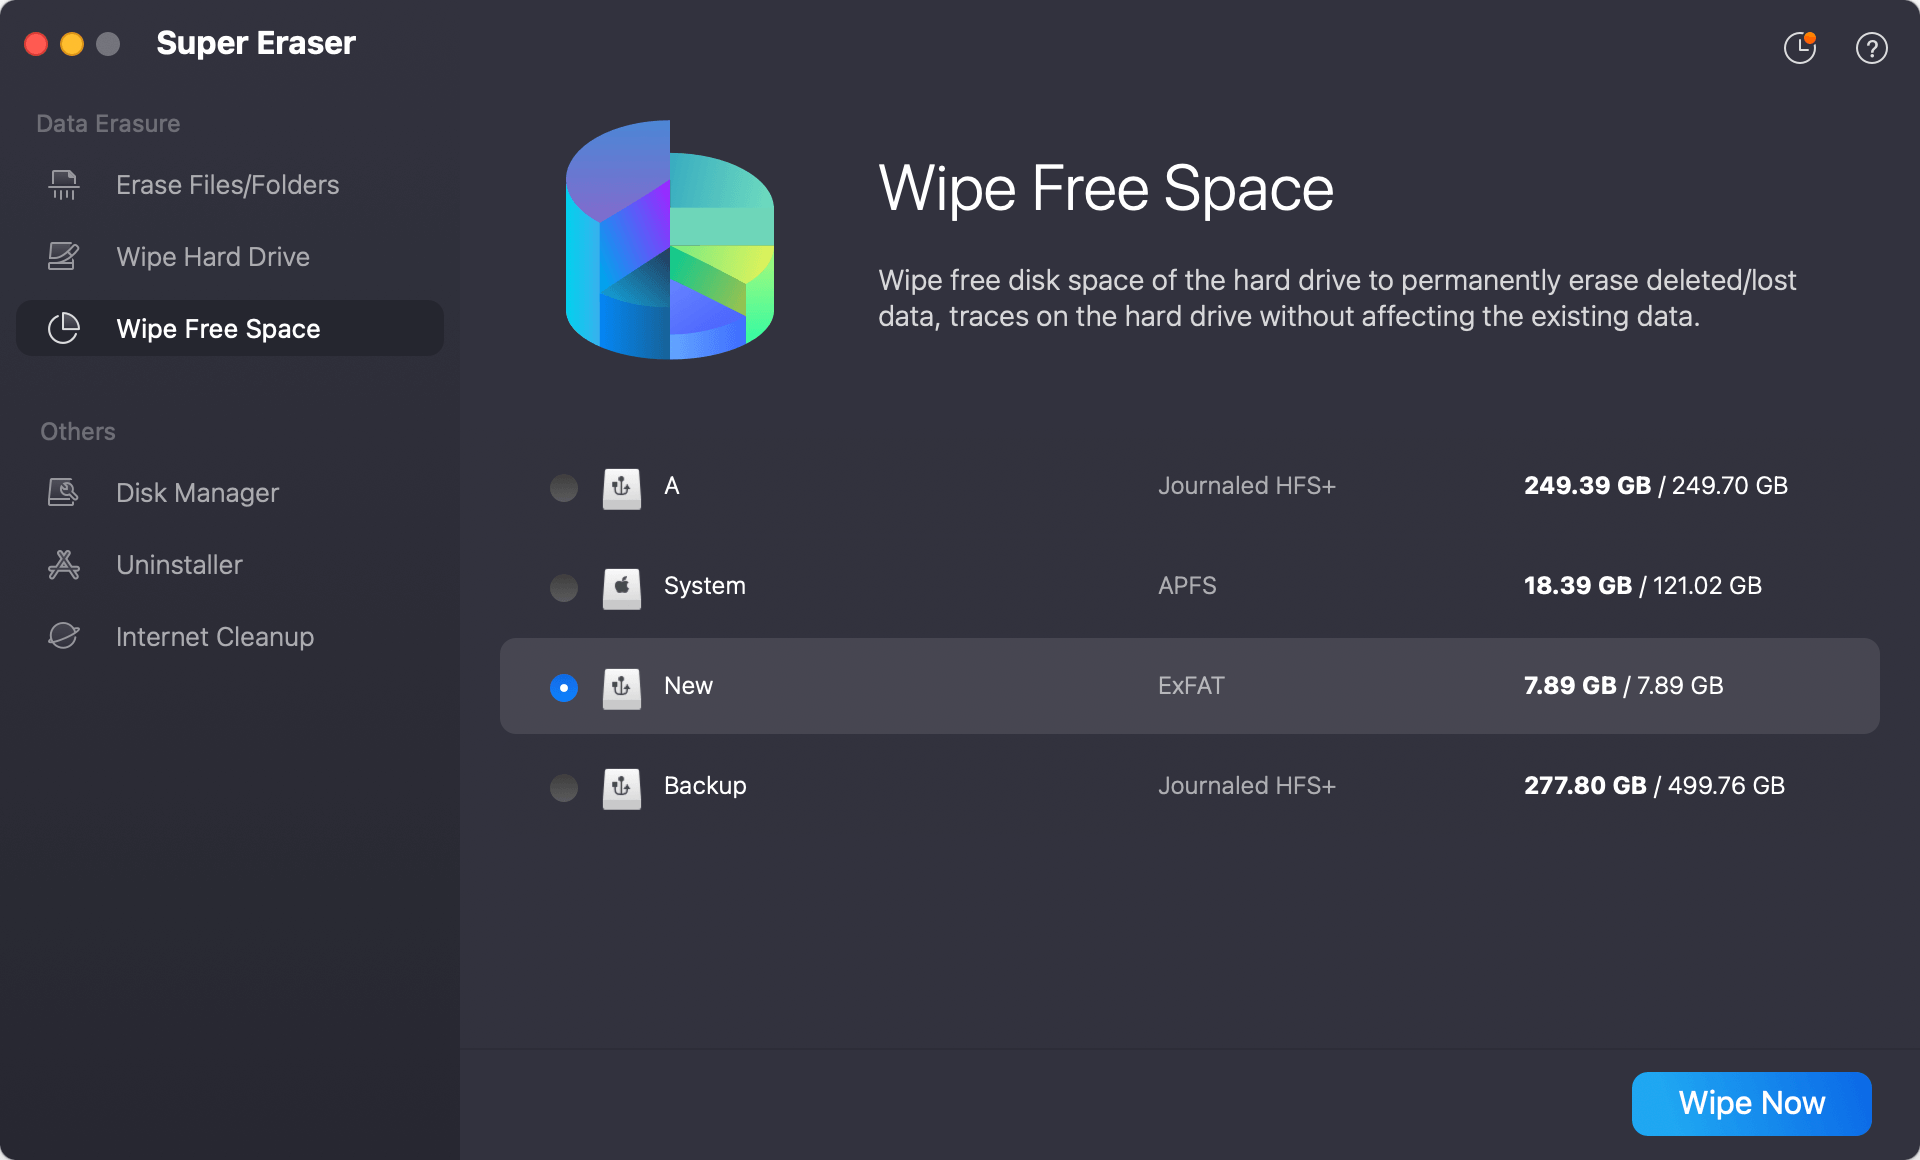
Mode 3. Wipe Free Space.
Wipe free disk space of a hard drive to permanently erase all already deleted/formatted or lost data from the drive.

Conclusion:
You can protect your files, fix problems that won't go away, or get your Mac ready for a new owner by erasing the hard drive. You can ensure the erasing process goes smoothly and safely by following the steps in this guide. If you will sell or donate your Mac, just use a reliable Mac hard drive eraser to permanently erase all your sensitive data.
Don't forget to back up your files, log out of important accounts, and carefully follow each step to ensure nothing goes wrong. Whether you want to start over, fix problems, or safely get rid of your Mac, this complete guide has given you the knowledge to safely erase your hard drive and restart macOS, making sure your device is ready for the next chapter.

DoYourData Super Eraser for Mac
DoYourData Super Eraser for Mac is a 100% safe, powerful and easy-to-use data erasure program. It offers certified data erasure standards including Peter Gutmann, U.S. Army AR380-19, DoD 5220.22-M ECE to permanently erase data from Macs and external devices, making data recovery be impossible.