How to Format Crucial Portable SSD X6/X8/X9/X9 Pro/X10/X10 Pro for Mac?
Formatting Crucial Portable SSD for Mac can solve Crucial Portable SSD read-only issue, fix logical errors, quickly regain full disk space of the Crucial Portable SSD, etc. Follow this guide to securely format a Crucial Portable SSD for Mac or wipe all sensitive data from it before you sell or donate the SSD.
![]() Updated by Shirly Chen on April 11, 2025
Updated by Shirly Chen on April 11, 2025
Quick Navigation:
- Why Should You Format the Crucial Portable SSD on Mac?
- The Requirements Before Formatting Crucial SSD
- Format Crucial Portable SSD on Mac with Disk Utility
- Format and Wipe Crucial Portable SSD on Mac with Data Wiper
- Conclusion
When it comes to managing and storing data, Solid State Drives (SSDs) have been game-changers. The small form factor, fast performance, and device compatibility of portable solid-state drives (SSDs) - especially those that work with Mac computers - have contributed to their meteoric rise in popularity. For example, Crucial Portable SSD is one of the best SSDs for Mac.

For best performance and compatibility with the macOS environment, formatting a Crucial Portable SSD for Mac is an essential operation. If you own a Mac and want to format a Crucial Portable SSD, this guide is for you.
Why Should You Format the Crucial Portable SSD on Mac?
You must know why formatting your Crucial Portable SSD for Mac is important before you can begin. The default NTFS file system format is usually preinstalled on new solid-state drives (SSDs). Time Machine backups and file encryption are two Mac-specific tasks with which this format may not be well-suited or compatible.
Formatting Crucial Portable SSD to ExFAT/APFS or Mac OS Extended will solve the read-only issue and make the Crucial Portable SSD be compatible with macOS. That will guarantee that your SSD will work seamlessly with macOS and operate efficiently. Format operation also can help you fix disk errors, convert RAW drive to a new file system drive, etc.
The Requirements Before Formatting Crucial SSD
You must have the following before you can begin the formatting process:
1. Backup of Important Data:
When you format your SSD, all of its data will be deleted. To protect yourself from data loss, create a backup of any important files or data saved on the Crucial Portable SSD. Make a backup on your Mac, transfer the files to the cloud, or utilize an external device.
2. Reliable Connection and Power:
During formatting, ensure your Crucial Portable SSD is connected to a reliable power source. Data corruption or drive malfunction might occur if the power suddenly cuts out while formatting.
3. Compatible Connection Cables:
For your Mac, be sure to have the necessary cables to connect the Crucial Portable SSD. The type of connection your solid-state drive uses (USB-A, Thunderbolt, or USB-C) will depend on its model. Verify that you own any adapters or cables required for connection.
Format Crucial Portable SSD on Mac with Disk Utility
To format your Crucial Portable SSD to work with a Mac, follow these steps:
Step 1: Connect the SSD to Your Mac:
Attach the Crucial Portable SSD to a spare USB or Thunderbolt port on your Mac using the corresponding connection or adapter.
Step 2: Backup Your Data:
Ensure you have a backup of all the important data stored on the SSD before formatting it.
Step 3: Launch Disk Utility:
- To launch Finder, go to the Mac's dock and click on the Finder icon or the Finder in the upper left corner of your screen.
- Launch Disk Utility by navigating to Applications > Utilities: Go to the Disk Utility software in Finder.
Step 4: Select the Crucial Portable SSD:
Within the window of Disk Utility: To find and choose your solid-state drive, open Disk Utility. You should see a list of all the drives and volumes attached to your Mac on the left sidebar. From the list, choose your Crucial Portable SSD.
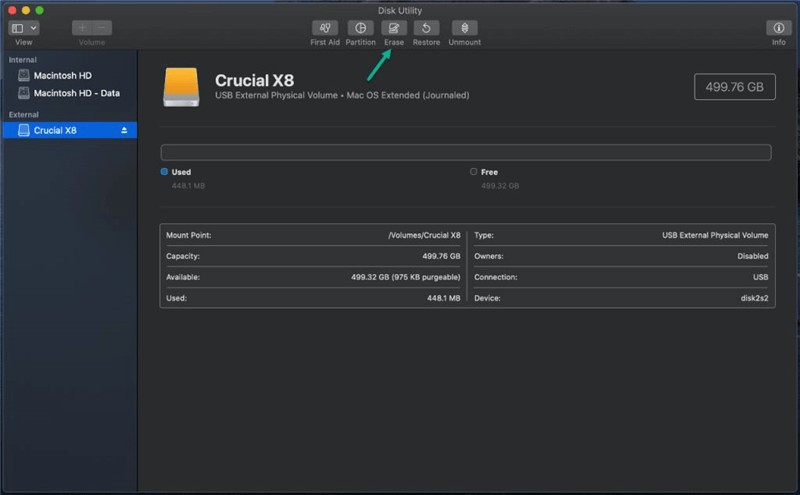
Step 5: Erase the SSD and Choose the Format:
- Select Your Solid-State Drive (SSD), and then, in the Disk Utility box, click the "Erase" button.
- Give the Drive a Name: Select an SSD and give it a name. The drive will now be known as this.
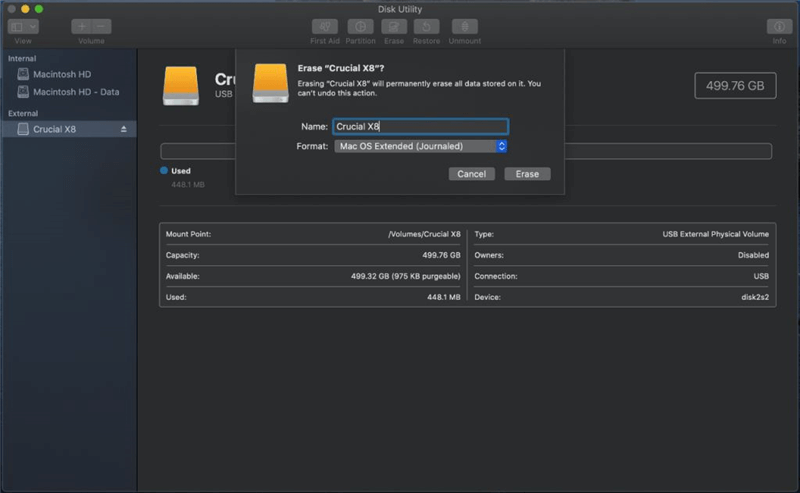
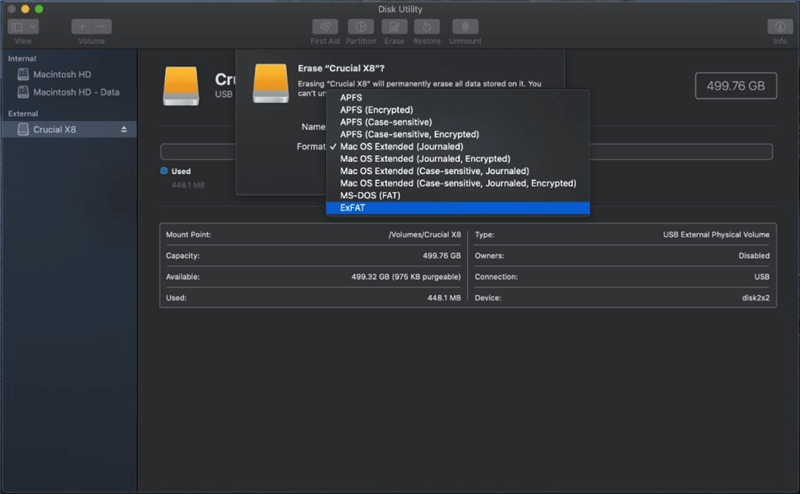
Select the Format: Click the corresponding drop-down menu to change the format. Both "Mac OS Extended (Journaled)" and "APFS" are compatible with macOS. If you want to use this SSD on both Windows and macOS, select ExFAT.
Choose Scheme: Make sure to choose "GUID Partition Map" as the Scheme for newer Macs with Apple Silicon processors. For Macs powered by Intel, select "GUID Partition Table."
Step 6: Start the Formatting Process
Check Settings: Make sure the name, format, and scheme settings are as you want them.
To erase, use the button: Press the "Erase" button to start formatting after you've confirmed your choices.
Step 7: Let Formatting Finish
Disk Utility will format and erase your Crucial Portable SSD using your chosen parameters when ready. How long it takes to complete could change depending on the drive's size and your chosen format. When it gets finished, click on Done button.

Step 8: Use the Formatted SSD
After formatting, your Crucial Portable SSD will be prepared for use with your Mac. The drive is ready for data transmission or other uses, such as storage, backups, or program execution.
🔖 Note: The data which is erased by Disk Utility can be recovered by data recovery software. It means the formatted data on your Crucial Portable SSD is not lost forever, check full guide: recover deleted or formatted data from a Crucial Portable SSD.
Format and Wipe Crucial Portable SSD on Mac with Data Wiper
Have ever wondered how to securely wipe your Crucial Portable SSD before you sell or donate it. To prevent the data on your Crucial Portable SSD from being recovered by others, you can use a disk wiper to wipe the Crucial Portable SSD to destroy all data stored on it.
DoYourData Super Eraser for Mac is a reliable disk wiper which offers certified data erasure standards to permanently erase data from Mac-based hard drives and external HDDs/SSDs, USB flash drives, memory cards, cameras, etc. If you want to wipe Crucial Portable SSD on Mac, just try this software.
DoYourData Super Eraser for Mac
- Shred files from Crucial Portable SSD.
- Wipe entire Crucial Portable SSD to erase all data.
- Erase deleted data from your Crucial Portable SSD.
To wipe Crucial Portable SSD on Mac, just follow the steps below:
Step 1: You should make a backup of your Crucial Portable SSD data before start disk wiping. Please note that once your data is erased by DoYourData Super Eraser for Mac, the data will be gone forever, can not be recovered by any method.
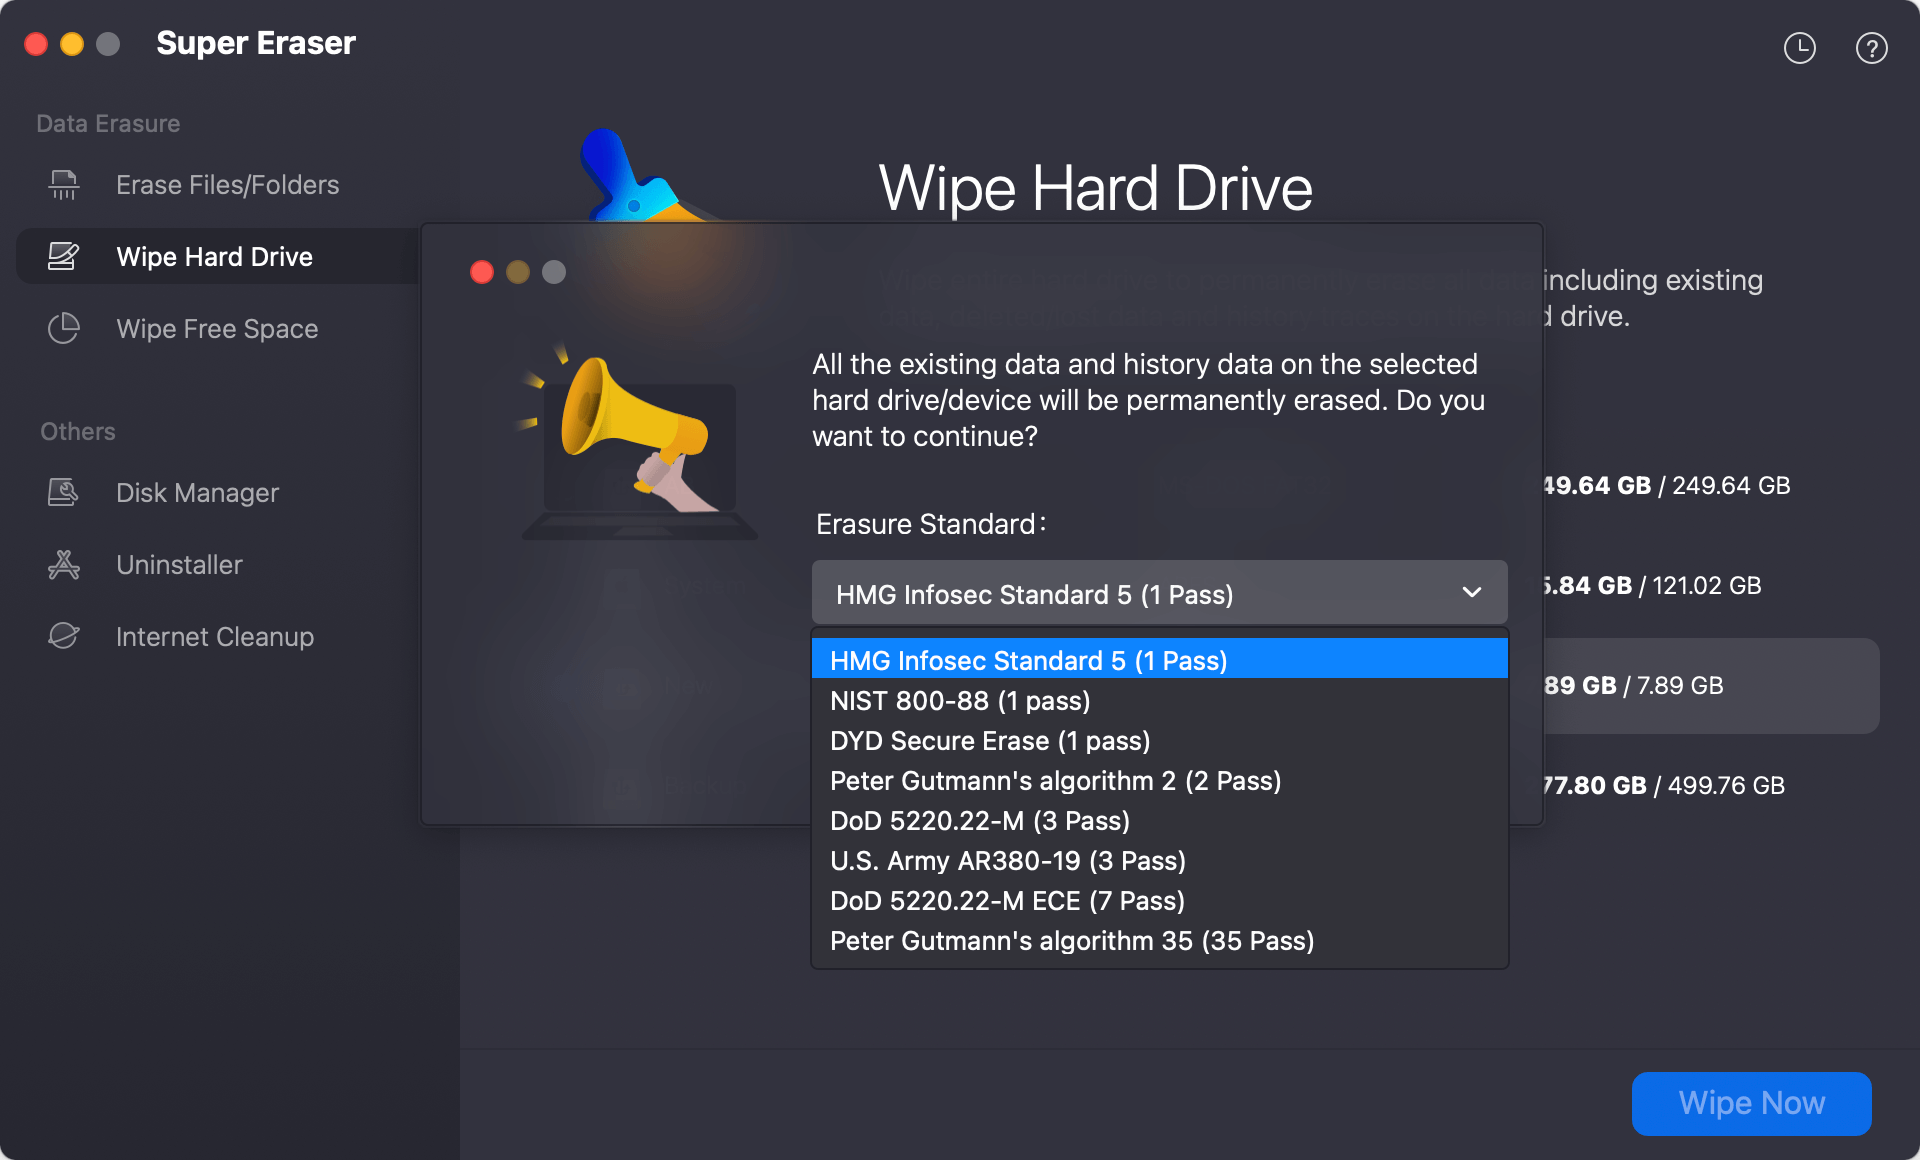
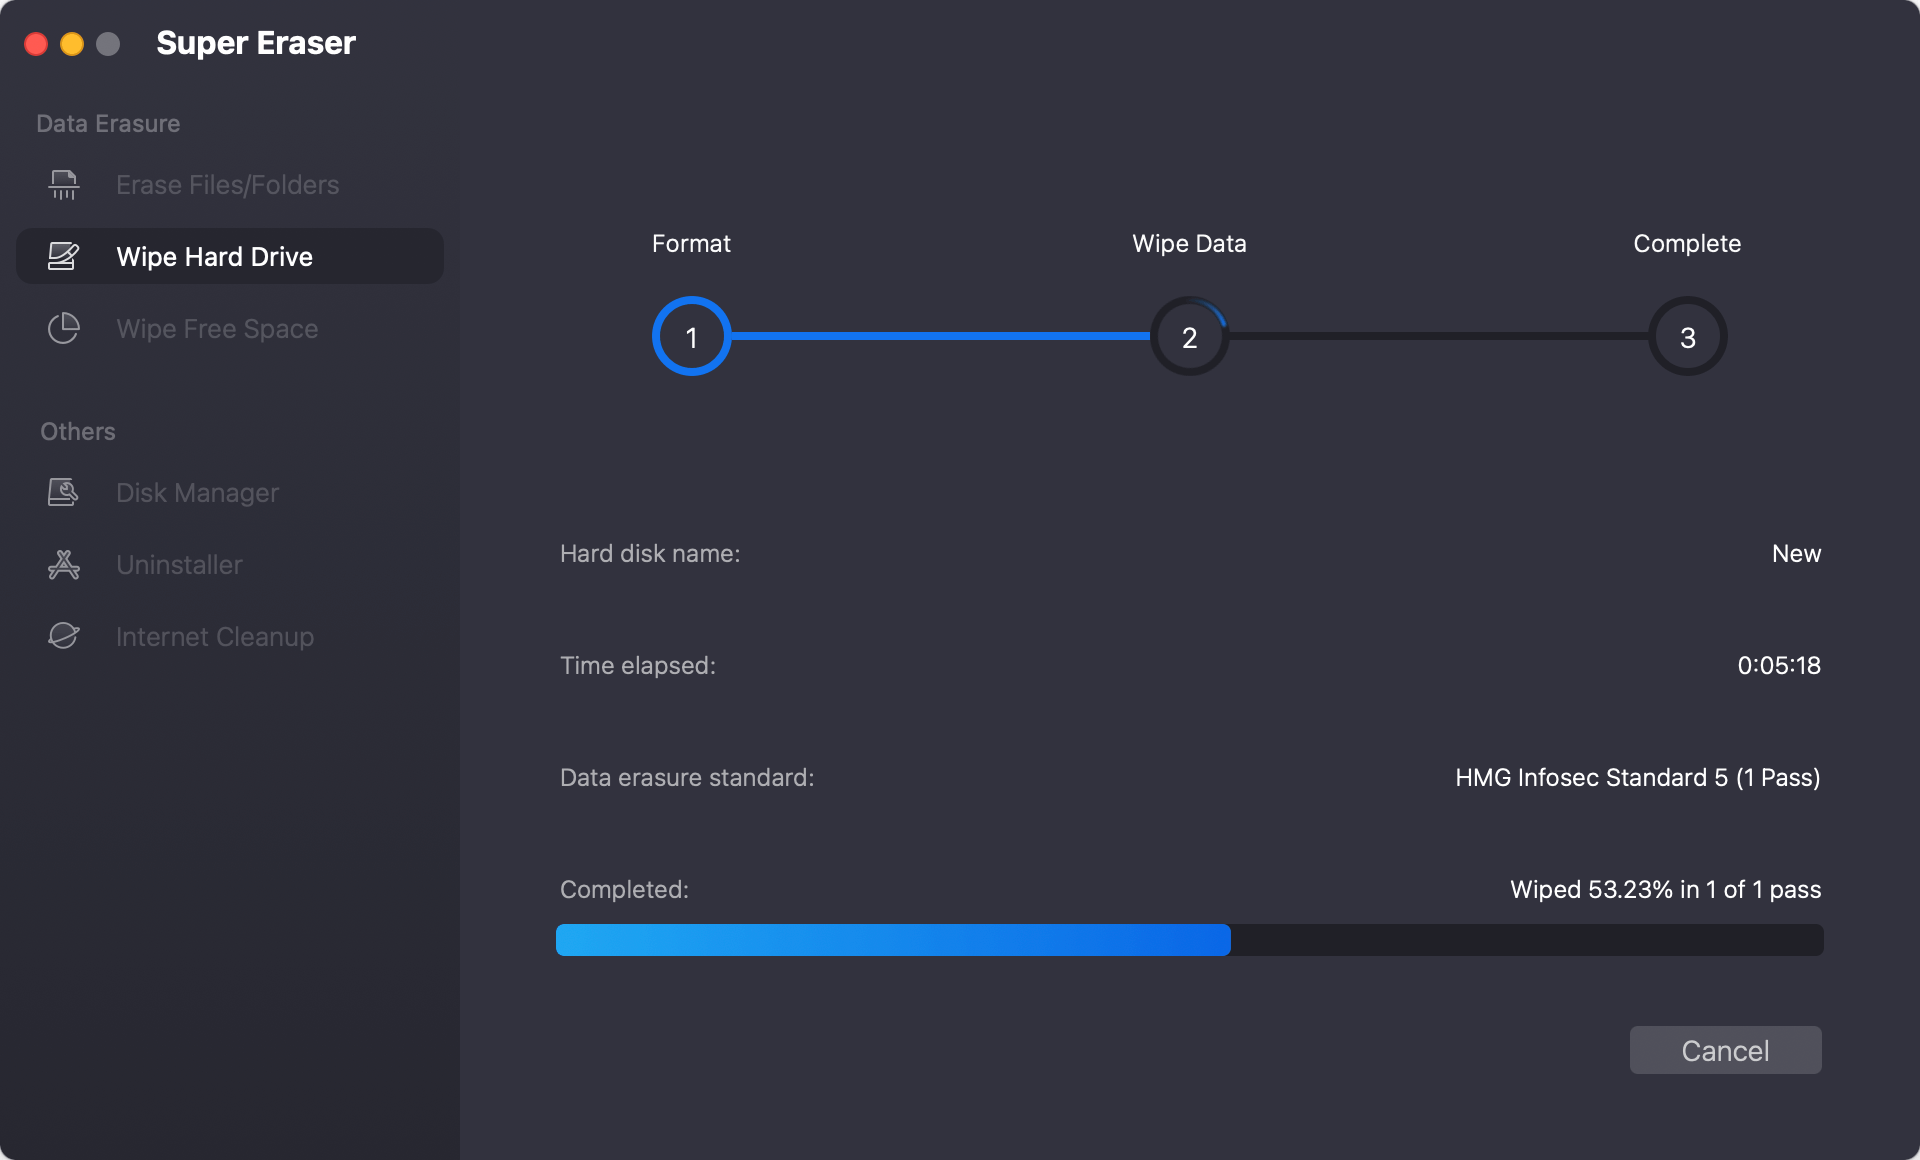
Step 2: Connect the Crucial Portable SSD to your Mac and open DoYourData Super Eraser for Mac. Choose data erasure mode - Wipe Hard Drive.

Step 3: Select the Crucial Portable SSD and click on Wipe Now button. There you will need to select a data erasure standard from the drop-dwown list to wipe data from the drive.
Step 4: After selecting the data erasure standard, click Continue button to start data wiping. It will format the Crucial Portable SSD and then wipe all data stored on the Crucial Portable SSD. All existing files, hidden files, deleted/lost files on the Crucial Portable SSD will be permanently erased.
Conclusion:
Formatting is necessary to get the most out of your Crucial Portable SSD for Mac on macOS. Following these instructions, you may safely format your SSD, remove the current file system, and get it ready to work with your Mac.
Before formatting, ensure you have a backup of all your crucial files, as this will destroy all data on the device. You may format your Crucial Portable SSD for Mac efficiently by following these steps, and then you can enjoy efficient storage and data management.

DoYourData Super Eraser for Mac
DoYourData Super Eraser for Mac is a 100% safe, powerful and easy-to-use data erasure program. It offers certified data erasure standards including Peter Gutmann, U.S. Army AR380-19, DoD 5220.22-M ECE to permanently erase data from Macs and external devices, making data recovery be impossible.
Written & Updated by Shirly Chen
Shirly Chen has been writing data recovery, data erasure articles for DoYourData over 4 years. She has been working as a professional website content writer & editor for quite a long time. She also writes articles about disk clone, Mac optimization, disk backup, etc.