How to Recover Formatted NTFS Drive on Mac
With Do Your Data Recovery for Mac, you can easily recover all lost data from a formatted or erased NTFS drive on Mac.
DoYourData Super Eraser for Mac is one of the best Mac disk wipe software. It can help you format NFTS drive on Mac and wipe NTFS drive on Mac. The this tool can permanently erase all data from NTFS-formatted HDD/SSD/USB drive/memory card, make sure all data stored on the NTFS drive is erased permanently, cannot be recovered by any method.
![]() Updated by Shirly Chen on July 4, 2024
Updated by Shirly Chen on July 4, 2024
Quick Navigation:
Wiping an NTFS drive on a Mac might seem daunting, especially with the inherent compatibility issues between macOS and NTFS. Whether you plan to sell an old drive, repurpose it, or simply clear out all the data securely, knowing how to wipe it properly is crucial.
Imagine finally conquering the tech barrier holding you back, confidently erasing every bit of data, and formatting your drive to fit your needs. This guide will go through the entire process of formatting or wiping NTFS drive on Mac with different tools such as Disk Utility and disk wipe software.
Ready to master the art of drive wiping? Let's dive in and transform that seemingly impossible task into an easy, stress-free experience.

NTFS, "New Technology File System," is a private file system that Microsoft made for Windows. It is a better choice for Windows users because it has advanced features like big volume support, file compression, and encryption. However, regarding macOS, NTFS support makes things a lot harder.
macOS can read NTFS files by default but can't write to them. Mac users can view and copy files from an NTFS drive with this read-only access, but they can't change the files or add new ones. If you switch between Windows and Mac computers a lot or need to handle NTFS drives on your Macs, this limitation can be a pain.
Users can deal with this problem in several ways. Using third-party software like DoYourData NTFS for Mac, Paragon NTFS for Mac or Tuxera NTFS for Mac, which lets you read and write to NTFS files, is one way to do it. You could also change the drive to a file system with macOS, like ExFAT, which works with Windows and macOS.
Wiping an NTFS drive for several functional and safety reasons is often necessary. We recommend wiping an NTFS drive for several important reasons, such as moving from Windows to macOS, selling or reusing a drive, or ensuring all data is gone.
Keeping your private data safe is one of the most important reasons to wipe an NTFS drive. When you delete files normally, bits and pieces of the data are often still accessible. When you wipe the drive, all the data is wiped. It protects your privacy and keeps data from getting into the wrong hands.
If you want to use the drive mostly with macOS, you must change it to a file system that works with it, like APFS or Mac OS Extended (Journaled). Wiping the drive deletes all of its data, which lets you reset it and make it work best with your Mac.
Before you sell or give a drive to someone else, you must wipe it clean so the new owner can't get to your old files. This step is crucial for keeping your data safe and stopping people from misusing your information.
To protect against malware and other harmful software, wiping your drive is the best thing you can do. This step makes sure the drive is clean and safe to use again.
Before you format or erase your NTFS drive, make a backup of your important data.
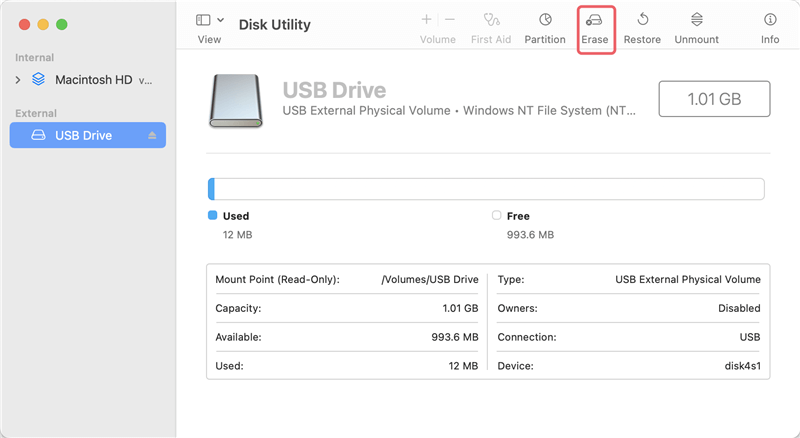
The built-in Disk Utility tool in macOS can quickly reformat an NTFS drive on a Mac. To clear your drive and get it ready for use again, do these steps:
Step 1. Open Disk Utility: To find Disk Utility, go to Applications > Utilities > Disk Utility, or press Command + Space and type "Disk Utility" into Spotlight Search.
Step 2. Select the NTFS drive: Find and click on the NTFS drive you want to erase in the Disk Utility menu.
Step 3. Erase the NTFS drive: Click the "Erase" button At the top. A box with formatting choices for the drive will show up.
Step 4. Choose a Format: Pick a file system that works with macOS in the box that appears. You can give the drive a name in the Name box.
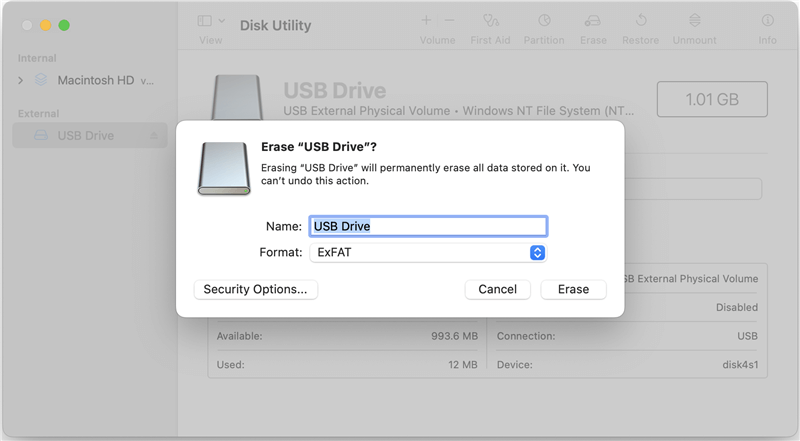
Step 5. Confirm and erase: To start, click "Erase." Disk Utility will erase the NTFS drive to other file system, erasing all its data. Wait until the process is done. Based on the drive's size and speed, it might take a while.
DoYourData NTFS for Mac is a trusted third-party program that lets you fully read and write to NTFS drives. It can also be used to format an NTFS drive on a Mac. To safely format your NTFS drive with DoYourData NTFS for Mac, do the following:
Step 1. Download and install DoYourData NTFS for Mac and connect the NTFS drive to your Mac.
Step 2. Open DoYourData NTFS for Mac, select the NTFS drive, click on Format button. Select a file system, then click on Format button again to format it. (It can format the NTFS drive to NTFS/APFS/Mac OS Extended/ExFAT/FAT32)

Note: The formatted data is not lost for good. Any data recovery software can easily recover formatted data or recover lost data from a drive which is erased by Disk Utility.
How to Recover Formatted NTFS Drive on Mac
With Do Your Data Recovery for Mac, you can easily recover all lost data from a formatted or erased NTFS drive on Mac.
Before you sell or donate the NTFS drive, you'd better permanently erase all data from it to prevent data recovery. DoYourData Super Eraser for Mac is a powerful Mac data erasure application. It offers certified data erasure standards to help in permanently erasing data from HDD/SSD, PC, Mac, USB flash drive, memory card, digital camera, etc.
Step 1. Download and install DoYourData Super Eraser for Mac, then connect the NTFS drive to your Mac.

Step 2. Choose Wipe Hard Drive mode, select the NTFS drive, click on Wipe Now button.
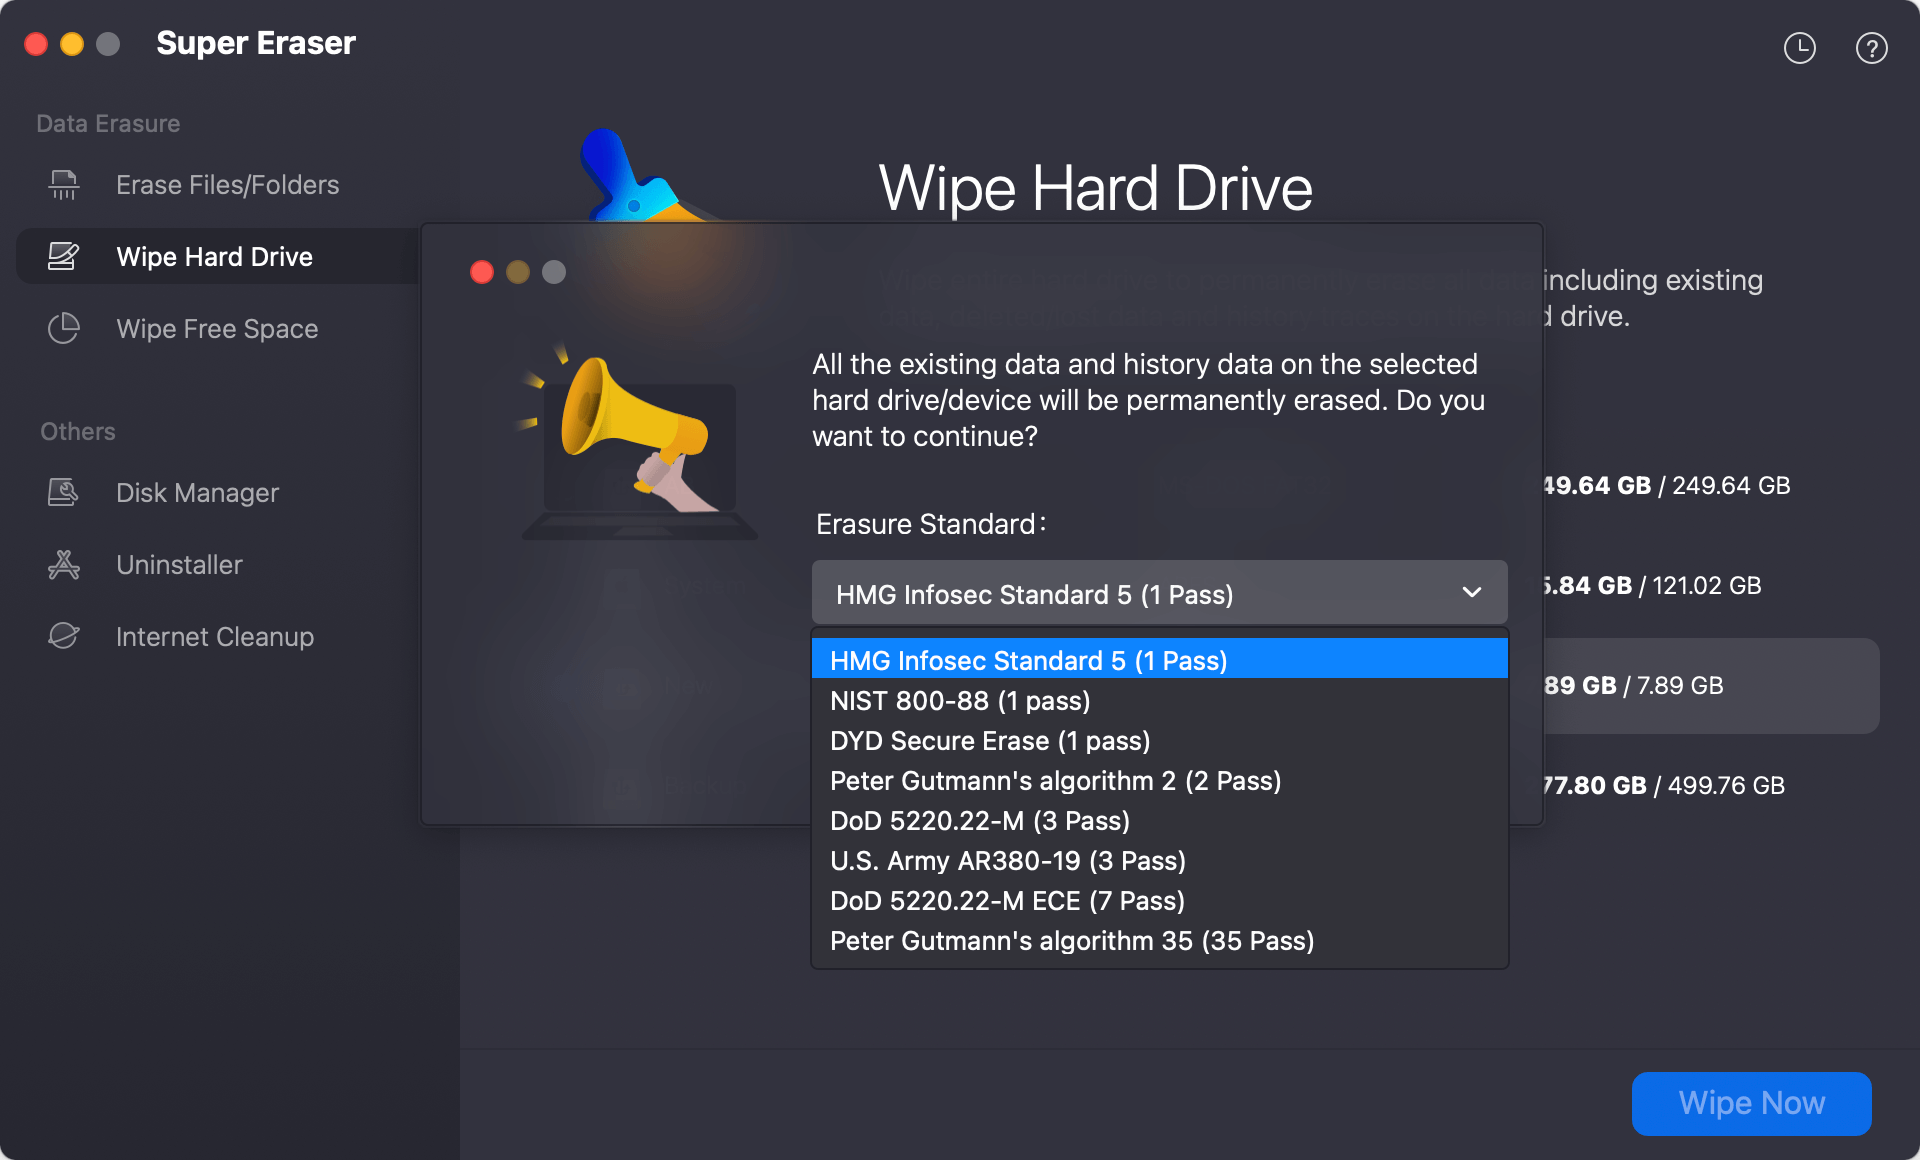
Step 3. Select a erasure standard, then click on Continue button.

Step 4. Securely format and wipe the NTFS drive, permanently erase all data from it.
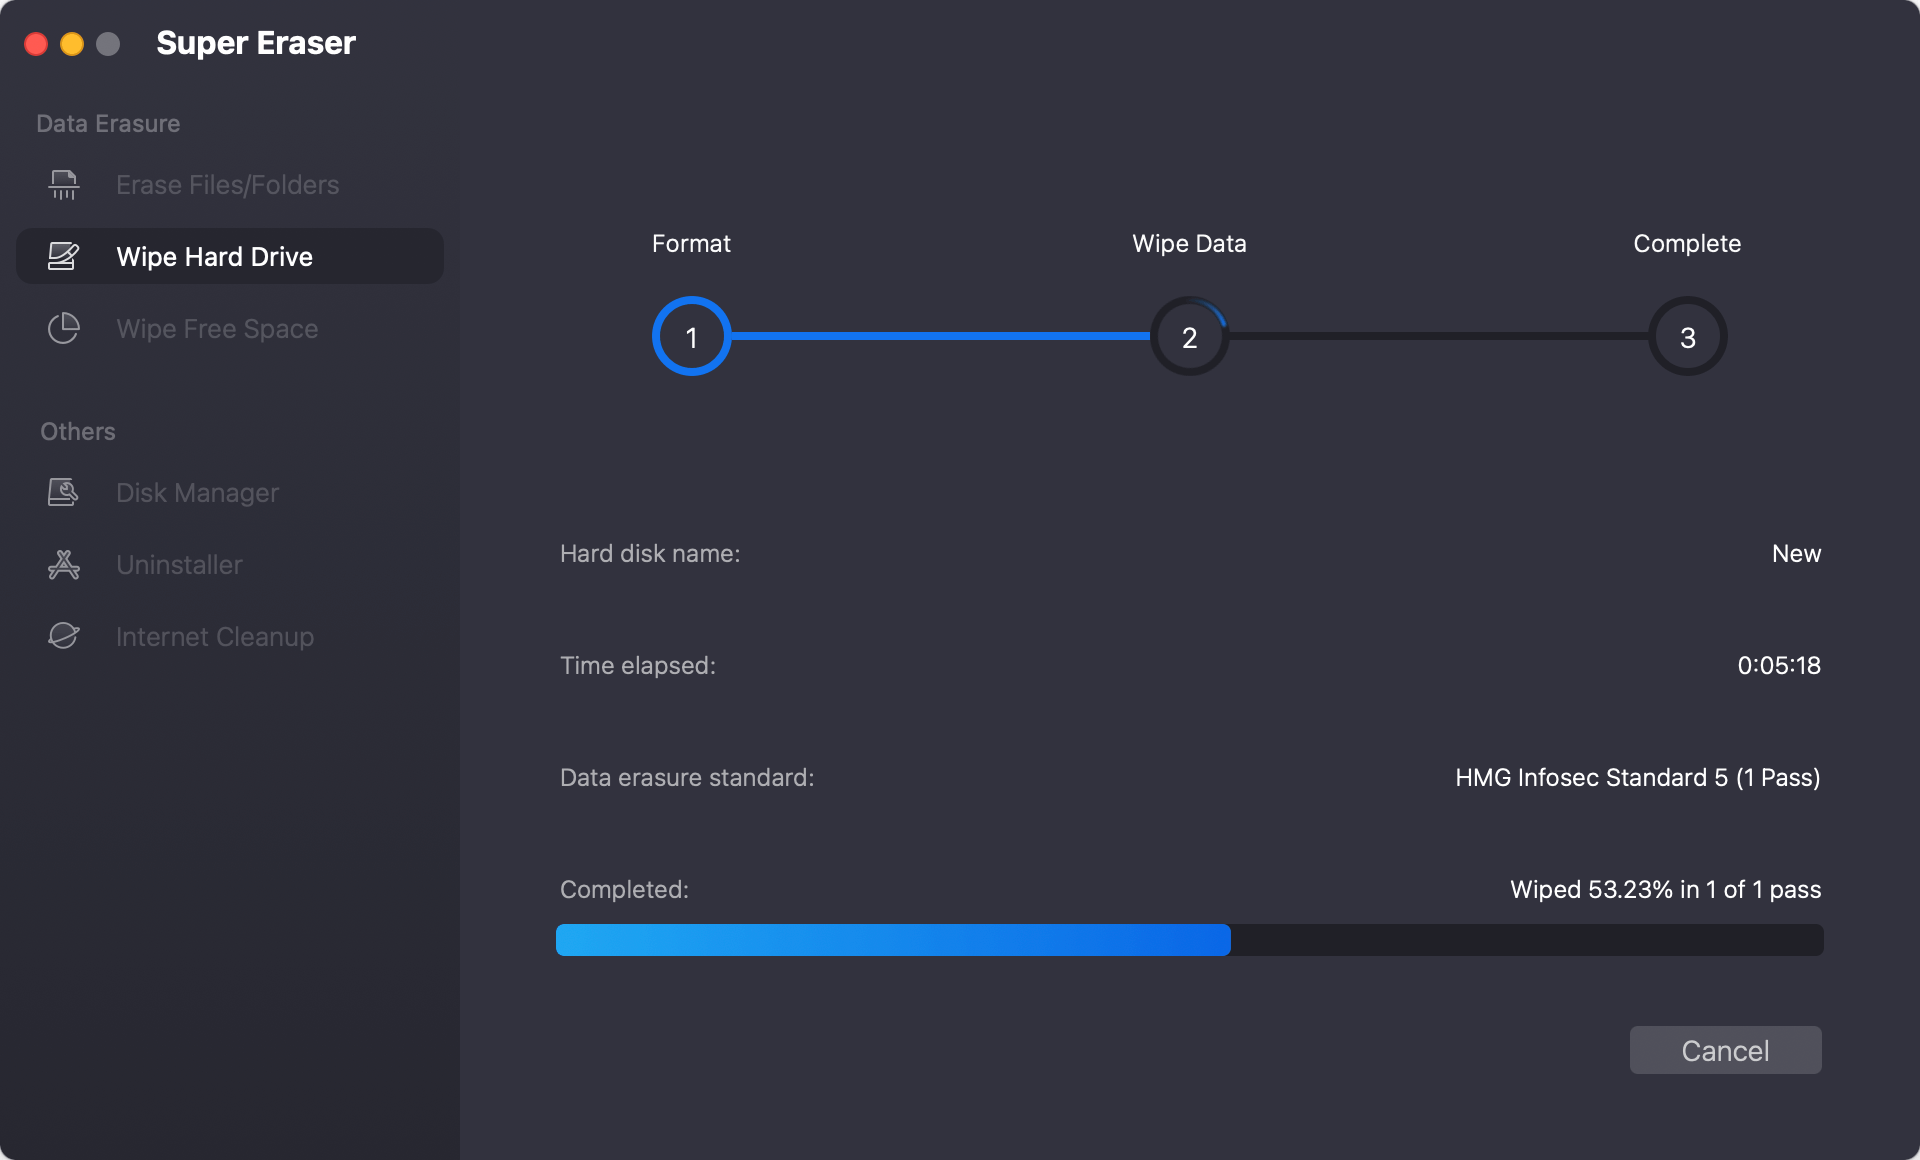
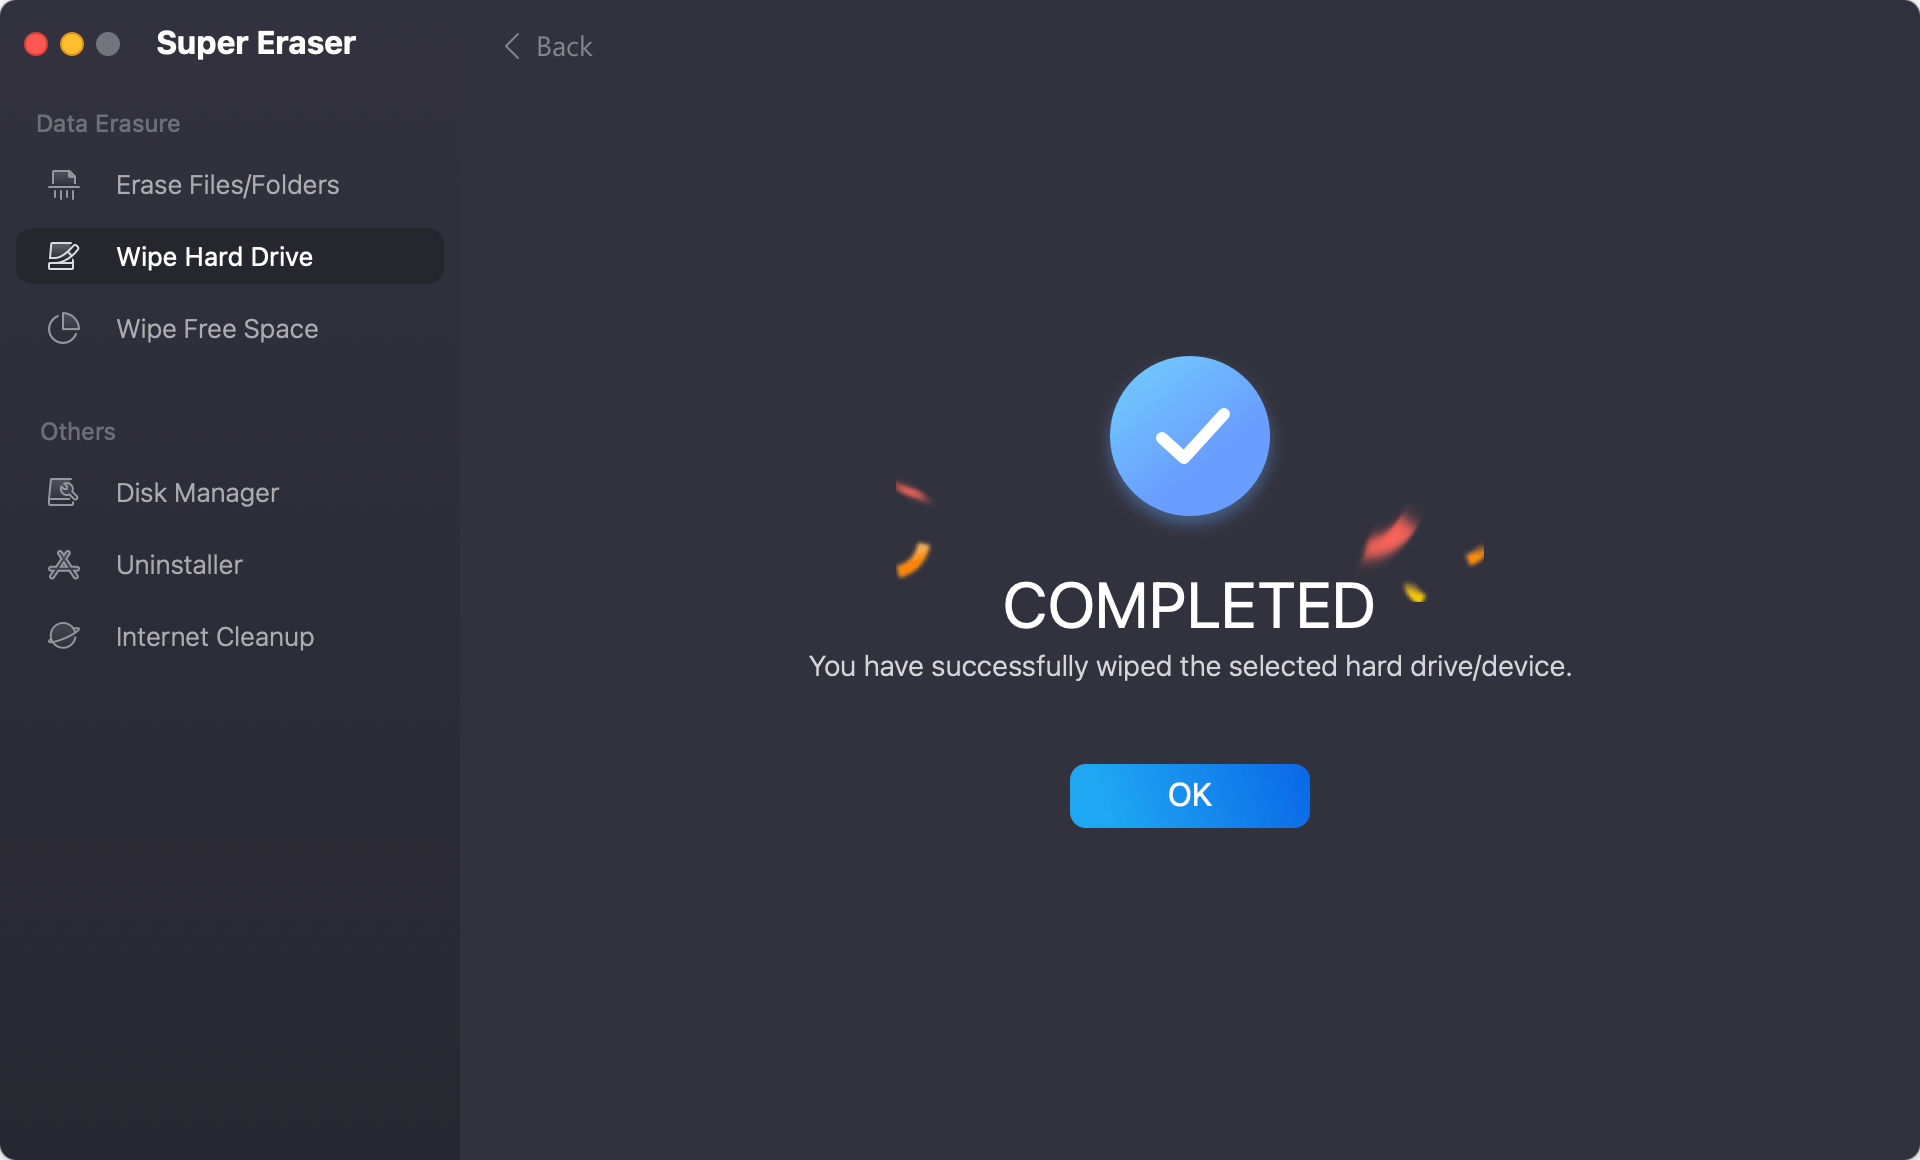
Once the process gets finished, all data is gone forever, cannot be recovered by any method.
It can be hard to wipe an NTFS drive on a Mac because of compatibility problems, but you can do it quickly and easily with built-in tools like Disk Utility or third-party disk formatting software.
These steps will make sure that your data is deleted safely, keeping your information safe and getting the drive ready for use again. If you follow the steps, you can work with NTFS drives without any problems, whether you are reformatting them to work with macOS, protecting your data, or getting rid of harmful software.
DoYourData Super Eraser for Mac is one of the best erasure tools. Before you sell or donate your NTFS drive, you can use this tool to wipe the NTFS drive and permanently erase all data from it.
1. Any tool can help wipe NTFS drive on Mac?
There are lots of tools can help in formatting or wiping NTFS drive on Mac:
2. How to wipe an NTFS drive on Mac?
To securely wipe NTFS drive on your Mac, choose a disk wipe tool:
3. How to format an NTFS drive for Mac?
Disk Utility can help you format NTFS drive for Mac. Just open Disk Utility, select the NTFS drive, then click Erase. Select the file system, click Erase again.
4. Can I use NTFS drive on Mac without formatting (read-write)?
Yes, you just need to install an NTFS drive on your Mac:

DoYourData Super Eraser for Mac
DoYourData Super Eraser for Mac is a 100% safe, powerful and easy-to-use data erasure program. It offers certified data erasure standards including Peter Gutmann, U.S. Army AR380-19, DoD 5220.22-M ECE to permanently erase data from Macs and external devices, making data recovery be impossible.
Written & Updated by Shirly Chen
Shirly Chen has been writing data recovery, data erasure articles for DoYourData over 4 years. She has been working as a professional website content writer & editor for quite a long time. She also writes articles about disk clone, Mac optimization, disk backup, etc.