How to Wipe Data on Mac OS X Yosemite (OS X 10.10.x)?
DoYourData Super Eraser is a reliable file shredder & disk wiper for Mac OS X Yosemite. It can securely and permanently delete files on Mac OS X Yosemite, wipe deleted/lost data or wipe hard drive on Mac OS X Yosemite. Once the data is erased by DoYourData Super Eraser for Mac OS X Yosemite, the data is lost for good, cannot be recovered by any method. Then you can sell, donate or dispose of your old Mac which is running Mac OS X Yosemite without any security issue.
![]() Updated by Shirly Chen on March 12, 2025
Updated by Shirly Chen on March 12, 2025
Quick Navigation:
- Before Wiping Data on Your Mac with OS X Yosemite System
- Wipe Data from Mac OS X 10.10 Yosemite
- Post-Wipe Considerations
- Conclusion
Mac OS X 10.10 Yosemite, released in October 2014, represented a major update in Apple's macOS lineup. It introduced a flat, modern design and numerous new features that enhanced the user experience. Despite its age, Yosemite remains popular with many users due to its stability and familiar interface. However, there are various scenarios where securely wiping your Mac's data is necessary. Whether you're preparing to sell your Mac, hand it over to someone else, or simply want to perform a clean start to resolve system issues, wiping the data ensures that all personal and sensitive information is irretrievably removed.
This comprehensive guide will take you through the process of securely wiping data on Mac OS X 10.10 Yosemite, exploring multiple methods and providing detailed steps to ensure that your data is completely erased and the Mac is ready for a fresh start.

Before Wiping Data on Your Mac with OS X Yosemite System
#1 Backup Your Data
Before you wipe your Mac, creating a backup is a critical step. This ensures that you don't lose any important files or settings, which could otherwise be irreplaceable.
1. Importance of Backups: Backing up your data is not only a precaution but also a necessary step to protect against data loss. Whether you're wiping the data to sell your Mac or to fix persistent issues, having a backup ensures that all your important documents, photos, music, and other files are safely stored and can be restored later. A backup serves as a safety net, allowing you to recover your files if something goes wrong during the wiping process or if you wish to transfer your data to a new device.
2. Methods for Backing Up:
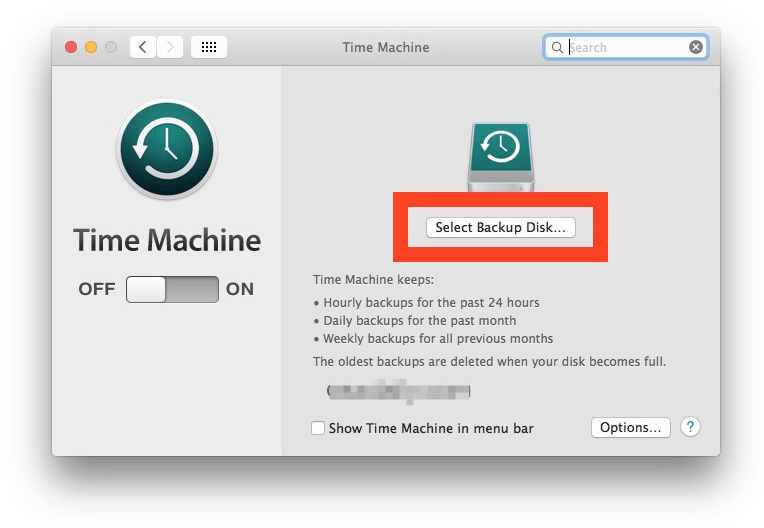
1> Time Machine: Time Machine is a built-in backup feature in macOS that automatically backs up your entire system. To set up Time Machine:
- Connect an external hard drive to your Mac. Time Machine will prompt you to use the drive for backups. If not, you can go to System Preferences and select Time Machine.
- Click Select Backup Disk and choose your external drive. Time Machine will format the drive and start the initial backup process. This may take several hours depending on the amount of data.
- Once set up, Time Machine will perform incremental backups, meaning it will back up only the changes made since the last backup, which is more efficient and faster.
2> External Drives: If you prefer a more manual approach, you can copy important files to an external hard drive or USB flash drive. Simply drag and drop files from your Mac to the external drive. This method is straightforward but requires you to manually select the files and folders you wish to back up.
3> Cloud Services: Cloud storage solutions like iCloud, Dropbox, Google Drive, and OneDrive offer a convenient way to store your data online. By uploading your files to these services, you can access your data from any device with an internet connection. Cloud backups are especially useful if you have a stable internet connection and prefer not to rely on physical storage media.
4> Disk Cloning Software: Mac disk cloning software, such as DoYourClone for Mac, can help you clone all data from your Mac which runs macOS Yosemite to an external hard drive, then create a full bootable clone backup for your Mac.
#2 Disable Find My Mac
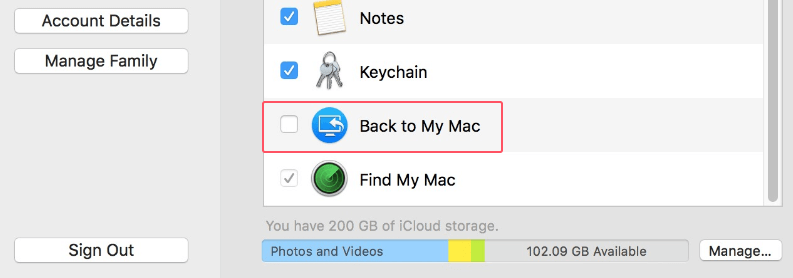
Find My Mac is a security feature that helps locate your Mac if it is lost or stolen. To prevent potential issues during the data wipe and to avoid complications when the new owner tries to use the Mac, you need to disable this feature.
Steps to Disable Find My Mac:
- Open System Preferences from the Apple menu located in the top-left corner of your screen.
- Click on iCloud to access iCloud settings. You will see a list of iCloud services and options.
- Locate the checkbox next to Find My Mac and uncheck it. You may need to enter your Apple ID password to confirm the action.
- Disabling Find My Mac will unlink your device from your Apple ID, ensuring that the new owner will not face any issues related to the device being locked or tracked.
Wipe Data from Mac OS X 10.10 Yosemite
#1 Using Disk Utility
Disk Utility is a built-in macOS tool that provides powerful functions for managing disks and volumes, including the ability to securely erase data.
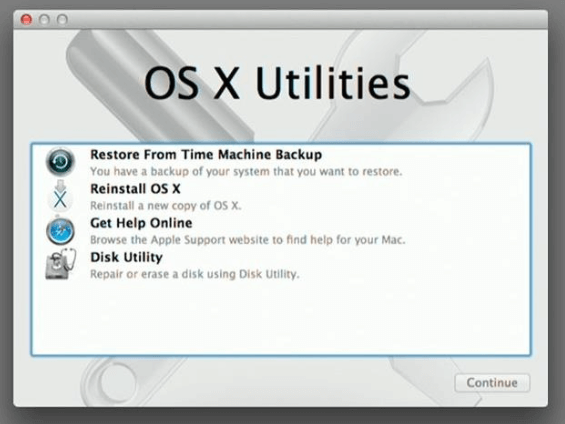
Step 1. Open Disk Utility:
- Restart your Mac and immediately hold down Command + R during startup. This key combination boots your Mac into Recovery Mode, allowing you to access utilities needed for troubleshooting and reinstalling macOS.
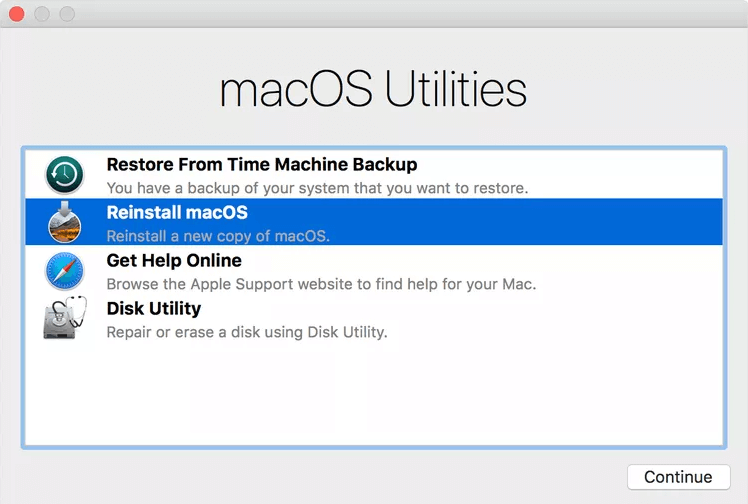
- From the macOS Utilities window, select Disk Utility and click Continue. Disk Utility will open and display a list of available disks and partitions.
Step 2. Select the Hard Drive:
- In Disk Utility, locate and select your main hard drive from the list on the left side. It is typically named Macintosh HD or whatever custom name you've given it.
- Ensure that you select the correct drive, as erasing the wrong disk will result in data loss.
Step 3. Erase Tab Options:
- Click on the Erase tab. This tab provides options for formatting the selected drive and securely erasing its contents.
- Enter a new name for the drive if desired. This is optional and mainly for organizational purposes. The most important aspect is to choose the right format.
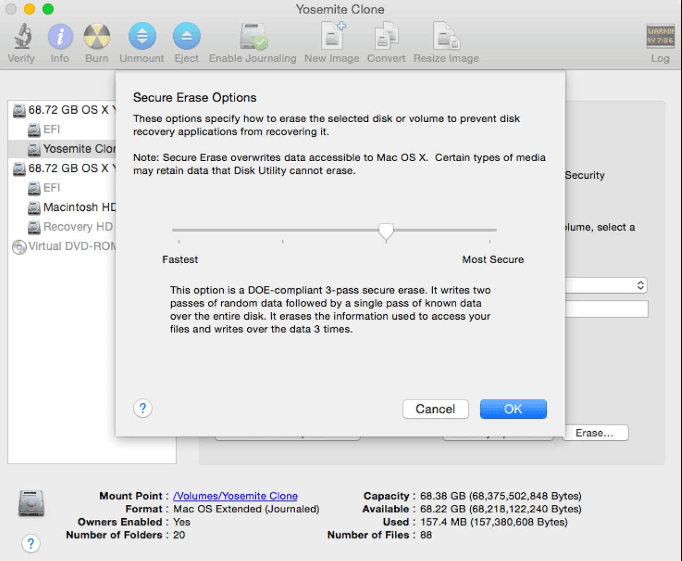
Step 4. Choosing a Secure Erase Option:
- Click on Security Options to access a slider with different erase methods. The slider allows you to choose the level of security for the erasure:
- Fastest: This option only removes the file system journal and does not overwrite the data. It is the least secure option, as data can potentially be recovered with specialized tools.
- 3-Pass Erase: This method writes over the data three times. It is more secure than the fastest option and is generally adequate for most users.
- 7-Pass Erase: This method writes over the data seven times, providing a higher level of security. It is recommended for sensitive information and provides a thorough level of data destruction.
- Select the level of security that suits your needs and click OK to return to the Erase tab.
- Click Erase to begin the process. The duration of the erasure depends on the size of the drive and the chosen security level. The drive will be reformatted, and all data will be permanently removed.
Step 5. Reinstalling macOS:
After securely wiping your hard drive, you will need to reinstall Mac OS X 10.10 Yosemite. Go back to Utilities window, choose Reinstall OS.
Note: The data which is erased by Disk Utility is not lost for good and can be recovered by data recovery software.
#2 DoYourData Super Eraser for Mac
DoYourData Super Eraser for Mac is a powerful data erasure tool. It can help you easily and securely wipe data from Yosemite 10.10 Mac computers, leaving no trace for data recovery. It not only wipes the data, but it also overwrites the disk space of the wiped data to make data recovery be impossible. It means your data on the Yosemite 10.10 Mac will be permanently lost after being wiped by DoYourData Super Eraser for Mac.
DoYourData Super Eraser for Mac
- Permanently delete files and folders on Mac OS X Yosemite.
- Wipe disk volume, external hard drive, USB drive, SD card on Mac OS X Yosemite.
- Wipe free disk space to permanently erase deleted/lost data.
This Mac data erasure tool offers three data erasure modes for you to permanently destroying and wiping data under Mac OS X Yosemite 10.10:
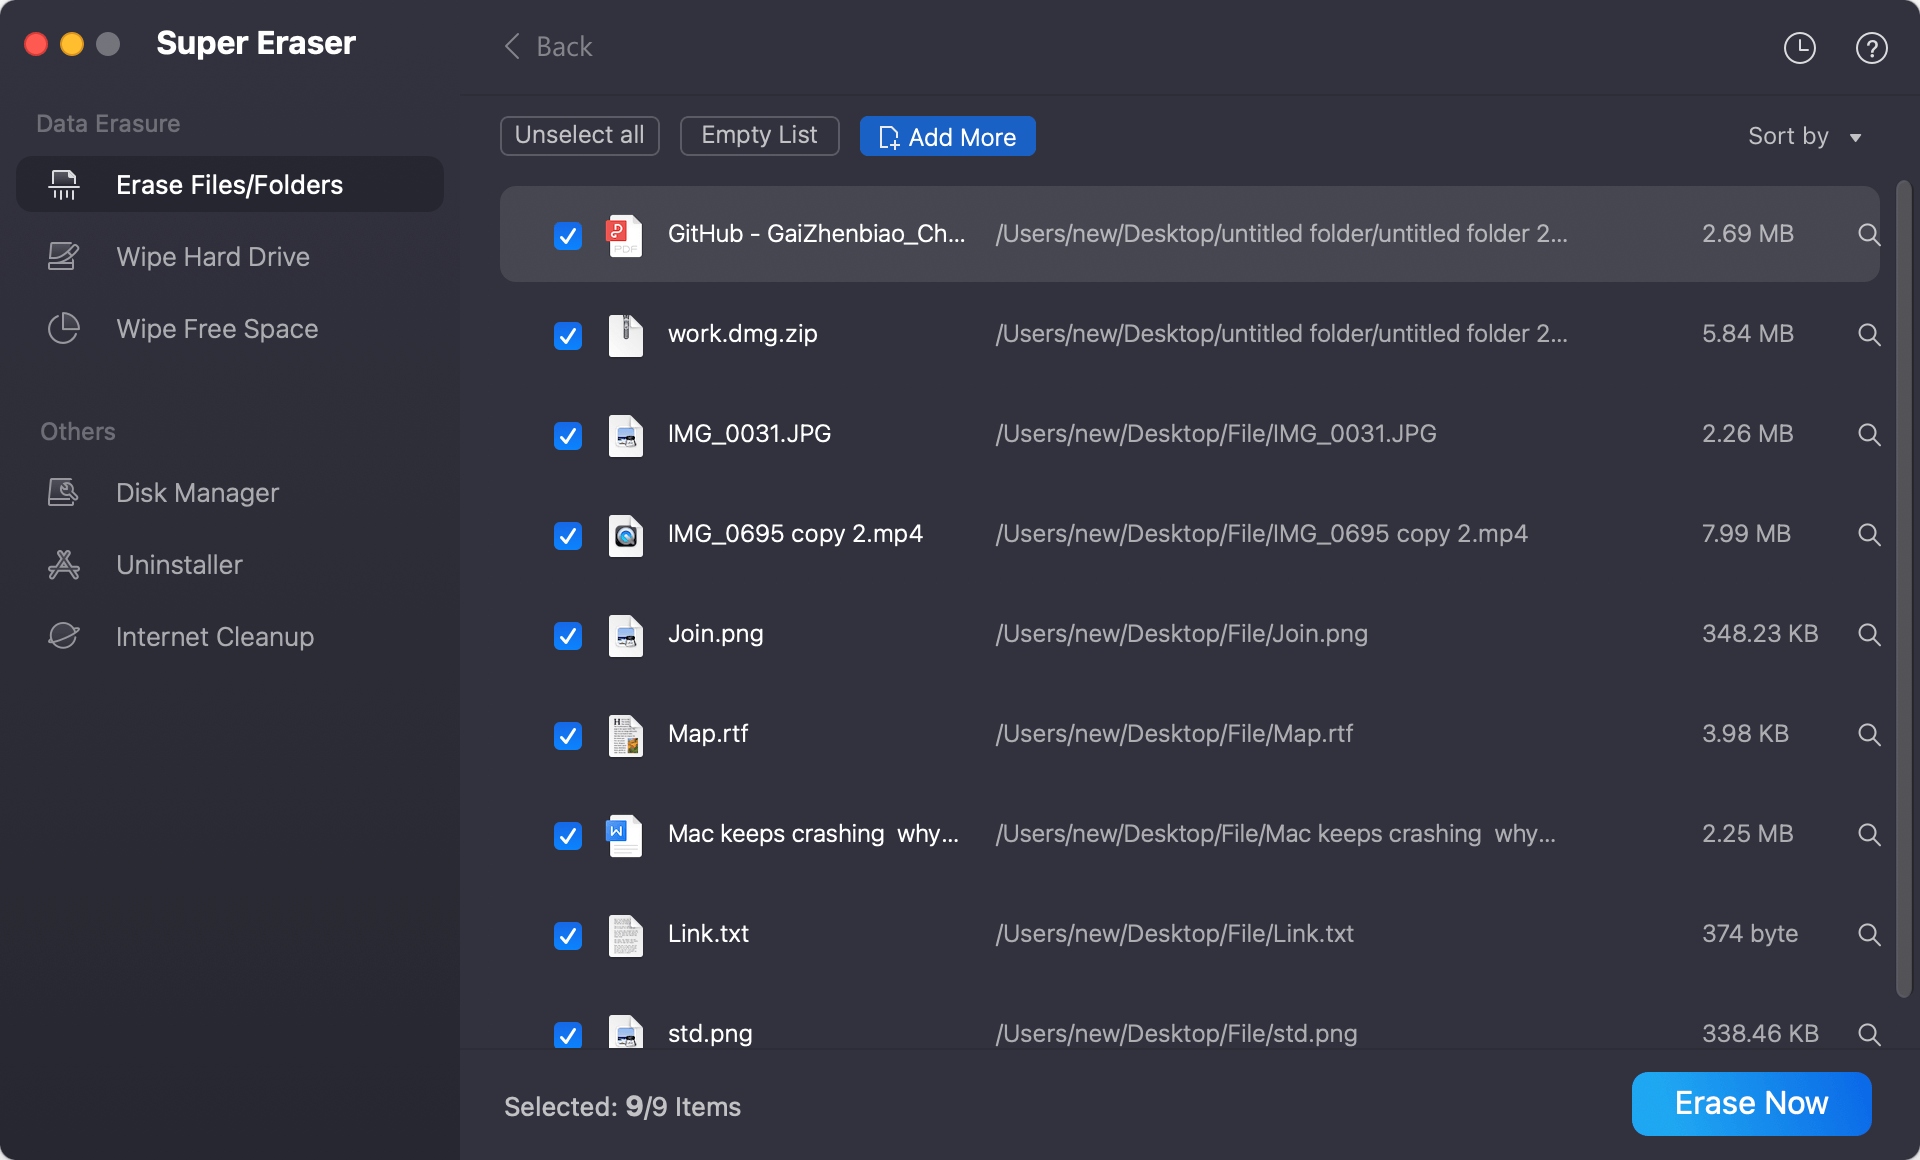
Mode 1. Selectively destroy files or folders under Mac OS X 10.10 Yosemite
DoYourData Super Eraser for Mac allows you to shred & destroy files/folders under Mac OS X 10.10 Yosemite. Just launch this software on your Mac, you will see the first data erasure mode – Erase Files/Folders. What you need to do is adding the files or folders you want to erase, then click on Erase Now button to securely and permanently erase the selected files/folders.
Mode 2. Wipe entire hard drive under Mac OS X 10.10 Yosemite
In some cases you need to destroy and wipe all your Mac data under 10.10 Yosemite. This mode "Wipe Hard Drive" can help you wipe the entire hard drive to destroy and wipe all the existing data and deleted/lost data stored on the hard drive under Mac OS X 10.10 Yosemite.

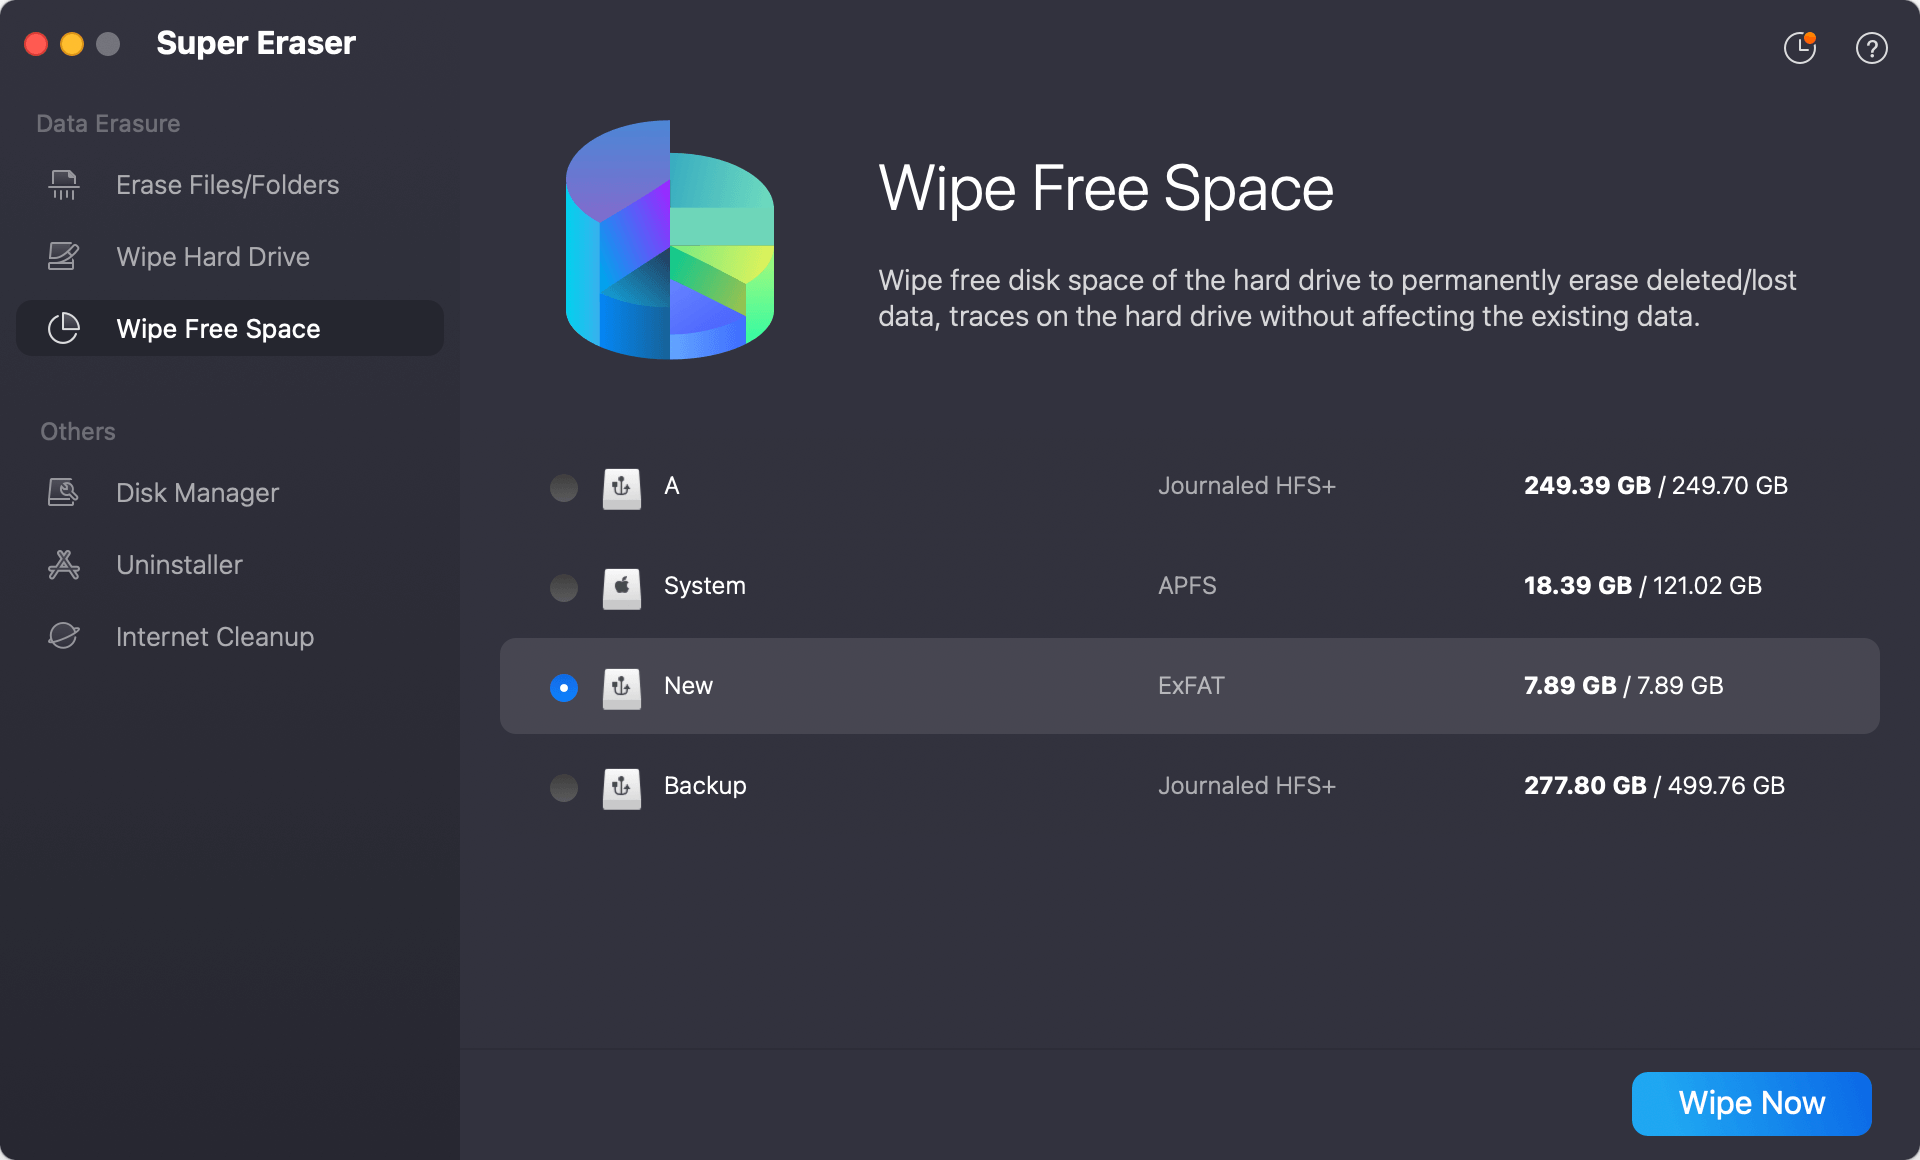
Mode 3. Wipe free disk space under Mac OS X 10.10 Yosemite
The deleted and lost data is stored on the free disk space of the internal drive. If you only want to wipe the deleted/lost data, this mode is the best option. It will wipe the free disk space under Mac OS X 10.10 Yosemite and destroy all the deleted/lost data without affecting the existing data.
Because that DoYourData Super Eraser for Mac will permanently destroy and wipe data under Mac OS X 10.10 Yosemite, so please back up your useful files to another hard drive before using DoYourData Super Eraser for Mac. It is strongly recommended to destroy and wipe all sensitive data before you sell/donate/giveaway your Mac computers or storage media devices. DoYourData Super Eraser for Mac also is the best option to clean Mac hard drive, format hard drive under OS X 10.10 Yosemite.
More Data Erasure Tools for Mac OS X Yosemite:
- CCleaner: Known for its comprehensive cleaning capabilities, CCleaner includes a Drive Wiper feature.
- SuperDuper!: Primarily a backup tool, but can also perform secure erases.
- Drive Genius: A professional-grade utility with advanced data wiping features.
Pros and Cons of Using Third-Party Software:
- Pros: Often more user-friendly, additional features like scheduled wipes, and comprehensive reports.
- Cons: May require purchase, potential compatibility issues, and the need to trust third-party software.
#3 Terminal Commands
For advanced users, Terminal provides a powerful way to securely erase data from your Mac.
1. Introduction to Using Terminal for Data Wiping:
- Terminal commands can offer more control and precision over the wiping process. It requires familiarity with command-line interface.
2. Step-by-Step Instructions for Secure Erasure Commands:
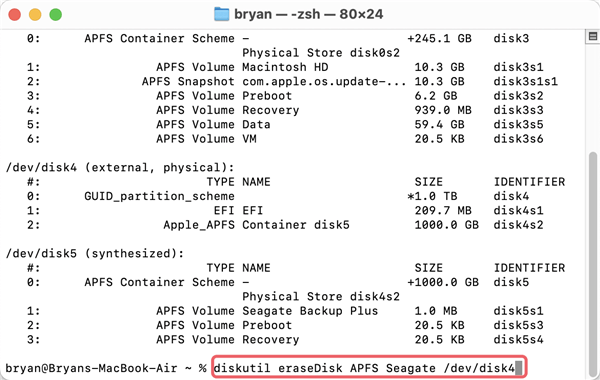
- Open Terminal from the Applications > Utilities folder.
- Identify your disk with diskutil list. Note the identifier (e.g., disk0).
- Use the following command to perform a secure erase: diskutil secureErase 4 /dev/disk0. The number “4” corresponds to a 3-pass secure erase; adjust as needed.
- Confirm and execute the command. This will overwrite the disk with random data multiple times.
Post-Wipe Considerations
Verifying Data Wipe:
After wiping your data, it’s prudent to verify that all information has been erased.
1.How Ensure All Data is Securely Erased:
- Use tools like Disk Utility's Verify Disk function to check the integrity of the drive.
- Boot from a different system and use recovery tools to ensure no data can be retrieved.
2. Tools and Methods for Verification:
- Data Recovery Software: Attempt to recover data using tools like Data Rescue or Donemax Data Recovery. If no data is recovered, the wipe was successful.
- Professional Services: For absolute certainty, consider consulting a professional data recovery service.
Setting Up Mac OS X Yosemite:
Once you've confirmed that your data is securely wiped, it's time to set up your Mac.
1. Initial Setup Steps After a Clean Install:
- Follow the on-screen prompts to configure basic settings like language, Wi-Fi, and Apple ID.
- Customize settings according to your preferences.
2. Restoring Data from Backups (optional):
- Use Time Machine or other backup methods to restore your data. Connect your backup drive and follow the restoration process.
- Manually copy files from external drives or cloud storage back to your Mac.
Conclusion
Wiping data on Mac OS X Yosemite (OS X 10.10.x) is a critical process to ensure your personal information remains secure. By following the steps outlined in this article, you can confidently erase your data using built-in tools like Disk Utility, Terminal commands, or third-party software. Always remember to back up your data before starting and verify the wipe afterward to guarantee no traces remain. Properly setting up your Mac post-wipe ensures a smooth transition back to normal use.

DoYourData Super Eraser for Mac
DoYourData Super Eraser for Mac is a 100% safe, powerful and easy-to-use data erasure program. It offers certified data erasure standards including Peter Gutmann, U.S. Army AR380-19, DoD 5220.22-M ECE to permanently erase data from Macs and external devices, making data recovery be impossible.
Written & Updated by Shirly Chen
Shirly Chen has been writing data recovery, data erasure articles for DoYourData over 4 years. She has been working as a professional website content writer & editor for quite a long time. She also writes articles about disk clone, Mac optimization, disk backup, etc.