Quick Navigation:
- Understanding Data Destruction on Mac Server
- Preparing for Data Destruction on Mac Server
- Erase Data on Mac Server with Built-in Tools: Disk Utility, Terminal
- Wipe Data on Mac Server with Third-party Data Erasure Software
- Conclusion
Data destruction is a critical process for anyone managing a Mac server. Whether you're decommissioning hardware, upgrading systems, or ensuring compliance with stringent security regulations, securely destroying data ensures sensitive information doesn't fall into the wrong hands. This article will delve into the methods, best practices, and tools available for securely destroying data on a Mac server.
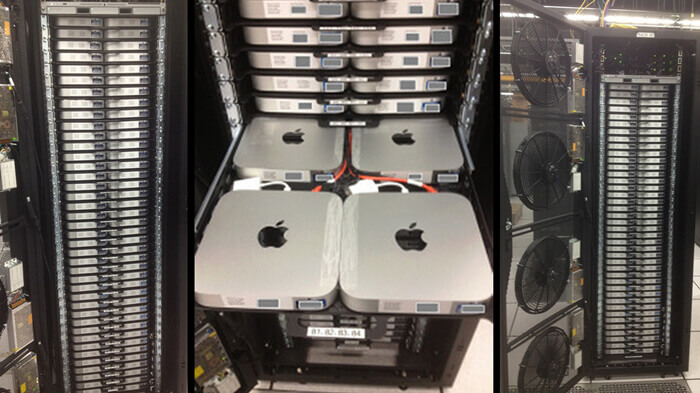
Understanding Data Destruction on Mac Server
Data destruction is the process of rendering data unreadable and irretrievable. Unlike simple data deletion, where files are removed from view but can often be recovered with specialized software, data destruction ensures that the data is permanently eradicated. There are two main types of data destruction: physical and digital.
- Physical Destruction: Involves physically damaging the storage media to make data recovery impossible.
- Digital Destruction: Utilizes software to overwrite existing data with random patterns, ensuring that the original data cannot be recovered.
Preparing for Data Destruction on Mac Server
Before initiating any data destruction process, it's crucial to prepare adequately. This preparation includes:
- Backing Up Important Data: Ensure that all necessary data is backed up. Use external drives, cloud storage, or another server to save copies of important files. With disk cloning software, you can clone everything from your Mac Server disk to an external hard drive and create a full bootable clone backup.
- Verifying Backup Integrity: After backing up, verify that the data is intact and accessible. This step prevents data loss if something goes wrong during the destruction process.
- Compliance with Data Protection Laws (optional): Ensure you understand and comply with relevant data protection regulations. This includes GDPR, HIPAA, or other applicable standards, which often have specific requirements for data destruction.
Erase Data on Mac Server with Built-in Tools: Disk Utility, Terminal
macOS provides robust tools for securely erasing data. These include Disk Utility and Terminal commands.
#1 Disk Utility
Disk Utility is a versatile application included with macOS that offers a range of features for managing disk drives and volumes. Among its capabilities is the ability to securely erase data, which is particularly useful when preparing to decommission a server or when you need to remove sensitive information from a drive.
Step 1. Opening Disk Utility: To begin, open Disk Utility by navigating to Applications > Utilities > Disk Utility. This application provides a graphical interface for managing disks and partitions.
Step 2. Selecting the Drive: Once Disk Utility is open, you will see a list of available drives and volumes on the left side of the window. Select the drive or volume that you wish to erase. Be cautious to choose the correct drive, as erasing it will permanently delete all data contained on it.
Step 3. Erasing the Drive: With the drive selected, click the "Erase" button located at the top of the window. This action opens a dialog box where you can specify how the drive will be erased.
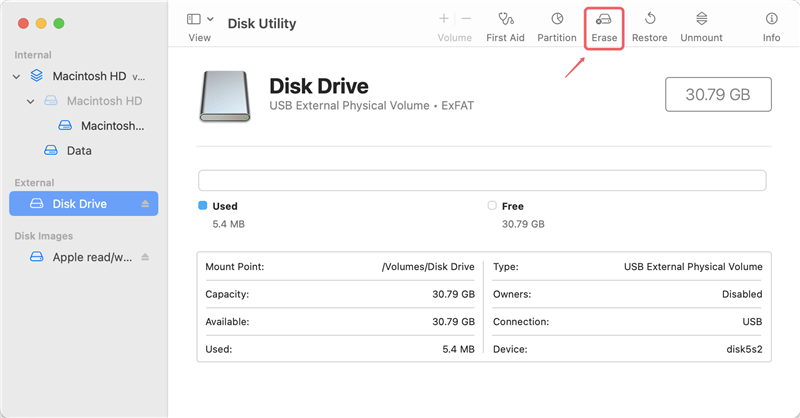
Step 4. Choosing a Secure Erase Option: In the dialog box, you will find options for configuring the erase process. Click on the "Security Options" button to reveal different levels of data erasure. macOS offers several options:
- Fastest Option: Single-pass erase, which quickly writes over the data with zeros. While this method is faster, it is less secure as it does not fully ensure data is irretrievable.
- Moderate Security: Multi-pass overwrites, such as a three-pass or seven-pass erase. These options write multiple layers of random data over the existing data, providing greater security and making it more difficult to recover the original information.
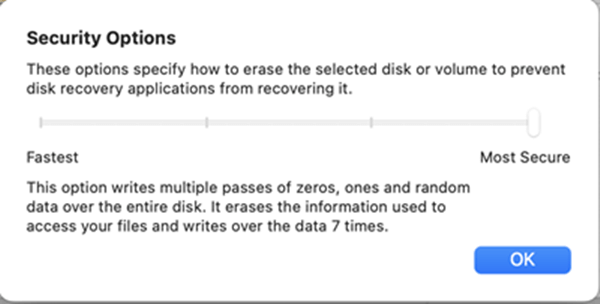
Step 5. Confirming the Erasure: After selecting the desired security level, click the "Erase" button to begin the process. Disk Utility will prompt you to confirm your decision, as this action will permanently erase all data on the selected drive. Once confirmed, Disk Utility will proceed with the erasure process according to the security options you have chosen.

Step 6. Completion and Verification: After the erasure process is complete, Disk Utility will notify you. It's advisable to verify that the drive has been securely erased by attempting to recover data using recovery tools. This step ensures that no residual data remains.
🔖 Note:
● The data which is erased by Disk Utility is not lost for good and can be recovered by data recovery software.
● If you want to erase the startup disk of Mac Server, restart the Mac and boot it into macOS Recovery mode, select Disk Utility. Then select the startup disk and erase it with Disk Utility.
#2 Terminal Commands
- For more advanced users, Terminal provides command-line tools for data destruction. The diskutil command is particularly useful.
- Example: diskutil secureErase freespace 3 /Volumes/yourdrive (This command performs a three-pass secure erase of free space on the specified volume).
Wipe Data on Mac Server with Third-party Data Erasure Software
Before you replace or resell the old Mac Server machine, it is strongly recommended to securely and permanently erase all data from the old hard drives of the Server to avoid data leakage. You may only delete your data from the Mac server hard drive or format the hard drive by using Disk Utility. It seems like you have cleaned up the hard drive. But it is not true, the deleted or formatted data is still stored on the hard drive and can be easily recovered by Mac data recovery software. It means other people including the Cyber-criminals, hackers or even your competitors have a golden opportunity to access to your private or business information by using a data recovery app to scan the drive.
In order to destroy and wipe Mac server data, you can try our sophisticated data erasure tool.
DoYourData Super Eraser for Mac is one of the best data erasure tools that can be used to destroy and wipe Mac server data completely and permanently.
DoYourData Super Eraser for Mac
- Securely and permanently erase files/folders on Mac Server.
- Wipe old Mac Server hard drive to permanently erase all data from it.
- Wipe free disk space of your Mac Server to permanently erase all deleted/lost data.
This Mac data erasure software offers three modes to permanently erase data on Mac Server:
Method 1: Erase Files/Folders on Mac Server
If you only need to erase specific files or folders rather than wiping the entire hard drive, you can choose this erasure mode. It allows you to permanently delete selected files or folders on your Mac Server. The process is straightforward: simply choose the files or folders you want to erase and click the "Erase Now" button.
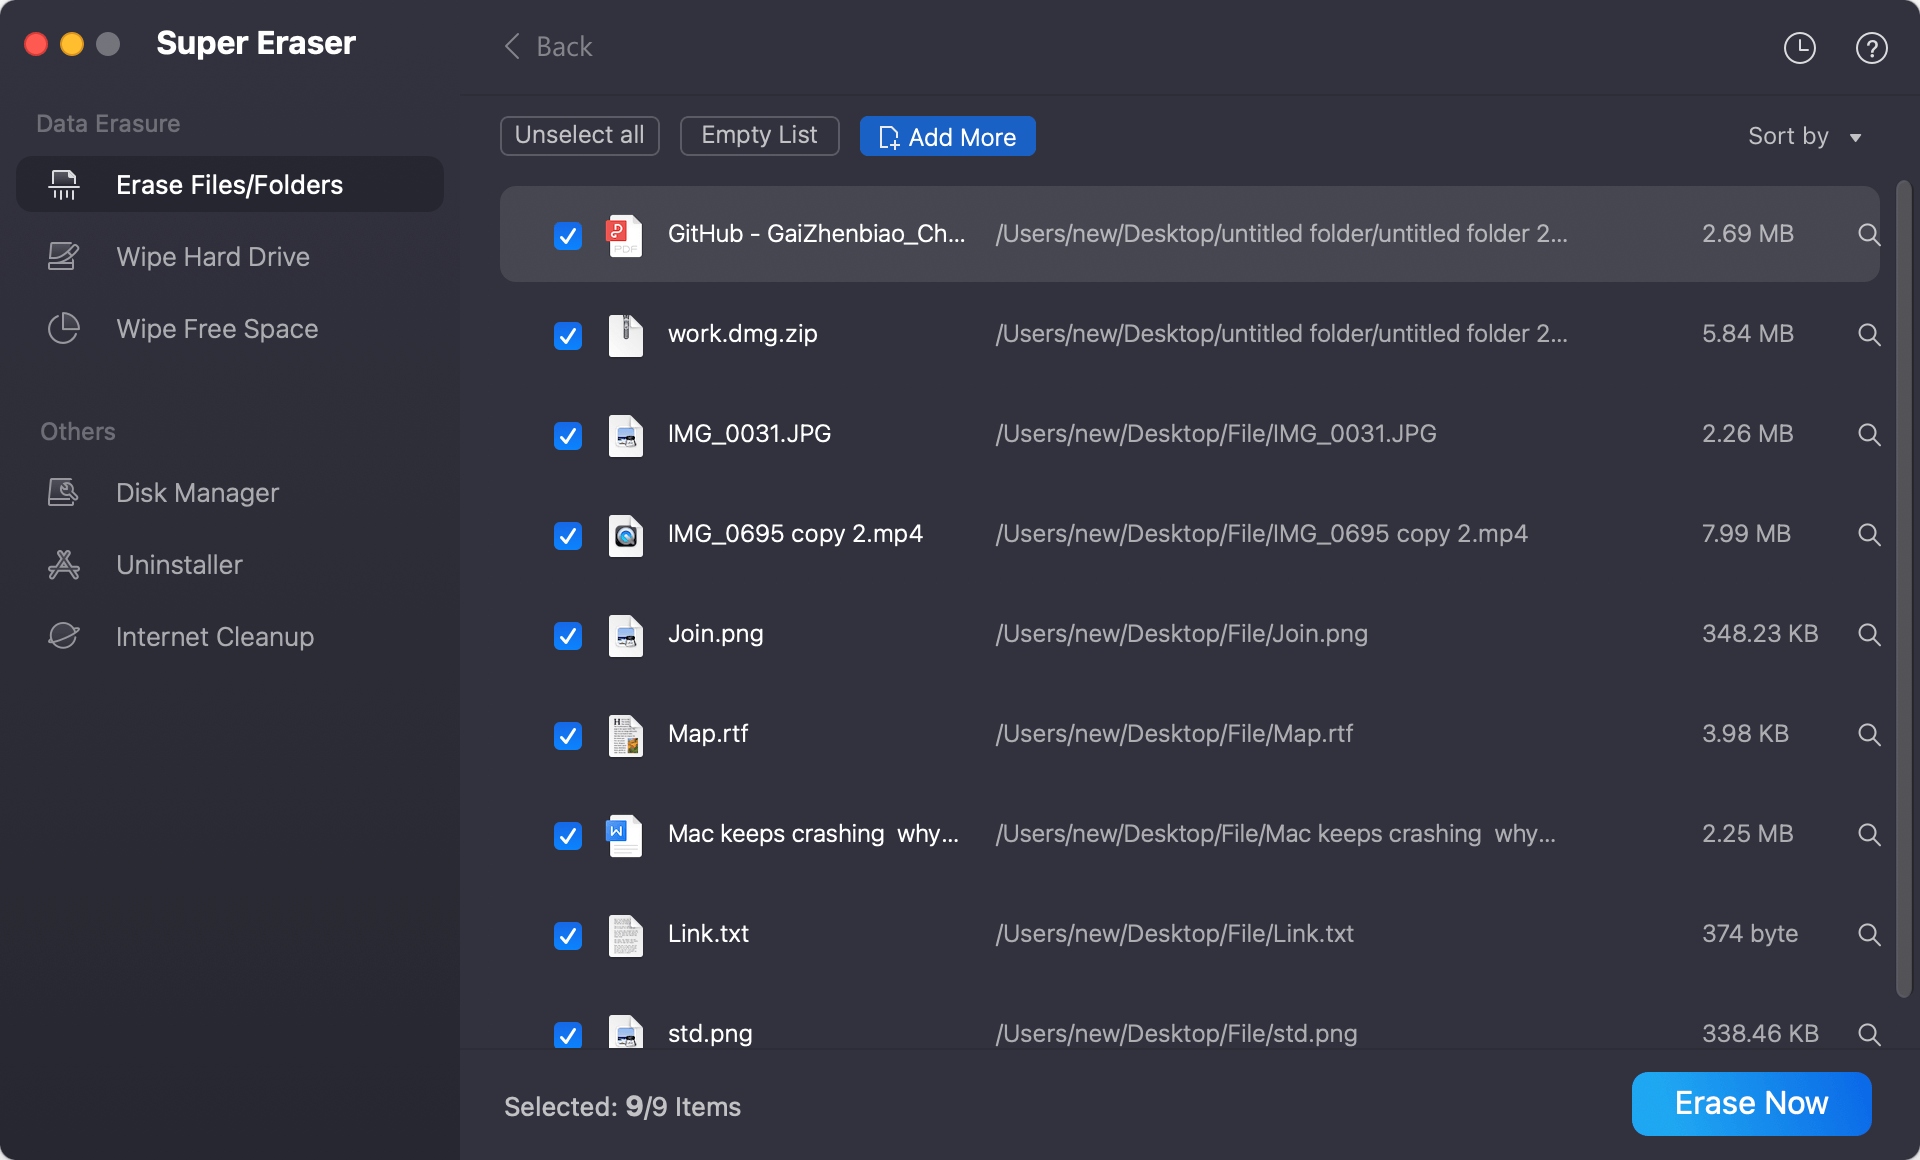
Method 2: Wipe Hard Drives in Mac Server System
This mode will permanently erase all data including existing data and any deleted or lost files from the selected hard drives in the Mac Server system.

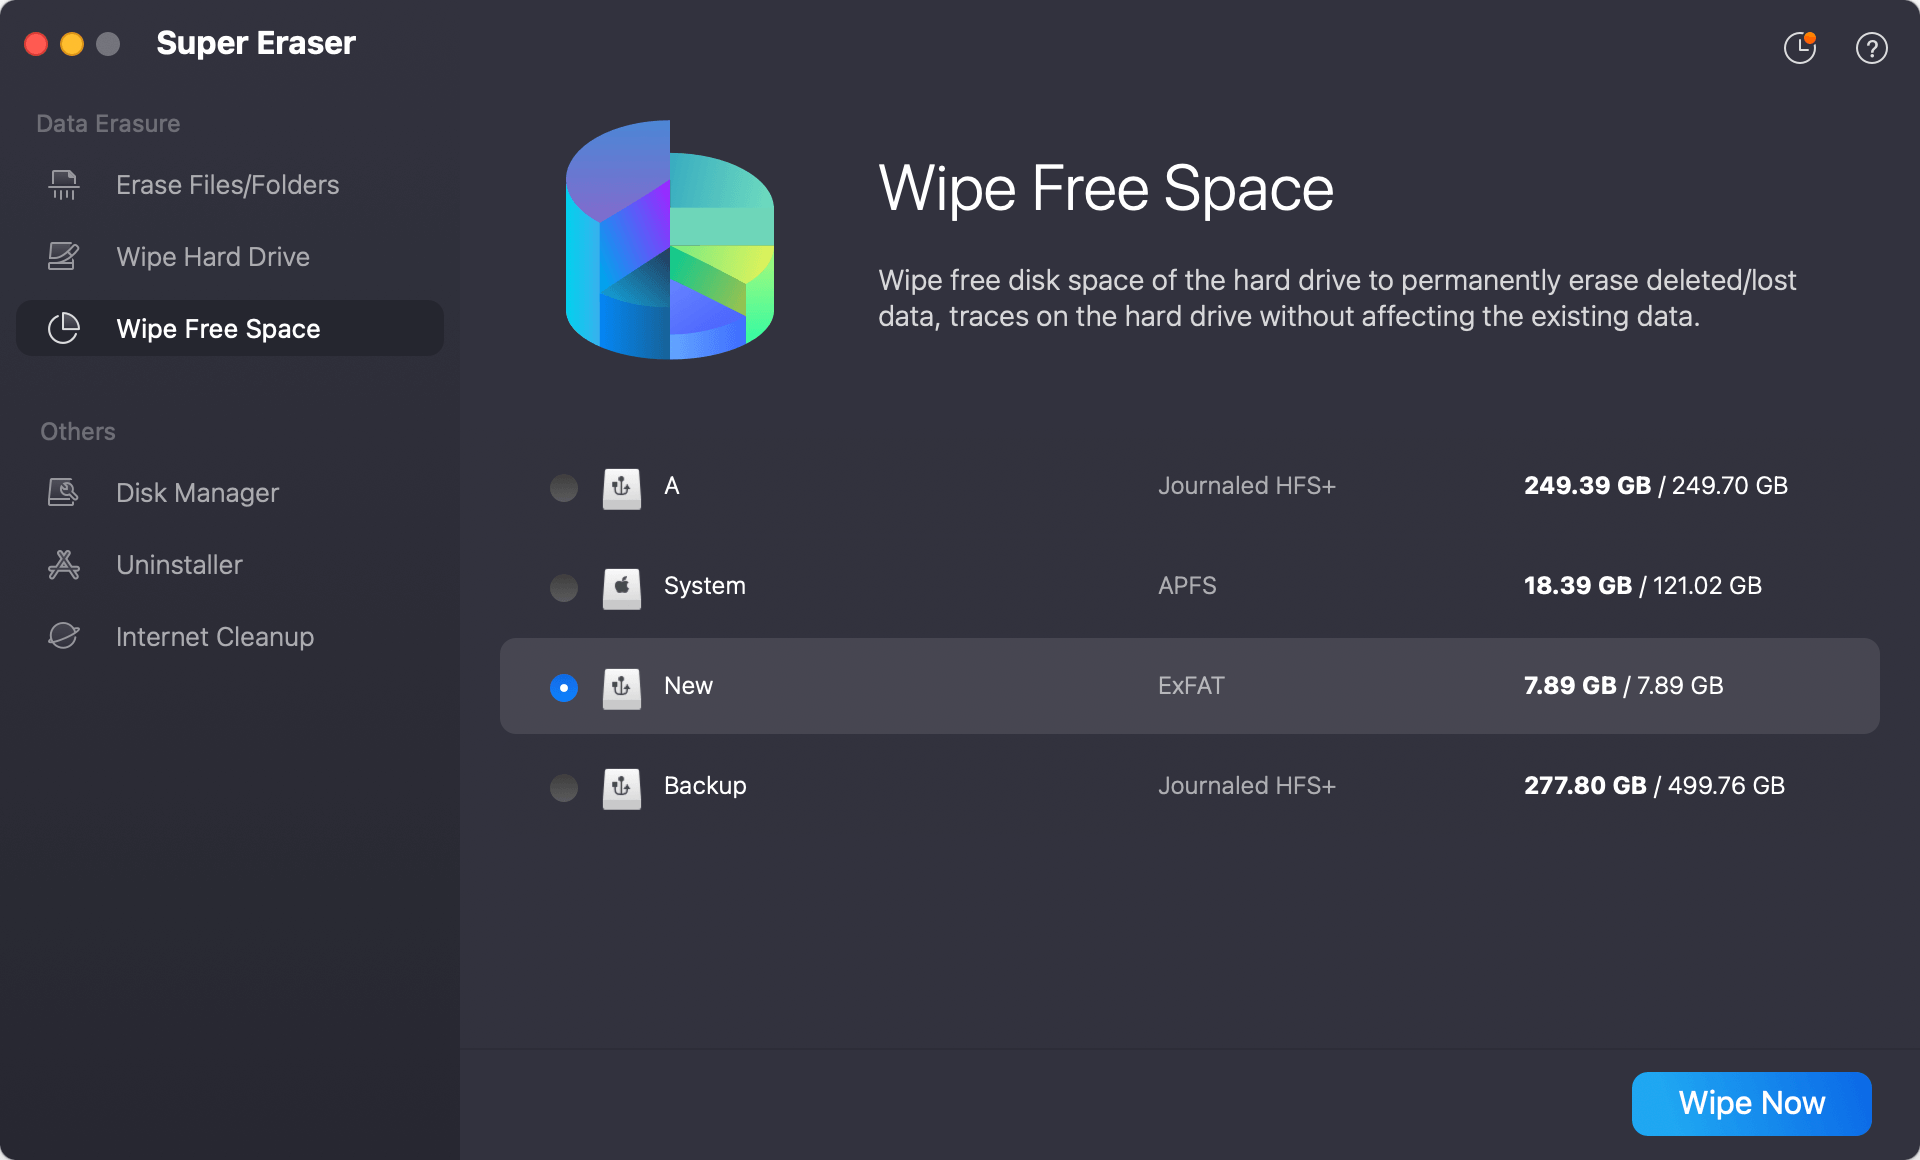
Method 3: Wipe free Space of Mac Server
Wipe Free Space mode can help you securely wipe free disk space of the Mac Sever hard drive, then permanently erase all deleted/lost data, making data recovery be impossible.
Other Data Erasure Software Solutions:
Third-party tools can offer enhanced features and usability for data destruction. Some reputable options include:
- Blancco Drive Eraser: Known for its compliance with various international data erasure standards.
- CCleaner: Offers secure deletion features alongside its cleaning capabilities.
- Eraser: A free tool that supports complex data destruction methods.
Using Blancco Drive Eraser:
- Download and install Blancco Drive Eraser.
- Boot your Mac server using the Blancco Drive Eraser bootable media.
- Follow the on-screen instructions to select and securely erase your drives.
Physical Destruction:
In certain scenarios, physical destruction of storage media might be necessary. This method is particularly useful when dealing with highly sensitive data.
- When to Consider Physical Destruction:
- When decommissioning servers with highly sensitive information.
- When storage media is damaged and cannot be securely erased using software.
- Methods for Physical Destruction:
- Shredding: Physically shredding hard drives and other storage devices.
- Degaussing: Using a degausser to disrupt the magnetic fields on hard drives, rendering them unreadable.
- Drilling: Drilling holes through hard drives to physically destroy the platters.
Best Practices for Data Destruction:
To ensure a thorough and secure data destruction process, follow these best practices:
- Complete Data Destruction:
- Always opt for secure erase methods that overwrite the entire disk.
- Verify that no data remnants are left behind.
- Verification:
- After the erasure process, use verification tools to confirm that the data has been securely destroyed.
- Tools like Disk Utility can help verify the erasure process.
- Documentation:
- Document the data destruction process for compliance purposes.
- Include details such as the date of destruction, method used, and any verification results.
Common Mistakes to Avoid:
Avoid these common pitfalls to ensure successful data destruction:
- Incomplete Data Destruction:
- Ensure the entire drive is securely erased, not just the visible files.
- Avoid using simple delete functions which do not permanently remove data.
- Overlooking Backup Data:
- Remember to securely erase backup data stored on other media.
- Backup drives should undergo the same rigorous destruction process.
- Ignoring Compliance Requirements:
- Familiarize yourself with and adhere to relevant data protection laws and standards.
- Non-compliance can lead to legal penalties and data breaches.
Verifying Data Destruction:
Verification is a crucial step to ensure that data has been securely destroyed. Methods include:
- Using Disk Utility:
- Use the "Verify Disk" feature in Disk Utility to check for remaining data remnants.
- Third-Party Verification Tools:
- Tools like Blancco Drive Eraser provide built-in verification features.
- These tools can generate reports confirming successful data destruction.
- Manual Checks:
- Attempt to recover data using recovery software to ensure nothing remains.
- Perform multiple checks to confirm thoroughness.
Conclusion
Securely destroying data on a Mac server is essential for protecting sensitive information and ensuring compliance with data protection regulations. By understanding the difference between data deletion and data destruction, preparing adequately, and following best practices, you can ensure a thorough and secure data destruction process. Whether using built-in macOS tools, third-party software, or physical destruction methods, the key is to be thorough, methodical, and compliant with relevant standards.
DoYourData Super Eraser for Mac is a reliable Mac data erasure application. It can help you permanently erase files/folders, wipe hard drive, erase deleted/lost data on Mac Server.

DoYourData Super Eraser for Mac
DoYourData Super Eraser for Mac is a 100% safe, powerful and easy-to-use data erasure program. It offers certified data erasure standards including Peter Gutmann, U.S. Army AR380-19, DoD 5220.22-M ECE to permanently erase data from Macs and external devices, making data recovery be impossible.