How to Back Up Mac Data with Time Machine?
Time Machine, a built-in data backup tool, can help you quickly back up all data from your Mac to an external hard drive.
Quick Navigation:
In an era where data breaches and privacy concerns are increasingly prevalent, the importance of securely erasing data from our devices cannot be overstated. For users of Apple devices, understanding the nuances of data erasure is crucial to protecting personal information and ensuring that it cannot be recovered by unauthorized individuals. This article provides a comprehensive guide to Apple data erasure, explaining its significance, methods, and best practices for securely erasing data from your Apple devices.

Data erasure refers to the process of securely removing data from a device to ensure that it cannot be recovered. This is distinct from simple data deletion, which typically only removes pointers to the data, leaving the actual files intact and recoverable using specialized software. Proper data erasure involves overwriting the storage space where the data resided, making it impossible to retrieve the original information.
Data erasure is critical for several reasons:
There are several compelling reasons to securely erase data from Apple devices:
Our devices store a wealth of personal information, including photos, messages, emails, financial data, and more. If this information falls into the wrong hands, it can be used for identity theft, fraud, or other malicious purposes. Secure data erasure ensures that this information is completely removed and cannot be recovered.
When selling or donating an Apple device, it's essential to erase all personal data to protect your privacy and ensure that the new owner cannot access your information. A factory reset or a more thorough data erasure process can achieve this.
Various laws and regulations, such as the General Data Protection Regulation (GDPR) and the California Consumer Privacy Act (CCPA), require organizations to securely dispose of personal data. Complying with these regulations is essential to avoid legal penalties and maintain customer trust.
Improperly disposed devices can be a goldmine for cybercriminals. By ensuring complete data erasure, you minimize the risk of data breaches and protect sensitive information from being exposed.
DoYourData Super Eraser for Mac is an easy-to-use and 100% safe Apple data erasure program. It supports to securely wipe data from Mac hard drive, external hard drive, digital camera, HDD/SSD, memory card, RAID, Server, etc.
Three Apple data erasure modes: DoYourData Super Eraser for Mac offers three data erasure solutions to help in permanently erasing Mac machines and external storage devices. Whether you want to permanently erase a file or wipe a hard drive, this Apple data erasure software can help you.
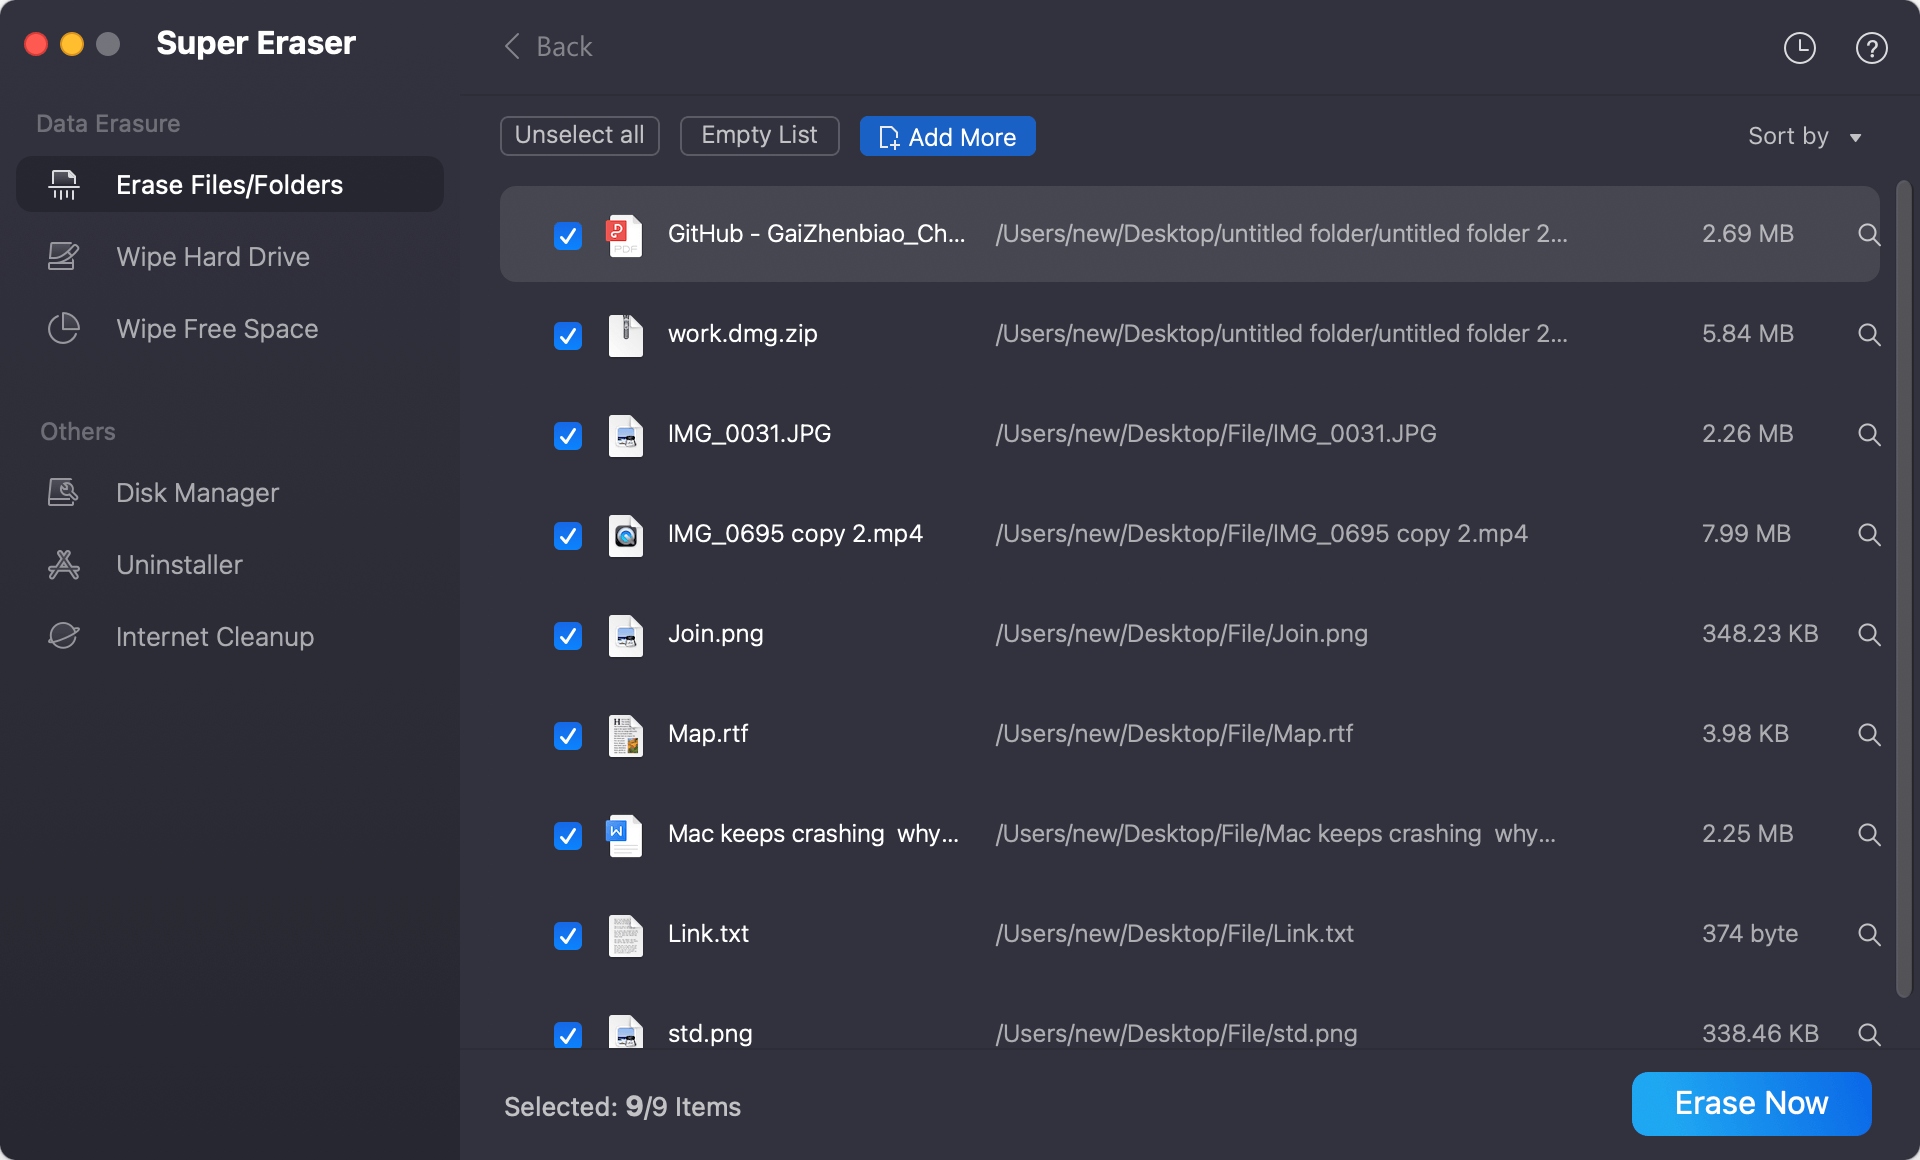
Mode 1: Erase Files
This mode can help you permanently erase files/folders from Mac computer or external device. Just add the files/folders to the erasure list, then click on "Erase Now" button to permanently erase the selected folders and files.
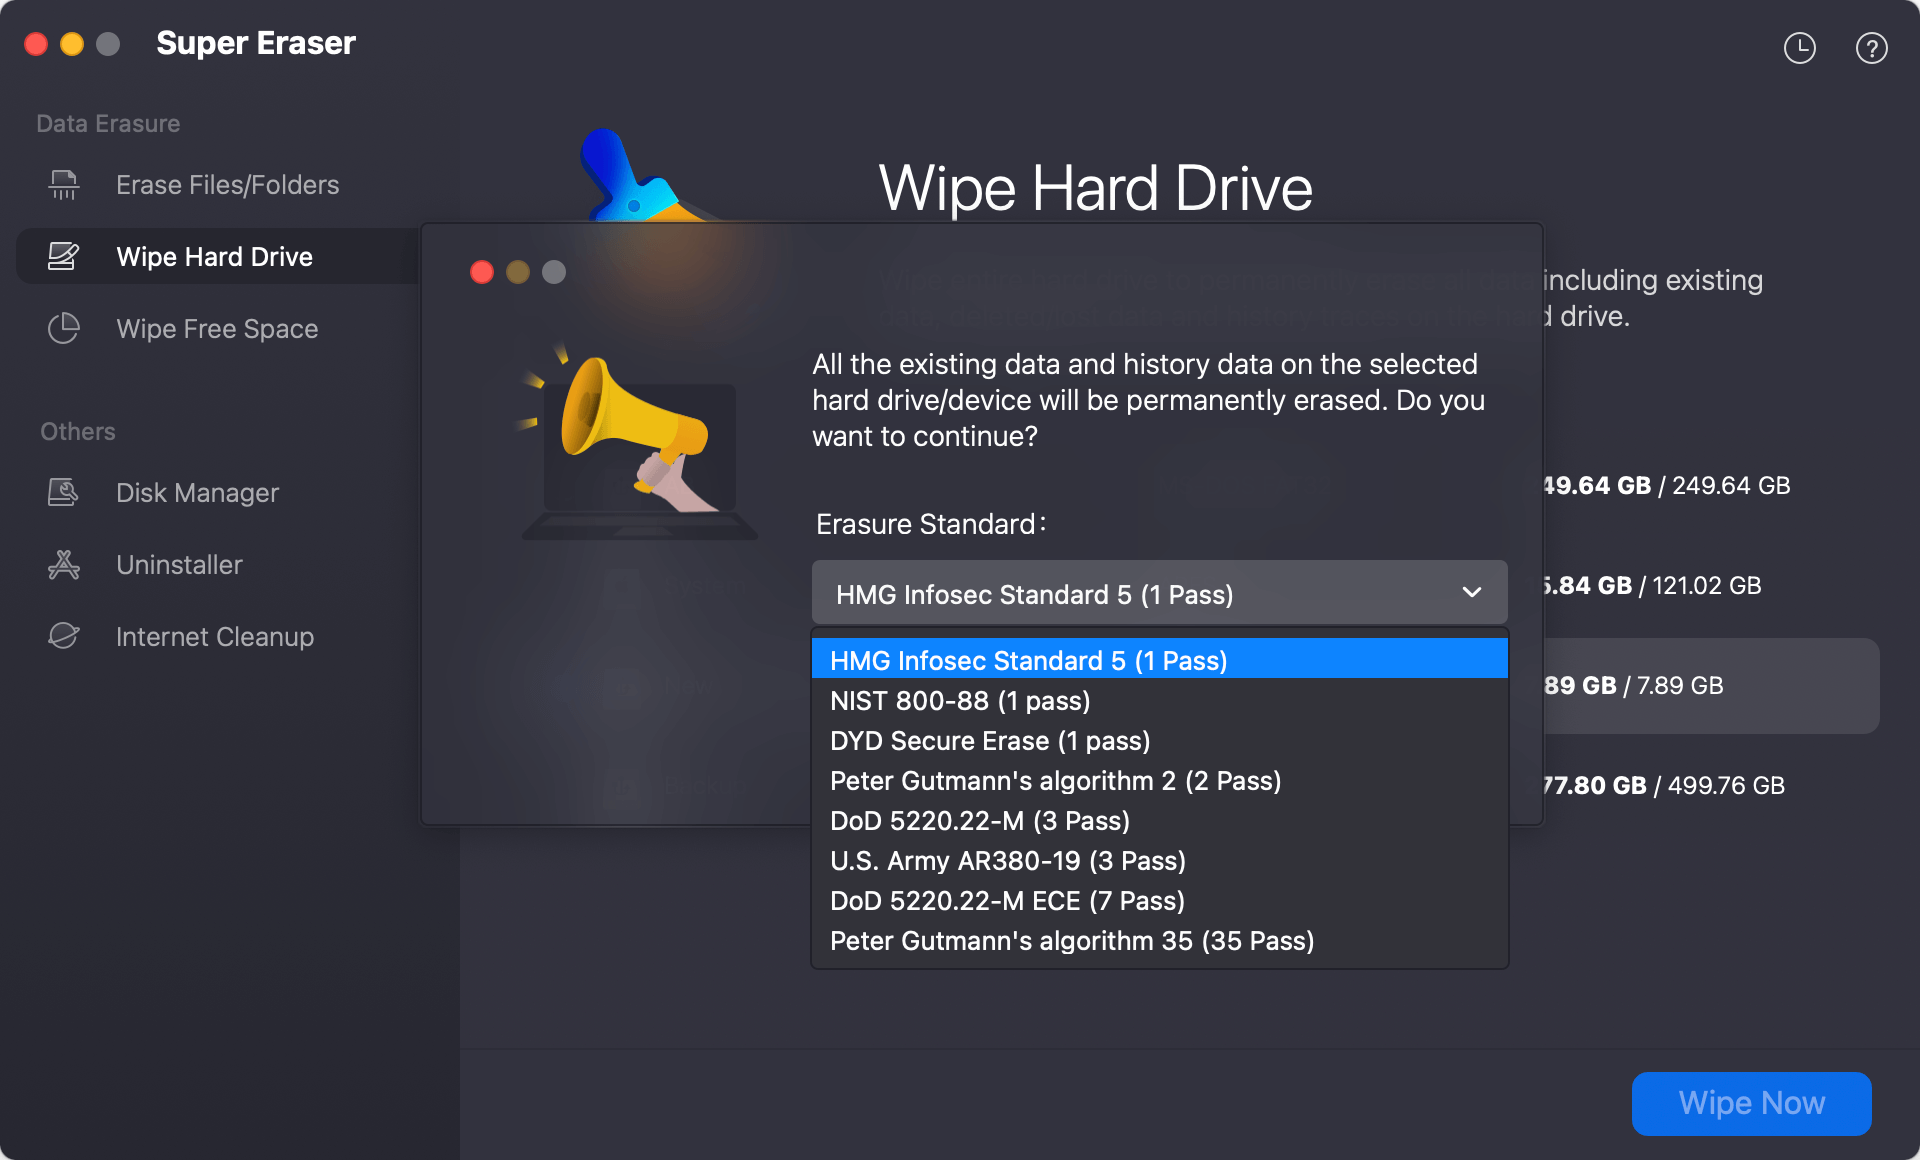
Mode 2: Wipe Hard Drive
If you want to permanently erase all data from a hard drive, just try this mode. This Apple data erasure mode will help you wipe entire hard drive to permanently erase all data information stored on the hard drive.
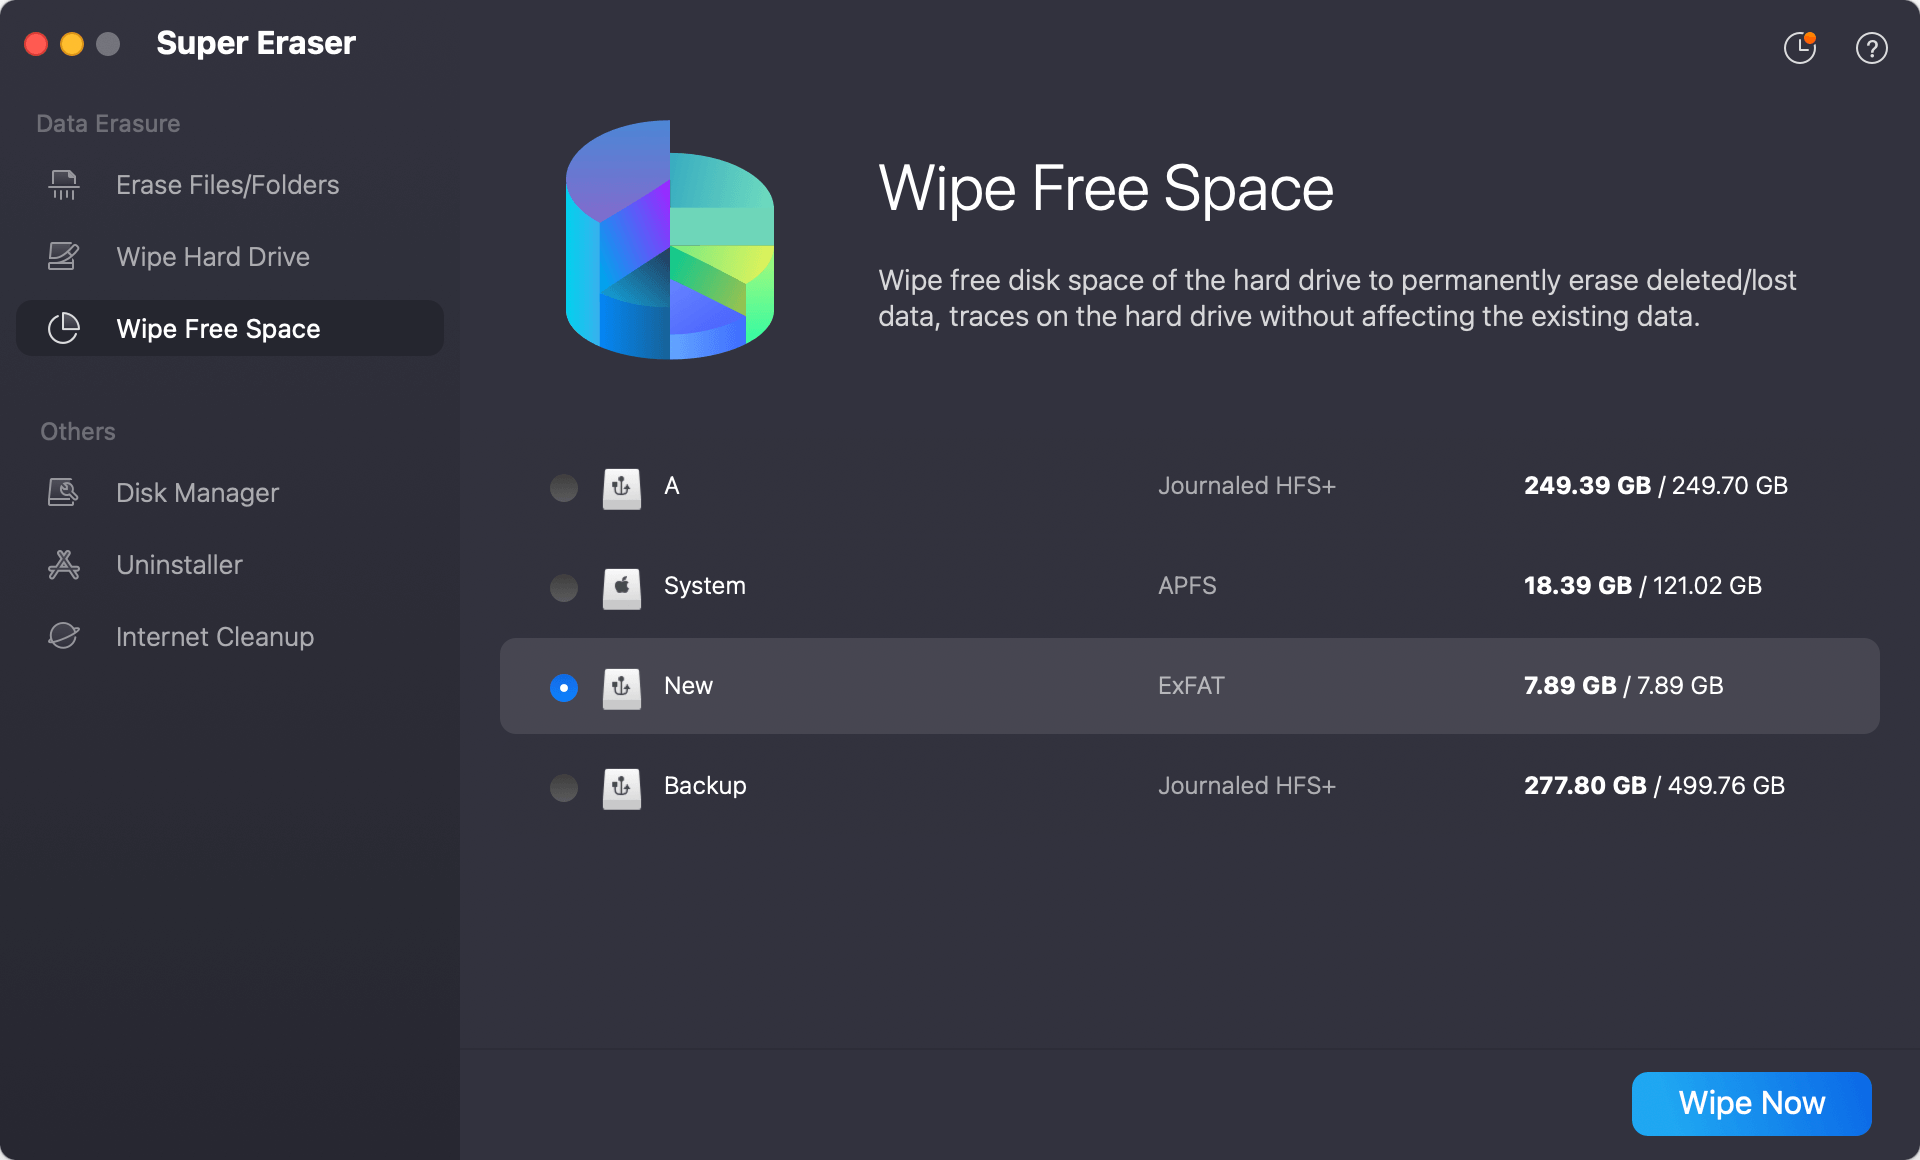
Mode 3: Wipe Free Space
This mode can help you permanently erase already deleted/lost data without affecting the existing data on the hard drive.
Apple provides several built-in tools to help users securely erase data from their devices. These tools are designed to be user-friendly and effective.
1. Factory Reset via Settings (Erase iPhone/iPad/Mac)
For Macs, iPhones and iPads, a factory reset is a straightforward method to erase all content and settings. This can be done through the device settings:
This process will remove all data and settings, restoring the device to its original factory state.
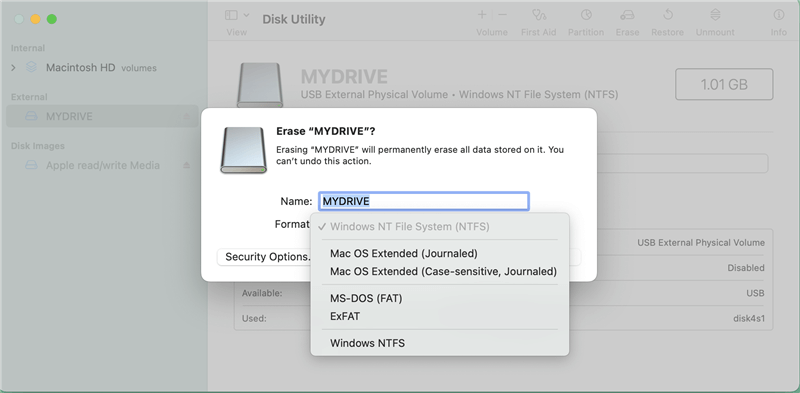
2. Securely Erasing Data Using Disk Utility (macOS)
For Mac computers, Disk Utility is a powerful tool for securely erasing data:
While Apple's built-in tools are effective, there are also several third-party data erasure tools that offer additional features and benefits. These tools are especially useful for organizations that need to erase data from multiple devices or require compliance with specific regulatory standards.
Overview of Popular Third-Party Tools:
Features and Benefits of Using Third-Party Tools:
Third-party data erasure tools offer several advantages:
Comparison of Third-Party Tools
| Features | Blancco | Donemax Data Eraser | Stellar Data Erasure |
|---|---|---|---|
| Regulatory Compliance | Yes | Yes | Yes |
| Multi Pass Overwriting | Yes | Yes | Yes |
| Remote Erasure | Yes | No | No |
| Device Support | Mac, iOS, and others | Mac, Windows, external devices | Various Storage Devices |
| User Interface | User Friendly | User Friendly | User Friendly |
Using Disk Utility for Secure Erase:
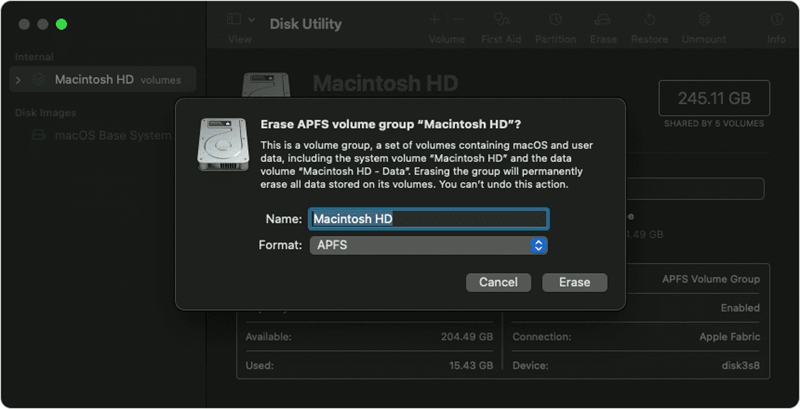
After erasing the internal drive, go back to recovery app, then choose Reinstall macOS to start reinstalling macOS.
Command-Line Options for Advanced Users:
For advanced users, the command-line tool diskutil can be used to securely erase data:
Using Third-Party Software:
Steps to Erase All Content and Settings:
Ensuring iCloud and Find My iPhone are Disabled:
Before erasing your device, ensure that iCloud and Find My iPhone are disabled:
Using Third-Party Apps for Data Erasure:
Ensuring that data has been completely erased is crucial to avoid any potential security risks. Here are some methods and tools for verifying data erasure:
Verifying Data Erasure:
Tools and Methods for Data Verification:
Before you begin the data erasure process, it's crucial to back up any important files to a secure location. This ensures you won't lose valuable data during the erasure process. Use cloud storage solutions, external hard drives, or other reliable backup methods to safeguard your information.
How to Back Up Mac Data with Time Machine?
Time Machine, a built-in data backup tool, can help you quickly back up all data from your Mac to an external hard drive.
Ensure that your operating system and data erasure tools are up to date. Software updates often include security patches and new features that enhance the erasure process. Keeping your software current helps protect against vulnerabilities and ensures you are using the most effective erasure methods available.
Encrypting your data before erasing it adds an additional layer of security. Even if some data remnants remain after erasure, encryption makes it unreadable without the decryption key. Utilize strong encryption standards, such as AES-256, to protect your data before beginning the erasure process.
Maintaining detailed documentation of the data erasure process is essential for compliance with regulations and for maintaining a record of data destruction. This documentation should include:
Data erasure is a fundamental step in safeguarding your privacy and protecting sensitive information on Apple devices. Whether you are preparing a device for resale, complying with data protection regulations, or simply ensuring your data is secure, following the right methods and best practices is crucial.
By understanding the importance of data erasure, utilizing effective methods, and adhering to best practices, you can ensure that your data is completely removed, minimizing the risk of data breaches and protecting your personal and organizational information. Always double-check the erasure process and stay updated with the latest tools and techniques to maintain the highest level of data security.
For further assistance, explore additional resources and tools available from Apple Support, Blancco, and DoYourData. By taking these steps, you can confidently secure your data and maintain your privacy across all Apple devices.

DoYourData Super Eraser for Mac
DoYourData Super Eraser for Mac is a 100% safe, powerful and easy-to-use data erasure program. It offers certified data erasure standards including Peter Gutmann, U.S. Army AR380-19, DoD 5220.22-M ECE to permanently erase data from Macs and external devices, making data recovery be impossible.
