Three Easy Solutions to Recover Deleted Desktop Items on Mac
Delete files on Mac desktop? Here are three methods to get them back: recover from Trash, Time Machine backup and using data recovery software. Do Your Data Recovery for Mac is an easy-to-use recovery application. It can help you recover deleted Mac desktop files even the trash bin is emptied.
![]() Updated by Justin Kenny on April 27, 2024
Updated by Justin Kenny on April 27, 2024
Quick Navigation:
- #1 Restore deleted desktop items from Trash
- #2 Restore deleted desktop files from Time Machine backup
- #3 Use data recovery software to recover deleted Mac desktop files
- Conclusion
- FAQs about recovering deleted Mac desktop items
It's a common digital fear to delete important files from your Mac desktop accidentally. The sinking feeling of making such a mistake is the same whether it's a crucial paper, a beloved photo, or an irreplaceable project. If you know what to do and have the right tools, getting back lost files from your Mac desktop is possible and often surprisingly easy.
This guide will discuss the different ways to recover lost data, from easy ones like restoring items from the Trash to more complex ones that use Time Machine backups and third-party data recovery tools. If you've ever looked at an empty screen and felt like everything was lost, don't worry. By the end of this guide, you'll know how to get your files and digital life back in order.
#1 Restore deleted desktop items from Trash
Step 1. Open The Trash.
To recover things you removed from your Mac's Trash, you must first open the Trash Bin. The Trash button is in the Dock at the bottom of your screen.
Step 2. Locate Deleted Items.
When you open the Trash Bin, you'll see a list of everything you've recently deleted from your desktop or other files. Scroll through the list to find the things you want to get back. Additionally, the search bar at the top right of the Trash window can help you quickly locate files or folders.
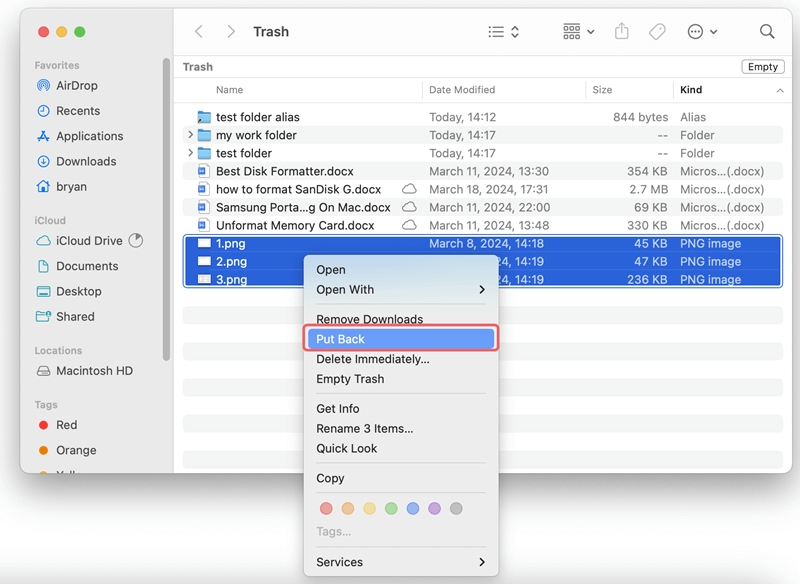
Step 3. Restore Deleted Items.
You can bring the files or folders you want to recover from the Trash back to life by clicking on them. Then, right-click on the items you want to move and pick "Put Back" from the menu that appears.
Step 4. Check Restored Items.
After restoring the deleted items, one more thing to do is to ensure they were successfully retrieved. Go back to where the files or folders were and ensure they are back where they belong.
#2 Restore deleted desktop files from Time Machine backup
Time Machine is like a guardian angel for Mac users because its automated backup tool makes getting lost data easy. Time Machine ensures that your important files are always safe and easily accessible, even if accidentally deleted. Here is a step-by-step guide on how to use Time Machine to get back lost data:
Step 1. Connect Time Machine Backup Disk.
First, save your Time Machine to your Mac and then connect the external hard drive or Time Capsule. Ensure the backup disk is linked correctly, and your system can see it.
Step 2. Open The Folder Where The Items Were Located.
Find the folder on your Mac where the things you removed were stored. It could be your desktop, the Documents folder, or any other place where the lost files were stored. If you want to restore lost files from desktop, you don’t need to open a location.
Step 3. Open Time Machine.
In the menu bar at the top right of your screen, click on the Time Machine button. Use the drop-down button to find "Browse Time Machine Backups." You can also get to Time Machine from the menu called "System Settings."
Step 4. Navigate Using the Timeline.
Once you're inside Time Machine, you'll see a timeline on the right side of the screen. This timeline contains snapshots of your machine at different times. You can scroll through the schedule to find a backup that was made before you deleted your files.
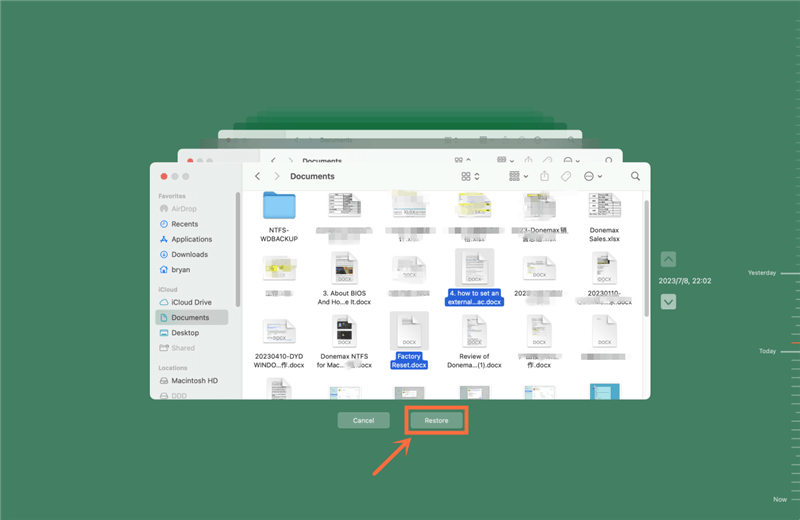
Step 5. Select And Restore Deleted Files.
As you move through the timeline, Time Machine will show you what was on your desktop or in each folder at each backup point. You can use the visual interface or the search bar to find the things you removed. Pick out the files or folders you want to get back, then click the "Restore" button.
Step 6. Confirm Restoration.
Time Machine will ask you to confirm the repair process. Once you agree, the chosen files will be restored from the backup to where they were on your Mac in the first place.
Step 7. Verification.
Once the restoration is done, ensure the deleted things are successfully recovered by looking for them in the original folder. Time Machine's easy-to-use interface and strong backup system make data recovery quick and easy.
#3 Use data recovery software to recover deleted Mac desktop files
When normal methods of recovering deleted files on your Mac, like restoring from the Trash or using Time Machine backups, don't work, third-party data recovery software is your best bet.
Choose a trustworthy third-party data recovery program from the many available online. Once chosen, download the software and install it on your Mac. Installing the software on a separate drive or partition is important to prevent the deleted data from being overwritten.
Do Your Data Recovery for Mac is an award-winning data recovery software, and it supports to recover any type of file on your Mac. With this software, you can easily and quickly restore deleted desktop files on your Mac.
Do Your Data Recovery for Mac
- Recover permanently deleted files from Mac desktop.
- Recover lost files due to deletion, formatting, reinstalling macOS, virus attacking, etc.
- Recover formatted or erased drive on Mac.
Step 1. Download and install Do Your Data Recovery for Mac on your Mac, then open it from Launchpad. If you want to recover deleted desktop files, just select the Mac internal SSD or HDD to start data recovery.

Step 2. Click on Scan button. The software will carefully go through the disk sectors, looking for traces of deleted files. Depending on how big and healthy your drive is, this process could take a while.

Step 3. After the scan, the software will show you a list of files. Preview lets you ensure that the files you have and the ones you want are right. Pick the things you want to recover, putting the most important data first.
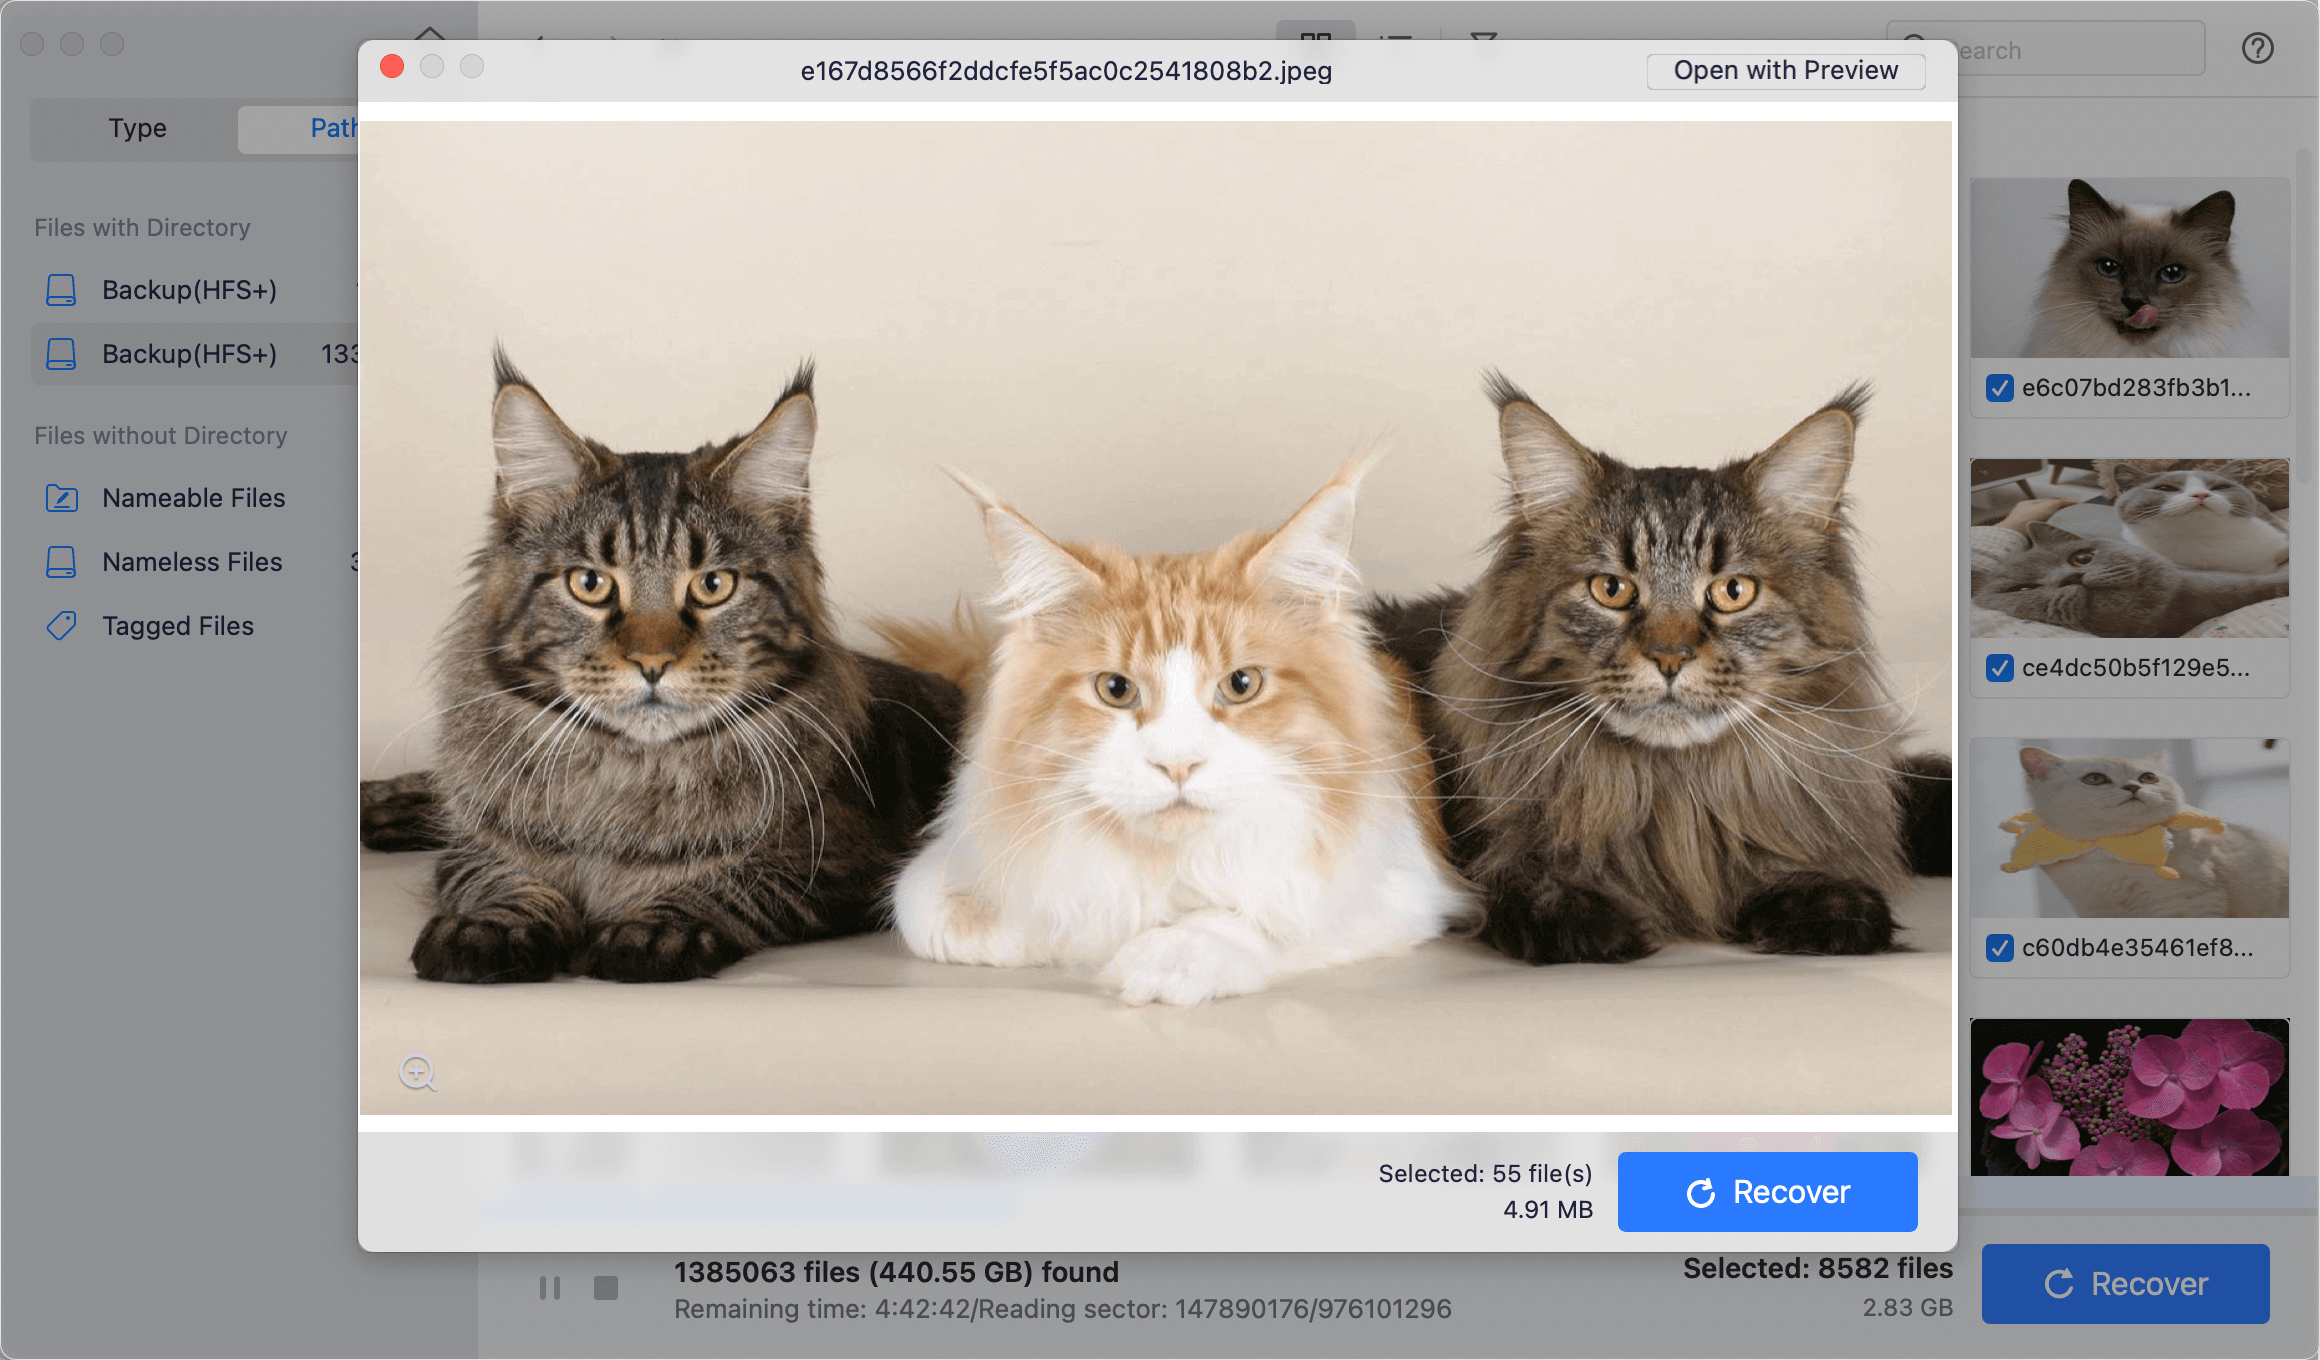
Once you've made your choices, you can start the recovery process by clicking on Recover button. The software will then do its magic, finding the files you want on your hard drive and putting them back where you want them. Be patient during this step, especially if you have a lot of data to work with.

Once the recovery process is finished, ensure the recovered files are still whole by checking them carefully. Open and look over each item to make sure it's whole and not damaged. Consider using antivirus software to look through the recovered data for possible threats.
Now that you've recovered your files, it's time to clean up and do some maintenance. Sort the recovered files into their proper folders and eliminate any duplicates or unnecessary files. You might also want to consider setting up a strong backup system to avoid losing data again.
Conclusion:
There are effective ways to recover lost data, whether you accidentally removed files from your Mac desktop or the system crashed. This guide has detailed instructions on how to get back your important files, from simply restoring things from the Trash to using Time Machine backups and third-party data recovery software.
These tips and tricks will help you feel less stressed about losing data and keep your digital life safe and organized. To keep your important data safe in the future, remember to act quickly, keep an eye on your backups, and use the right tools.
FAQs about recovering deleted Mac desktop items
1. How to recover disappeared files and folders on Mac desktop?
Firstly, check if you can restore these files/folders from Trash or Time Machine backup. If the two methods don’t work, run a data recovery app to scan the Mac hard drive and find the deleted files and folders.
2. How to recover permanently deleted items from Mac desktop?
Data recovery software, such as Do Your Data Recovery for Mac, can help you recover permanently deleted items from the Mac desktop.
- Download and install Do Your Data Recovery for Mac.
- Open this software and select the Mac internal HDD or SSD.
- Click on Scan button.
- Preview and recover lost files after scanning.
3. How to recover lost files from Mac desktop?
Here are possible ways to recover deleted Mac desktop files:
- Put back deleted files from Trash.
- Restore deleted items from iCloud.
- Restore lost files from Time Machine backup.
- Recover permanently deleted files using Mac data recovery software.

Do Your Data Recovery for Mac
Do Your Data Recovery for Mac, one of the best Mac data recovery software, can help you easily and completely recover deleted, formatted or lost files from Mac HDD/SSD, external HDD/SDD, USB drive, memory card, digital camera, or other storage devices.
Written & Updated by Justin Kenny
Justin Kenny is a writer & editor of DoYourData. He joined DoYourData in 2016 and focuses on writing articles about Windows data recovery, Mac data recovery, external device data recovery, hard drive clone, data erasure, Mac cleanup, computer issue fixes, etc. He is a super fan of Apple devices and is big on testing new digital device and system utility software.