Create Full Backup for Mac
Clone the Mac and make a complete and bootable copy of your macOS.
Quick Navigation:
Encountering the "File system check exit code is 8" error on macOS can be a daunting experience for many users. This error typically indicates a significant issue with the file system, which could result in system instability or data loss. Understanding this error and taking appropriate measures to resolve it is crucial to maintaining the health of your macOS system and safeguarding your data.

In this guide, we'll explore what the "File system check exit code is 8" error means, how to fix it, and how to recover any lost data. By following the steps outlined here, you'll be equipped to tackle this problem effectively and prevent future occurrences.
The "File system check exit code is 8" error is a file system-related issue that macOS users might encounter. The error code 8 is part of the file system check (fsck) process, which is a utility used to verify and repair file systems.
In the context of macOS, exit code 8 typically signifies that fsck encountered a severe issue with the file system that it could not repair automatically. This could be due to a variety of reasons, including:
When fsck returns exit code 8, it usually means that the file system has inconsistencies that need manual intervention to resolve.
Before diving into the technical solutions, it's crucial to take some preliminary steps to ensure that you don't inadvertently lose any data or exacerbate the problem.
Before attempting any repairs, it is imperative to back up your data. This precaution ensures that you have a copy of your important files in case something goes wrong during the repair process.
How to back up your data:
1. Using Time Machine:
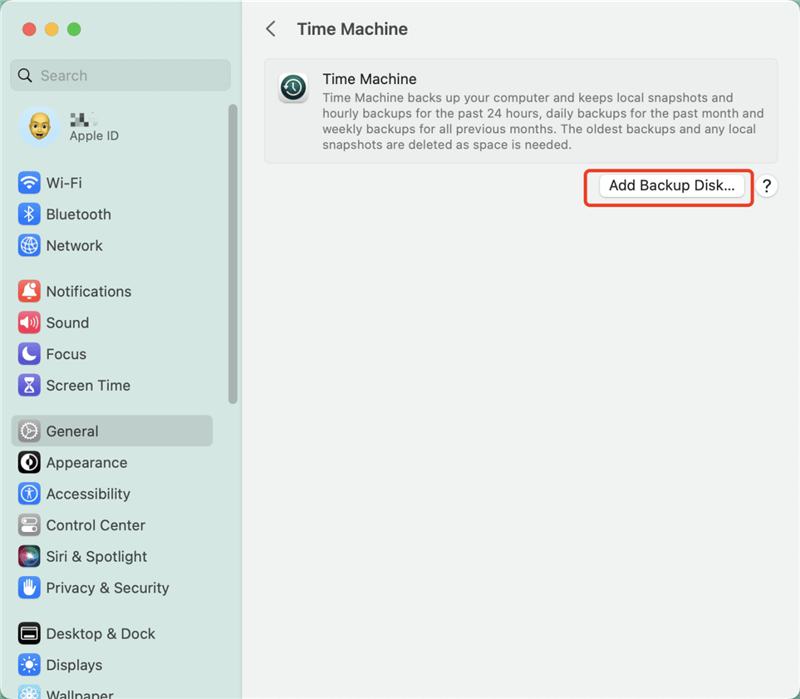
2. Manually Copying Files:
3. Using Cloud Storage:
One useful tool that lets you troubleshoot and fix your machine is macOS Recovery Mode. How to boot into Recovery Mode is as follows:
1.Turn on your Mac again.
2.Press and hold the Power button (or Command (⌘) + R for Intel based Macs) right away until the spinning globe or the Apple logo appears. Select Options and click Continue.
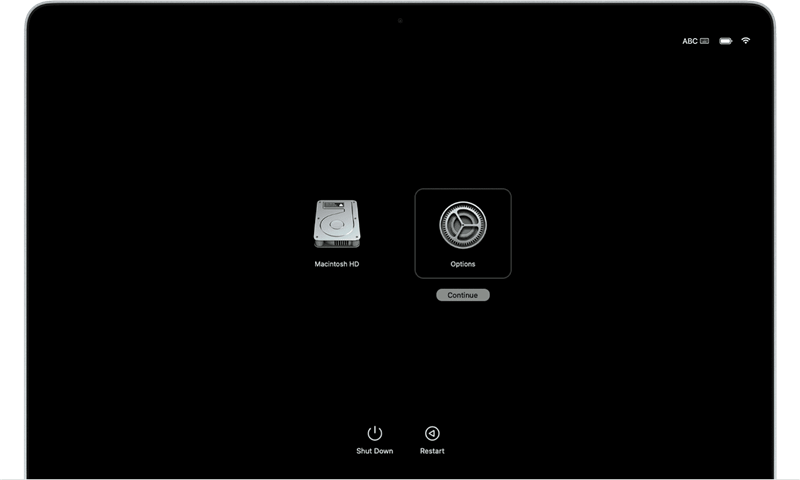
3.Then you will see the macOS Utilities window appears.
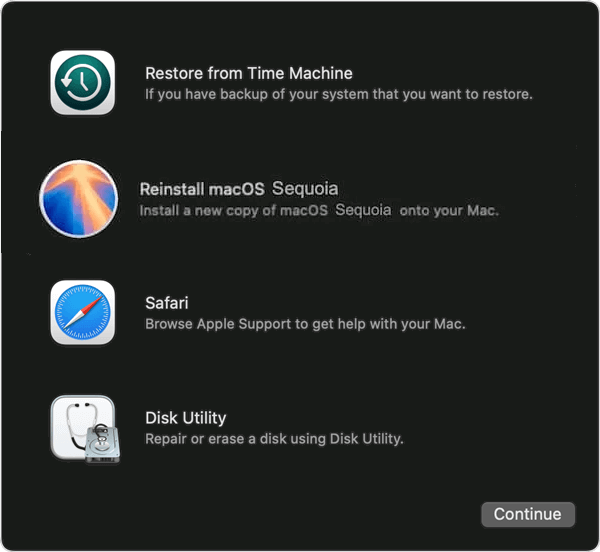
In Recovery Mode, you can access tools such as Disk Utility and Terminal, which are essential for addressing file system issues.
Once you've backed up your data and entered Recovery Mode, you can proceed with troubleshooting and fixing the "File system check exit code is 8" error.
Disk Utility is a built-in macOS application designed to manage disks and volumes. It includes a feature called First Aid that can repair disk errors.
Steps to Run Disk Utility and Perform First Aid:
1.In the macOS Utilities window, select Disk Utility and click Continue.
2.In the Disk Utility sidebar, choose the disk or volume that you want to repair. Click the First Aid button in the toolbar.
3.Confirm that you want to run First Aid by clicking Run. Disk Utility will check the disk for errors and attempt to repair them.

If Disk Utility reports that the disk has been repaired, restart your Mac and see if the error persists. Otherwise, you may need to try additional methods or consider reformatting.
If Disk Utility cannot resolve the issue, you can use Terminal to run the fsck command. This command checks and repairs file system inconsistencies.
Steps to Run fsck in Terminal:
1. In the macOS Utilities window, click the Utilities menu at the top of the screen and select Terminal. (for Intel based Macs, restart your Mac and immediately hold down Command (⌘) + S until you see a black screen with white text.)
2. At the command prompt, type the following command and press Enter:
/sbin/fsck -fy
The -f option forces the file system check, and -y automatically answers "yes" to any prompts.
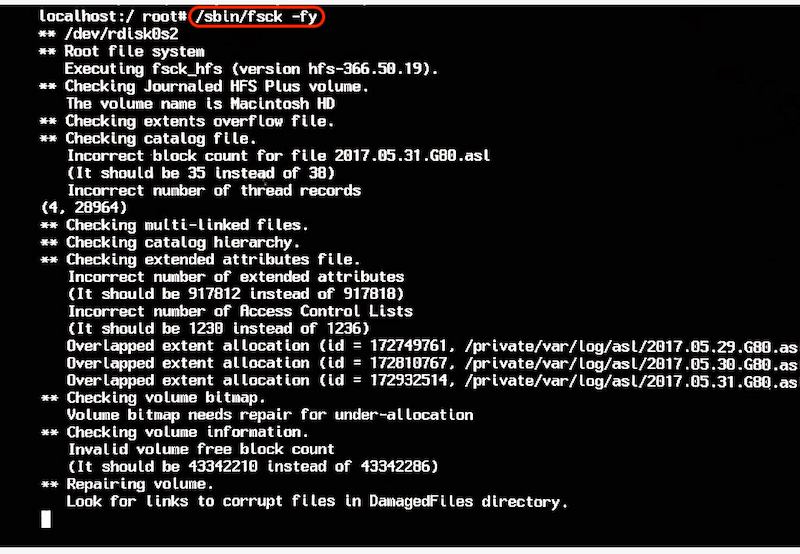
3. The command will check the file system and attempt repairs. Follow any on-screen instructions.If the output indicates that the file system was modified, run the fsck command again until you receive a message stating that the file system appears to be OK.
4. After running fsck, type reboot and press Enter to restart your Mac.
If all else fails and the disk cannot be repaired, reformatting might be necessary. This process will erase all data on the disk, so it should only be done if you have a backup or if data recovery is not a priority.
Steps to Reformat Using Disk Utility:
1. Follow the steps mentioned earlier to open Disk Utility. In the sidebar, choose the disk you want to reformat. Click the Erase button in the toolbar.
2. Choose a format (e.g., APFS for newer Macs or Mac OS Extended (Journaled) for older Macs). Enter a name for the disk and click Erase.
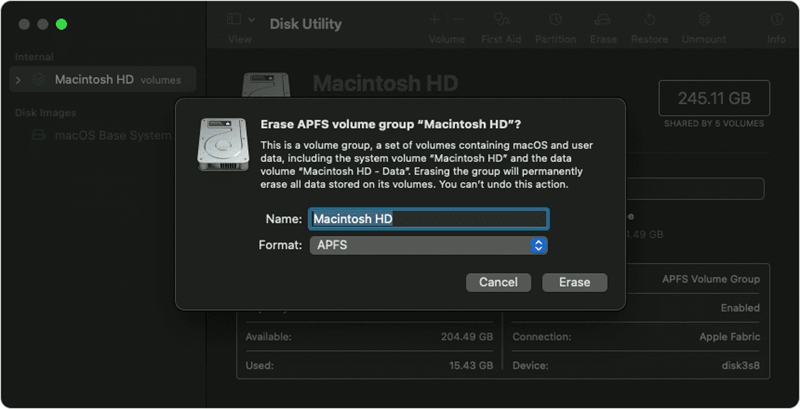
3. After erasing the disk, you'll need to reinstall macOS. Exit Disk Utility and go back to the macOS Utilities window, select Reinstall macOS and follow the instructions.
If you've encountered file system errors, there's a chance that data may be lost or inaccessible. Fortunately, there are several methods for recovering lost data.
macOS offers built-in tools that can help you recover lost data, especially if you've been using Time Machine or have local snapshots.
Steps to restore data from Time Machine backups:
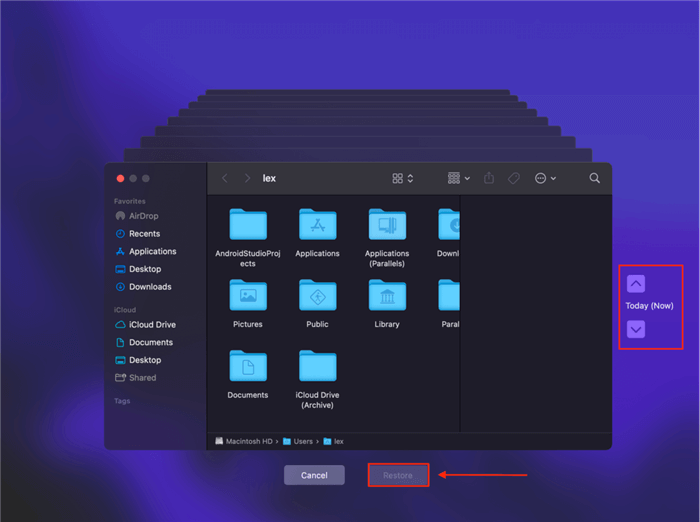
1. Connect your Time Machine backup drive. Open Time Machine from menu bar icon by clicking the Browse Time Machine Backups, or from the System Settings.

2. Navigate through the timeline and find the files or folders you want to recover. Select the desired items and click Restore to recover them to their original location.
If built-in tools are insufficient, you may need to use third-party data recovery software. There are several reliable options available. The best one we recommended is Do Your Data Recovery for Mac.
Why use Do Your Recovery for Mac? The software is reliable and keep updated for new macOS. It offers the robust features for success data recovery in different data loss situations:
General process for using Do Your Data Recovery for Mac:
Step 1. Download and install the data recovery tool on a separate drive or partition to avoid overwriting lost data. Run the software and choose the affected disk.

Step 2. Click on the Scan button and initiate a scan of the affected disk. It will deeply scan the disk to find any lost files.

Step 3. Once the scan is complete, locate the wanted files and preview the files to verify if the files are recoverable.

Step 4. Select the files and click the Recover button, choose a location to save the recovered files, preferably on a different drive.

To minimize the risk of encountering file system errors in the future, consider implementing the following best practices:
Regular backups are essential for protecting your data. Use Time Machine or other backup solutions to ensure that your files are regularly saved and can be easily restored if needed.
Perform routine checks and maintenance to keep your disk in good condition. Regularly run Disk Utility's First Aid and monitor your disk's health for any signs of issues.
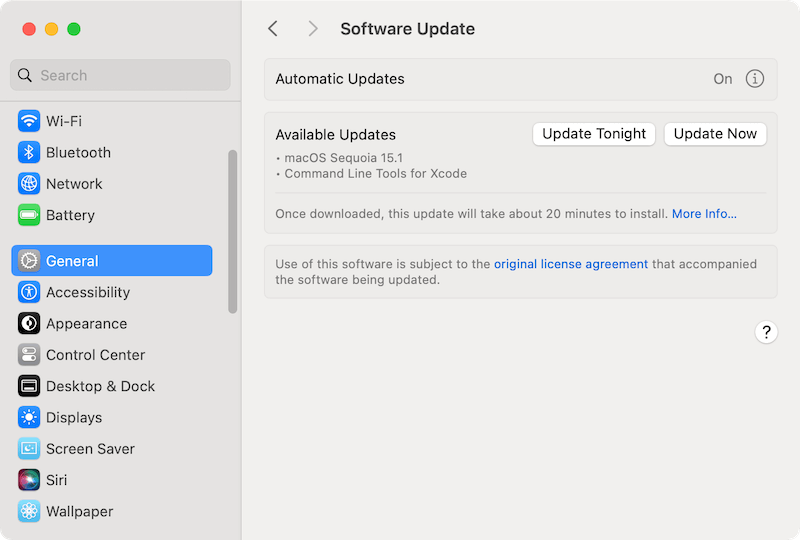
Keep macOS and all installed software up to date. Software updates often include fixes for known issues and security vulnerabilities that could impact your system's stability.
The "File system check exit code is 8" error on macOS can be a challenging issue, but with the right approach, it can be effectively resolved. By understanding the error, taking preliminary precautions, and following the steps outlined for repair and data recovery, you can address the problem and restore your system's functionality.
Remember to always back up your Mac, use built-in and third-party tools for recovery, and seek professional help if necessary. By following these practices, you can prevent future issues and ensure the ongoing health and stability of your macOS system.
Do Your Data Recovery for Mac
Do Your Data Recovery for Mac, one of the best Mac data recovery software, can help you easily and completely recover deleted, formatted or lost files from Mac HDD/SSD, external HDD/SDD, USB drive, memory card, digital camera, or other storage devices.