Quick Navigation:
In 2020, Apple announced three new Mac models with the ARM-based M1 CPU, including the MacBook Air, MacBook Pro, and Mac mini, switching from Intel to Apple Silicon. New Macs come with macOS 11, the latest OS.
Despite the latest Mac devices' unparalleled integration and battery economy, Apple still has no NTFS read-only solutions. However, Apple M1 Mac users cannot see files or folders from an NTFS external hard disk. How can I activate NTFS read-write on macOS Big Sur with Apple M1? This post will explain general information and offer the best solution.
![]()
What is NTFS for Mac?
Microsoft NTFS for Mac is an app that sits in the menu bar. Mount and unmount Windows NTFS volumes in Mac's desktop, Finder, and Disk Utility with this NTFS mounter. Files on an external drive formatted with the NTFS file system can be viewed and copied on a Mac with this reader. The NTFS writer allows Macs to write to NTFS volumes.
It allows you to use files formatted in Windows' NTFS file system in a Macintosh computer without having to reformat them in a way that the Mac operating system reads. In addition to its primary function as a file system, high-quality NTFS for Mac software lets you eject, repair, and format NTFS devices on your Mac.

Do M1/M2/M3 Macs support NTFS?
To summarize, NTFS is not fully functional on Apple Silicon Macs.
Mac OS reads NTFS drives but cannot write to them by default. Since Microsoft owns the NTFS file system and Apple has no license to utilize it, macOS cannot read-write NTFS files.
In other words, whether your Mac is powered by an Intel processor or an Apple Silicon (M1 and M2) processor, you can view and read data stored on an NTFS-formatted drive. However, due to a lack of write access, you cannot modify the data on the drive.
About NTFS driver for Apple Silicon Mac?
When using an Apple Silicon Mac, you have many options for reading and writing to an NTFS file system. It is advised that you use a third-party NTFS driver, but you can also use command lines to enable Apple's unreliable NTFS-write support or format your NTFS drives with another file system.
Best to utilize third-party NTFS driver for Apple silicon M1/M2/M3/M4:
You may have experimented with alternative software in the past. However, you may experience difficulties using these applications if you have recently upgraded to a Mac equipped with an M1 or M2 processor.
DoYourData NTFS for Mac's Key Features:
DoYourData works with any Mac running macOS 10.13 or later, including macOS Ventura, Sonoma, Sequoia, Tahoe, and it is also fully compatible with Macs running on the M1/M2/M3/M4/M5 chip.
Simple Disk Administration:
If you have a Mac, DoYourData NTFS for Mac is a must-have. If you connect an NTFS drive, Finder will recognize it. This drive can be used as a starting disk in the event of a Mac failure and can also be used to recover Time Machine backups.
With AirDrop, you may easily transfer NTFS files to another Mac. Your NTFS disks can also receive downloads from your cloud storage. Disk Utility also allows you to change the file system of a disk from APFS, HFS+, or exFAT to NTFS.
Transfer files faster with lightning speed:
High-capacity file transfers are possible because of the program's compatibility with modern 4k record hard drives. For example, you can copy over sixty thousand files to your NTFS drives simultaneously.
This third-party Mac program is compatible with Apple's security policy because it uses its file system drive and can read and write data as quickly as the Mac's native drivers. Because of this, it allows you to send files at a rate six times faster than its rivals. That means no problems will arise when transferring a 200GB file.
How to enable read-write support for NTFS drive on Apple Silicon Mac?
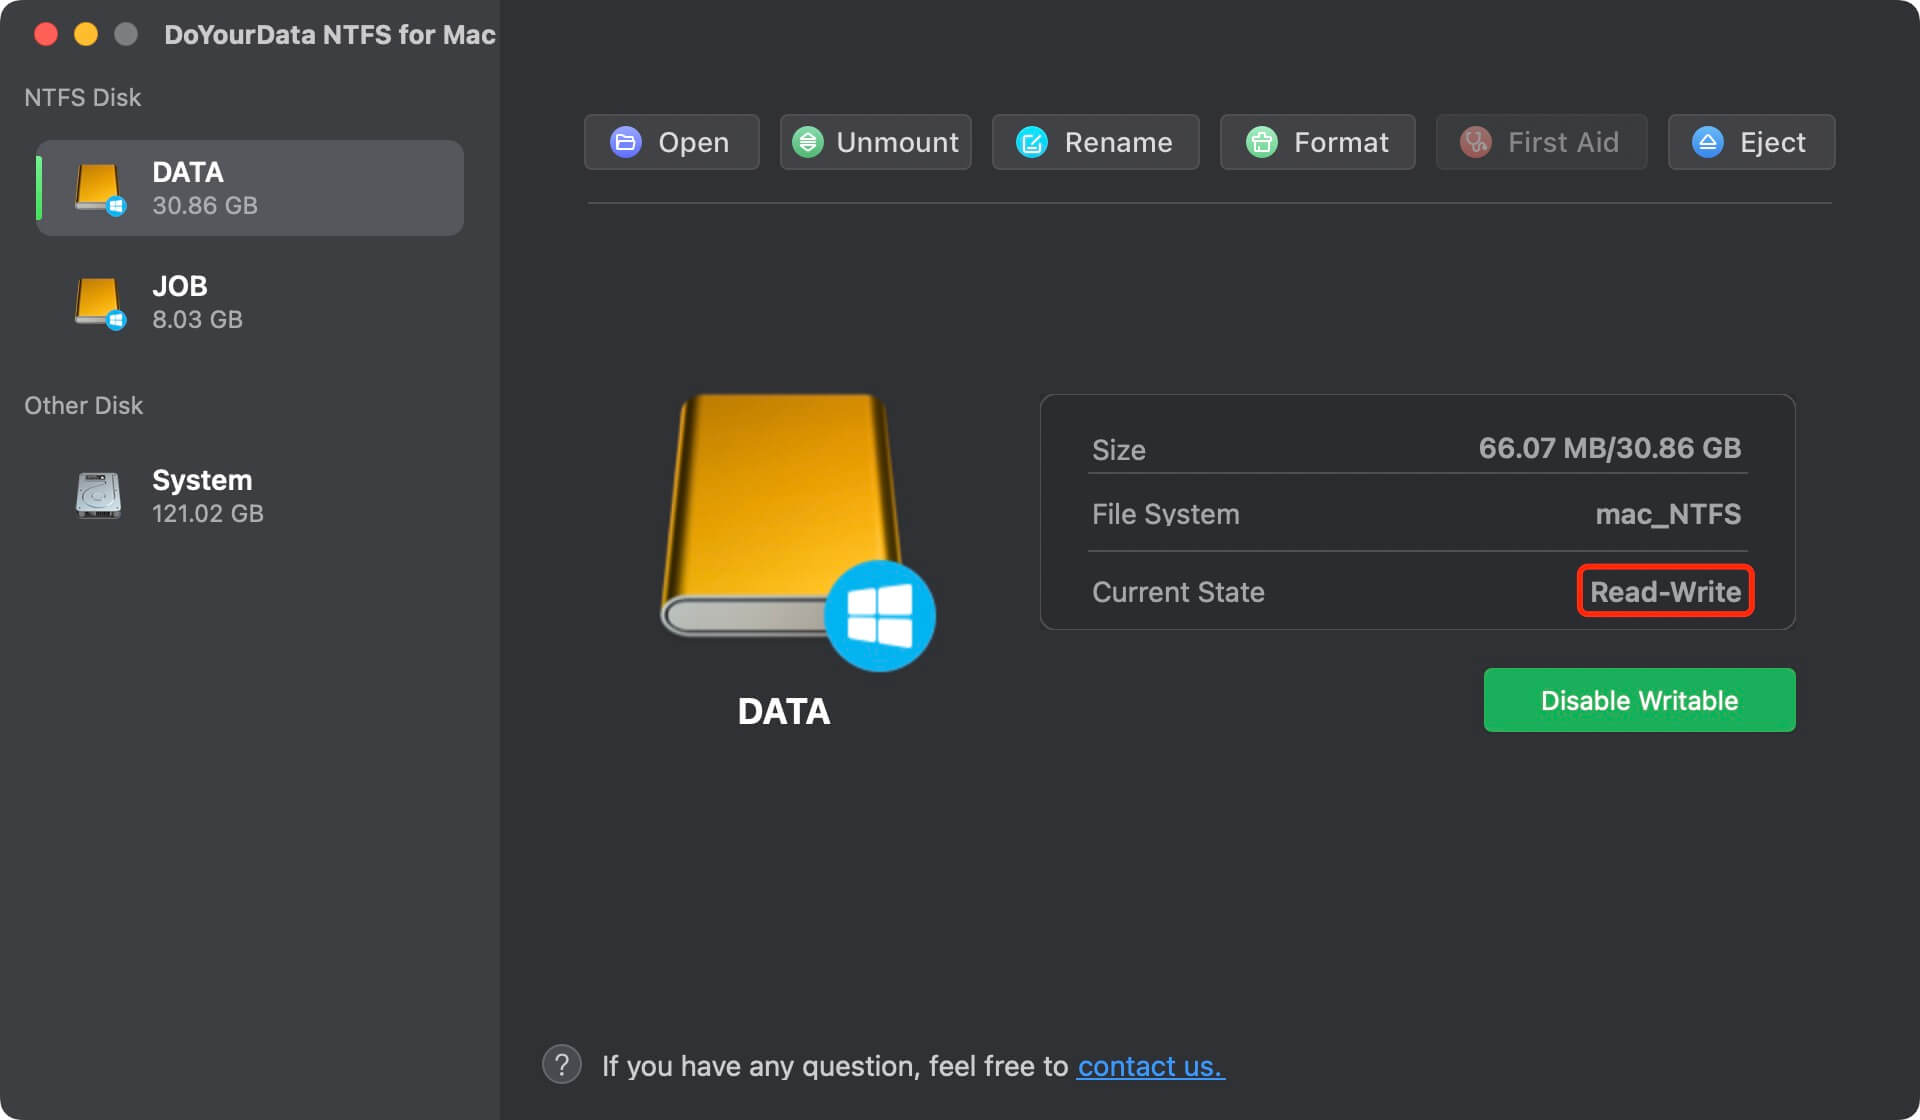
DoYourData NTFS for Mac can help you quickly mount and enable read-write support for NTFS drive on Apple silicon Apple Silicon Mac. After installing this NTFS for Mac tool, just open it from Launchpad.
Step 1. Connect the NTFS drive to your Mac, open DoYourData NTFS for Mac.
Step 2. Select the NTFS drive and click Enable Writable.

Then you can use the NTFS drive on Mac without limitation.
Supported Chips: Intel-based chips, Apple T2 Security chip, Apple Silicon chips.
FAQs about NTFS driver for Apple Silicon Mac
- Download and install the NTFS driver - DoYourData NTFS for Mac.
- Connect the NTFS drive to the Apple Silicon Mac, open DoYourData NTFS for Mac.
- Select the NTFS drive, click Enable Writable.
- Now, the NTFS drive will become read-write.

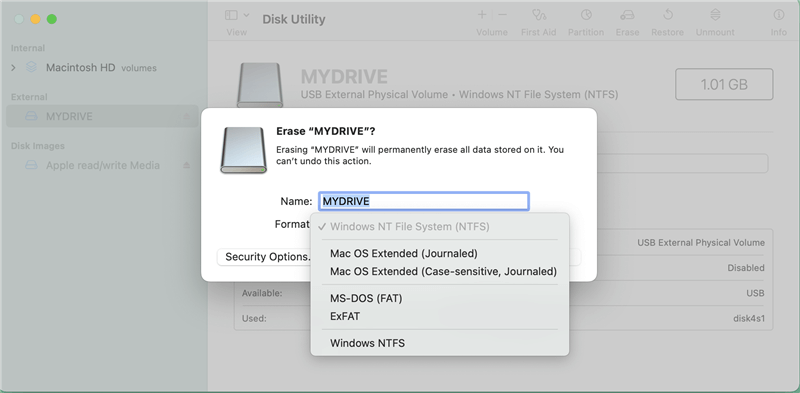
- Open Disk Utility (Go to Launchpad > Other > Disk Utility).
- Select the hard drive, click Erase.
- Select a file system and click Erase again.
- When it completes, click on Done button.

- DoYourData NTFS for Mac
- Donemax NTFS for Mac
- Fuse for Mac
- Mounty for Mac
- NTFS-3G
- iBoy NTFS for Mac
- Method 1: Open Disk Utility, find the external hard drive and click Mount button.
- Method 2: Open Disk Utility, find the external hard drive, and click First Aid button.
- Method 3: Open DoYourData NTFS for Mac and then find the external hard drive, click Mount button.
Conclusion:
Apple silicon Mac does not support read-write NTFS drive. If you want to transfer data between Windows and Apple Silicon Mac using an NTFS drive, you can install a third-party NTFS driver on your Apple Silicon Mac. It can quickly enable read-write support for NTFS drive on Apple Silicon Mac. It also can help in mounting NTFS drive on Mac, fixing damaged hard drive, formatting external hard drive, USB flash drive, etc.