Recover Lost Data from Erased Hard Drive on Mac
If your external hard drive is erased by Disk Utility, use data recovery tool to unformat the drive and get all lost data back.
Quick Navigation:
Have you ever had the annoying problem where your M3-chip MacBook, MacBook Air, MacBook Pro won't work with your portable hard drive? You've hit a brick wall in your digital trip, stopping progress when needed. It's not unusual for people to get stuck on this problem; many have experienced it, too.
![]()
If your M3-chip MacBook doesn't recognize or mount the external hard drives, this guide will detail why and how to fix it. Get ready as we go over setting tips and strategies to get back to working and connecting without any problems. Let's go on this mission to fix the problem together!
Your M3-chip MacBook might not be able to add an external hard drive for several reasons, including:
Check the cord that connects your external hard drive to your MacBook to start fixing the problem. Make sure it's securely connected to both the hard drive and the USB-C port on the MacBook. If unsure it works, try using a different line to rule out any possible problems. This step ensures the devices are physically connected and eliminates any issues a bad wire could have caused.
Connect your portable hard drive to something else, like another MacBook, to discover the issue. This way, you can tell whether the hard drive or MacBook is the problem. If the hard drive boots properly on the other device, the problem is with the MacBook and needs to be investigated further. Otherwise, if the problem happens on multiple devices, the external hard drive is to blame, and other answers are required.
Ensure the latest version of macOS is installed on your M3-chip MacBook. Bug fixes and improvements that may fix problems with compatibility with external devices are often included in regular software changes. Ensuring your MacBook's up-to-date software will help you improve mounting issues with external hard drives.
Use Disk Utility to find and fix any possible issues with the file system on the external hard drive. From the Applications area, open Disk Utility and choose the external drive.
First of all, click on Mount button to check if you can mount the external hard drive.
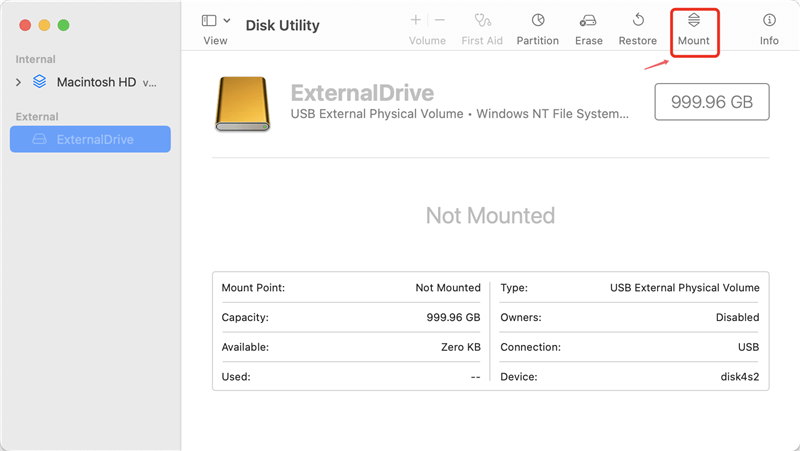
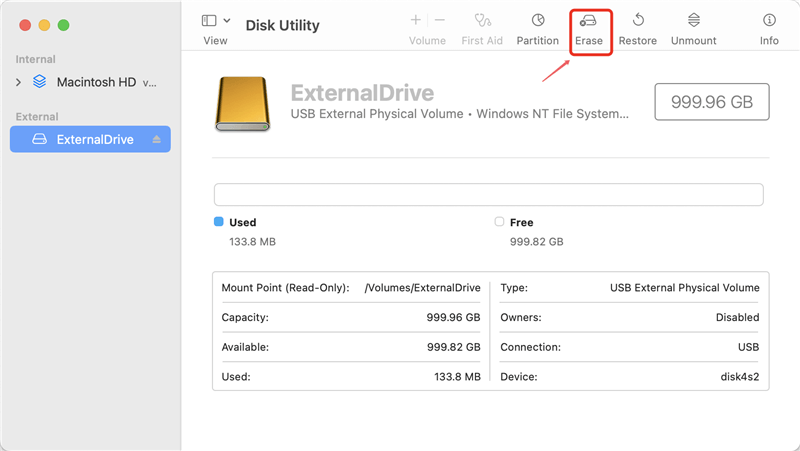
If it still does not work, click on Erase button to erase the drive to Mac compatible file system.
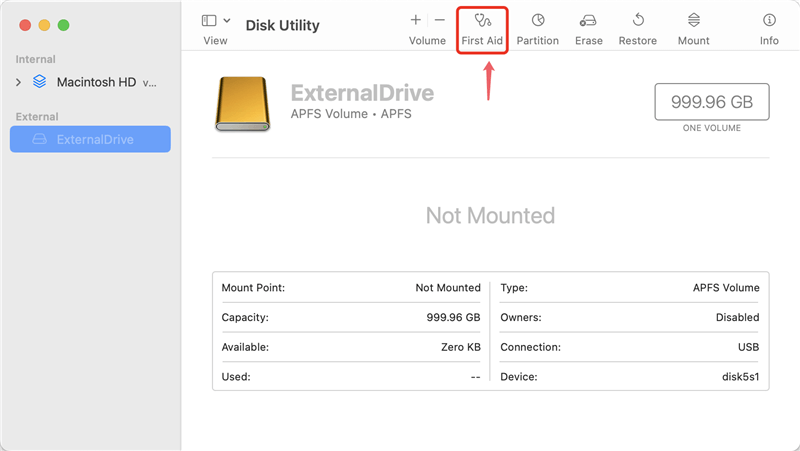
When the drive gets damaged, press the First Aid button to start a diagnostic check. This all-in-one tool can find and fix many problems, including disk mistakes and damaged file systems, which could bring back the mounting capabilities of your external hard drive.
Note: First Aid or Erase will delete everything from the external hard drive. Fortunately, the erased data is not gone forever. With a data recovery tool, you can easily recover lost data from the external hard drive.
Recover Lost Data from Erased Hard Drive on Mac
If your external hard drive is erased by Disk Utility, use data recovery tool to unformat the drive and get all lost data back.
You may need to use Terminal instructions to get your MacBook to recognize an external hard drive. In some situations, commands like "diskutil list" and "diskutil mountDisk" have worked well. When you run these tasks, you tell the system to list all available disks and try to mount them by hand. This method covers any possible software bugs and lets you work directly with the hardware, which could fix mounting problems.
Learn More: Use Terminal Commands to Mount External Hard Drive on Mac >>
If your MacBook has more than one USB-C port, try connecting the portable hard drive to a different port to see what happens. By taking this easy step, you can tell if the issue is with a single port or the whole system.
By moving ports, you can rule out problems that the port might cause and see if the mounting problem stays the same on different connections. If it works, this workaround will restore a seamless connection, letting you use your external hard drive again without any more problems.
DoYourData NTFS for Mac tool is a powerful disk management for macOS. It can help you force mount external hard drive, USB flash drive, SD card on Intel-based Macs and Apple silicon Macs. To mount an external hard drive on M3-chip MacBook, follow the steps below:
Step 1. Download and install DoYourData NTFS for Mac on your M3-chip MacBook, then run it from Launchpad.
Step 2. Open DoYourData NTFS for Mac, find the external hard drive, click on Mount button.
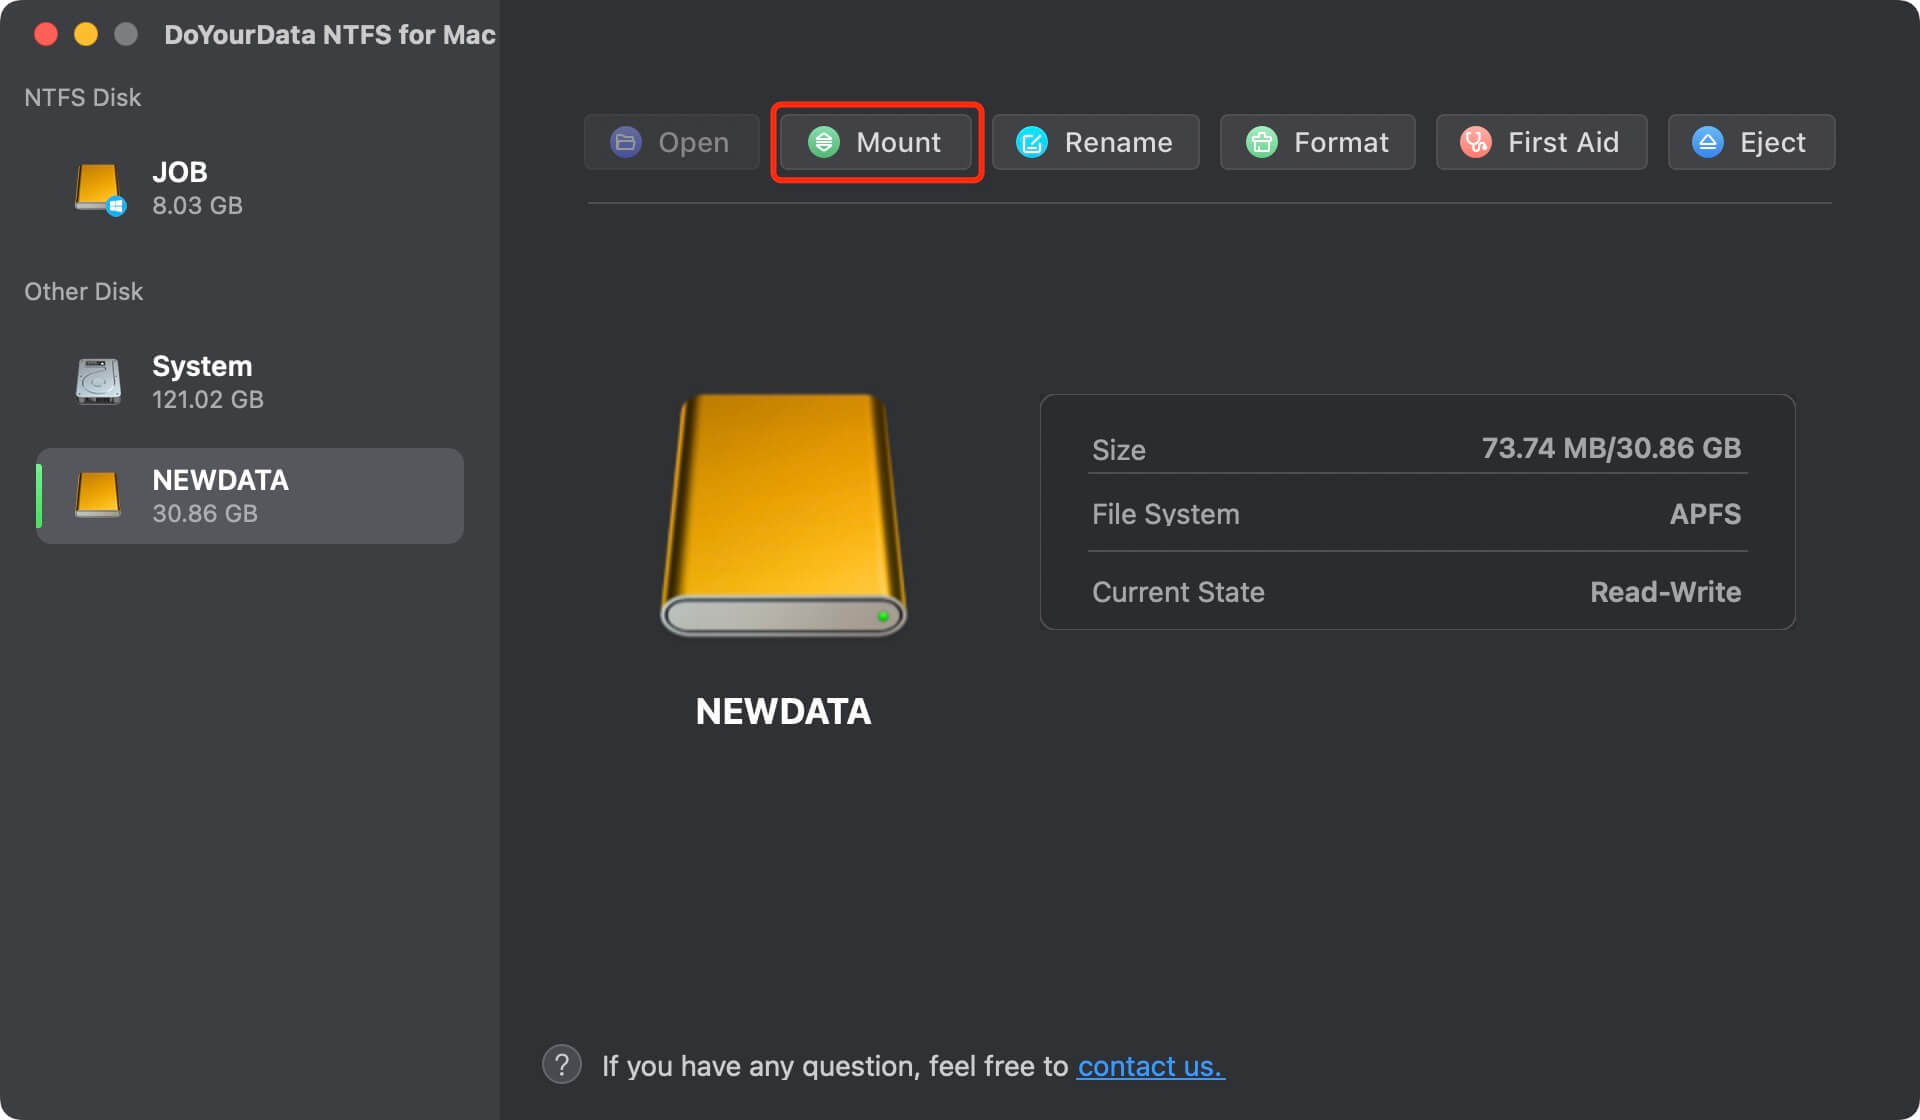
And if the external hard drive has been formatted to NTFS file system, just click on Enable Writable button to allow your M3-chip MacBook to read-write NTFS drives on your Mac. It also can help you format external hard drive, eject external hard drive on M3-chip MacBook.

In conclusion, you need to follow steps to fix mounting problems between your M3-chip MacBook and external hard drives. Fixing possible hardware and software problems, like broken cords, old software, or damaged file systems, is usually enough to resolve the issue.
Remember that persistence and patience are very important as you work through the answers in this guide. If you work at it and use the right methods, your external hard drive will work perfectly again on your M3-chip MacBook.
