Recover Formatted Hard Drive on Mac
Do Your Data Recovery for Mac can scan the formatted hard drive and find all recoverable files. It takes only three steps to unformat a hard drive which has been erased by Disk Utility.
Home > Hard Drive Solutions for Mac
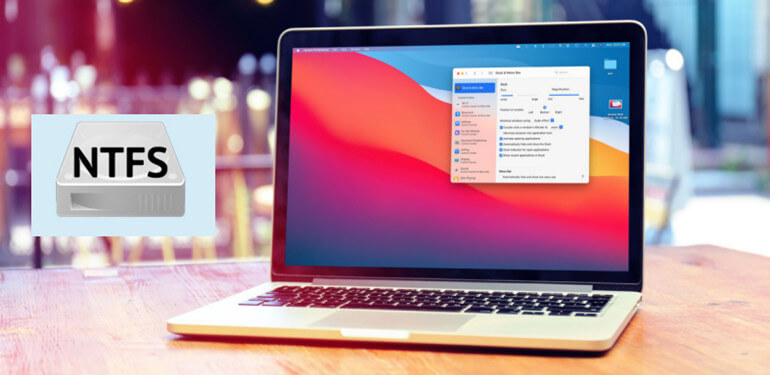
If you want to use an NTFS drive on macOS Mojave without formatting it, you should download and installer a NTFS driver on macOS Mojave. It will quickly enable NTFS write-read support on macOS Mojave and can mount external hard drive, USB flash drive on Mac.
![]() Updated by Justin Kenny on August 9, 2023
Updated by Justin Kenny on August 9, 2023
Quick Navigation:
Even though the popularity of Macs has been on the rise recently, Windows PCs still dominate the market. That's why almost all portable storage media - from external hard drives to USB flash drives - come with the installed NTFS file system.
The USB drive or external hard drive is read-only Mac after upgrading to macOS Mojave issue is only one of the potential issues. Don't worry; we teach you to mount an NTFS drive in macOS Mojave and grant you full read/write access. Let's get going!
Microsoft created the NTFS and did not grant permission for its use to any third party. Apple considered purchasing the NTFS license, but Microsoft set the price high. Apple can't affix NTFS support for its macOS or other products without the proper licensing. It would be against the law to do so.
Windows has used the NTFS file system for as long as anybody can remember. It's used for archiving data on a hard drive and retrieving it later. Microsoft introduced this file format in July 1993, and has seen numerous updates. Microsoft originally dubbed the NT File System creation before rebranding it as NTFS to better align with the Windows NT series of operating systems. NTFS is quick, safe, and trustworthy when storing, managing, organizing, and doing whatever else you want to do with your files and folders on Windows.
Normally, there are two methods to use an NTFS drive on macOS Mojave: Format or Without Format.
If your NTFS disk is empty or contains no crucial information, you can easily format NTFS for Mac by converting it to either FAT32 or ExFAT. The file systems FAT32 and ExFAT are backward-compatible with Windows and forwards-compatible with macOS, whereas NTFS is not.
Here's how to reformat an NTFS drive so that it may be used with a Mac:
Connect the NTFS drive to your Mac and make sure it is recognized.
Disk Utility may be accessed using the Mac Launchpad by going to Other and then selecting it. Spotlight may also be used to access Disk Utility; to do so, press the Command + Space bar simultaneously, type "Disk Utility," and then press Return.
Even though macOS is compatible with both file systems, you should know that the FAT32 format has several drawbacks. Moreover, NTFS is superior in functionality. In addition, since formatting would delete all data on the drive, you should back it up first.
Choose your NTFS drive from the list on the left side of the Disk Utility window.
After renaming the disk and changing the format to FAT32 or ExFAT, the Erase button can be activated.
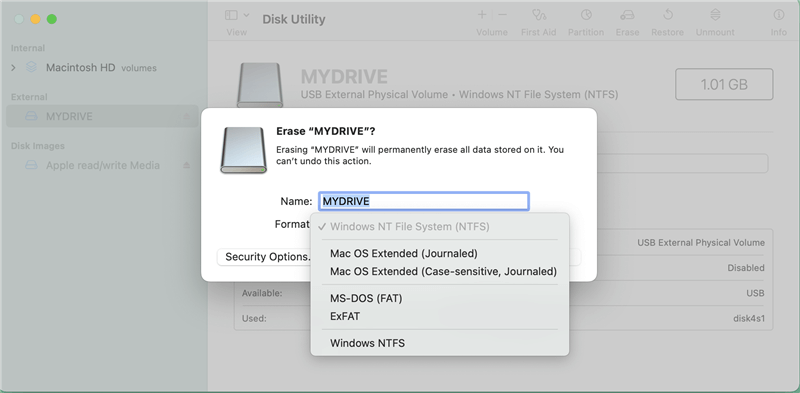
Please be patient while the format finishes.
Your NTFS drive is now formatted to read and write on a Mac. However, if the information on your NTFS drive is crucial, you may want to look elsewhere. Data recovery software can help you recover lost data from erased hard drive on Mac.
Recover Formatted Hard Drive on Mac
Do Your Data Recovery for Mac can scan the formatted hard drive and find all recoverable files. It takes only three steps to unformat a hard drive which has been erased by Disk Utility.
macOS Mojave does not natively support Windows NTFS drives, various third-party software has been developed to enable NTFS storage support on a Mac. These apps are licensed to read and write on Windows disks.
These are useful if you frequently transfer files between a Mac and a PC, and those files are too huge to be stored in the more common FAT32 format.
DoYourData's Microsoft NTFS for Mac, compatible with macOS Mojave, is one of the best NTFS for Mac tools. After setup, the program will automatically mount your Windows drives so you can access them and make any necessary edits or deletions.
Follow the steps below to enable NTFS read-write support on macOS Mojave:
Step 1. Download and install DoYourData NTFS for Mac on macOS Mojave, then connect the NTFS drive to your Mac.
Step 2. Open DoYourData NTFS for Mac, select the NTFS drive and click Enable Writable to grant full read-write access to NTFS drives on Mac.

You could need access to an NTFS drive for a variety of reasons. Having complete access is important for various reasons, including transferring data from your old Windows PC to your new Mac and sharing files with friends who use Windows. Having only read privileges is insufficient. In macOS Mojave, you have numerous choices for how to write to NTFS storage. There are benefits and drawbacks to both options.
Using Terminal is a good example of a free but sometimes buggy technical operation. However, changing the drive format to exFAT is straightforward, but it will wipe out all of your data if you don't back it up first. The amount of characters and files that can be stored is also lower than in NTFS. The quickest way to add NTFS read-write support on macOS Mojave is to install a NTFS driver on your Mac.
Written & Updated by Justin Kenny
Justin Kenny is a writer & editor of DoYourData. He joined DoYourData in 2016 and focuses on writing articles about Windows data recovery, Mac data recovery, external device data recovery, hard drive clone, data erasure, Mac cleanup, computer issue fixes, etc. He is a super fan of Apple devices and is big on testing new digital device and system utility software.