Home > Hard Drive Solutions for Mac
How to Enable NTFS Full Read-write Support on macOS Monterey?
How to fix external hard drive Read-only issue on macOS Monterey? You may think you should format the external hard drive. No, you just need to install a NTFS driver for macOS Monterey and use it to quickly enable writable for NTFS drives on Mac. DoYourData NTFS for Mac is fully compatible with macOS Monterey, download it here:
![]() Updated by Justin Kenny on September 24, 2025
Updated by Justin Kenny on September 24, 2025
Quick Navigation:
- 1. Enable NTFS support with NTFS driver for macOS Monterey
- 2. Fix external hard drive read-only on macOS Monterey by formatting the drive
- 3. How to Recover Lost Data after Erasing Your Hard Drive?
- 4. FAQs about NTFS Support on macOS Monterey
macOS Monterey is one of the most recent Mac operating systems. Every year, Apple strives to improve and modernize its operating system. Meanwhile, the name Monterey is derived from nearby Monterey Bay. macOS Monterey has several fantastic and practical additions.
Computer users' inability to create NTFS volumes or use external hard drives on a Mac is a common source of frustration. Like other Mac operating systems, macOS Monterey does not support NTFS drives and can not write data to external hard drive with NTFS file system.
If you want to use NTFS drives on macOS Monterey, just check the guide below.
Enable NTFS support with NTFS driver for macOS Monterey
A reliable third-party NTFS for Mac program is all you need when you require a speedy NTFS write solution for macOS Monterey. While the best software for this purpose is usually paid, demo versions are often available for download. We'll focus on DoYourData NTFS for Mac because it's one of the most elegant solutions available.
DoYourData NTFS for Mac is an easy-to-use and powerful NTFS for Mac tool, and it is fully compatible with macOS Sonoma, Sequoia, Tahoe, etc. Follow the steps below to quickly enable writable for NTFS drives on Mac.
Step 1. Download and install DoYourData NTFS for Mac on macOS Monterey, then make sure the NTFS disk is connected to your Mac.
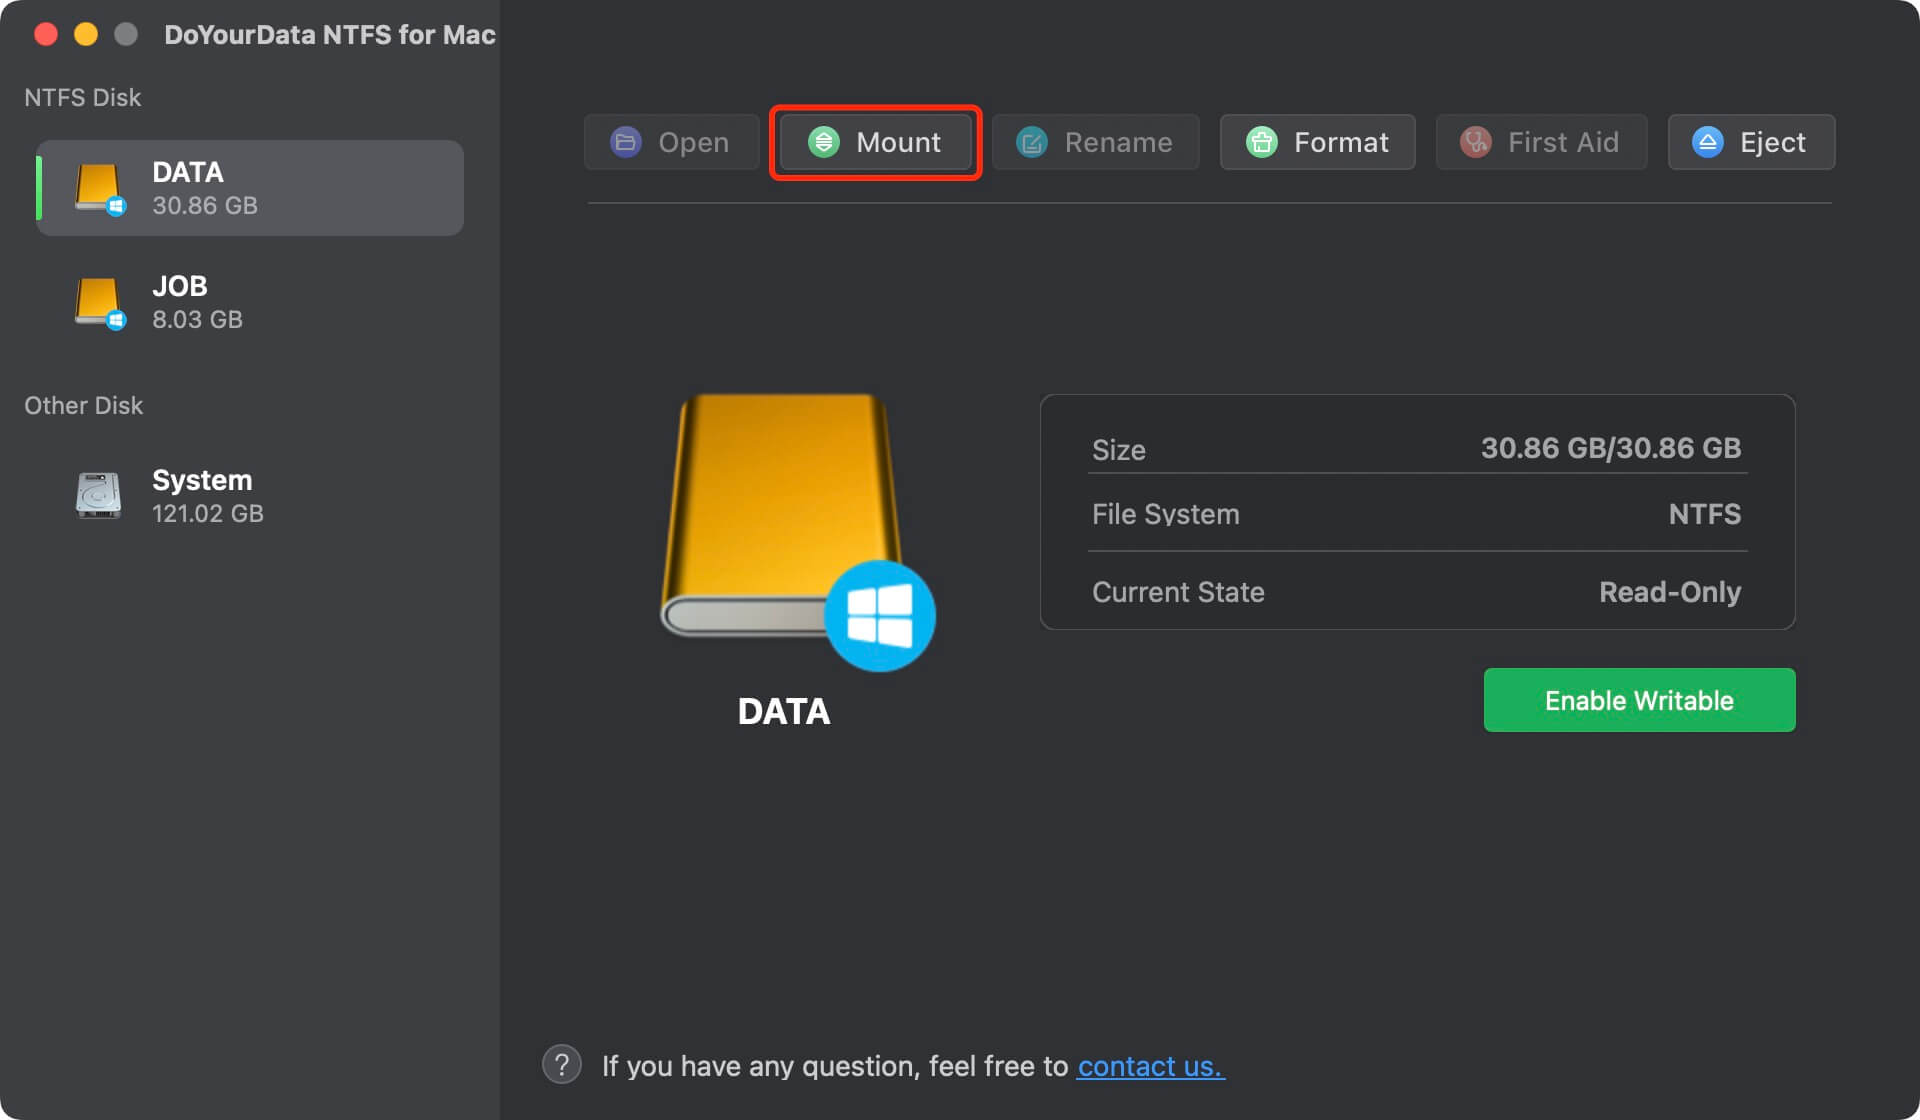
Step 2. Open this NTFS for Mac software and find the NTFS disk. Select the NTFS disk, click on Enable Writable. Then it will grant full read-write access to all NTFS drives on macOS Monterey.

Fix external hard drive read-only on macOS Monterey by formatting the drive
The exFAT and FAT32 file systems work equally well on Macs and PCs. If you're using a Mac and want full read/write access to an NTFS drive, you may use this functionality by converting it to the exFAT/FAT32 file system.
First, make a backup copy of all the files you need to keep before formatting the NTFS drive and storing it elsewhere.
The second action is to go to Launchpad > Other > Disk Utility.
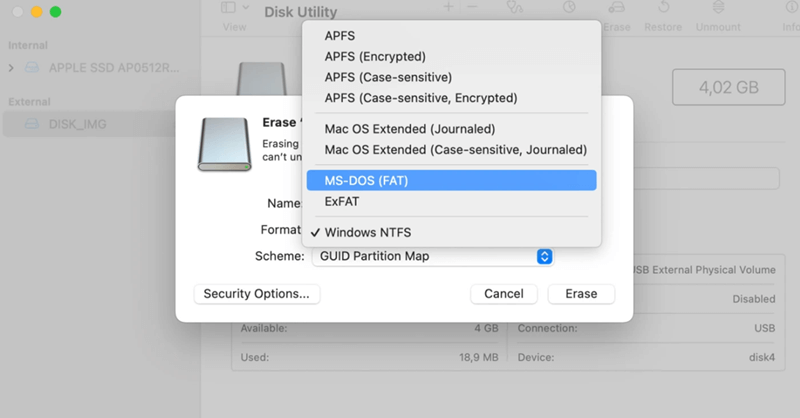
Select the NTFS drive in Disk Utility's left panel, then click Erase in the tool's main menu.
Fourth, after giving the drive a new name, selecting "exFAT" or "FAT32" as the file system from the drop-down menu, and then clicking "Erase," you're done.
How to Recover Lost Data after Erasing Your Hard Drive?
If you erase the external hard drive without backup, you will lose all files. Fortunately, Mac data recovery software can help you recover lost data from the external hard drive which has been erased by Disk Utility.
Step 1. Download and install Do Your Data Recovery for Mac. Open it from Launchpad.
Select the external hard drive to start data recovery.

Step 2. Click on Scan button. This Mac data recovery software will deeply scan the external hard drive and find all recoverable files.

Step 3. Once the scan is completed, you can preview all recoverable files. Then select the wanted files and save them.

FAQs about NTFS Support on macOS Monterey
1. Does macOS Monterey support NTFS Read-write?
No, the NTFS drive is Read-only on macOS Monterey. If you want to read-write NTFS drives on macOS Monterey, just download and install NTFS driver and use it to enable writable for NTFS drives.
2. What is Bootcamp Assistant?
Installing and running a copy of Microsoft Windows on a Mac is a breeze with the help of Boot Camp Assistant, a built-in program on every Mac. This feature makes it possible to launch Windows and macOS on your Mac simultaneously. Once Boot Camp Assistant has installed Windows on your Mac, it will function like on a regular PC, allowing you to read and write to an NTFS disk by plugging it in.
However, things can get complicated for Macs made with Apple silicon. Macs built with Apple's custom silicon won't be able to use Boot Camp Assistant. Furthermore, installing an entire OS on your Mac seems pointless to acquire write rights on an NTFS disk.
3. How to enable NTFS Read-write support on macOS Monterey?
The Microsoft NTFS for Mac file system driver allows you to read and write to disks formatted in the NTFS file system on a Mac running the macOS operating system.
If you are going to use an NTFS drive on macOS Monterey, just download and install DoYourData NTFS for Mac on your Mac, then select the NTFS drive and click Enable Writable.
4. What is the best NTFS Driver for macOS Monterey?
- DoYourData NTFS for Mac
- iBoysoft NTFS for Mac
- Fuse for Mac
- NTFS-3G
- Donemax NTFS for Mac
5. How to use NTFS driver to mount NTFS drive on macOS Monterey?
- Download and install DoYourData NTFS for Mac.
- Open DoYourData NTFS for Mac.
- Click the NTFS drive.
- Click Mount button.
Conclusion:
NTFS drive can be used on macOS Monterey. You don’t need to format the NTFS drive to APFS/ExFAT or FAT32, just install an NTFS driver on your Mac. DoYourData NTFS for Mac is a reliable NTFS for Mac tool which is fully compatible with macOS Monterey. Use this software, you can quickly enable NTFS read-write support on macOS Monterey.
You also can erase the NTFS drive to Mac-compatible file system. Before you erase the NTFS drive, you’d better make a backup of your files.
Written & Updated by Justin Kenny
Justin Kenny is a writer & editor of DoYourData. He joined DoYourData in 2016 and focuses on writing articles about Windows data recovery, Mac data recovery, external device data recovery, hard drive clone, data erasure, Mac cleanup, computer issue fixes, etc. He is a super fan of Apple devices and is big on testing new digital device and system utility software.