Home > Hard Drive Solutions for Mac
How to Write NTFS Drives on macOS Big Sur?
Why the external hard drive is read-only after upgrading to macOS Big Sur? macOS Big Sur and other macOS does not support read-write NTFS drives. To read-write NTFS drives on macOS Big Sur, you can format your hard drive to Mac-compatible file system or install the reliable NTFS driver to quickly grant full read-write access to NTFS drives on macOS Big Sur.
![]() Updated by Justin Kenny on September 24, 2025
Updated by Justin Kenny on September 24, 2025
Quick Navigation:
- 1. Can macOS Big Sur Write NTFS Drives?
- 2. Methods to Read-write NTFS Drives on macOS Big Sur
- Method 1. Change to ExFAT/Fat32 Format
- Method 2. Boot Camp for Mac NTFS Disk Reading and Writing
- Method 3. Third-Party NTFS Driver for macOS Big Sur
- 3. FAQs About NTFS Driver for macOS Big Sur
The Messages app's user interface has been revamped, and the default search app, Safari, has received its most significant makeover yet, all thanks to Big Sur. There are lots of Mac users are using macOS Big Sur and using external hard drive, USB flash drive or memory card to transfer data between Macs and PCs.
Can macOS Big Sur Write NTFS Drives?
The problem is that the macOS 11 Big Sur still can’t support NTFS drives. NTFS disks are a common source of difficulty for Mac programs. Windows computers have employed NTFS, a proprietary file system, since the early 1990s. Its use persists in modern Windows PCs and software upgrades.
However, Mac does not supply the required standards for utilizing NTFS storage in an open-source format. That means that Apple would have to pay Windows a huge licensing cost so that all of their systems and applications, both old and new, could use the open-source NTFS disks.
Methods to Read-write NTFS Drives on macOS Big Sur
Method 1. Change to ExFAT/Fat32 Format
NTFS is Windows-based file system and is not compatible with macOS including macOS Big Sur. If you want to use an NTFS drive on macOS Big Sur, you can format the external hard drive to ExFAT or FAT32.
First, make copies of the source files from the NTFS drive.
Navigate to the Applications folder in Finder. Additionally, choose Utilities and Disk Utility here.
Third, select NTFS on Disk Utility's left panel.
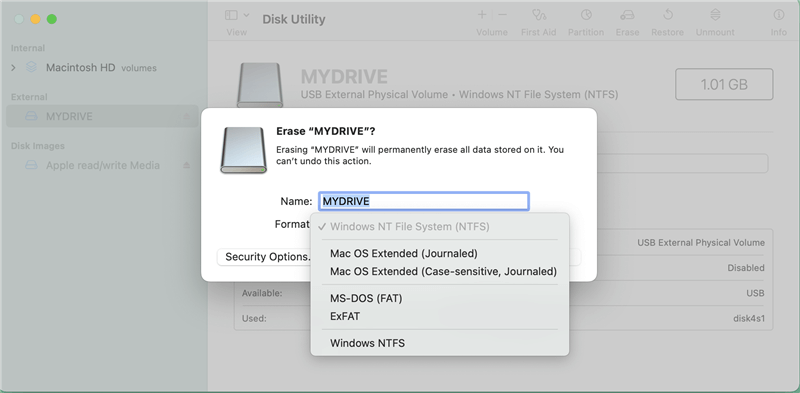
Select Erase.
Select either exFAT or FAT32 as the file system. Click Erase again.
Method 2. Boot Camp for Mac NTFS Disk Reading and Writing
Apple's Bootcamp is a Windows emulator for Mac computers. Because of this, it may be used for reading and writing to NTFS drives. It will download everything that is required to run on a Mac. Unfortunately, at this time, it is only compatible with macOS Big Sur or Monterey.
And it will eliminate any previous Time Machine backups you may have. If you need to read or write NTFS on a Mac, be sure you haven't recently used Time Machine to back up any crucial files.
You may easily use Windows on your Mac by installing Boot Camp. After that, data stored on NTFS can be read and written easily.
Method 3. Third-Party NTFS Driver for macOS Big Sur
In addition to the options above, NTFS for Mac software developed for other platforms can read and write such files. It's simple and fast, but the other two are more involved and time-consuming.
DoYourData NTFS for Mac is an easy-to-use NTFS for Mac driver. Download and install it on your Mac. It is fully compatible with macOS Sonoma, Sequoia, Tahoe, etc.
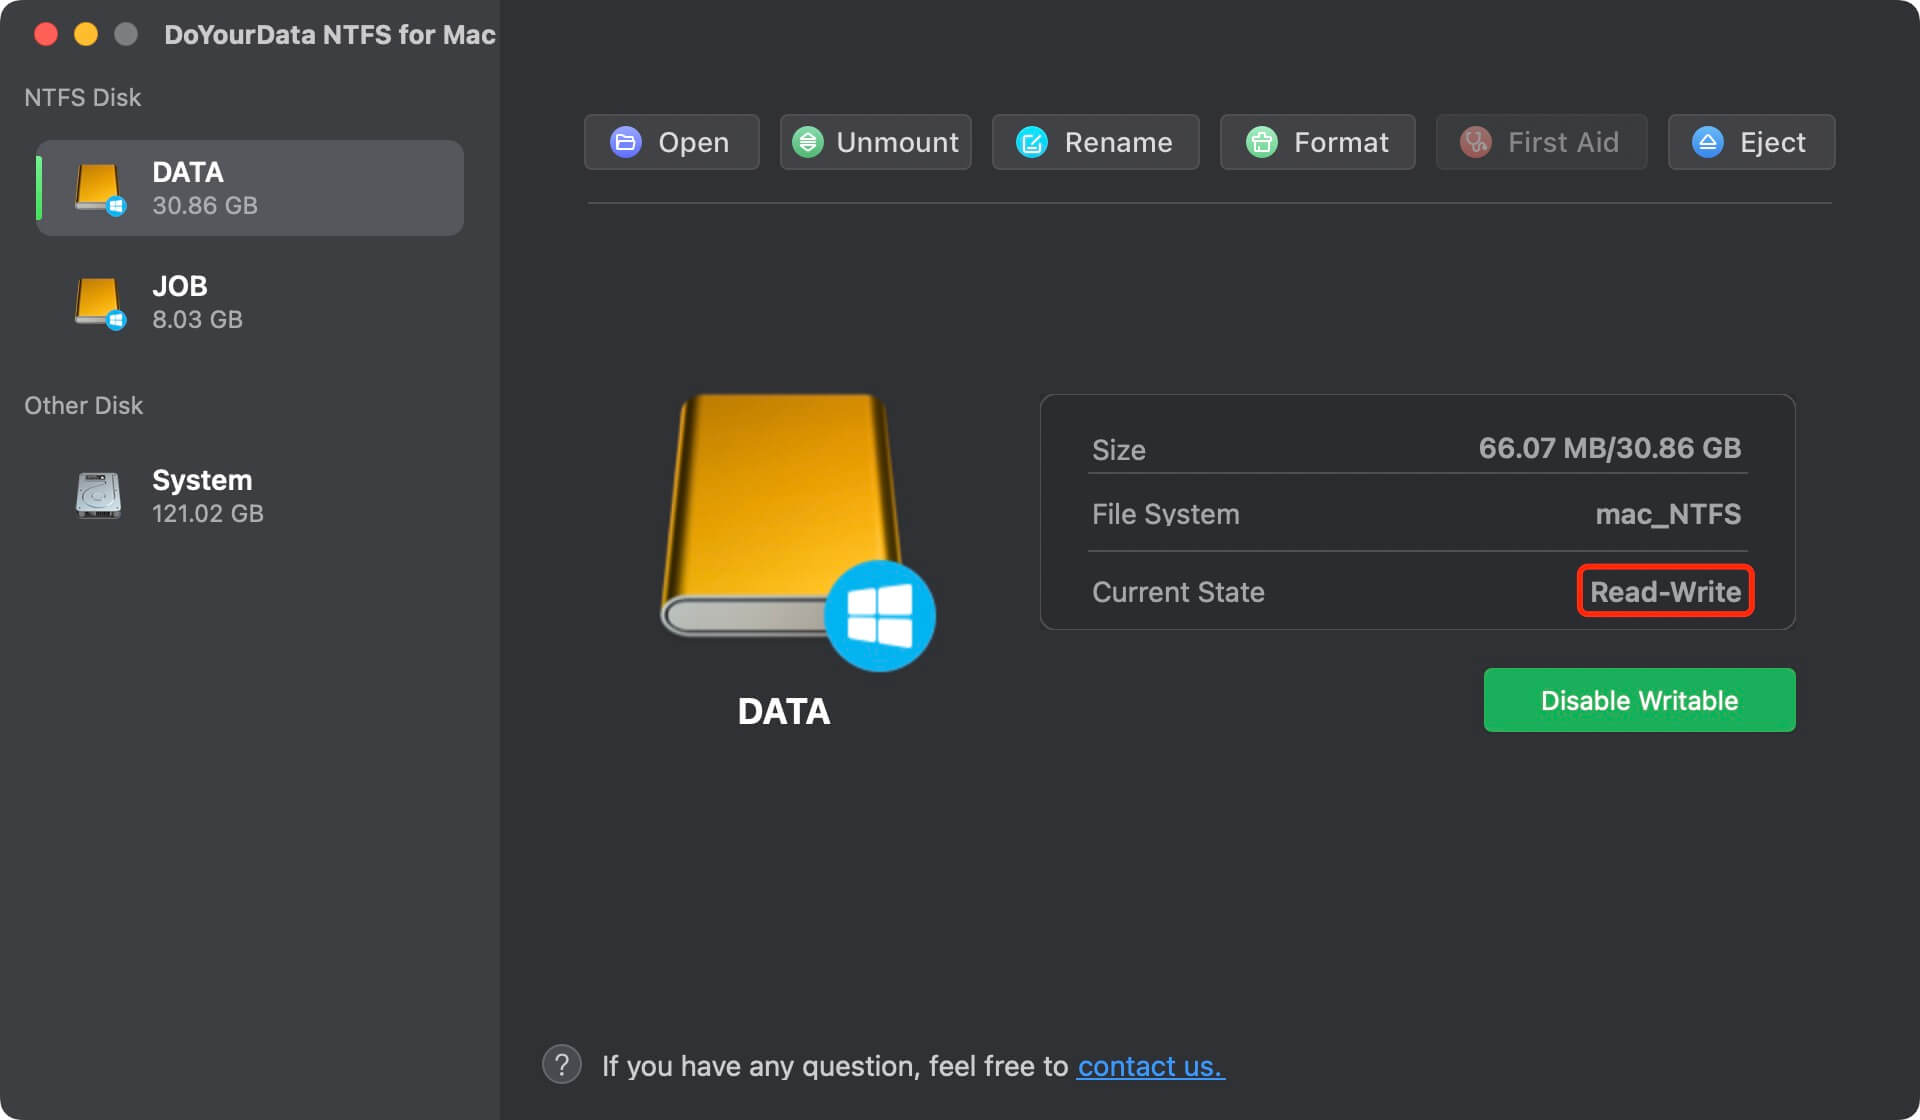
1-click to enable writable for NTFS drives on Mac: connect the NTFS disk to your Mac and then open DoYourData NTFS for Mac, select the NTFS drive and click Enable Writable.

All NTFS drives on your Mac will become Read-write. You can use any NTFS drive on your Mac without any limitation.
FAQs About NTFS Driver for macOS Big Sur
1. What is the best NTFS driver for macOS Big Sur?
- DoYourData NTFS for Mac: This easy-to-use NTFS for Mac tool gives Mac users a quick way to enable writable for NTFS drives on Mac. It supports Seagate, Toshiba, Western Digital, Samsung, LaCie, G-drive, SanDisk and others. It also can mount or unmount hard drive, repair damaged drive, format disk, etc.
- Donemax NTFS for Mac: This program facilitates NTFS file operations between macOS Big Sur and Windows, including copying, deleting, editing, and transferring. That is accomplished without the need for a disk reformat.
- Paragon NTFS for Mac: It's six times faster than competing NTFS programs and has many useful extras. Safe and easy data communication is possible. Additionally, not only does it work with the most recent version of macOS but also with all previous versions!
- Tuxera NTFS for Mac: Tuxera allows you to perform any Windows-compatible operations on your NTFS disk from your Mac. The USB drive is formatted in Windows NTFS, so it's easy to access files and delete, rename, move, or copy them. Additionally, it has superior features to examine and fix files.
2. How to quickly enable NTFS read-write support on macOS Big Sur?
- Download and install DoYourData NTFS for Mac.
- Open this NTFS driver, select the NTFS disk.
- Click on Enable Writable.
3. How to format an external hard drive for macOS Big Sur?
- Open Disk Utility and connect the external hard drive to your Mac.
- Select the external hard drive and click Erase.
- Select ExFAT or APFS as the file system, click Erase again.
- It will quickly format the external hard drive.
Conclusion:
It is entirely feasible for Macs to read and write NTFS drive on macOS Big Sur . Alternatives to permanently erasing all data to switch file systems include free NTFS drivers, inexpensive NTFS drivers, and Apple's native NTFS compatibility.
The additional effort required to mount an NTFS drive on a Mac in read-write mode is offset by the fact that both the necessary NTFS drivers and Apple's NTFS support are free. They are dangerous and erratic. Although DoYourData NTFS for Mac may not come at no cost, the time and energy it saves you more than makes up for the price. You can use this macOS Big Sur NTFS driver to grant full read-write access to NTFS drives on Mac.
Written & Updated by Justin Kenny
Justin Kenny is a writer & editor of DoYourData. He joined DoYourData in 2016 and focuses on writing articles about Windows data recovery, Mac data recovery, external device data recovery, hard drive clone, data erasure, Mac cleanup, computer issue fixes, etc. He is a super fan of Apple devices and is big on testing new digital device and system utility software.