Home > Hard Drive Solutions for Mac
How to Delete Files from NTFS Drive on Mac or Clean NTFS Drive on Mac?
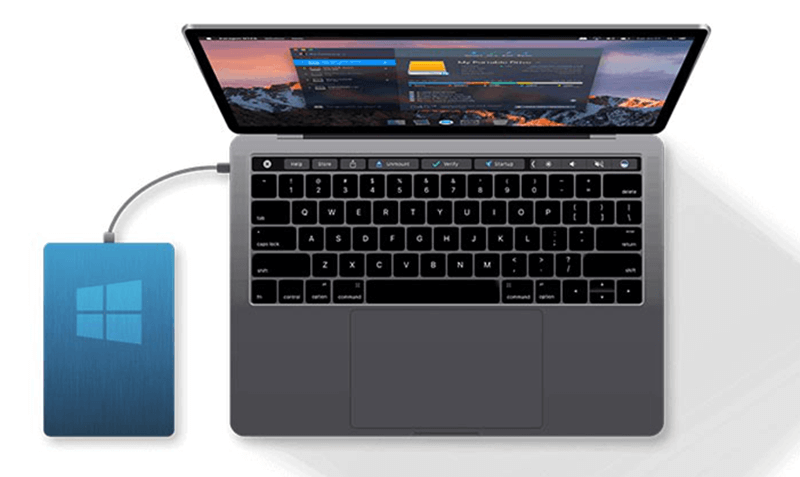
If you find you can't delete files from an external hard drive, just check if the file system of the drive is NTFS. If so, you need to download and install an NTFS for Mac tool, run it to enable writable for NTFS drive. Then you can delete files from an NTFS drive on Mac or clean up data on the NTFS drive.
![]() Updated by Justin Kenny on September 10, 2024
Updated by Justin Kenny on September 10, 2024
Quick Navigation:
- Why You Need to Delete Files from the NTFS Drive on Mac?
- How to Delete Files from NTFS Drive on Mac?
- Method 1: Use macOS Built-in Features with Limited Write Support
- Method 2: Use Third-Party NTFS Drivers
- Method 3: Format the NTFS Drive to a Compatible File System
- Conclusion
It can be hard to find your way around when you're using a Mac to manage files on an NTFS drive. You may get upset when you plug in your external drive because macOS can only read NTFS files and not write them. This task might confuse you about removing files you don't need or cleaning up your drive for better performance.
You must know how to manage your NTFS drive well to free up space, remove unnecessary files, or safely delete sensitive information. In this guide, we'll show you how to delete files from the NTFS drive on a Mac, clean up your storage, and ensure you get the most out of your external storage without any of the usual problems. Let's get started and see what your NTFS drive can do!
Why You Need to Delete Files from the NTFS Drive on Mac?
There are several reasons why you might need to delete files from the NTFS drive on a Mac:
- Free Up Space: NTFS drives can become full of files over time, limiting their storage space. Getting rid of files you don't need can help you regain important space, ensuring you have room for new data.
- Improve Performance: A crowded drive can make your system run less quickly. You can improve your NTFS drive by regularly removing old or unused files.
- Organizational Clarity: Keeping your files in order is crucial for completing work. By getting rid of unnecessary files, you can organize and reduce the ones that are left, making it easier to find what you need when you need it.
- Sensitive Information Management: If you've saved private information on your NTFS drive, you must delete files you don't need anymore to keep your privacy safe and stop people from getting to it without your permission.
- Drive Maintenance: Cleaning your NTFS drive regularly can prevent problems like file corruption and splitting. This preventative step can also make your drive last longer and work better.
- Preparing for Transfer: It's important to eliminate unnecessary files before moving files to a new drive or saving up data. This way, you'll only keep the information you need.
How to Delete Files from NTFS Drive on Mac?
Method 1: Use macOS Built-in Features with Limited Write Support
Even though macOS doesn't support writing to NTFS drives by default, it has a hidden tool that lets you write to them in certain situations. It would help if you were careful using this method because it involves changing system files and could cause you to lose data or damage your drive. To allow limited write support, do the following:
1. Open Terminal:
To open Terminal, go to Applications > Utilities or use Spotlight to look for it.
2. Edit the fstab File:
Type the following command in Terminal to open the fstab file in nano:
sudo nano /etc/fstab
To proceed, you'll need to enter the admin password for your Mac.
3. Add Write Support:
Add the following line to the nano editor, making sure to change "YourNTFSDrive" to the name of your NTFS drive:
LABEL=YourNTFSDrive none ntfs rw,auto,nobrowse
This command tells MacOS to mount the NTFS drive so that it can be read and written.
4. Save and Exit:
Press Control + O. Then press Enter To save the changes. To get out of nano, press Control + X.
5. Restart Your Mac:
Once you're done making changes, save them and restart your Mac to use the new settings.
6. Delete Files:
Open Finder and connect your NTFS drive. You should now be able to remove files from the drive. However, be careful, as this method might not always work and could damage your information.
Method 2: Use Third-Party NTFS Drivers
One of the easiest and most effective ways to delete files from the NTFS drive on the Mac is by using third-party software like DoYourData NTFS for Mac. DoYourData NTFS for Mac works with macOS without problems and lets you read and write to NTFS drives. Here is how to use it:
Step 1: Download and Install DoYourData NTFS for Mac:
You can get the NTFS for Mac app from the DoYourData Software website. Open the file that you download and follow the on-screen directions. During installation, you might need to give the app the rights it needs.
Step 2: Connect Your NTFS Drive:
Connect your NTFS drive via Thunderbolt or USB to your Mac. The drive should now appear in Finder and desktop.
Step 3: Enable Read-Write:
Open DoYourData NTFS for Mac, select the NTFS drive, click Enable Writable button. Then you can read-write any NTFS drive on Mac without any limitation.

Step 4: Delete Files from the NTFS Drive:
Go to your NTFS drive in Finder and find the files you wish to delete. You can drag them to the Trash, right-click, and choose "Move to Trash," or press Shift + Delete. Then, click the Trash button and choose "Empty Trash" to remove the files.
Step 5: Manage Your Drive:
With DoYourData NTFS for Mac, Your NTFS drive is as easy to handle on your Mac as any other drive. You are not limited in how to delete, change, or add things.
Method 3: Format the NTFS Drive to a Compatible File System
If you need full access to an NTFS drive on your Mac and use it often, change it to a file system that works with macOS, like ExFAT or APFS.
- When you format a drive, all of its data is erased, so ensure you have copies of any important information before you start.
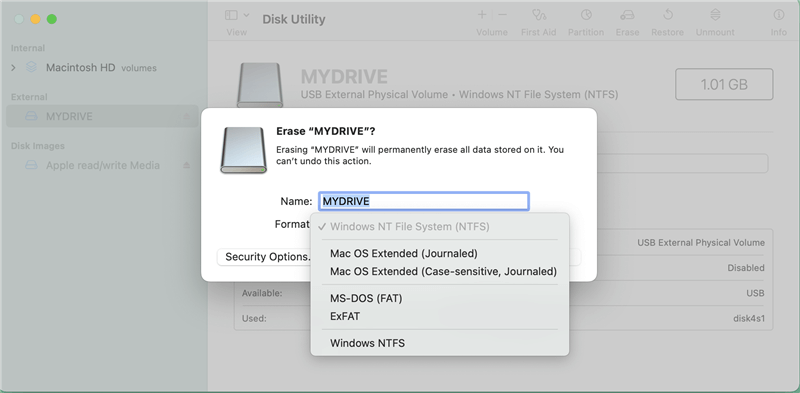
- To find Disk Utility, go to Applications > Utilities > Disk Utility, or use Spotlight to look for it.
- Scroll down to the list on the left and pick your NTFS drive.
- At the top of the box, click the "Erase" button.
- From the drop-down box, choose ExFAT (which works with both macOS and Windows) or APFS (which works best on macOS).
- You can give your driver a name if you want to.
- To erase the drive, click "Erase." Once done, your drive will work perfectly with macOS, and you can handle your files without problems.
This method is not recommended because it will erase everything stored on the drive and change the file system of the drive.
More Tips:
- If you have lost data due to formatting your NTFS drive, you can use a data recovery app to unformat the NTFS drive and get all lost data back.
- If you will use the drive on both Windows or macOS, just format the drive to ExFAT.
- If you will sell or donate the NTFS drive, just use a data erasure program - DoYourData Super Eraser for Mac to wipe the NTFS drive and permanently erase all data from it.
Conclusion:
In conclusion, managing an NTFS drive on a Mac doesn't have to be hard. If you want to delete data and clean up your drive, you can use macOS's built-in features, a reputable third-party app like DoYourData NTFS for Mac, or format your drive to a compatible file system.
Each has pros and cons, depending on your needs and tech-savvy. Following the steps makes it easy to make more room on your Mac, speed it up, and keep the NTFS drive organized and safe. These tips will help you keep your external storage working well.
DoYourData NTFS for Mac
DoYourData NTFS for Mac is a safe, powerful and easy-to-use NTFS for Mac tool. It allows macOS to read & write files on NTFS drives without any limitation. It is also a comprehensive disk management tool for Mac to mount/unmount disk, format disk, repair disk, read-write disk...on Mac.
Written & Updated by Justin Kenny
Justin Kenny is a writer & editor of DoYourData. He joined DoYourData in 2016 and focuses on writing articles about Windows data recovery, Mac data recovery, external device data recovery, hard drive clone, data erasure, Mac cleanup, computer issue fixes, etc. He is a super fan of Apple devices and is big on testing new digital device and system utility software.