Reset PRAM, NVRAM, SMC on Mac
Full guide for how to reset PRAM, NVRAM, SMC on Mac (Intel-based/T2/Apple Silicon). Read More >>
Quick Navigation:
Upgrading to macOS Sequoia gives you cool new features, better security, and better usefulness. However, some users may have performance problems and find their Macs running noticeably slower after the upgrade. It can be unpleasant when the new OS is supposed to make things run more smoothly and quickly. You don't need to worry—many ways exist to fix these problems.

This guide will show you the most important things you need to do, from easy fixes like restarting your Mac to more complex ones like resetting the system management controllers and indexing Spotlight again. If you follow these detailed tips, you can get your Mac running faster again and enjoy the benefits of macOS Sequoia without the slowdown.
A quick restart is often the best way to speed up a slow Mac, especially after upgrading to macOS Sequoia. A restart helps fix small problems and makes the computer run faster by removing and reloading temporary files. Let us check to see if restarting your Mac will speed things up.
Step 1: Go to the Apple menu.
Step 2: Tap the Restart in the dialog box.

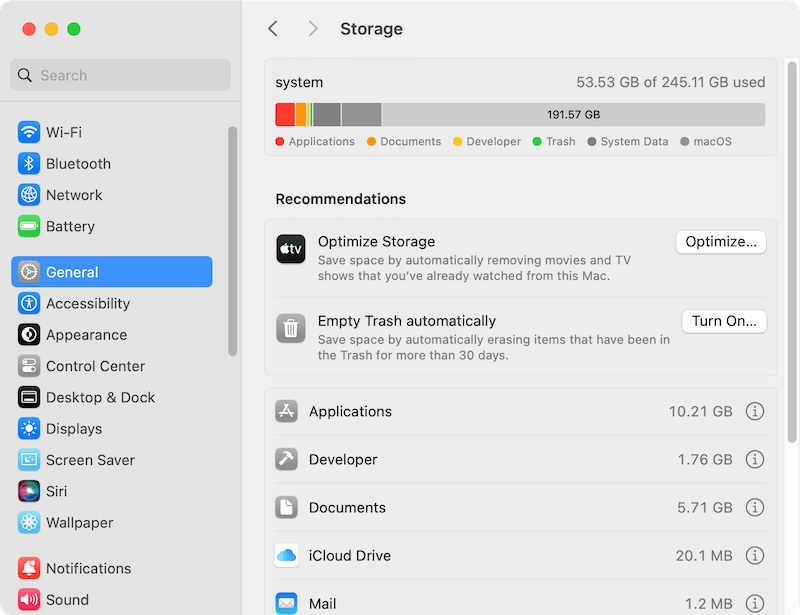
For your Mac to work well, it needs a lot of room, especially after a big update. Having enough room can improve performance. Let's look at how to check your Mac's storage and make necessary space changes.
Step 1: Go to the Apple menu.
Step 2: Click on System Settings. Check out the General part.
Step 3: Click on Storage. After the information loads, a colored list of your disk space will appear. Then you can do the necessary changes to make the Mac run faster, like optimize the space, empty trash, uninstall unnecessary apps, remove useless large files, etc.
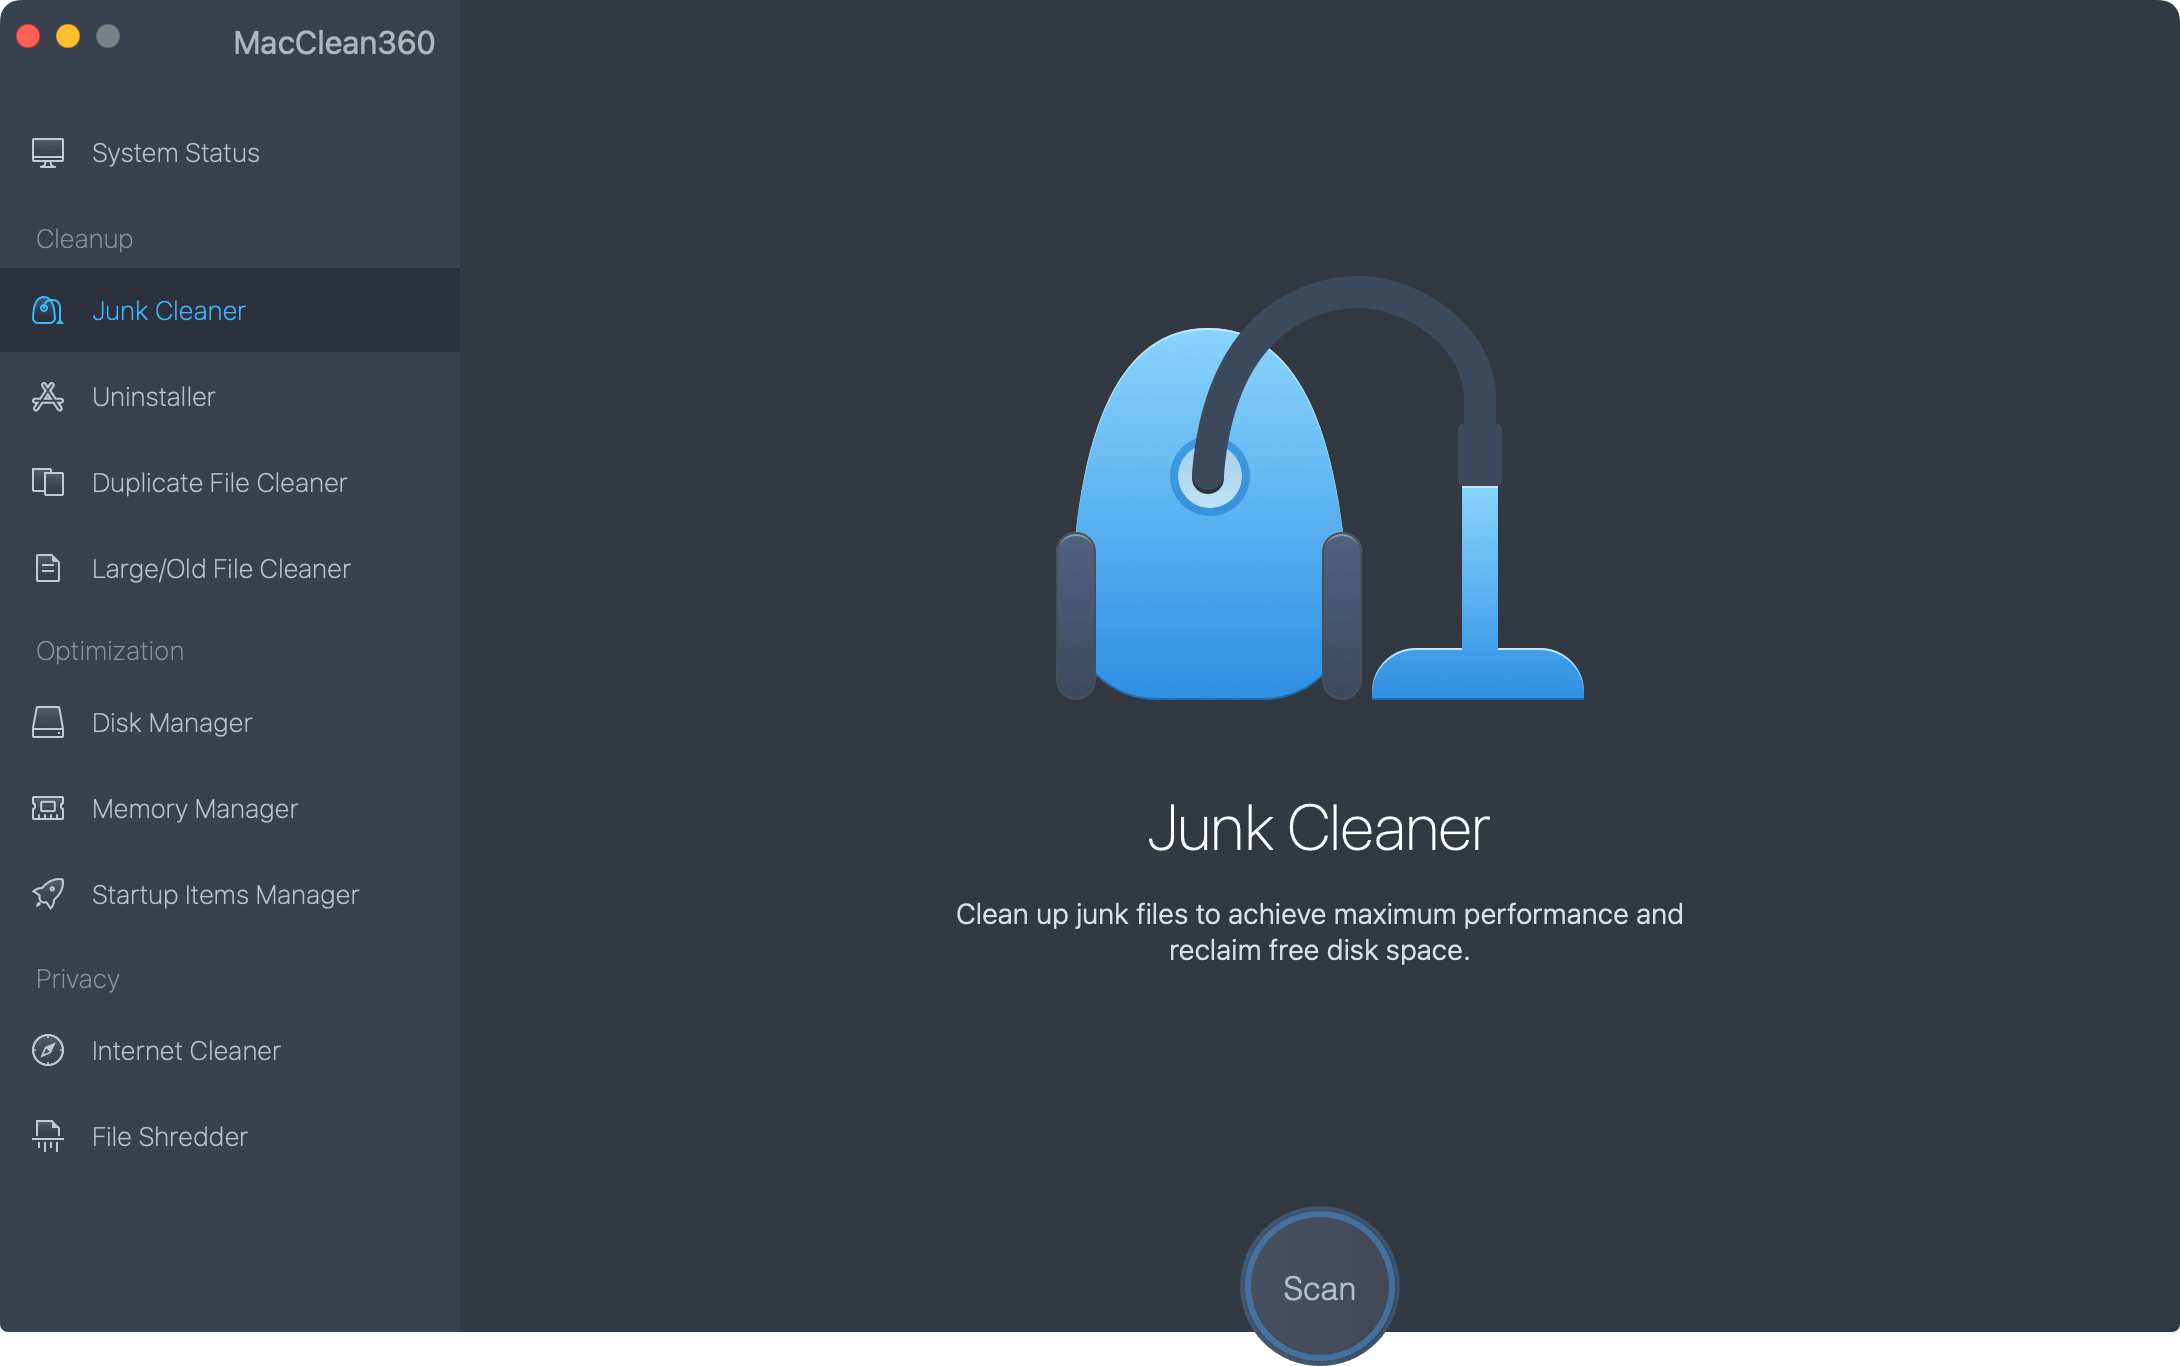
You can also clean your Mac with the software MacClean360 to help you clean the junk data and speed up the Mac after upgrading to macOS Sequoia.
This applications is a comprehensive tool which can search and clear the junk data, duplicate files, large files, etc. Also, you can use the software to uninstall useless apps, manage the startup items, clean browser cache data, and so on.
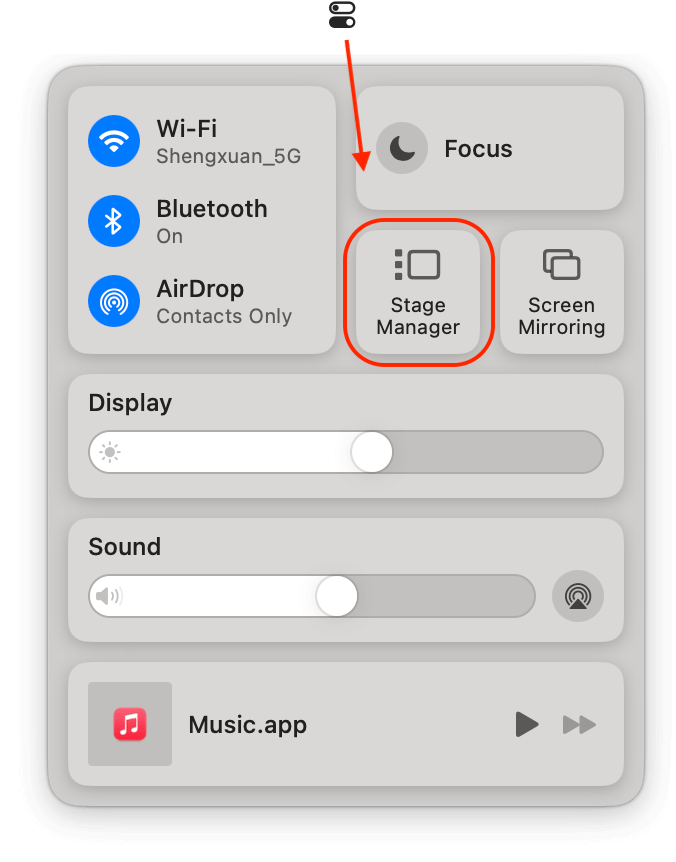
macOS Sequoia has a new Stage Manager tool that makes ordering your windows and apps easier. Stage Manager can help you organize your desktop, get more done, and do a better job. Check out how to get Stage Manager to work on a Mac.
Step 1: Control Center for Access.
Step 2: Click Stage Manager in the Control Center to turn on the feature quickly.
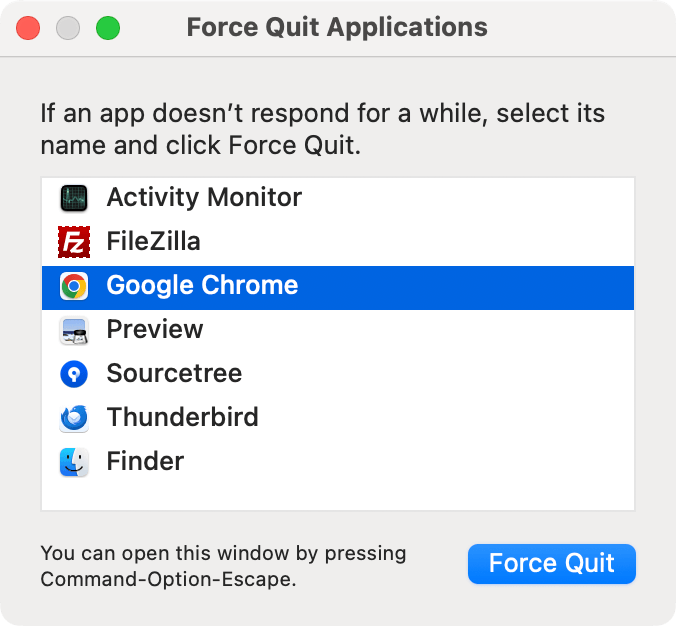
If the Mac is running slow after upgrading to macOS Sequoia sometime, it may be caused by some apps. It is possible to speed up your Mac by closing useless apps manually. If an app stops working, it can slow down your device. Here are steps to quit quickly on a Mac.
Step 1: Keep the Option, Command, and Esc buttons pressed down simultaneously.
Step 2: Pick the app that won't work in the Force Quit window.
Step 3: To close the app, click Force Quit.
Full visual features may cause the Mac run slow after switching to macOS Sequoia. Some visual features can be turned off to free up system resources and make the system run faster. It's useful especially when you updated to macOS Sequoia on an old machine.
Step 1: Go to System Settings.
Step 2: Click on Accessibility.
Step 3: Press Display.
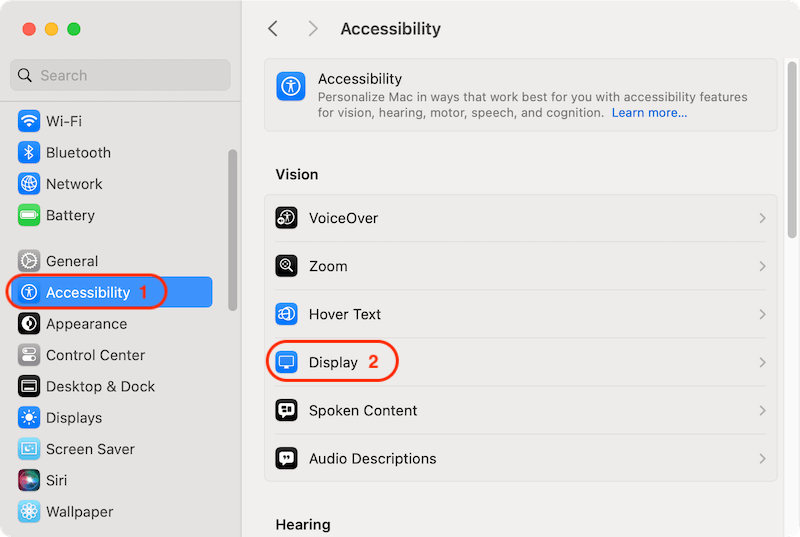
Step 4: Select Reduce transparency and Reduce motion.

If the Mac is becoming slow or using too much CPU after upgrading to macOS sequoia, it can help if you reindex Spotlight search. Here's how:
Step 1: Go to System Settings.
Step 2: Click on Spotlight.
Step 3: Click on the Search Privacy button.
Step 4: To keep your hard drive from being indexed, drag it to the list.
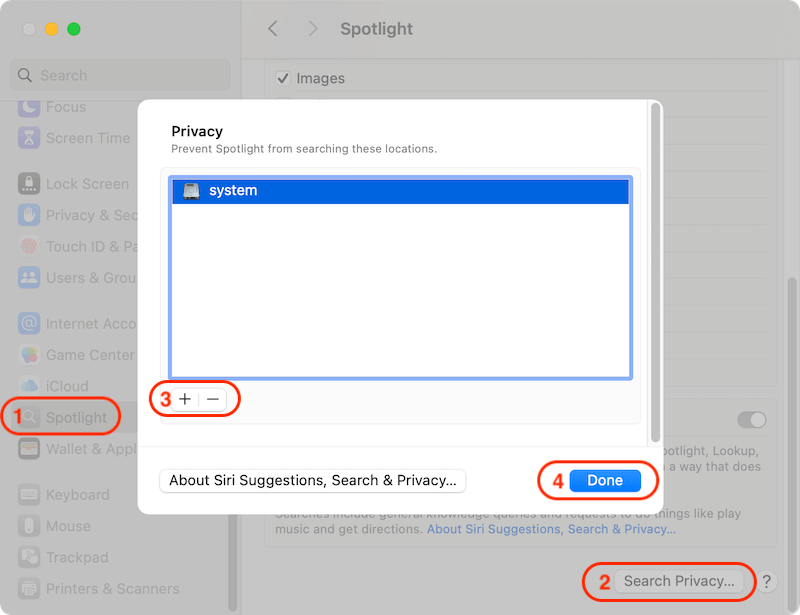
Step 5: After a short time, take your hard drive off the list to start indexing again.
Background tasks can use a lot of system resources. If there are too many useles background processes are running, it will make the Mac run slow in macOS Sequoia. Activity Monitor allows you to find and control these tasks.
Step 1: Go to Activity Monitor from Applications > Utilities.

Step 2: Find any background tasks that are using too much memory or CPU.
Step 3: Stop these processes or take care of them as needed.

Outdated apps can make things run slowly. After upgrading to macOS Sequoia, the Mac might be slow if some apps are outdated and not compatible with the new system. Check and make sure that all of your apps are up to date.
Step 1: Go to the App Store.
Step 2: Press Updates on the left.

Step 3: Update all of your apps when updates are ready.
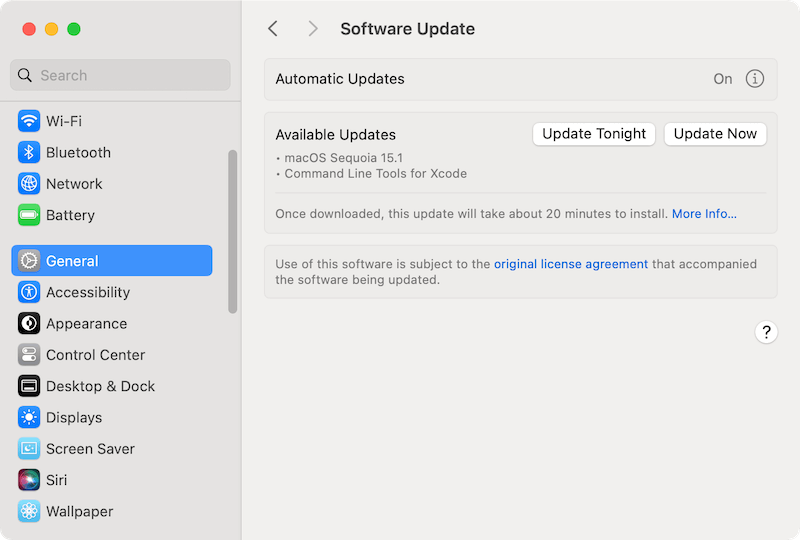
Apple often releases updates for macOS that fix bugs and improve performance. A new update might fix the macOS Sequoia run slow issue. Make sure your system is up to date.
Step 1: Click on the Apple menu in the upper left of the screen.
Step 2: Select System Settings.
Step 3: After that, click Software Update.
Step 4: If there are changes, click Update Now.
Disk Utility can find and fix problems on your hard drive that might slow down the Mac after upgrading to macOS Sequoia. You can use the First Aid feature in Disk Utility to fix the hard drive issues and improve the macOS performance.
Step 1: You can find Disk Utility in the Applications > Utilities folder.

Step 2: Pick out your hard drive and click First Aid.
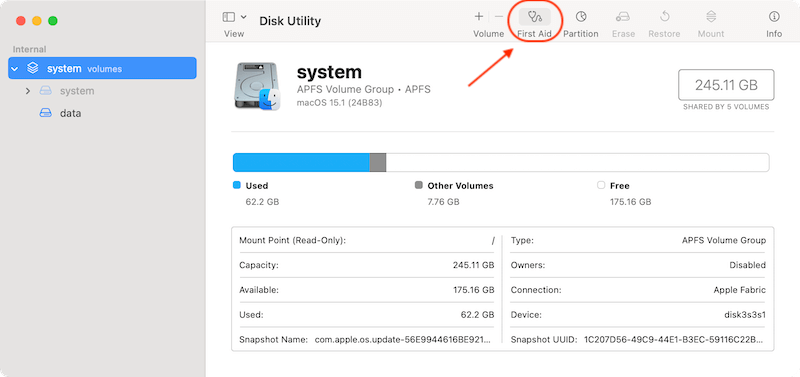
Step 3: To fix the disk, follow the steps shown on the screen.
When you update to macOS Sequoia, you can clear your Mac's SMC, PRAM, or NVRAM to fix speed issues, such as lags. These restarts can also help fix problems with power, batteries, and the system's setup. Here's how to clear the NVRAM on your Mac.
For Macs with Apple silicon: There is no need to reset the NVRAM/PRAM/SMC yourself. The system settings are typically tested during the boot process, which means the system will automatically reset the NVRAM if it detects the need to do so when computer start up.
For Intel based Macs: Here are the steps to reset PRAM/NVRAM:
How to reset SMC on Mac (Intel base machines): There are different methods for the machines:
💡 Tips: macOS Sequoia doesn't support the Mac machines with T2 security chip.
Reset PRAM, NVRAM, SMC on Mac
Full guide for how to reset PRAM, NVRAM, SMC on Mac (Intel-based/T2/Apple Silicon). Read More >>
If nothing else works, reinstalling macOS can fix persistent speed problems. Before you continue, make sure you have a copy of your information.
Step 1: Hold down Power button (or Command + R keys for Intel-chip) and restart your Mac to get into Recovery Mode.
Step 2: Select Options and click Continue and go to the next screen.
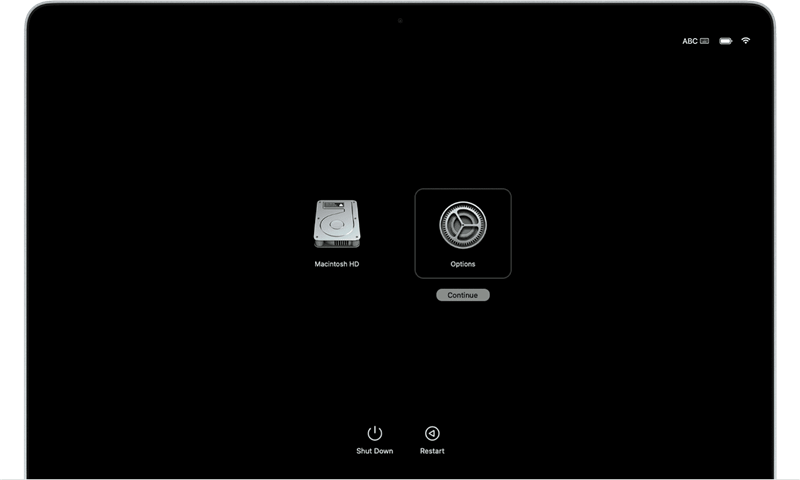
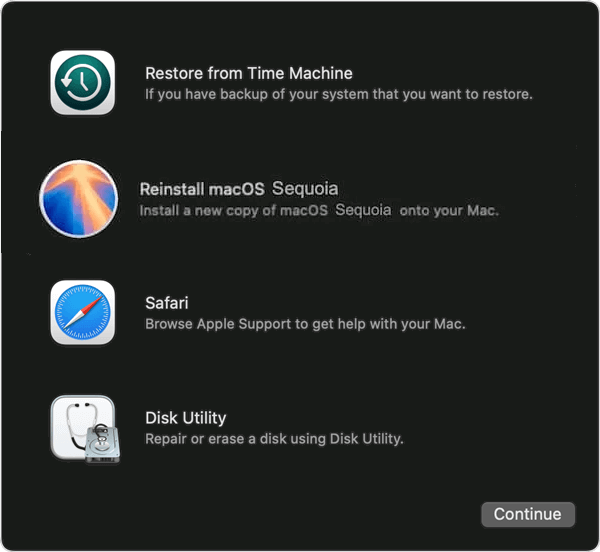
Step 3: Choose Reinstall macOS and do what it says on the screen to reinstall the operating system.
Monitor Your Mac's Health
Tools like Activity Monitor and Console (Applications > Utilities) can help you monitor your Mac's health and find problems early on.
Consider Hardware Limitations
Your old Mac might not have enough power to run Sequoia. You may need to add more RAM or switch to a smaller operating system.
Create Backups for Mac
Before doing any changes, like upgrading macOS, installing software, ensure to create a full backup first. If any problem happens, you can restore your system back to the previous normal status. You can use Time Machine or third-party software, like DoYourClone for Mac to back up your Mac.
Seek Professional Help
If you don't feel okay with the steps or the problem keeps happening, you might want help from Apple Support or a certified technician.
It can be annoying to experience a slowdown after switching to macOS Sequoia, but these steps can help you figure out what's wrong and fix it. Taking care of your Mac by doing things like updating the system and apps, clearing out the trash, and managing startup items can also help it run easily.
By following these steps, you can get the most out of macOS Sequoia without slowing down or wasting resources, ensuring your Mac works at its best. If the speed problems don't go away after you follow these steps, you might want to contact Apple Support for more help. Also, it's a good habit to back up your Mac regularly. If there is any problem happening, you can restore the system back to the previous working status.
The reliable Mac data recovery software to recover deleted or lost files.
Free Trial