Clone to back up external drive on Mac
Clone the external hard drive with DoYourClone for Mac to back up all the data on the drive.
Quick Navigation:
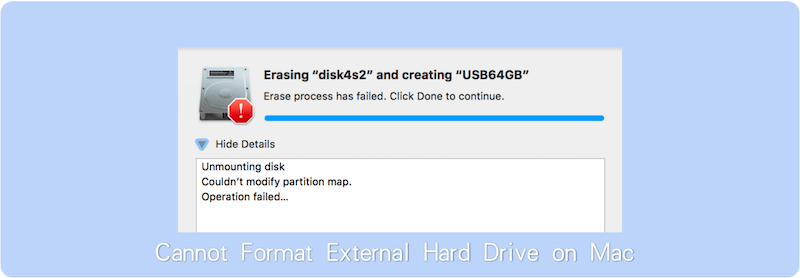
When you're in the middle of organizing your data or setting up backups, it will be frustrating if you cannot format the external hard drive on Mac. Whether you're trying to prepare your drive for Time Machine backups, set up a new file system, or simply clear out an old drive, being unable to format it can halt your progress. This article will walk you through the common causes of formatting failures and provide step-by-step solutions to fix the issue, ensuring that your external hard drive is ready for use on your Mac.
Before diving into the solutions, it's essential to understand the possible reasons why you might be unable to format your external hard drive on a Mac.
🧩 File System Incompatibility:
One of the most frequent causes of formatting issues is file system incompatibility. For example, if your external hard drive is formatted in NTFS (commonly used on Windows systems), macOS can read it but won't allow you to write to or format it directly without additional software. Similarly, trying to format a drive in a file system that isn't fully supported by macOS can lead to errors.
🛑 Drive Corruption or Errors:
Over time, external hard drives can develop bad sectors or corrupted partitions, which may prevent the drive from being formatted. These errors often manifest as the drive being inaccessible or causing macOS to display error messages during the formatting process.
🗄 Hardware Issues:
Sometimes, the issue isn't software-related. Physical damage, such as wear and tear or faulty connections, can prevent an external hard drive from being formatted. If your drive is making strange noises or intermittently disconnecting, it might be suffering from hardware problems.
⛔ macOS Restrictions:
macOS itself can sometimes be the culprit. Certain security settings, permissions, or write protection on the drive can interfere with the formatting process. Additionally, macOS may restrict formatting of drives that are currently in use or have been set as bootable drives.
Before attempting to format your external hard drive, it's a good idea to perform some preliminary checks. These steps can help identify and potentially resolve the issue without requiring more complex solutions.
1. Verify Disk Health:
Start by using Disk Utility's First Aid feature to check the health of your drive. This tool can identify and repair minor errors that might be preventing the drive from formatting. To do this, open Disk Utility, select your external drive from the sidebar, and click on the "First Aid" button. If errors are found, follow the on-screen instructions to repair them.
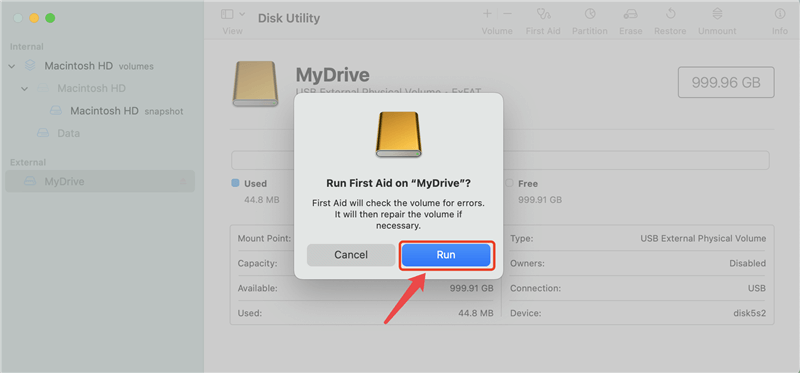
Disk Utility will scan the drive for errors and attempt to repair any that it finds. If the tool reports that the drive is healthy, you can proceed with formatting. However, if it identifies unrepaired errors, you may need to consider other repair options or replace the drive.
2. Ensure Proper Connection:
A loose or faulty connection can interfere with the formatting process. Ensure that the cable connecting your external hard drive to your Mac is securely plugged in and isn't damaged. If possible, try using a different cable or connecting the drive to a different USB port.
Sometimes, the issue may be with the USB port or adapter you're using. Try connecting the drive to another port or using a different adapter to rule out this possibility.
3. Backup Data:
Before proceeding with any formatting or repairs, make sure to back up any important data on the drive. Formatting will erase all data on the drive, so it's crucial to save any files you want to keep to another location.
Clone to back up external drive on Mac
Clone the external hard drive with DoYourClone for Mac to back up all the data on the drive.
If your external hard drive still won't format after performing the preliminary checks, it's time to try some more specific solutions.
Disk Utility is the built-in tool on macOS for managing drives. To format your external hard drive using Disk Utility, follow these steps:
1. Go to Applications folder. Move to Utilities folder. Select Disk Utility.

2. In the Disk Utility window, select your external drive from the sidebar. Click the "Erase" button at the top of the window.
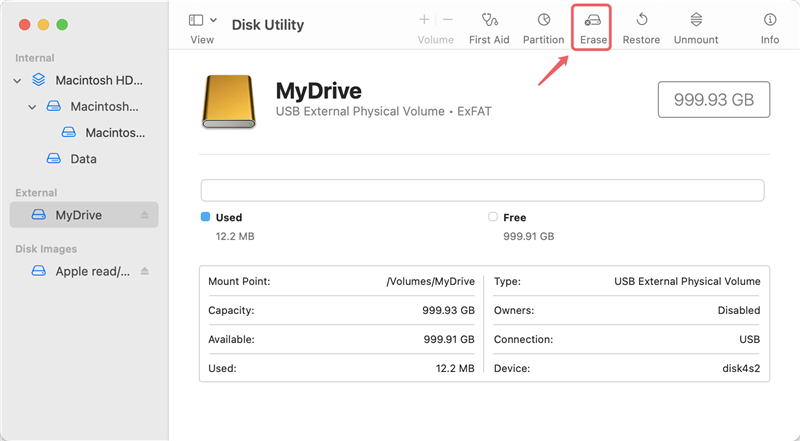
3. Choose a new name for your drive and select the desired file system (e.g., APFS, Mac OS Extended).
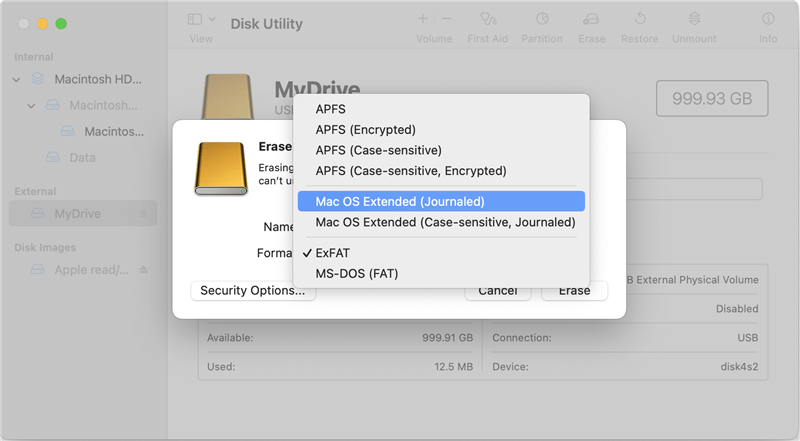
4. Click "Erase" to begin the formatting process.
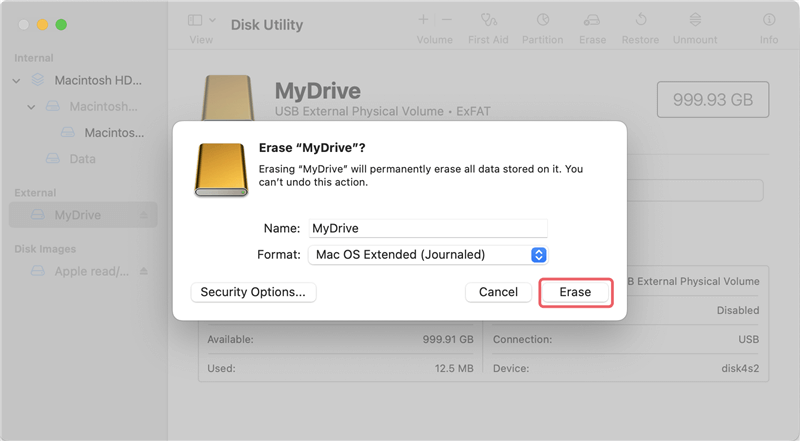
Choosing the Right File System:
Ensure you select a file system that's compatible with your needs. For general macOS use, APFS or Mac OS Extended (Journaled) are good options. If you need cross-compatibility with Windows, consider exFAT.
Drive Appears but Cannot Be Formatted?
Issue: The drive shows up in Disk Utility, but you can't format it.
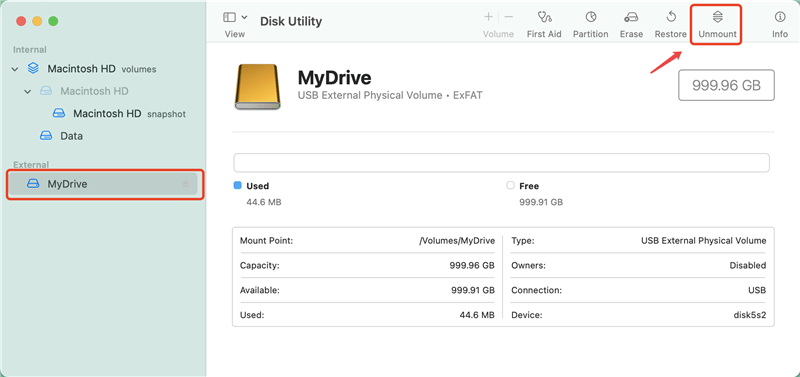
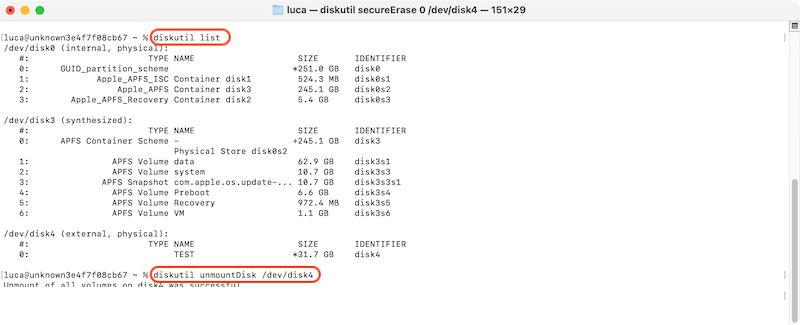
If Disk Utility fails to format the drive, it might be because the drive is still in use. You can force unmount the drive using the Terminal:
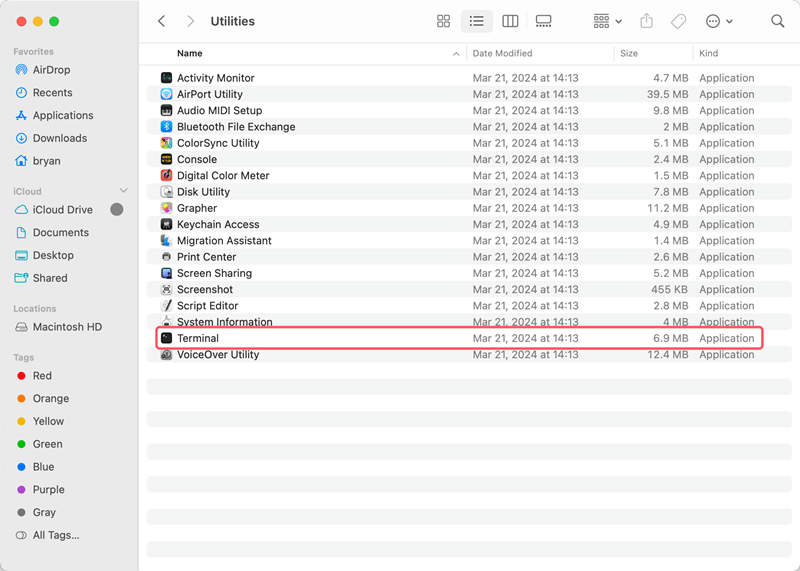
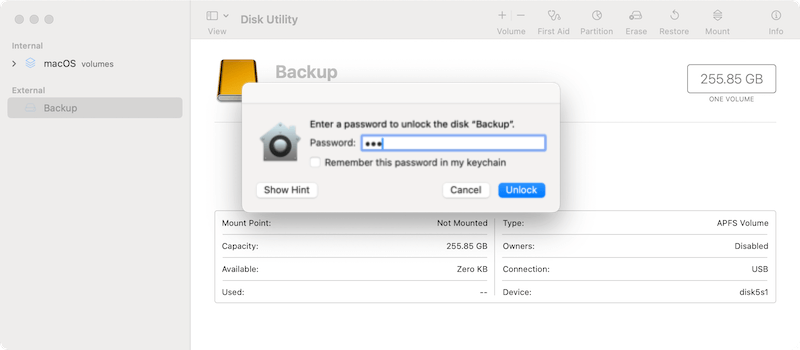
If your external hard drive is encrypted or password-protected, you may need to remove these security features before formatting. This can usually be done through Disk Utility by selecting the drive and clicking on "Mount", then enter the password and click the "Unlock" option, or by entering the password when prompted.
For more control over the formatting process, you can use Terminal commands. For more advanced users, formatting the drive using Terminal can bypass some issues.
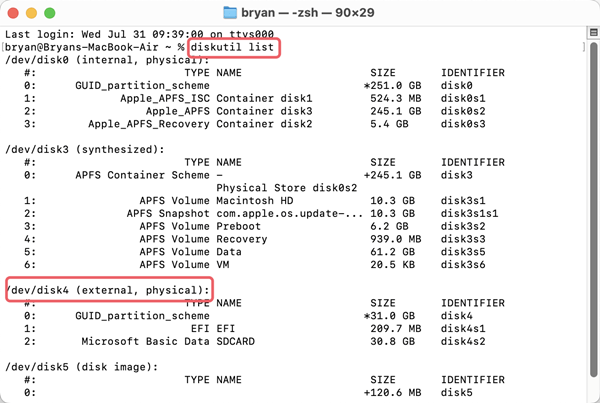
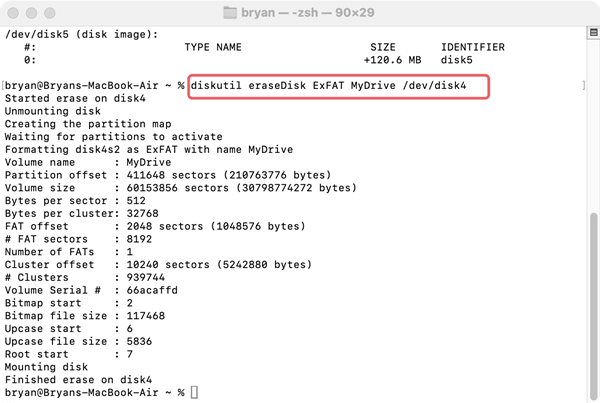
Replace FILE_SYSTEM with your desired format (e.g., APFS, exFAT), DRIVE_NAME with a name for the drive, and /dev/diskX with your drive identifier.
If possible, try connecting the drive to another Mac or even a Windows PC. Sometimes, formatting issues are specific to the Mac you're using, and another machine might handle the process more effectively. If the drive formats successfully on another computer, it should work when reconnected to your original Mac.
If none of the previous solutions work, you may need to explore more advanced options.
There are several third-party disk management tools available that offer more features and capabilities than Disk Utility. Programs like DoYourData Super Eraser can help you format even the most stubborn drives.
You can do as following steps to erase and format an external hard drive with Super Erasure on Mac:
Step 1. Connect the external hard drive to the Mac and run DoYourData Super Eraser.
Step 2. Choose the Wipe Hard Drive mode and select the external hard drive from the list.

Step 3. Click Wipe Now button and then you will be asked to choose a data erasure standard.
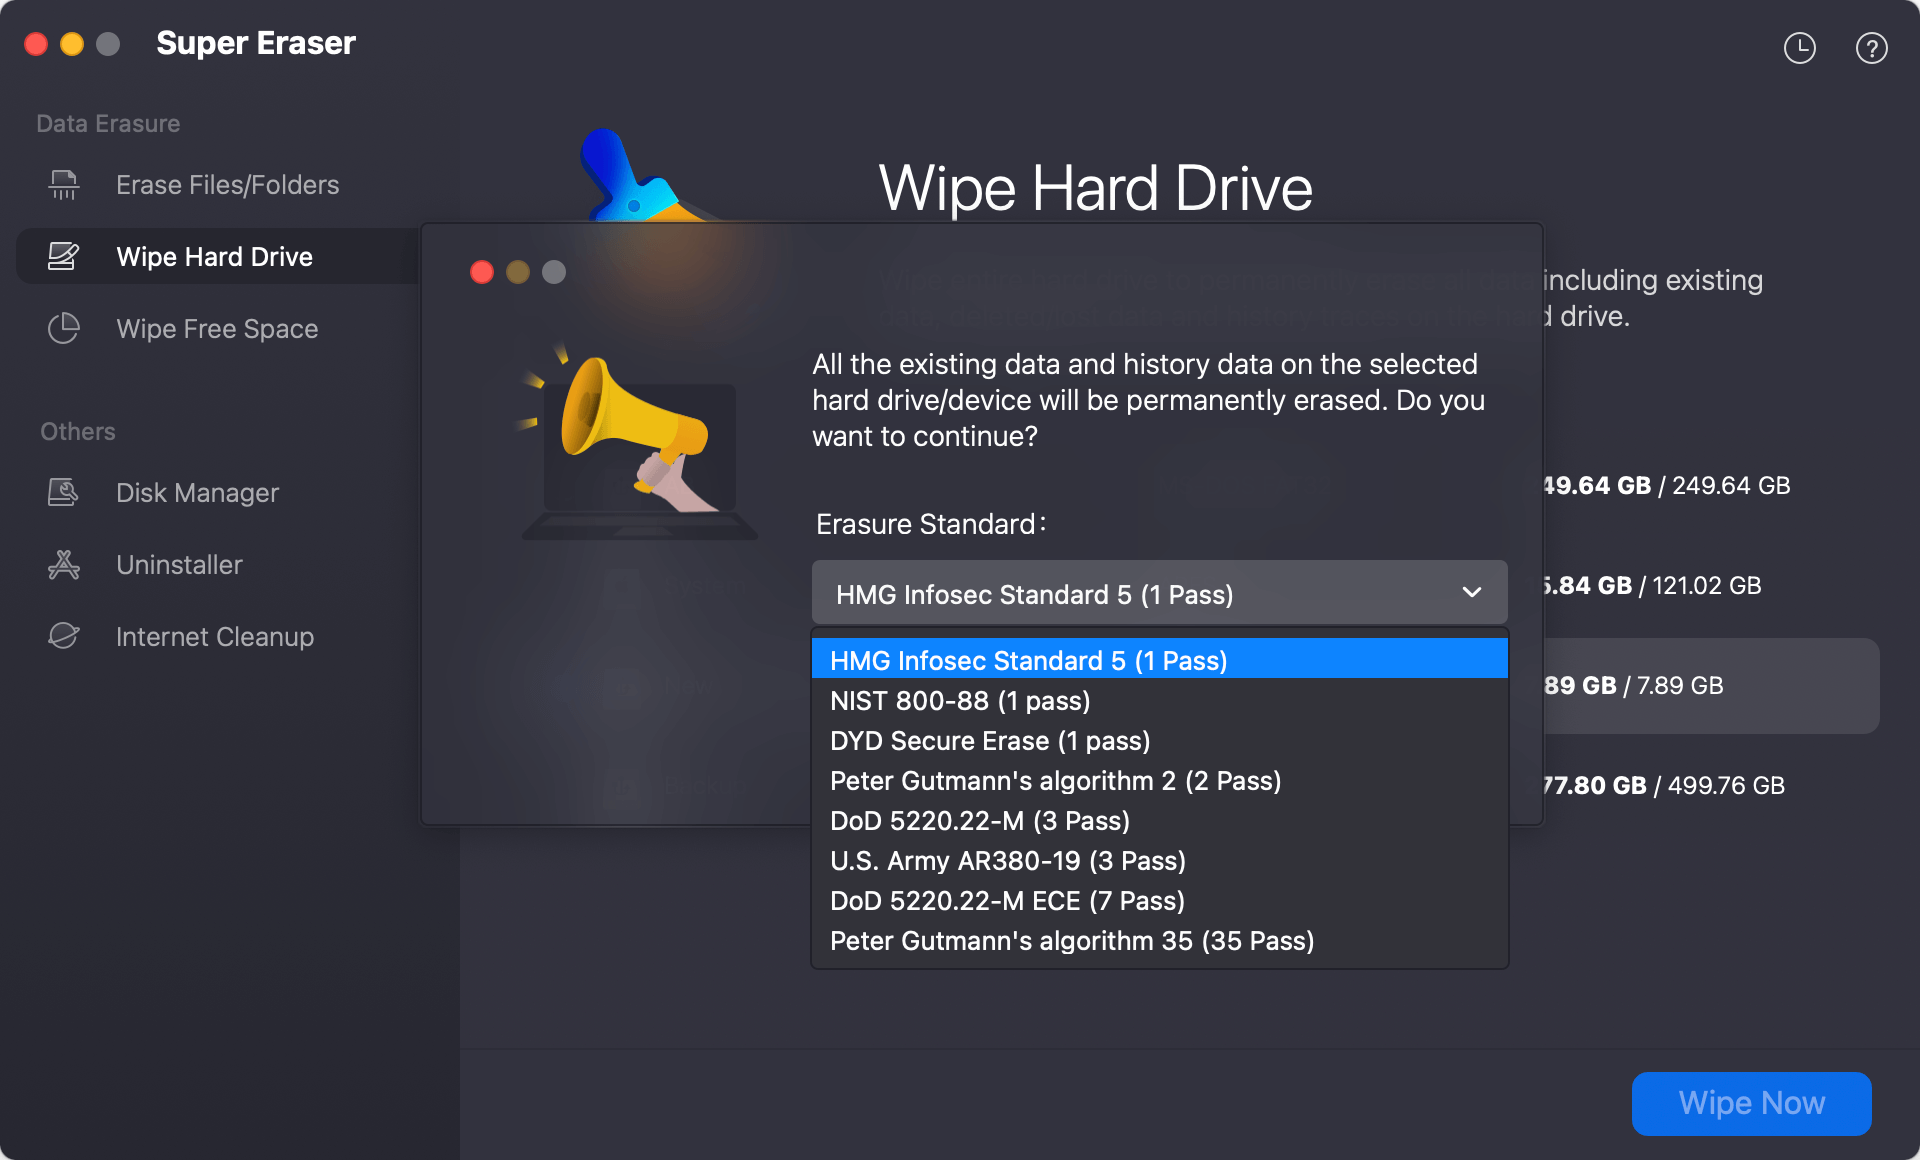
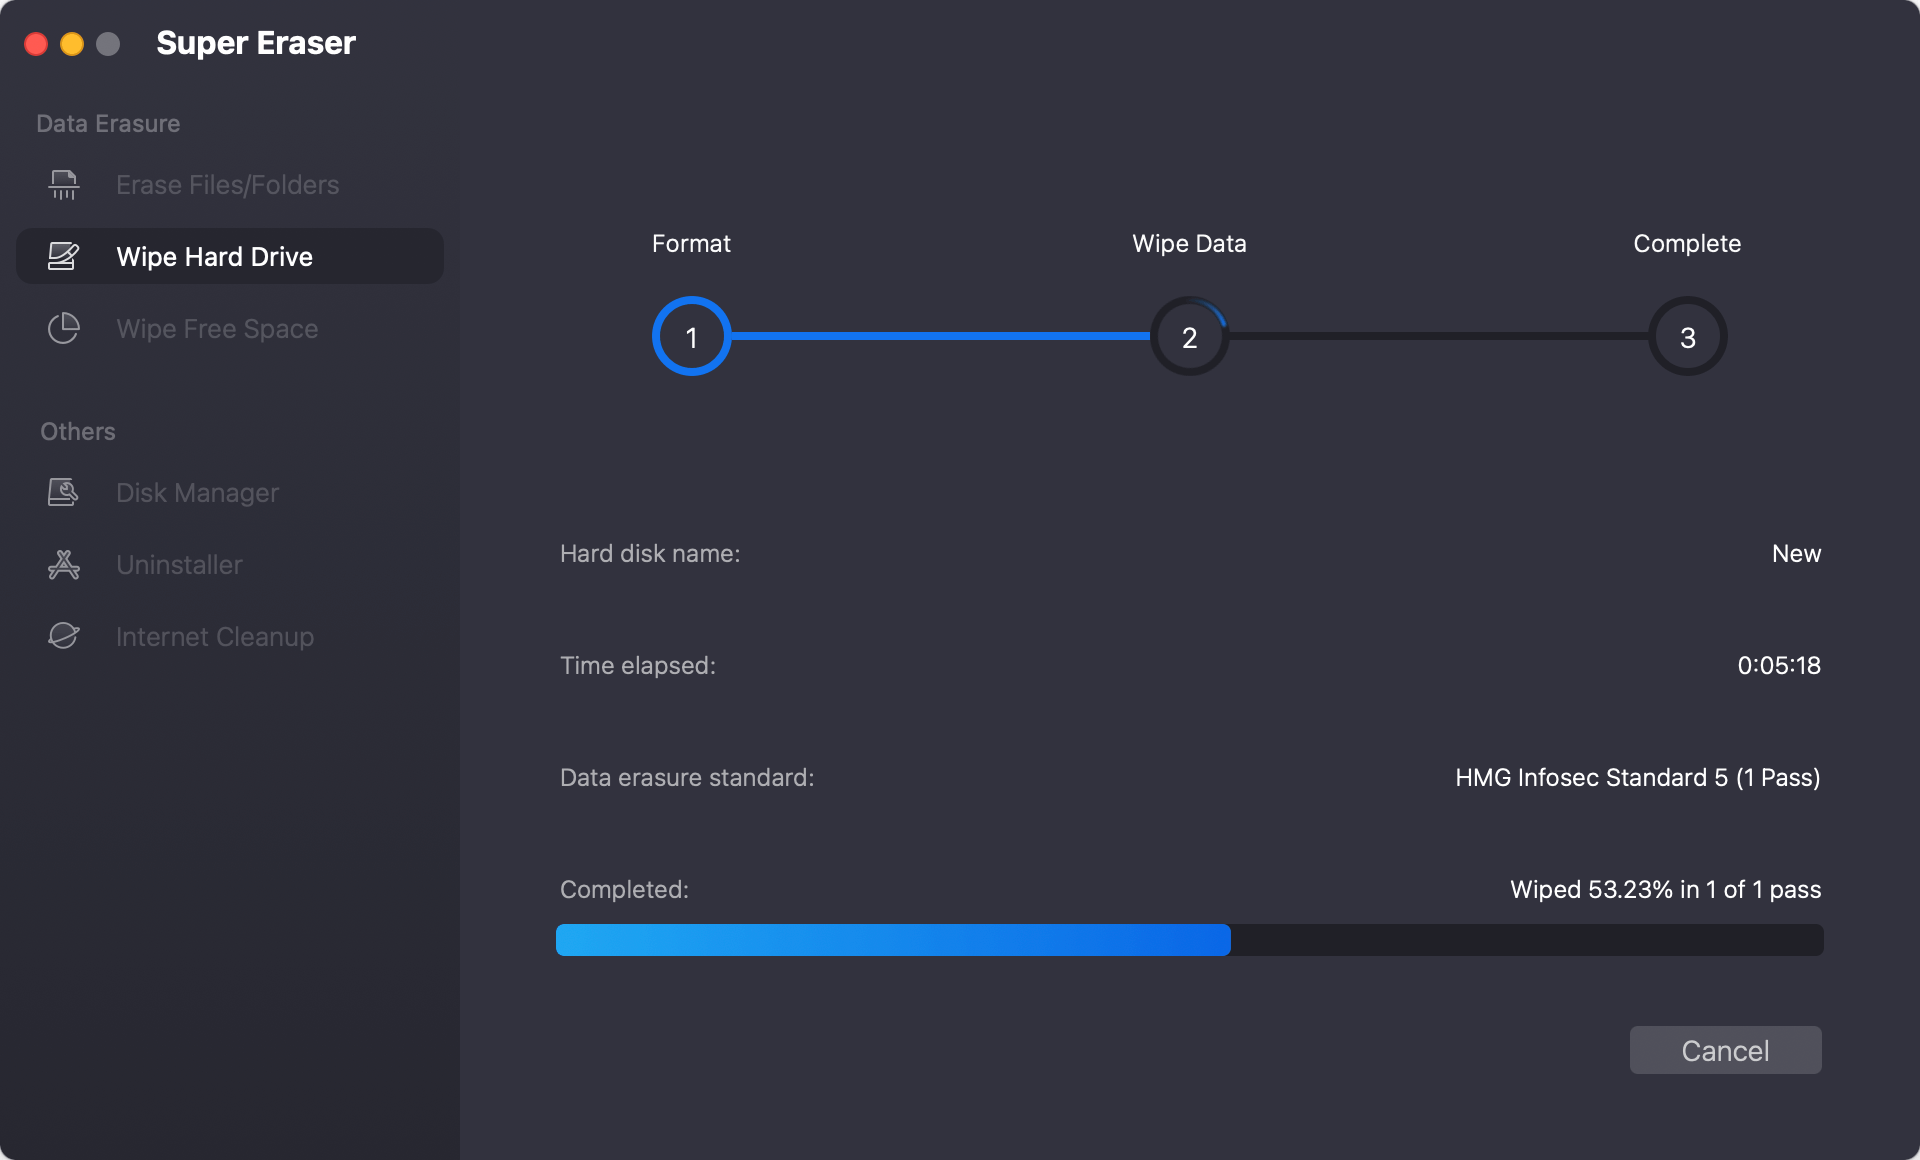
Step 4. Start the erasing process. It may take some time than a simply formatting. Once it's done, the drive was wiped and also formatted.
If your external hard drive still refuses to format, it may be time to reach out to Apple Support. They can provide guidance specific to your Mac and may be able to identify issues that are not immediately apparent.
If formatting fails due to hardware issues and you have important data on the drive, consider using professional data recovery services before discarding the drive. These services can often recover data from severely damaged drives.
To avoid encountering formatting issues in the future, consider these preventive measures:
1. Regular Maintenance:
Regularly checking your external hard drive for errors and maintaining it can prevent many common issues. Use Disk Utility's First Aid feature periodically and avoid physical damage by handling the drive carefully.
2. Choosing the Right File System:
Always choose a file system that matches your needs. For Mac-only use, APFS is the recommended option, while exFAT offers cross-platform compatibility.
3. Keeping macOS Updated:
Ensure your Mac is running the latest version of macOS. Updates often include fixes for bugs and issues that can affect disk management and formatting.
Formatting an external hard drive on a Mac is typically a straightforward process, but various factors can complicate it. By understanding the common causes of formatting failures and following the solutions outlined in this article, you can resolve most issues and ensure your external drive is ready for use. Remember to always back up your data and maintain your drive's health to avoid future problems.

DoYourData Super Eraser for Mac
DoYourData Super Eraser for Mac is a 100% safe, powerful and easy-to-use data erasure program. It offers certified data erasure standards including Peter Gutmann, U.S. Army AR380-19, DoD 5220.22-M ECE to permanently erase data from Macs and external devices, making data recovery be impossible.
