Clone to back up your Mac completely
Using DoYourClone for Mac to create a full copy of all the data on Mac.
After the Word documents are deleted, unsaved or lost due to other issues on Mac, there are still a great chance to get them back. By using AutoRecover feature, checking temp files and Trash, restoring with Time Machine backups, or using third-party data recovery tools, you can easily retrieve the Word documents.
![]() Updated by Justin Kenny on January 8, 2025
Updated by Justin Kenny on January 8, 2025
Quick Navigation:
Losing a Word document on your Mac can be upsetting, whether you accidentally delete it or your computer crashes without warning. Macs are great because they let you get back both lost and deleted files.

It is possible to regain deleted/lost or unsaved Word documents on Mac using built-in tools like AutoRecover and Time Machine and third-party data recovery software. You can ensure you never lose important files again by following these detailed guides on getting back deleted or unsaved Word documents on Mac.
When the Word program was closed or crashed suddenly, the editing data might be lost due to being saved. If you have AutoRecover feature enabled, it would be easy to recover the unsaved data. Or you can check the temporary files for the Word documents on Mac.
Unsaved Word Documents via AutoRecover
AutoRecover is a built-in tool of Microsoft Word that saves a copy of your document regularly. You can use AutoRecover to find copies of your document that haven't been saved if Word crashes or closes without warning.
Steps to recover unsaved Word documents using AutoRecover:
/Users/YourUsername/Library/Containers/com.microsoft.Word/Data/Library/Preferences/AutoRecovery/

Word Document Recovery from Temporary Files:
Temporary files are another place you can find your lost document if AutoRecover doesn't work. As a safety measure, Macs often keep temporary copies of papers.
Steps to recover from temporary files:
Open Terminal: Launch the Terminal by going to "Applications" > "Utilities" > "Terminal."
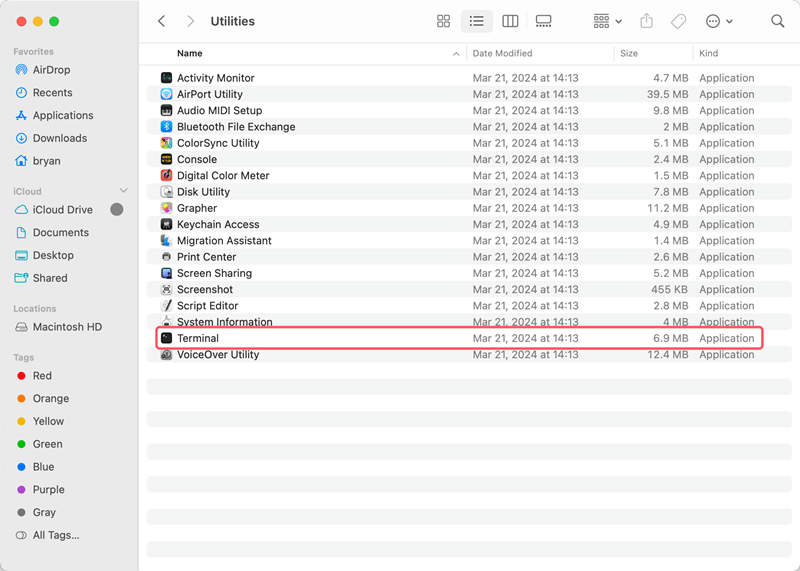
Search Command: To open $TMPDIR in the Terminal, type it and press Enter.

Navigate Through Temporary Folders: When the Finder app opens, it will show a folder called TemporaryItems. Check this folder for Word files or papers that you have saved. Files may have strange names or endings, so pay close attention.

Recover and Rename: It is the file you think is your Word document. Copy it to your desktop. Try opening it in Word after giving it a new name that ends in .docx.
If you removed your Word file on purpose or by accident, you should look first in your Mac's Trash. You can get back files that you put in the Trash until you remove them for good or empty the Trash.
Steps to recover deleted files from Trash:

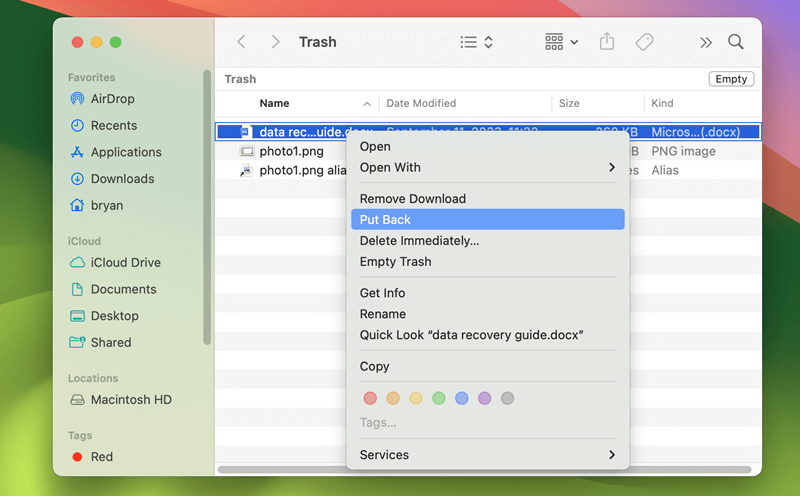
It's better not to empty the Trash immediately after deleting files. It can help get back the deleted files easily if you find some files were removed by mistake. Otherwise, you can only try other methods to recover the deleted Word documents or other files.
If the lost Word documents cannot be found with the mentioned methods, there is another way to recover the deleted or lost Word documents on Mac by using a third-party data recovery software.
Do Your Data Recovery for Mac is an excellent Mac data recovery tool that easily retrieves important files like deleted or lost Word documents. How to use it:
Step 1. Download Do Your Data Recovery for Mac:
You can get the Mac version of Do Your Data Recovery for Mac and download it as follows.
Install it on your Mac, but don't install it on the drive where the lost file was saved, so you don't delete it.
Step 2. Open Do Your Data Recovery for Mac:
Run the app and give it the system rights it needs (you may need to enter your Mac's master password to do this).
Step 3. Select the Drive:
Please select the drive where you last saved your Word file. It is likely to be your main hard drive.

Step 4. Run a Scan:
Press the "Scan" button. Do Your Data Recovery for Mac might take a few minutes to hours to do a deep scan to find lost Word documents from the drive.

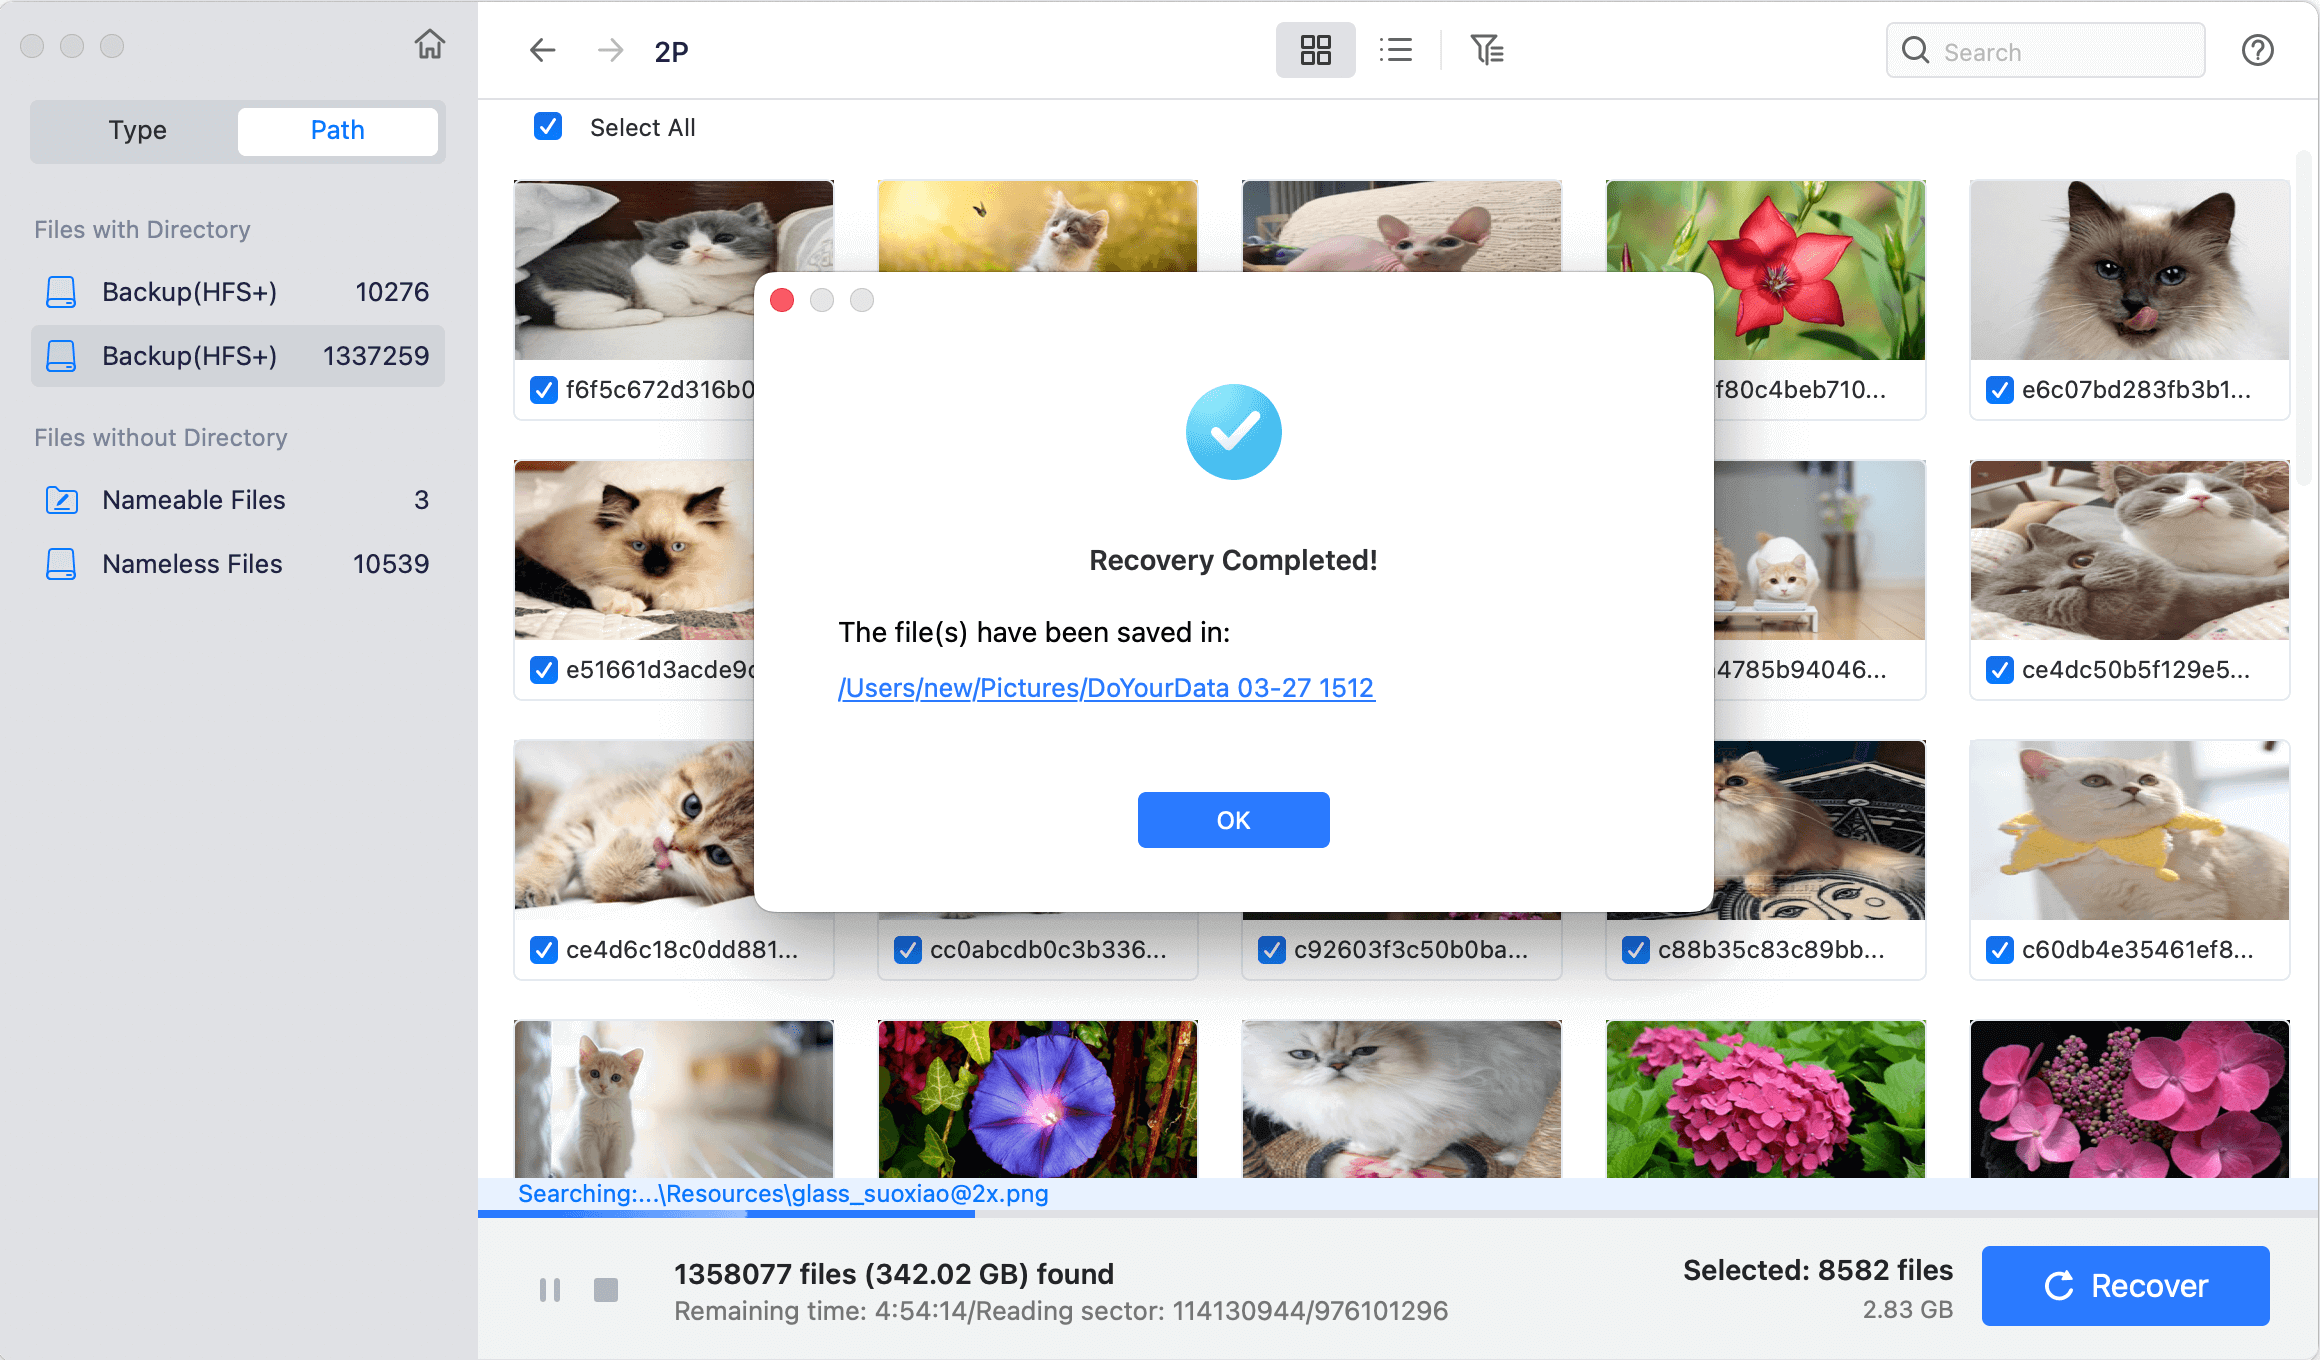
Step 5. Check and Preview:
When the scan is done, look through the list of restored files for your Word document. It might be in a .docx format. You can also double click the file to preview and confirm if it's recoverable.

Step 6. Review and Recover:
To save the file somewhere else, select it and click "Recover" to choose a safe path to save the recovered files. To prevent the recovered files being damaged, ensure to select another drive instead of the original drive to save the files.
💡 Tips: After data loss happen, stop using the device immediately to avoid further damage to the lost data and find the best way to recover the files first.
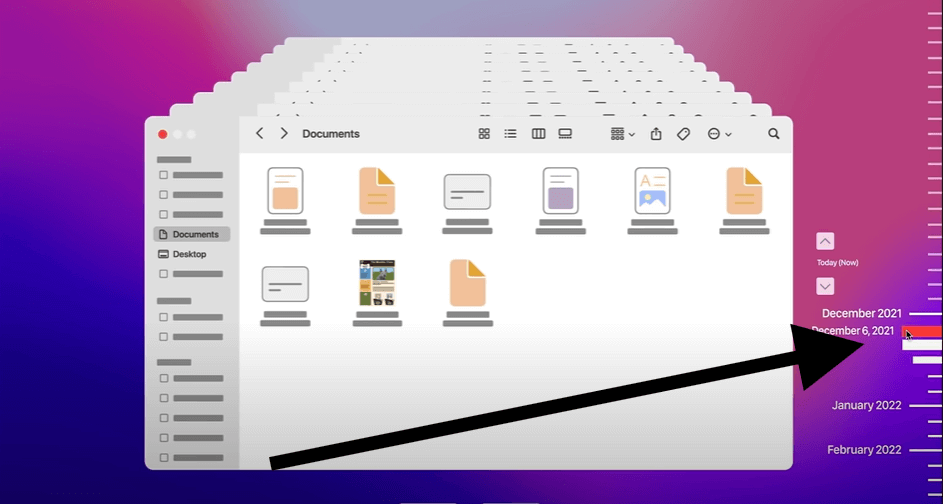
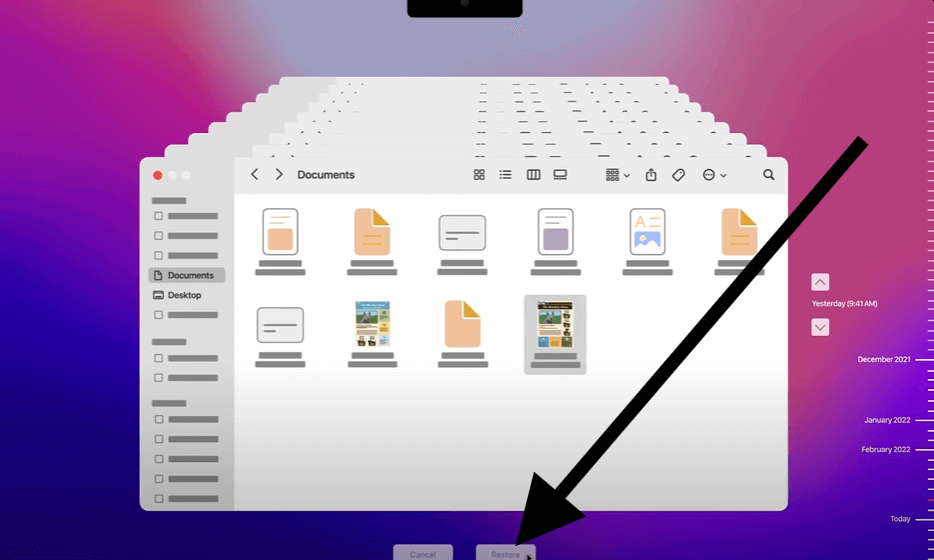
If you regularly back up your Mac with Time Machine, Apple's built-in backup tool, restoring an older Word document version is easy.
Steps to Recover Documents Using Time Machine:

You can do a few things now to make it less likely that you will lose important Word papers in the future. You can lower the chance of losing papers or accidentally deleting them:
Enable AutoSave in Microsoft Word
If you have Microsoft 365, you can use AutoSave to save your document immediately in OneDrive or SharePoint. To make AutoSave work:
Regularly Save Your Work
The easiest way to ensure you don't lose work is to save your paper by hand often. Pressing Command + S after every big change should become a habit.
Backup Your Files
Your documents will be automatically backed up whenever you use Time Machine or a third-party cloud storage service like Google Drive, Dropbox, or OneDrive. If you make regular backups, you can easily get your files back if your hardware fails or you accidentally delete them.
Clone to back up your Mac completely
Using DoYourClone for Mac to create a full copy of all the data on Mac.
Losing a Word document on a Mac can be stressful, but with this guide, you should be able to get it back. You can almost always get your document back, whether you use AutoRecover to recover unsaved files, Trash to recover deleted files or even data recovery tools.
Turning on AutoSave, making backups of your files, and remembering to save your work regularly can lower the chance of losing data in the future. Now that you know these tricks, you should be better able to handle any document recovery problems on your Mac.
Do Your Data Recovery for Mac
Do Your Data Recovery for Mac, one of the best Mac data recovery software, can help you easily and completely recover deleted, formatted or lost files from Mac HDD/SSD, external HDD/SDD, USB drive, memory card, digital camera, or other storage devices.
Written & Updated by Henry Lee
Henry Lee joined DoYourData in 2022. He is interested in writing articles about fixing PC/Mac’s problems. He often shares tutorials and skills regarding information tech and enjoys helping people solve various data loss problems or hard drive crash problems. He likes reading and cooking very much when he is off work.