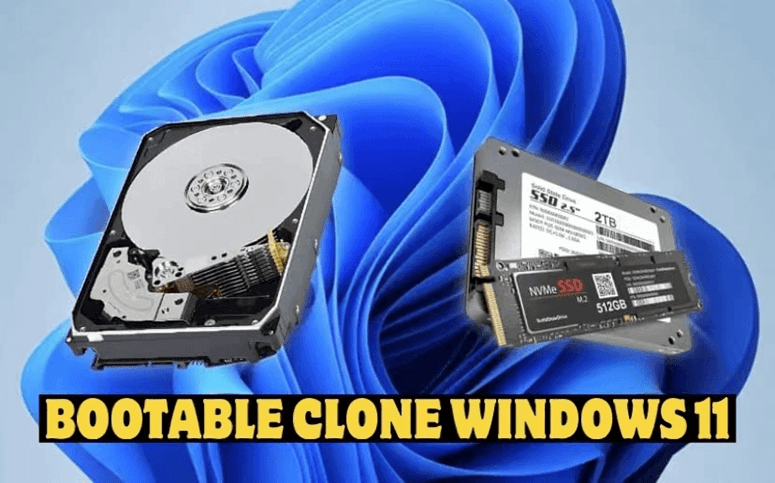
How to back up Surface Laptop?
Clone to create a full backup of your system and data before you sell the Surface Laptop.
Quick Navigation:
It can be exciting to sell your Surface Laptop, whether to get the newest model or make room for new tech. One important thing you must do before giving the device to someone else is delete all of your info.
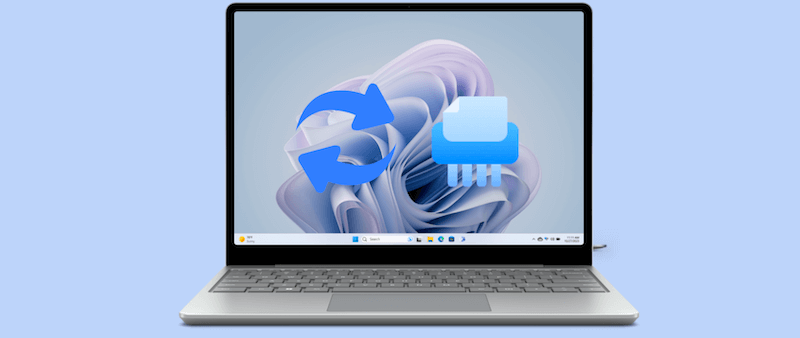
Many private things are stored on your laptop, from private photos and papers to saved passwords and browsing history. Therefore, you should safely delete all of your data. It will protect your privacy and help the new owner start smoothly.
This guide will show you how to do everything, from making a copy of your files to running a factory restart safely, and then permanently erase data from Surface Laptop. So, you can confidently sell your Surface Laptop because you'll know your data is safe.
It is important to wipe your Surface Laptop before selling it for many reasons:
🛡️ Protecting Personal Information
Your laptop contains a lot of personal data, such as pictures, documents, saved passwords, and browsing history. Deleting files is insufficient as it's able to recover the deleted files with the right tools. A full wipe removes your personal information for good, keeping your privacy safe.
♻️ Ensuring a Fresh Start
A factory restart deletes all your data and reinstalls the operating system, giving the new owner a clean device that works perfectly. It provides a smooth experience and makes it less likely that they will run into problems after you use it.
🥷 Avoiding Security Risks
If you don't delete your information properly before selling your laptop, you could face big security risks. Bad people could use personal information left behind, leading to identity theft, financial loss, or other problems. Your private information won't get into the wrong hands with a safe wipe.
Before giving your Surface Laptop to someone else, you must wipe it to ensure that all your personal information is gone. This process includes more than just deleting files to eliminate all traces of your information. The device must be completely reset. If you want to ensure that no one else can use your Surface Laptop after you wipe it clean, take these steps.
It's important to back up any data you want to keep on your Surface Laptop before you wipe it. These are personal files like pictures, music, documents, and more. There are several ways to back up your data:
How to back up Surface Laptop?
Clone to create a full backup of your system and data before you sell the Surface Laptop.
You should log out of your accounts and turn off any software you don't need before wiping your Surface Laptop. This step is especially important if you've used your Microsoft account or bought paid apps linked to your device.
If you have BitLocker encryption turned on for your Surface Laptop, you must turn it off before you do a factory restart. BitLocker is a security tool that encrypts your files so that people who aren't supposed to can't see them.
To disable BitLocker:
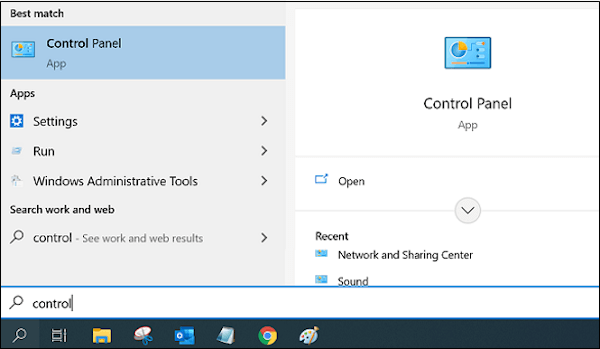

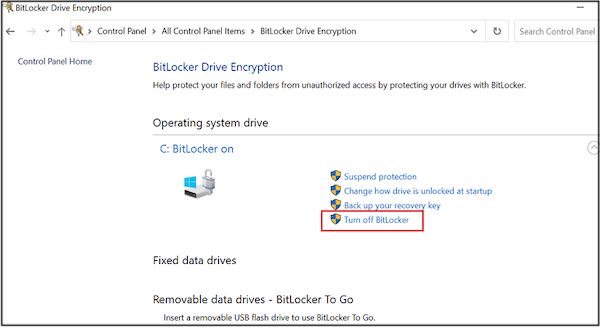
You are now ready to do a factory reset since you have backed up your files, logged out of all your accounts, and turned off BitLocker. During this process, your Surface Laptop will lose all its files, and Windows will be installed again.
To perform a factory reset:
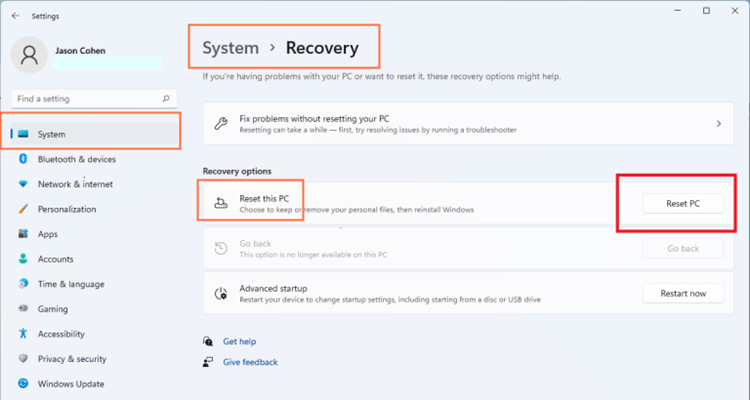
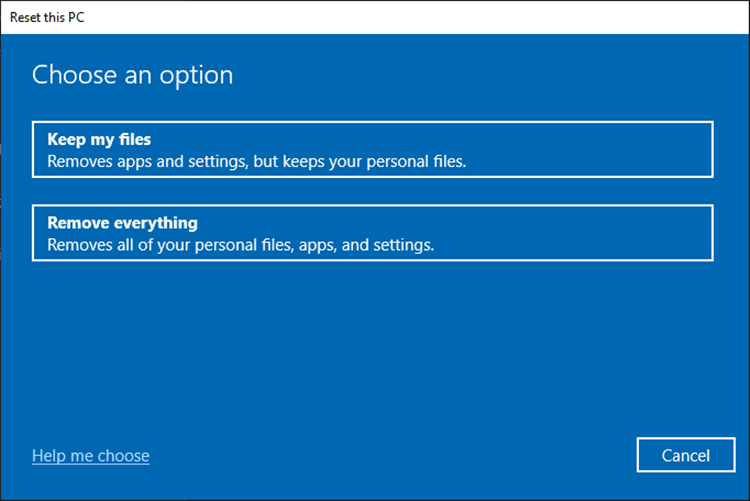
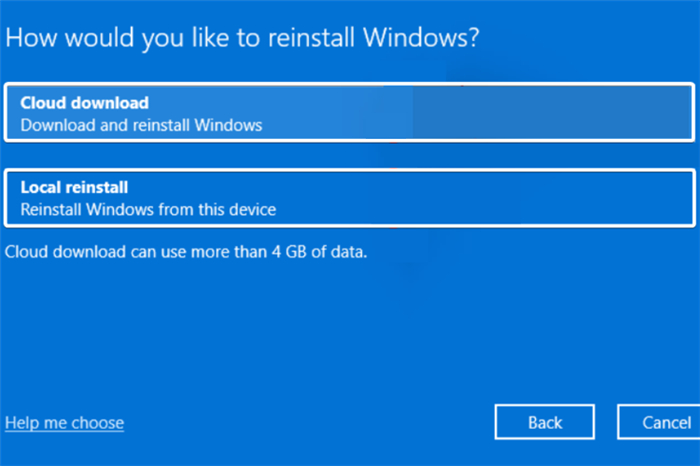
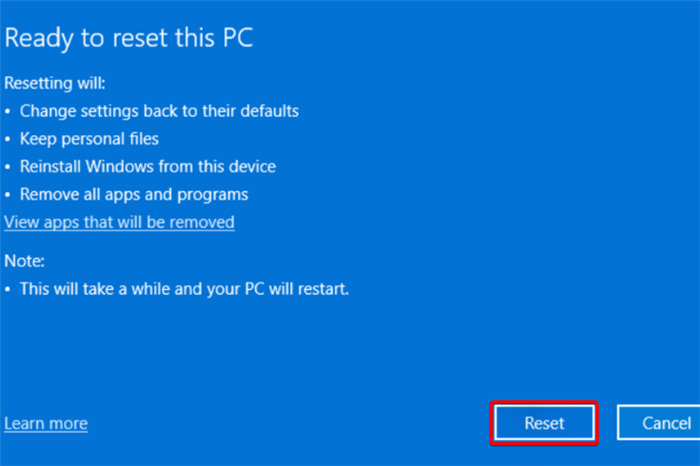
After a factory reset, it's not the end of the process. Even if you have selected the option to remove everything while factory resetting the system, it's not enough. The removed data can still be recovered with data recovery software.
How to recover the data from Surface Laptop?
With the professional data recovery software, you can recover the lost data from Surface Laptop even after a factory reset.
If you want to make sure the personal data is gone forever after a factory reset, it's necessary to wipe the free space of the drive to ensure the removed data is permanently wiped.
To accomplish the task, you need a reliable data erasure software. The data wiping tool will overwrite the free space with "0", "1" or random data, then removed personal files will be totally destroyed and no software can get them back.
What's the best data erasure software? No doubt, DoYourData Super Eraser stands out among all the data wiping tools. With multiple data sanitation algorithms applied, intuitive interface, and flexible modes, you can easily shred files or wipe drive using the software.
How to wipe the data on Surface Laptop before selling it? Here we will tell your the detailed steps to do that:
1. Download and install DoYourData Super Eraser, then un the software on your Surface Laptop. As you have removed the personal files while factory resetting the computer, now you can only choose the mode Wipe Free Space to make sure the deleted files will not be recoverable.
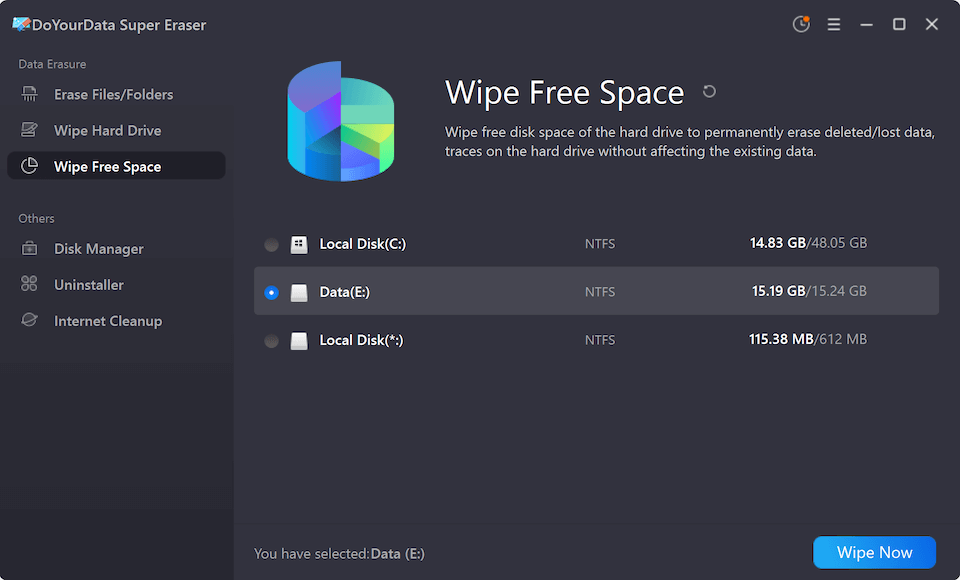
2. After clicking the button Wipe Now, you will be asked to select a data erasure standard. If you want to make sure it's more secure and no any piece of your files will be found, you can choose a standard with more passes which will take more time.
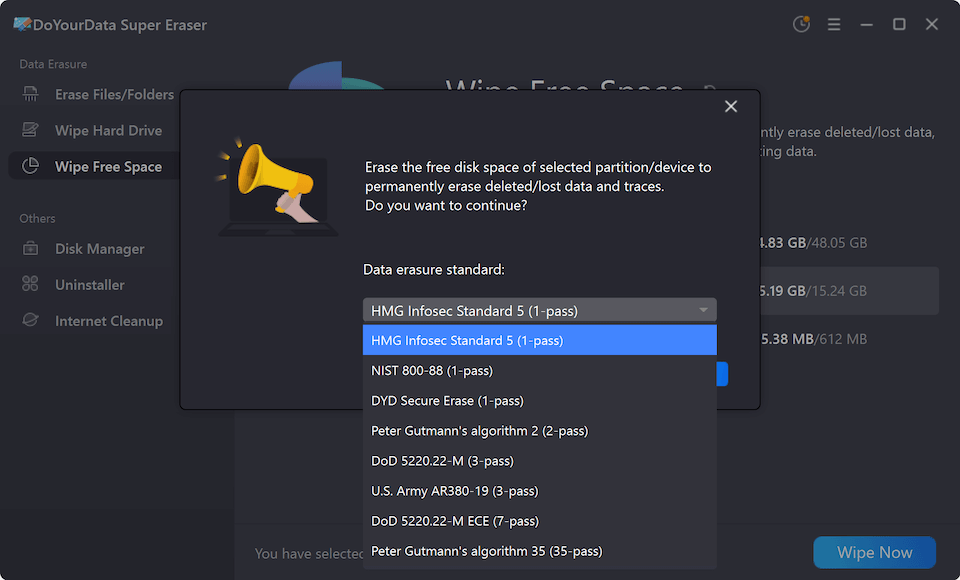
3. Once you confirmed the data wiping algorithm, click the Continue button to proceed the data wiping process.
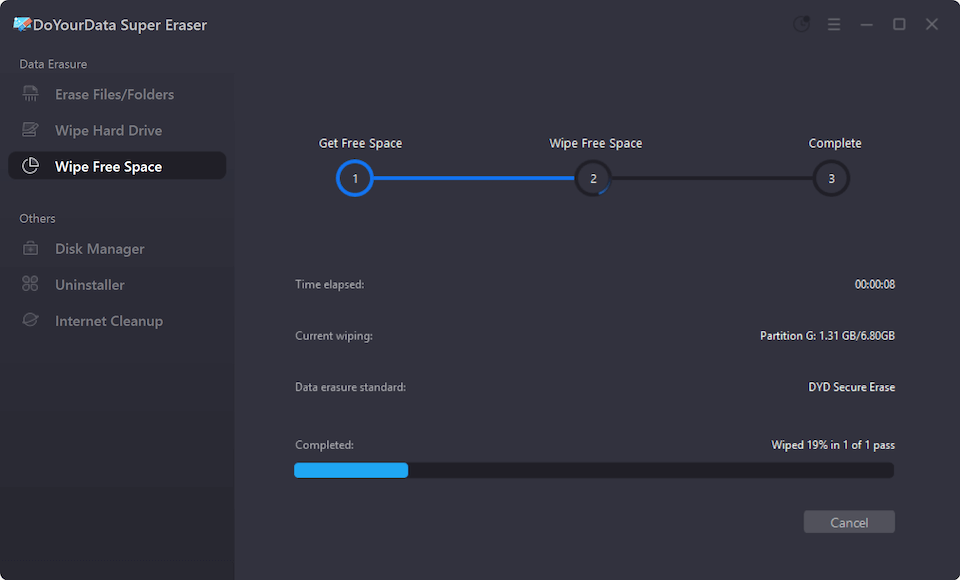
After the wiping process is finished, all the personal files on your Surface Laptop is gone for good. You can even use any data recovery software to scan the drive and verify it.
After the task is done, you can uninstall the software from your computer and turn off the computer. Then it's ready to be sold and you don't need to worry about data breach.
It's important to wipe your Surface Laptop before selling it to keep your personal information safe and ensure the new owner has a good time. You can safely delete all traces of your use by backing up your data, logging out of your accounts, turning off BitLocker, and doing a factory restart. The last most important thing is to wipe the personal data from the laptop permanently with DoYourData Super Eraser before you sell it.
This process keeps your information safe and gives the buyer a brand-new device. If you take the time to do these things, you can be sure that your data is safe and your laptop is ready for the next step.
DoYourData Super Eraser
DoYourData Super Eraser, the award-winning data erasure software, offers certified data erasure standards including U.S. Army AR380-19, DoD 5220.22-M ECE to help you securely and permanently erase data from PC, Mac, HDD, SSD, USB drive, memory card or other device, make data be lost forever, unrecoverable!
