How to Recover Deleted Files in 2026: The Complete Guide for PC, Mac, and External Drives
It is easy to recover deleted files with right methods or right tools. If you cannot recover deleted files from recycle bin or backups, you can use a data recovery program to help you scan the drive and find all deleted/lost files. Do Your Data Recovery can help you recover deleted files from PC, Mac, USB drive, or other storage devices. It takes only three steps to get all deleted files back.
![]() Updated by Justin Kenny on March 31, 2026
Updated by Justin Kenny on March 31, 2026
Quick Navigation:
- Are the Deleted Files Lost Forever?
- Recover Data from PC/Mac/USB with Do Your Data Recovery
- Final Thoughts!
- FAQs About Recovering Deleted Files
In today's digital age, our laptops and PCs and Storage Devices hold a treasure trove of valuable data - whether it's important work documents, cherished family photos, or critical system files. Accidental file deletion can be a frustrating and often panic-inducing experience. However, understanding how to recover deleted files can save you from significant stress and potential data loss.

This comprehensive guide will walk you through the steps to recover deleted files from your laptop or PC, Mac, external storage device. From utilizing built-in system tools to leveraging powerful third-party data recovery software and knowing when to seek professional help, you'll be equipped with the knowledge to retrieve your lost files effectively.
Are the Deleted Files Lost Forever?
"Can I recover permanently deleted files in 2026?"
Yes, as long as the data hasn't been overwritten, recovery software can retrieve files from the drive's file system.
Recover Deleted Files on Windows11/10/8/7:
Method 1. Check the Recycle Bin
When files are deleted or misplaced, the Recycle Bin is the first place to check. Typically, deleted files are moved here, making it easy to find and restore them to their original location unless the Bin has been emptied.
To ensure you are prompted before deleting a file, enabling a confirmation dialog is helpful. To do this, right-click the Recycle Bin on the desktop, select Properties, and check the "Display delete confirmation dialog" box.
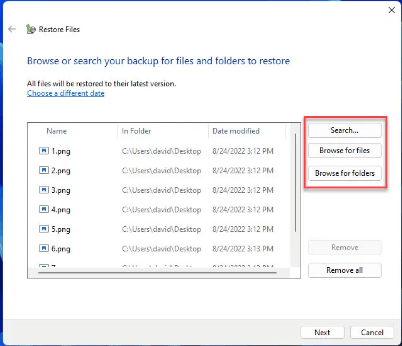
Steps to Restore Files from the Recycle Bin:
- Open the Recycle Bin: Access it from the desktop or the Start menu.
- Find the Missing File: Browse the Bin for the file you want to restore.
- Restore the File: Highlight the desired file and click "Restore." For restoring multiple files, select them and click "Restore the selected items" in the top left corner.
- Alternative Method: You can also drag and drop files from the Recycle Bin to another folder if you prefer not to restore them to their original location.

Method 2. File History Backup
File History Backup is a feature available in Windows 8.1, 10, and 11 that allows you to save copies of your files to network storage or an external SSD or hard drive. If your Recycle Bin is empty, this is the next option to try. Keep in mind that you must enable File History and run your first backup before losing any files, as it is not enabled by default. Refer to our guide for detailed instructions on setting up file backups in Windows.
Steps to Restore Files Using File History Backup:
- Open File History: Type "Restore your files with File History" into the Windows search bar.
- Find the File: Locate the file you want to recover. There may be multiple versions available.
- Restore the File: Select the desired version of the file and click "Restore." You can then drag it to a new location or keep it in its original folder.
Method 3. Windows File Recovery
Another option is the Windows File Recovery app, which can recover deleted files from various local storage devices, such as USB drives or SSDs. The app offers two modes: Regular and Extensive. Regular mode is ideal for recovering recently deleted files, while Extensive mode provides a broader search for files deleted a longer time ago. Though it may be challenging for a standard user, dedicated users will find it a valuable tool. Detailed instructions are available on the "Recover lost files on Windows 10" page.
Recover Deleted Files on macOS:
Method 1. Check the Trash
Similar to Windows, macOS sends most deleted files to the Trash. Files remain in the Trash until they are manually deleted or automatically removed based on Finder preferences. If you have set Finder to empty the Trash after a certain number of days, files will be permanently deleted accordingly.
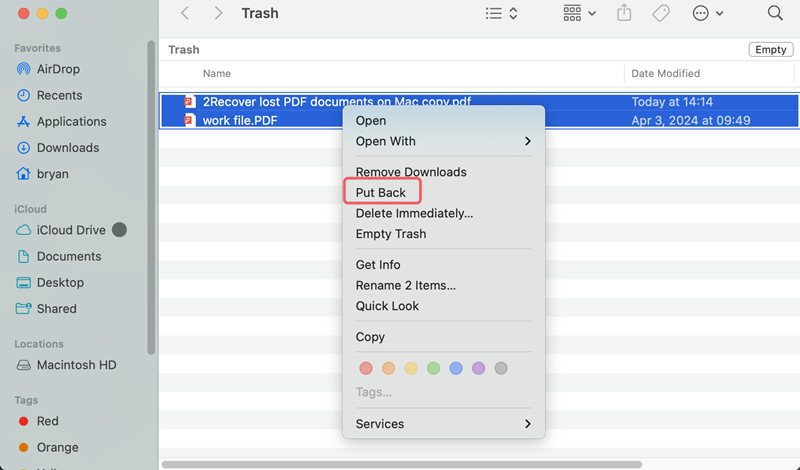
Steps to Restore Files from the Trash:
- Open the Trash: Access it from the Dock or by using Finder.
- Locate the File: Find the file you wish to restore.
- Restore the File: Right-click the file and choose Put Back. Alternatively, you can drag and drop the file to a new location if preferred.
Method 2. Time Machine Backup
Time Machine is a built-in application in macOS that allows users to set up automatic backups to an external storage device. Backups can be scheduled hourly, daily, or weekly. Once the storage device is full, Time Machine will delete the oldest backups.
To restore files using Time Machine, ensure it was set up and a backup was performed before the files were lost. Refer to our guide for detailed instructions on setting up Time Machine backups for macOS.
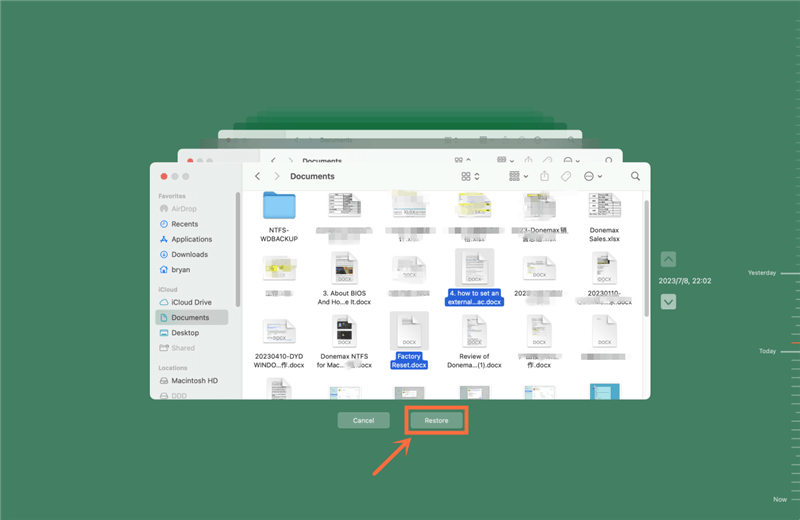
Steps to Restore Files with Time Machine:
- Connect the Storage Device: Connect the external storage device used for Time Machine backups.
- Open Time Machine: Go to the Apple menu, select System Preferences or System Settings > General > Time Machine, and click on Time Machine.
- Find the File: Locate the missing file using the timeline on the right side of the Time Machine window.
- Restore the File: Click Restore to return the file to its original location.
Recover Data from PC/Mac/USB with Do Your Data Recovery
File recovery software can be a valuable tool for recovering deleted files on macOS. Often referred to as "Data Recovery" "unerase" or "undelete" software, these programs can locate files that have been deleted but not yet overwritten by the system. To maximize your chances of recovery, start data recovery as soon as possible.
Top 4 File Recovery Software for Windows & macOS:
If built-in tools and backups fail to recover your deleted files, third-party recovery software can be an effective solution. Here are some top 4 recommended recovery tools:
Top 1. Do Your Data Recovery
Do Your Data Recovery is a powerful, 100% safe and easy-to-use file recovery program for both Windows PCs and Macs. It can help you securely and quickly recover deleted, formatted or lost files from Windows computers, Macs, HDDs, SSDs, USB flash drives, SD cards, digital cameras, RAID drives, Servers, etc.
Features:
- Easy-to-use and 100% effective file recovery software.
- Ensure finding every recoverable file with Deep Scan mode.
- Preview before recovery.
- Free version allows you to recover deleted files for free.
- Recovery all file formats.
Top 2. Recuva
Recuva is a popular and user-friendly file recovery tool developed by Piriform. It supports the recovery of files from various storage devices, including hard drives, USB drives, and memory cards.
Features:
- Simple interface with a step-by-step wizard
- Deep scan mode for more thorough recovery
- Supports a wide range of file types, including documents, photos, and videos
Top 3. Donemax Data Recovery
Donemax Data Recovery is a powerful and versatile recovery tool that can retrieve lost files from various storage devices, including PCs, laptops, and external drives.
Features:
- Easy-to-use interface with a comprehensive recovery process
- Quick and deep scan modes
- Supports over 1,000 file types
- Preview option before recovery
Top 4. Disk Drill
Disk Drill is a comprehensive data recovery software that supports multiple platforms, including Windows and macOS. It can recover files from various storage devices like hard drives, USB drives, and SD cards.
Features:
- User-friendly interface with advanced recovery algorithms
- Quick and deep scan options
- Supports recovery from formatted drives and lost partitions
- Additional data protection tools
Steps to Recover Deleted Files:
Do Your Data Recovery is one of the best deleted file recovery software. It can help you recover permanently deleted files, unformat hard drive, recover inaccessible data, etc.
Do Your Data Recovery
- Recover permanently deleted files even you have emptied Trash or Recycle bin.
- Recover formatted or erased hard drive.
- Recover inaccessible or corrupted data.
Step 1. Download and install Do Your Data Recovery, then open the software, select the drive where you delete your files.

Step 2. Click on Scan button to deeply scan the drive and find all recoverable files including the deleted files.
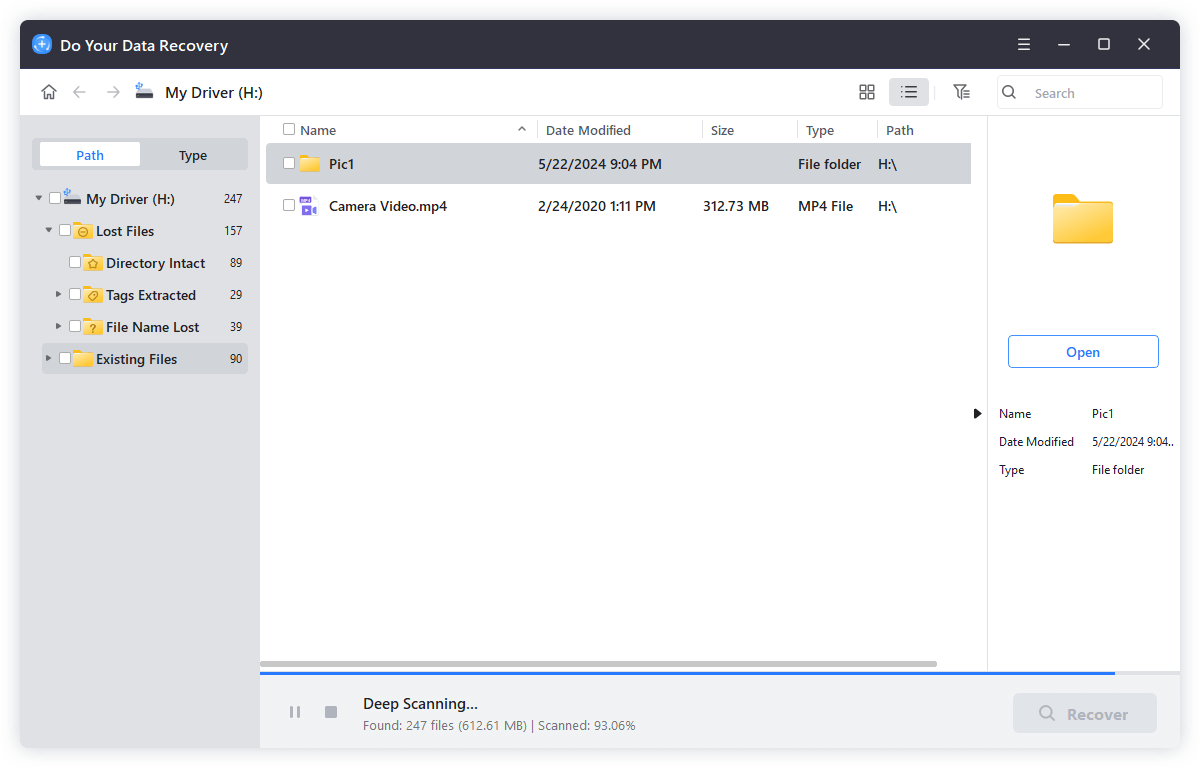
Step 3. When the scan gets finished, you can preview the recoverable files. Then select the wanted files and save them by clicking on Recover button.

Final Thoughts!
Preventing data loss is crucial for maintaining the integrity and availability of your important files. Regular backups, effective use of cloud storage, and safe file management practices are essential components of a robust data protection strategy.
By following these guidelines, you can minimize the risk of data loss and ensure that your valuable data is always recoverable.
FAQs About Recovering Deleted Files
- Do Your Data Recovery
- Recuva
- Donemax Data Recovery
- Disk Drill
- Magoshare Data Recovery
- Put Back files from Trash.
- Use data recovery software to scan the drive and recover deleted/lost files.
- Restore lost items from Time Machine backup.
- Recover lost files from iCloud.
- Recover deleted photos from Recent Deleted folder.
Do Your Data Recovery for Mac is a powerful Mac data recovery app, it can deeply scan the hard drive and find all recoverable files. Then you just need to select the wanted files and save them.
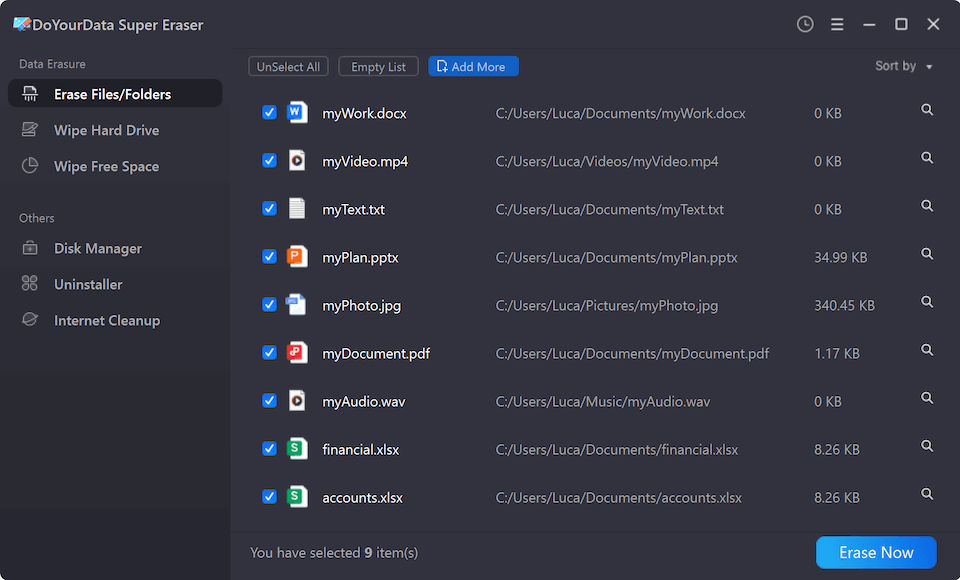
If you want to permanently delete files from your computer or external storage device, just download this software. It can hep you securely and permanently delete selected files, wipe entire hard drive or erase already deleted data.
- Download and install Do Your Data Recovery on your computer.
- Connect the SD card to your computer.
- Open Do Your Data Recovery, select the SD card.
- Click on Scan button to deeply scan the SD card.
- Preview and recover lost files.
Do Your Data Recovery
The safe, powerful and easy-to-use data recovery program to help you recover deleted, formatted or lost data, recover lost data from damaged hard drive, from HDD, SSD, USB flash drive, memory card, digital camera, etc, fix damaged drive and external devices.
Written & Updated by Justin Kenny
Justin Kenny is a writer & editor of DoYourData. He joined DoYourData in 2016 and focuses on writing articles about Windows data recovery, Mac data recovery, external device data recovery, hard drive clone, data erasure, Mac cleanup, computer issue fixes, etc. He is a super fan of Apple devices and is big on testing new digital device and system utility software.