Quick Navigation:
It can be frustrating when the

Each step is fully explained to ensure the issue could be fixed properly and the transfer goes smoothly. By doing these steps to fix problems, users can get past the disk cloning problems and make a good clone for the drive, which protects important data and makes the move to a new storage drive go smoothly.
How to Fix Samsung Data Migration Tool Cloning Failed
Cloning failed may happen when using Samsung Data Migration. There are different reasons that may lead to the problem. Here we gathered some useful methods that would fix the issue in different cases. You can check and try fix the issue and process smooth disk cloning and data migration.
1. Check to See If There Are Bad Sectors
Running tests on the source drive is very important to find bad sectors. Failures can happen when bad areas get in the cloning process. If these sectors are found, fixing them before cloning improves the chances of a successful migration.
Here's what you need to do to check the source drive for bad sectors:
- Pick up File Explorer and go to "This PC" or "My Computer." Pick out the parent drive, like the C: drive, and right-click on it. Then, choose "Properties."
- Select the "Tools" tab in the Properties window. Click "Check" under "Error checking" to start the disk check tool.
- When asked, choose "Scan and repair drive" to let the tool look for and fix bad areas.
- Wait until the scan is done. If the tool finds any bad sectors, it will try to fix them.
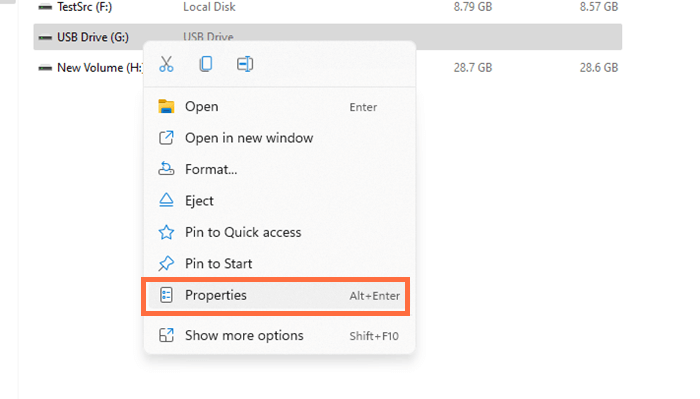
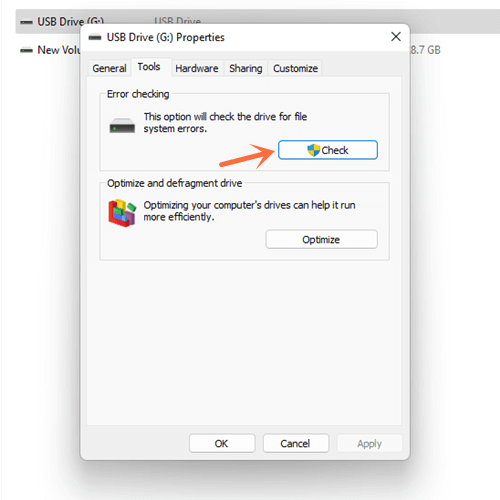
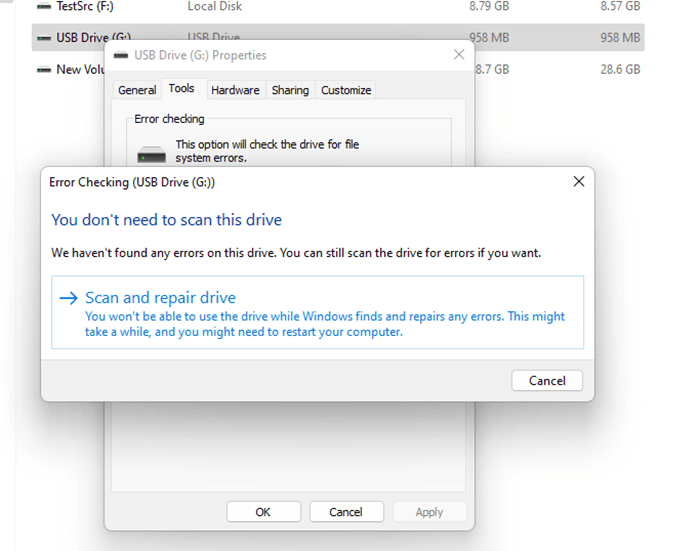
If you need to, restart your machine after the scan is done. Run the disk check tool again after restarting to ensure all bad sectors have been fixed. After that, you can try to clone the drive again and check if it works.
2. Disabled Hibernation Mode
Some system files can be locked in hibernation mode, so they can't be changed during cloning. To turn off Hibernation mode and make sure the cloning process goes smoothly, do the following:
- Enter "cmd" in the Start menu to open Command Prompt as an administrator. Click "Command Prompt" and choose "Run as administrator."
- Type the following code into the Command Prompt window and press Enter: powercfg.exe /hibernate off
- This command turns off Hibernation mode, so you can view all system files without problems while the cloning happens.
- When the order is finished running, close the Command Prompt window.


Check to see if the hiberfil.sys file is still in the root path of your system drive (usually C:) to ensure that Hibernation mode has been turned off. Then it's time to clone the disk again with Samsung Data Migration.
3. Disabled BitLocker
By securing data while it's being sent, BitLocker can get in the way of cloning. If you turn off BitLocker before cloning, data will be sent in an unencrypted file. Turning off BitLocker security before starting the cloning process is important so everything goes smoothly. Do these things:
- Look for the Control Panel in the Start menu to open it.
- Go to "System and Security" in the Control Panel and click "BitLocker Drive Encryption."
- Find the drive with BitLocker turned on and click "Turn off BitLocker."
- Do what it says to do to access the drive. It could mean you must enter your BitLocker restore key or password.
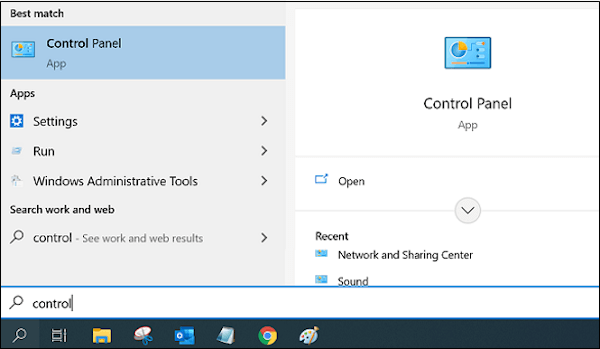

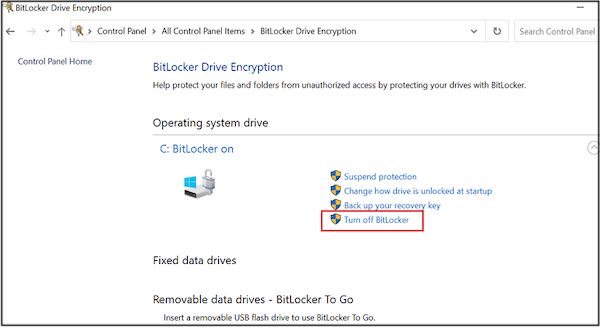
Once BitLocker is turned off and the drive is decrypted, you can continue the cloning process without worrying about security.
4. Convert Dynamic Disk To Basic
Changing a dynamic disk to a basic format is important for cloning tools to read. Do the following:
- Pick "Disk Management" from the window when you press Win + X.
- Find the dynamic disk you want to change in Disk Management.
- To remove a volume on the dynamic disk, click on each one and choose "Delete Volume." It deletes all of the disk's files.
- To turn the dynamic disk back into a basic disk, right-click on it and choose "Convert to Basic Disk."
- It's easy to check the conversion process. Just do what it says.


Once the change is done, you can use the newly converted basic disk to continue cloning.
5. Get The Current Version Of Samsung Data Migration
When you update to the latest version, the software is tuned for your system, which lowers the chance that the cloning will fail.
To get the software up to date, do the following steps:
- Open Samsung Data Migration on your machine.
- Choose "Help" or "Settings" from the menu. The exact spot might be different based on the software.
- Find a choice that says "Updates" and click it to check if there is new version available.
- To see if there are any updates, click on this choice.
- Once an update is found, follow the on-screen instructions to get and put it in.

To make sure the changes take place, restart Samsung Data Migration after the update is done. Then you can try to clone your drive with the latest version of the software and see if it will go though normally.
Clone Hard Drive with DoYourClone
With the Samsung Data Migration, you can only clone to Samsung SSD, so the feature is limited. If you want a more comprehensive to clone different type of hard drives, it's better to choose another professional tool.
DoYourClone is a trusted disk copy tool for Samsung SSDs and more. With the software, you can clone drive more stably and ensure the cloned system drive bootable without problems.
DoYourClone - Reliable Disk Clone Software
- Best data migration tool for Samsung SSDs and more.
- Clone system drive and ensure the cloned drive bootable.
- 100% secure and easy to use with intuitive interface.
The software DoYourClone is more simple to use compared to Samsung Data Migration. The wizard style interface can guide you step by step to clone drive easily. Here are the simple steps to clone drive with this tool:
Step 1: Download and have the software installed on your PC first. Then connect another drive to the computer to clone to. Then change to the option Disk Clone.
🪄 Tips: The destination drive will be overwritten while cloning to it. So it's better to use an empty drive or move the important data to another drive first.
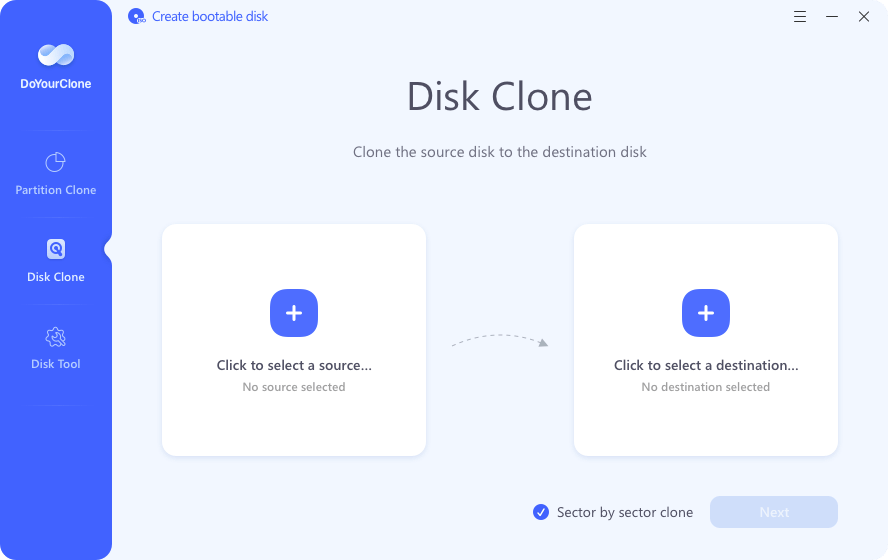
Step 2: Select the drive you want to clone as source. For example, if you want to migrate the system drive, you can just select the system drive as the source. Choose another drive as the destination drive.
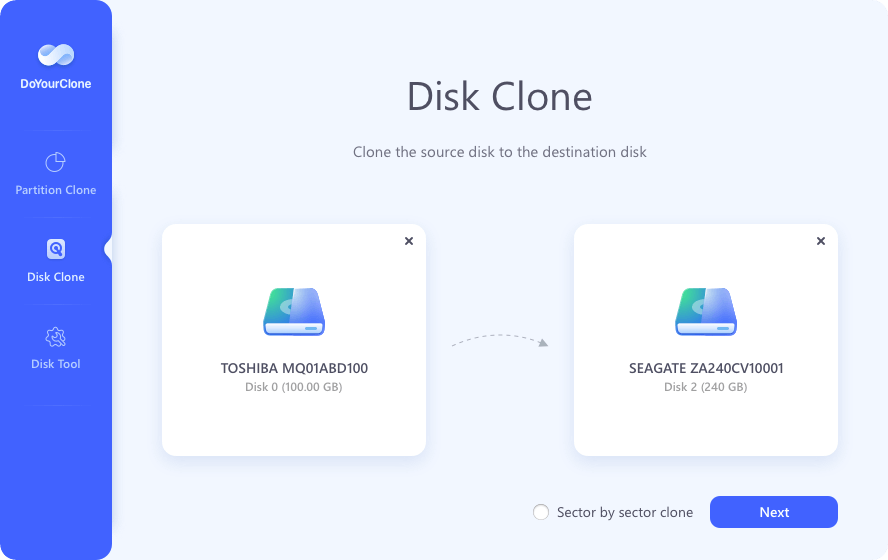
Step 3: Click Next button, and then you can edit the disk layout on the destination drive before you proceed the disk cloning. There are some options from the drop down list that can help you automatically set the disk layout, and also you can choose to manually resize or move the partitions on the drive.
At last, if the destination drive is an SSD, ensure to enable "Check the option if the destination is SSD" which can optimize the SSD while cloning the drive.
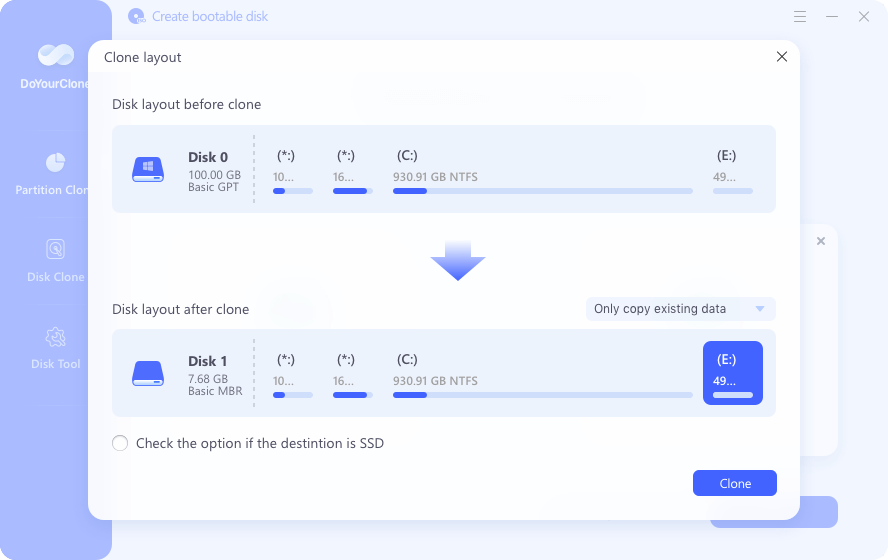
Step 4: At last, click Clone button to start. DoYourClone will copy all the disk data from the source drive to the destination. If the source drive is a system drive, the cloned drive will also be bootable.
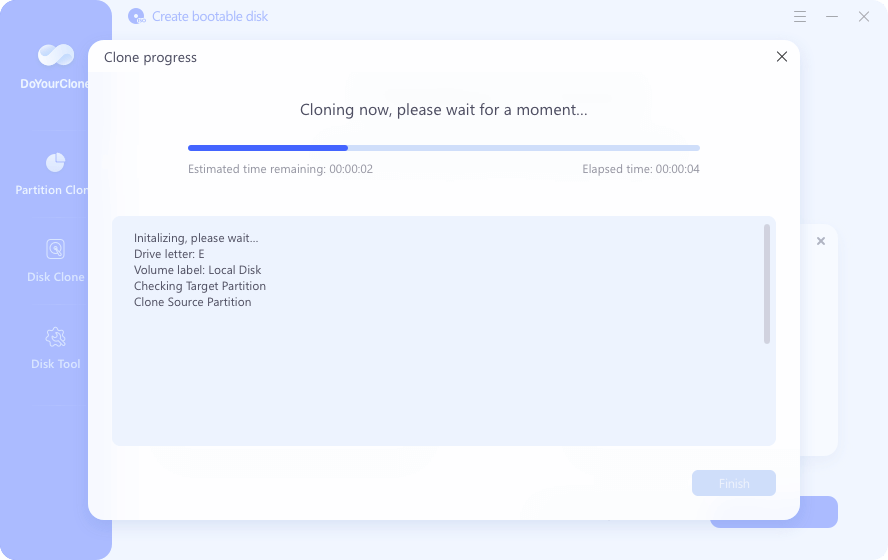
After the software finis the disk cloning process, you can then close the software and access the cloned drive to check if the data is intact and all copied.
If a system drive was cloned, you can also change the boot order and change the cloned drive as first boot device. After that, you can restart the computer and check if the computer could start normally from the cloned drive.
Conclusion:
In conclusion, fixing common problems during the Samsung Data Migration copy process is important for moving data to a new storage drive. If users follow the steps outlined, they can successfully fix issues. You can also change to DoYourClone to clone any type of drive. Making sure that every step is carefully carried out increases the chances of a smooth migration, which protects the integrity of the data and makes the move to the newest storage option easier.

DoYourClone - Best Disk Clone Software
DoYourClone is a 100% safe, powerful and easy-to-use disk cloning program. It supports to clone any hard drive, clone HDD to SSD, upgrade old drive to new drive, create bootable clone backup for Windows and macOS. With this program, you can easily clone any hard drive. It supports sector by sector clone, SSD upgrade clone, etc.