macOS Downgrade Process to Old or Previous Version
![]() Updated by Justin Kenny on 2022-06-18
Updated by Justin Kenny on 2022-06-18

It's always enticing to download the most recent version of macOS, which is packed with innovative capabilities and upgrades. Even yet, you can discover that after the upgrade, your machine isn't performing properly.
Fortunately, if necessary, you may revert to the previous macOS version you were using. However, downgrading is not as simple as it once was. We'll show you how to downgrade macOS Monterey or earlier to a previous version of macOS.
Quick Navigation:
- 1. Why You Might Want to Downgrade macOS?
- 2. Back Up Your Data Before You Downgrade!
- 3. How to downgrade macOS?
- 4. How to create a bootable clone backup for Mac?
Why You Might Want to Downgrade macOS?
Apple strives to make macOS updates as backward-compatible as possible, but there are still edge circumstances. Certain types of gear and software may not perform properly after updating.
This is especially true when it comes to audio, video, and graphics-related gear and software. As a result, many suppliers of this sort of software will advise you to never change your operating system in the middle of a project. Still, you may find you need to return to a project that won't operate on the most recent version of macOS.
Back Up Your Data Before You Downgrade!
You will delete everything on your hard disk regardless of how you downgrade your macOS version. Backing up your whole hard disk is the greatest way to ensure you don't lose any important data.

You may backup using the built-in Time Machine service, but you must be cautious if you do so. One method for downgrading is to restore an old Time Machine backup (if you have one available). If you do this and subsequently wish to restore a recent backup, make careful to just recover your private information so that the downgrade is not undone.
How to downgrade macOS?
Following a backup, here are the several techniques for downgrading your Mac.
Option 1: Use macOS Recovery to Downgrade: Intel Macs Only
If your Mac arrived with an older version of macOS installed, downgrading is rather simple. To downgrade, utilize the built-in macOS Recovery program. Simply ensure that you have internet connectivity throughout the installation, as the app will download an older version of macOS.
The procedure is identical to reinstalling macOS, but it will instead download the version of macOS that was initially installed on your machine. If your PC is fairly old, this will instead download the most recent accessible version.
Make sure you have a complete backup before proceeding because this will delete your starting disk:
Turn on your computer and hold Shift + Option + Cmd + R simultaneously. As macOS Recovery loads, starting will take longer than usual.
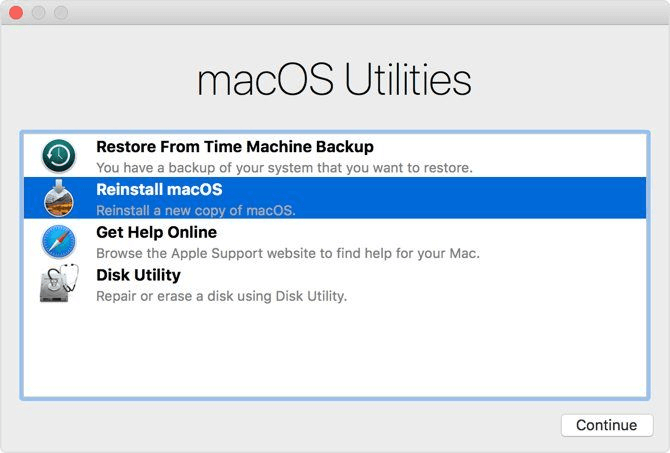
When the macOS Utilities screen appears, select Reinstall macOS (or Reinstall OS X) and press the Continue button.
Follow the on-screen prompts to select your starting disk. Now, select Install.
Follow the onscreen directions to complete the rest of the installation.
When the installation is finished, restore your files from the backup you made.
Option 2: Downgrade making Use of a Time Machine Backup
Another simple option to install a previous version of macOS is to use a Time Machine backup. Of course, this presupposes you generated the backup on an earlier version of macOS.
To downgrade using a previous Time Machine backup, insert your Time Machine disk into your Mac and turn it off or restart it.
Enter Recovery mode on your Mac. To enter macOS Recovery on an Intel Mac, use Cmd + R. Hold down the Power button on M1-based Macs until you see the message Loading Startup Options. To enter macOS Recovery mode, click Options on the following screen.
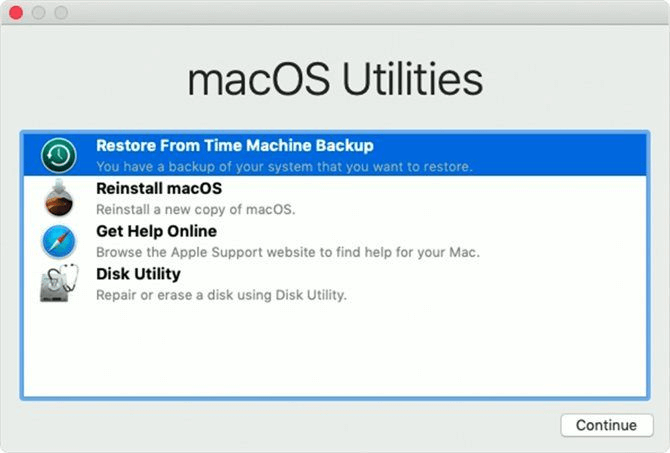
Select Restore From Time Machine Backup and click Continue when the macOS Utilities page displays.
Continue again on the following screen.
Choose your Restore Source. That would be the backup disk you plugged in before.
Select the backup you wish to restore from on the next screen. You'll be able to identify which macOS version was utilized to generate that backup.
Follow the on-screen instructions to finish the reinstallation, then restore your files from the backup you generated.
Getting the External Drive Ready
You must format the disk before you can construct the installation. You can skip this part if your disk has previously been formatted. Format the drive as follows:
Connect your external drive.
Start the Disk Utility software. Spotlight (Cmd + Space) or navigating to the Applications folder in Finder, then entering the Utilities menu and double-clicking on the app will help you discover it.
Select your disk from the External list on the left, then click the Erase button at the top of the window.
Select either the HFS+ or APFS file systems under Format. The best Mac file system to utilize is determined by your needs.
When the operation is finished, click Erase, then Done.
You might not even need to downgrade…
If you're considering reducing your macOS version because your machine is becoming sluggish, you should reconsider. While this may cure your performance issue, you may go to all of this difficulty only to discover that your Mac is still slow. To begin, try cleaning your hard drive and lowering your starting apps to improve the efficiency of your Mac.
How to create a bootable clone backup for Mac?
Clone backup can help you restore macOS in macOS Recovery mode. For example, before you upgrade to macOS 13, you can make a clone backup for macOS 12. Then if you have issues with macOS in the future, you can use the clone backup to restore your macOS to previous macOS version without losing any data.
DoYourClone for Mac is a powerful disk cloning application. It can help you securely clone Mac’s startup disk to an external hard drive.
DoYourClone for Mac
- Clone HDD, SSD and other disk on Mac.
- Create a bootable clone backup for Mac.
- Create disk image for Mac.
Follow the steps below to securely create a bootable clone backup for Mac:
Step 1. Open DoYourClone for Mac on your Mac and connect an external hard drive to your Mac. Then choose disk cloning mode - OS Clone. This mode will help you clone all data including system data, apps, settings, files to the external hard drive.
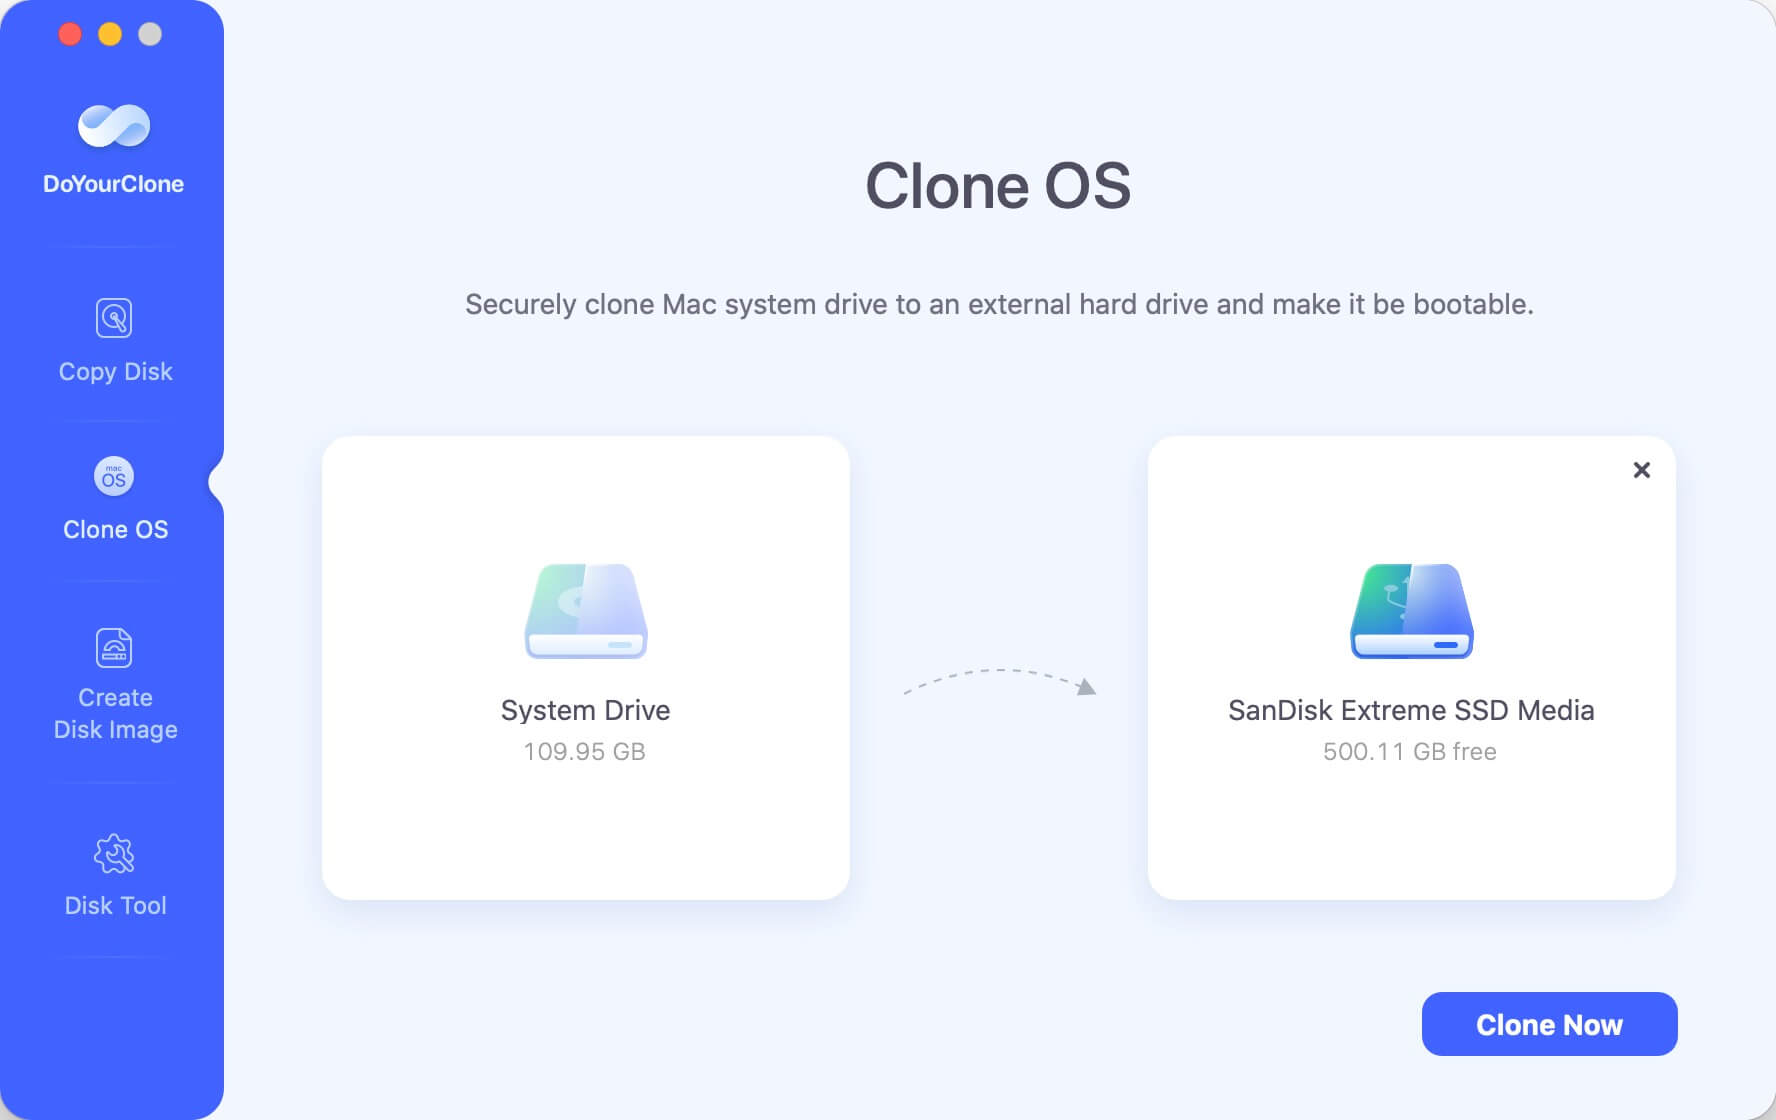
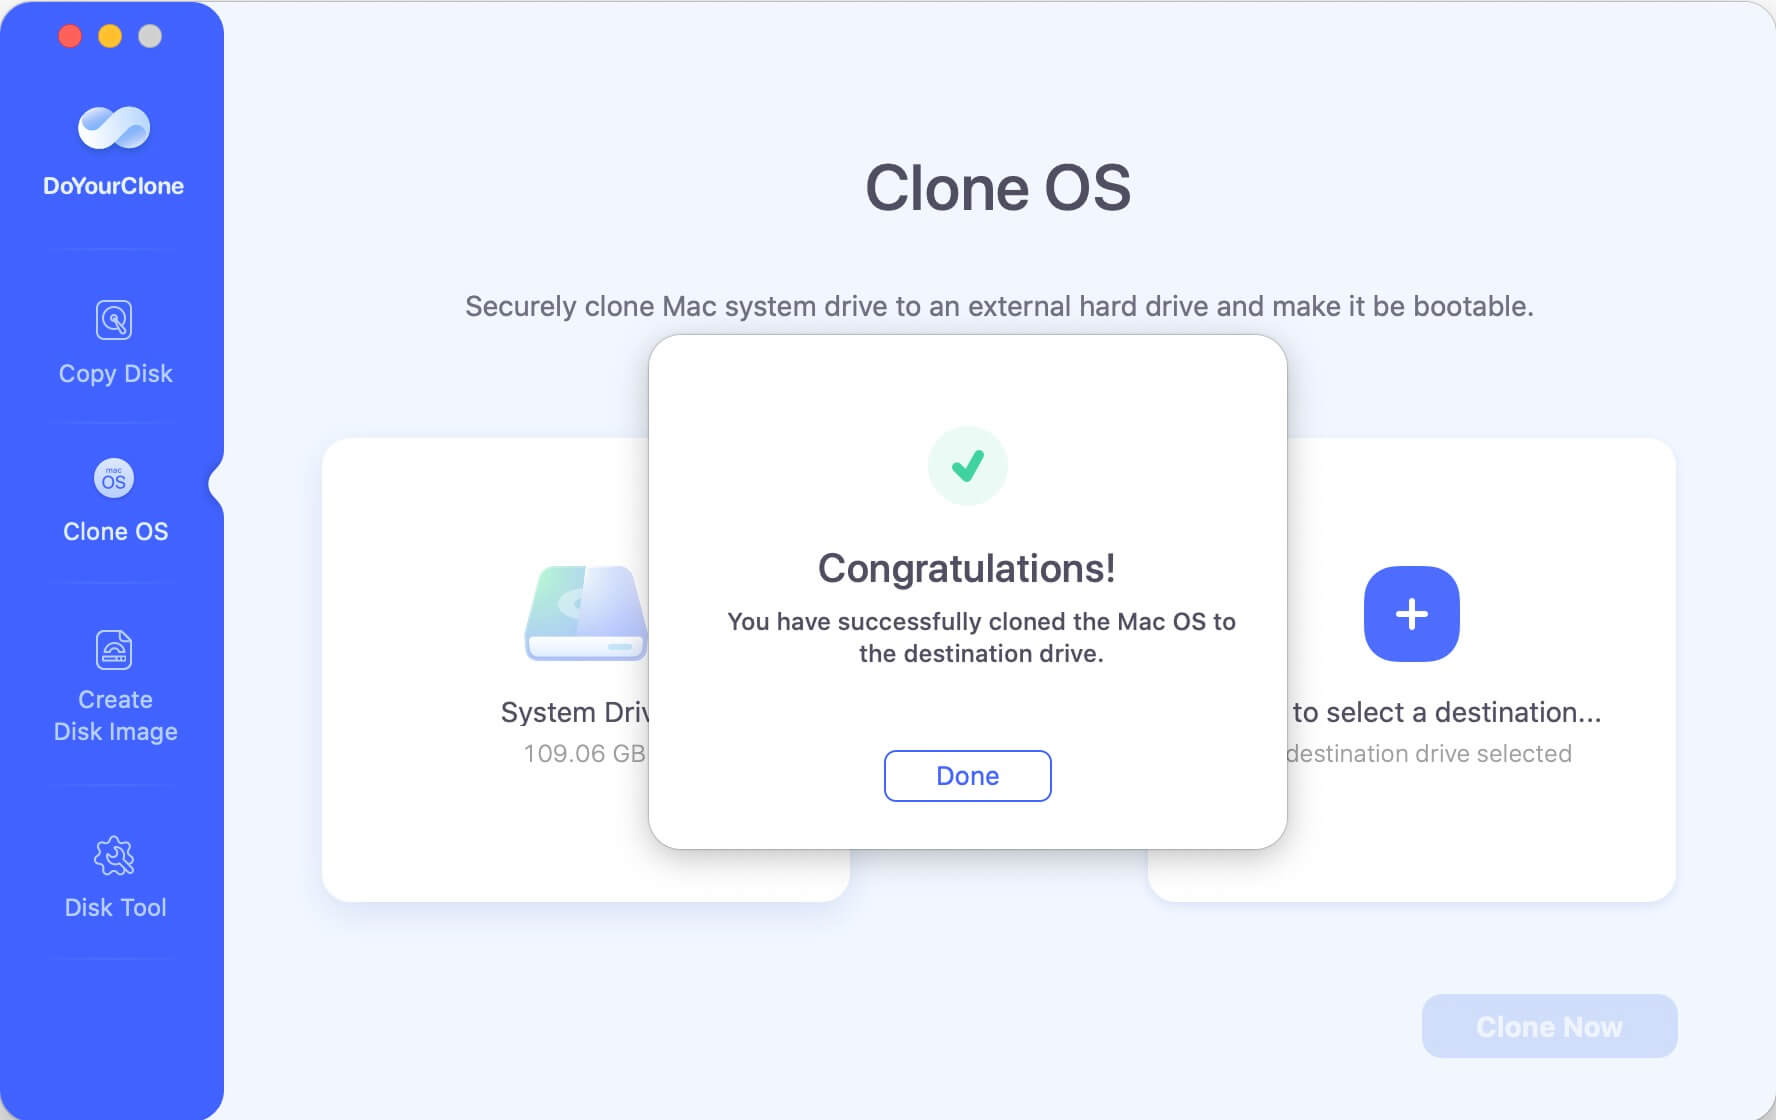
Step 2. Just select the external hard drive as the destination drive. Then click on Clone Now button to securely clone startup disk to the external hard drive.

Once the process gets finished, you can use the external hard drive as a bootable disk.
Written & Updated by Justin Kenny
Justin Kenny is a writer & editor of DoYourData. He joined DoYourData in 2016 and focuses on writing articles about Windows data recovery, Mac data recovery, external device data recovery, hard drive clone, data erasure, Mac cleanup, computer issue fixes, etc. He is a super fan of Apple devices and is big on testing new digital device and system utility software.