Back up Mac before wiping data.
With Time Machine or DoYourClone for Mac, quickly back up your Mac before wiping data.
Quick Navigation:

Many Mac users will have to wipe their hard drives at some point. It's an important job that they must do. If you want to sell your device, fix software problems that won't go away, or ensure private data is gone forever, you need to know how to wipe your hard drive. On macOS Sierra, this process has a few important steps that must be carefully followed to keep data safe and ensure the change to a new operating system or owner goes smoothly.
This guide will discuss why you want to wipe a hard drive, how to prepare for the process and the different safe ways to delete your data. Ultimately, you will know how to safely and effectively wipe your hard drive under macOS 10.12 Sierra, ensuring your Mac is ready for the next chapter. Let's begin this important process of making the system clean and fresh!
It is important to do a few things before wiping the hard drive on macOS Sierra. Follow these steps to ensure your data is backed up. The process will go smoothly.
1. Backup your data
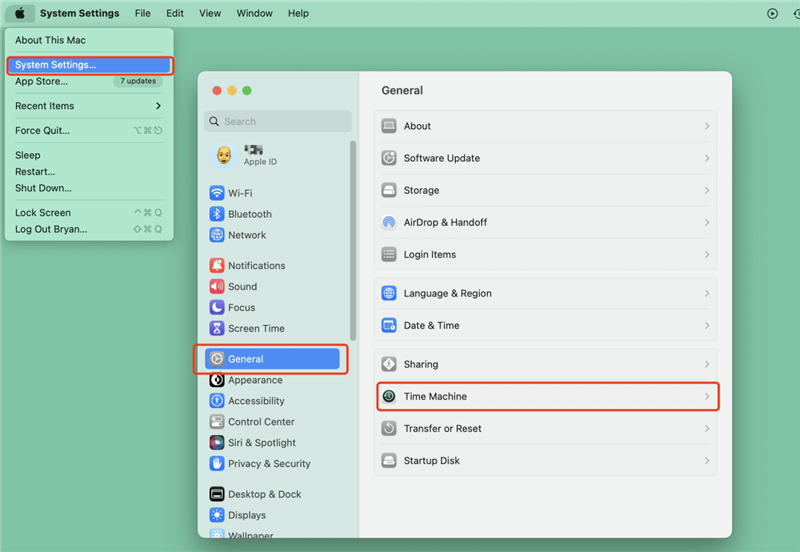
It is very important to back up your information first. You should also make a copy of any files, papers, or programs you want to keep because if you erase the hard drive, you will never get them back. Apple's built-in backup tool, Time Machine, can be used to make a full copy of your system. You can also use DoYourClone for Mac to back up data or clone the Mac.
Back up Mac before wiping data.
With Time Machine or DoYourClone for Mac, quickly back up your Mac before wiping data.
2. Sign Out of iCloud, iTunes, and other accounts
Log out of your Mac's accounts before deleting everything on the hard drive. You can sync this with iCloud, iTunes, iMessage, and other accounts linked to your Mac. When you sell or give away your Mac, make sure that you sign out of these accounts so that your data doesn't get shared with the new owner's account by accident.
3. Deauthorize your Mac from iTunes
If you use iTunes, you should log out of your iTunes account on your Mac. Apple limits the number of devices to play material bought through iTunes, so this step is very important. If you deauthorize your Mac, one of these spots will become available for adding another device.
4. Disable FileVault
FileVault is a disk encryption tool that comes with macOS Sierra. It encrypts your hard drive's contents to keep your data safe. If the hard drive is currently running, you must turn off FileVault before wiping it. If you turn off FileVault, the data will be decrypted, and the wiping process will go smoothly.
There are different methods to wipe a hard drive on macOS Sierra. You can try to wipe drive and data with the free and system integrated tools, like Disk Utility and Terminal. However, the easiest and reliable way is using the professional data erasing software, like DoYourData Super Eraser for Mac.
Disk Utility is the main tool on macOS Sierra that erases a hard drive. With this tool, you can delete everything on your hard drive, format it, and prepare it for a fresh download of macOS Sierra.
Step 1: Restart the Mac in Recovery Mode
It would help if you restarted your Mac in Recovery Mode to get to Disk Utility. Here are the steps you need to take:
Step 2: Access Disk Utility
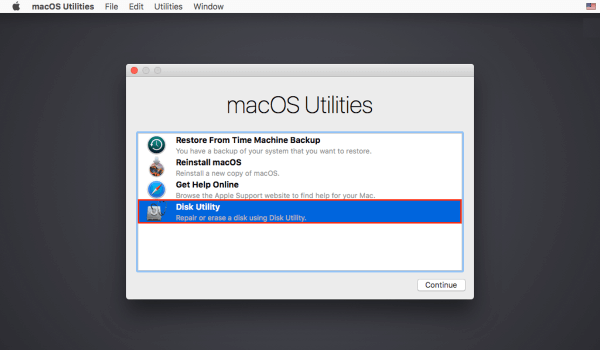
There will be a macOS Utilities window when your Mac starts up in Recovery Mode. You can access different tools to fix, recover, or reinstall macOS Sierra from this page. If you want to erase your hard drive, pick "Disk Utility" from the list and click "Continue."
Step 3: Select the hard drive to wipe
You can see a list of all the hard drives linked to your Mac in the Disk Utility window. This list includes your hard drive, external drives, and folders. Find the hard drive you want to erase and click on it. If you wipe the wrong drive, you could lose all your info forever, so make sure you pick the right one.
Step 4: Erase the hard drive
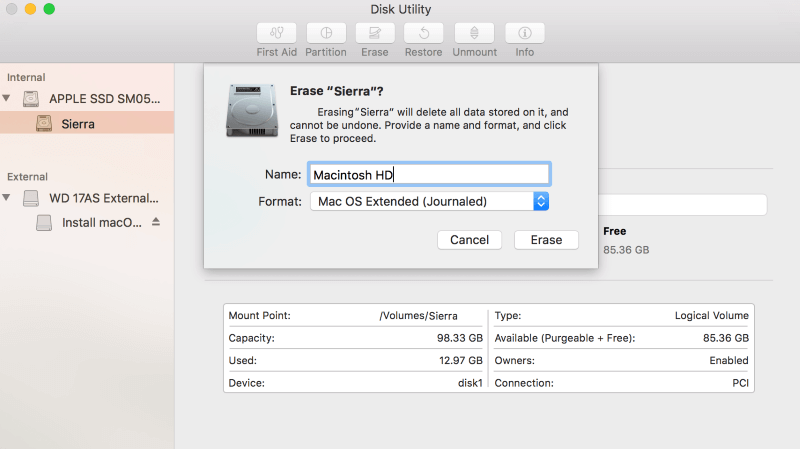
Once the right hard drive has been chosen, click the "Erase" button in the Disk Utility window. A new dialog box will ask you to give the drive a name, select a format, and select a scheme.
Once these settings are set, click "Erase" to clean the hard drive. Disk Utility will delete everything on the drive and prepare it for formatting. How long this takes will depend on the size of the drive and the amount of information on it.
Step 5: Reformat the hard drive
Disk Utility will reset the hard drive using your settings after the erasure process. You need to do this step before using the drive with macOS Sierra or another OS. Once the formatting is done, your hard drive will be erased, and all its information will be gone permanently.
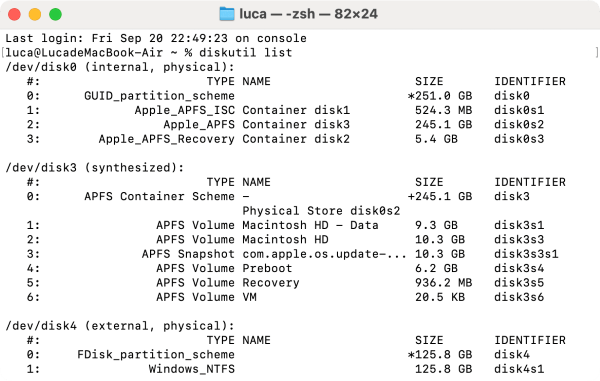
When users need a safer way to erase data from a hard drive, the Terminal app gives them more choices. Terminal is a command-line interface for macOS that lets you run tasks directly. Diskutil secureErase is one of these tools, and it can be used to wipe a hard drive safely by writing over the data more than once.
Please note that if it's not able to wipe a internal system drive which are in use. If you wipe data with this method, you need to first deleted the personal data which you want to erase, then use the command to wipe the free space of the drive. For a safe erase with Terminal, do these things:
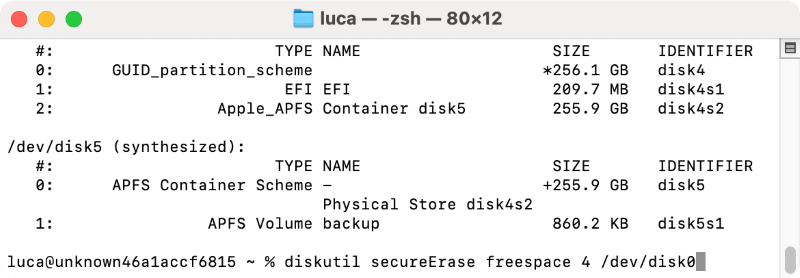
After erasing a drive in macOS Sierra with Disk Utility, the data would still be recoverable with professional data recovery software for Mac. And also if you are not familiar with command lines, it would be hard and would erase wrong drive by mistake. We highly suggest you wipe hard drive with the easy-to-use and professional tool to wipe a hard drive instead.
DoYourData Super Eraser for Mac is an effective data wiping tool equipped with international data sanitization algorithms. It can ensure to destroy data permanently and no software can recover the data erased by the software.
As mentioned in the above method, it's not able to wipe the system drive directly without going to the Recovery Mode. So you can first deleted the personal files or reset/reinstall the macOS Sierra to remove personal data, then you can use the software to wipe hard drive free space under macOS Sierra with the following steps:
Step 1. Download and install the software on your Mac. Run the software from the launchpad. Select the option Wipe Free Space.
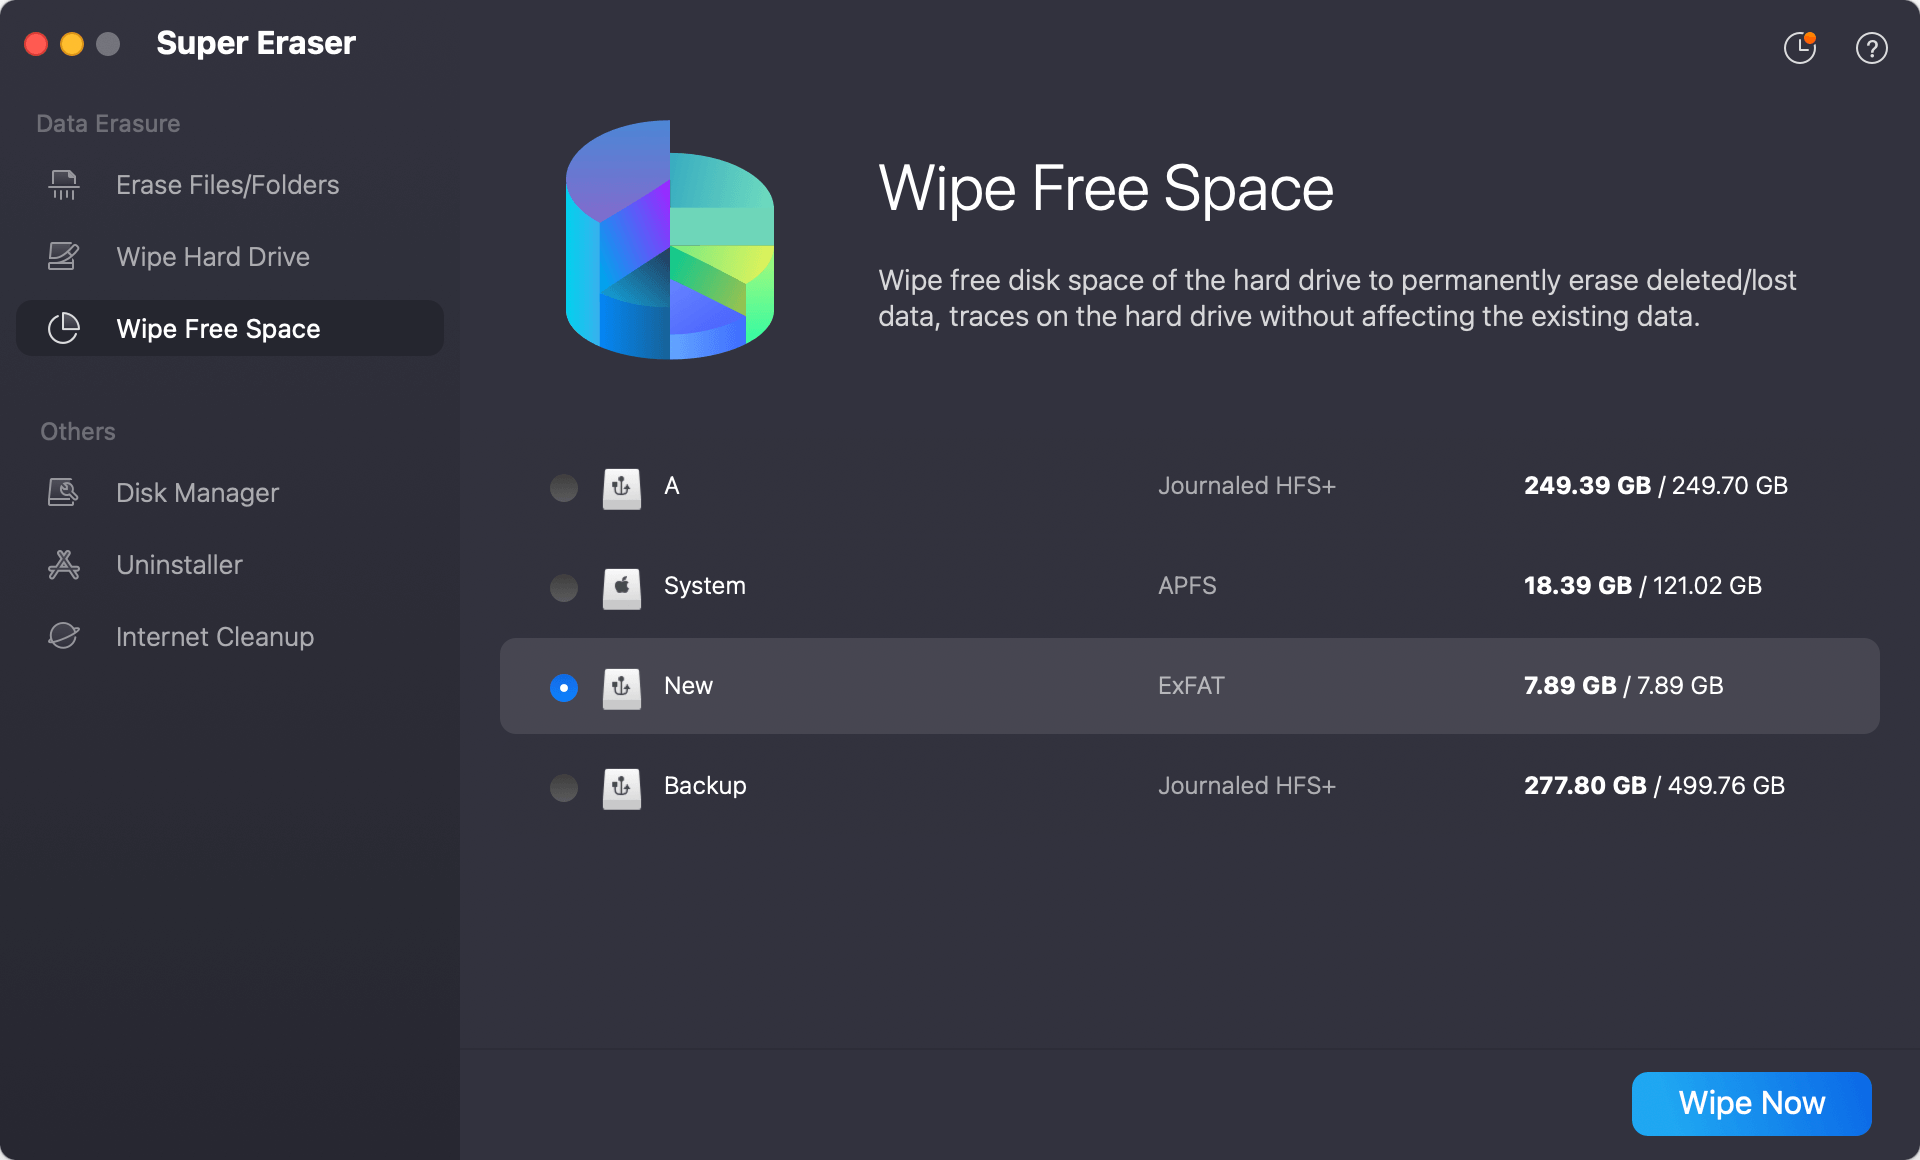
Step 2. Select the hard drive which you want to erase, and then click Wipe Now button.
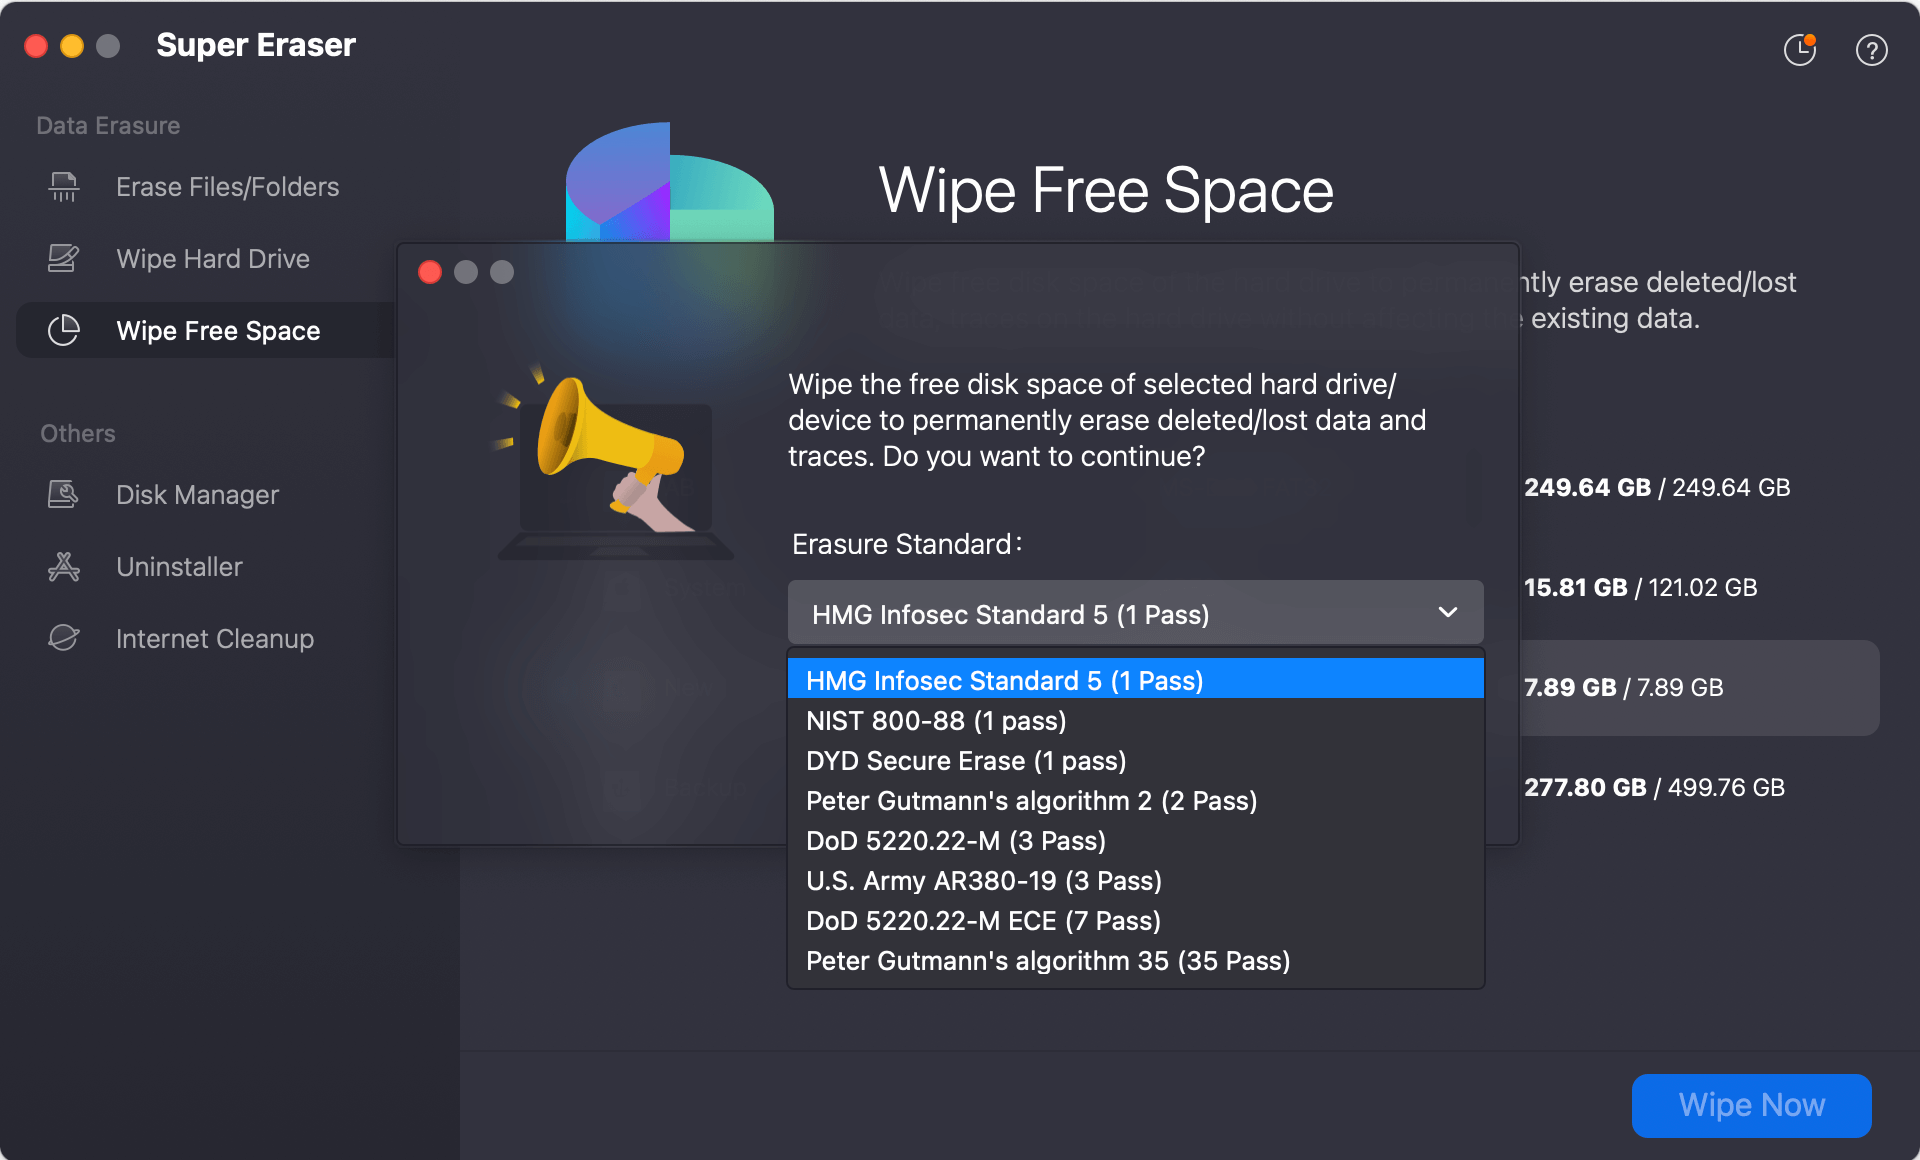
Step 3. You will be asked to select a erase standard from the drop-down list, then click Continue and it will start to erase the drive.
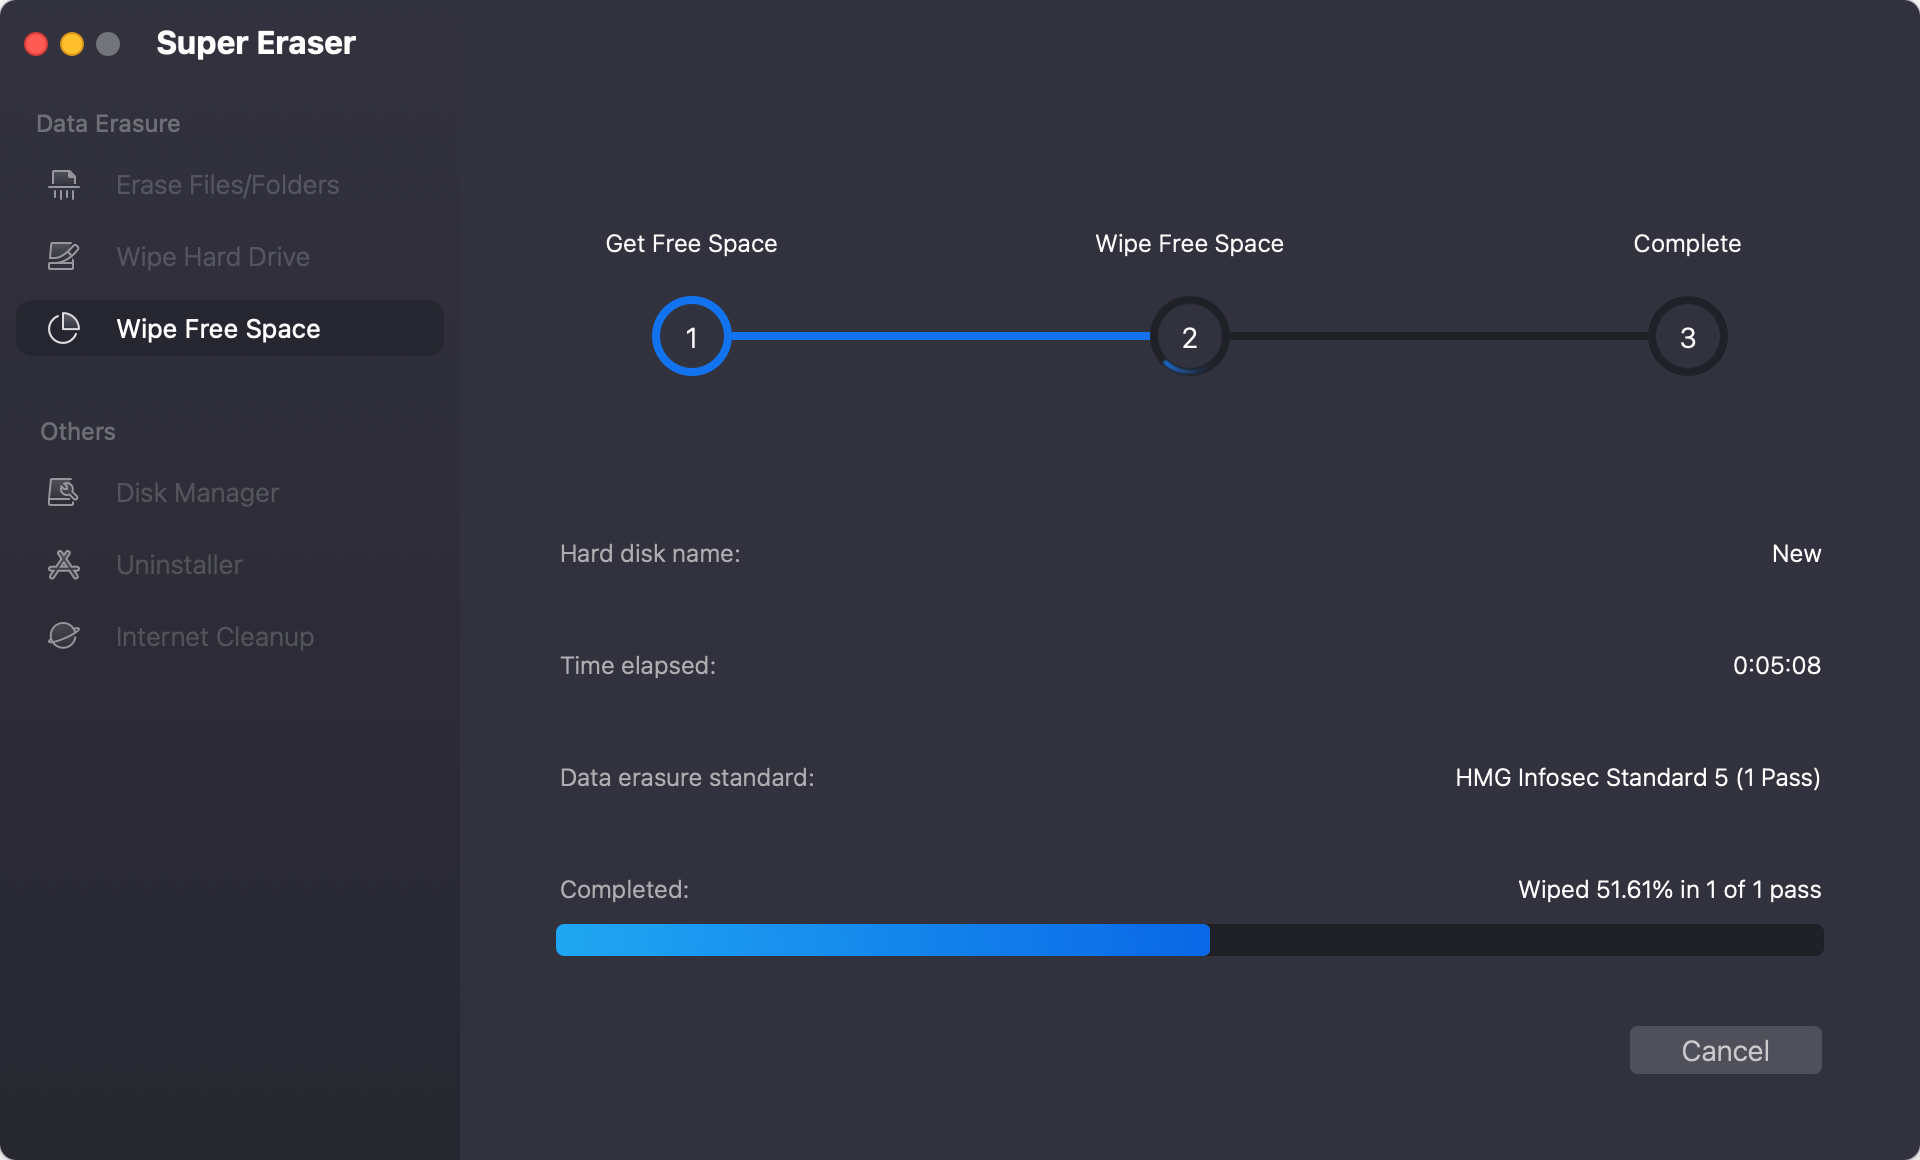
The application also offers the other options to wipe data in other situations. For example, if you only need to shred some individual files or folders, you can choose the first mode Erase Files/Folders, it will only wipe the selected files without affecting other data. Should you want to Wipe a none system drive, like an external drive fully, you can use Wipe Hard Drive mode, which can erase all data from the drive completely.
In macOS Sierra, wiping your hard drive is an important step that ensures all your data is gone permanently and prepares your device for a new start. You can eliminate all traces of personal information by backing up your data, logging out of your accounts, and using DoYourData Super Eraser, Disk Utility or Terminal for safe erasure.
If you want to protect your privacy and improve your system, you should know how to wipe your hard drive before selling your Mac or fixing software problems. Do this important job and have a clean, fresh Mac experience!

DoYourData Super Eraser for Mac
DoYourData Super Eraser for Mac is a 100% safe, powerful and easy-to-use data erasure program. It offers certified data erasure standards including Peter Gutmann, U.S. Army AR380-19, DoD 5220.22-M ECE to permanently erase data from Macs and external devices, making data recovery be impossible.
