Quick Navigation:
- Why Data Destruction Matters
- Methods for Destroying Sensitive Business Data on a Mac
- Permanently Erase Sensitive or Business Data on Mac
- Advanced Techniques for Maximum Data Destruction
- Verifying Data Destruction
- Conclusion
- FAQs About Erase Business Data on Mac
In today's digital age, protecting sensitive business data is crucial. Whether you're disposing of old company devices, upgrading hardware, or just ensuring data security, proper destruction of data is essential to prevent unauthorized access and potential breaches. For Mac users, understanding the best methods to securely destroy data can help safeguard against data theft and ensure compliance with legal requirements. This article provides a comprehensive guide on how to securely destroy business or sensitive data on a Mac.

Why Data Destruction Matters
Security Risks of Data Exposure
Data breaches and unauthorized access to sensitive information can have severe consequences for businesses. From financial loss to reputational damage, the risks are substantial. Even when data is deleted from a device, it can often be recovered if not properly destroyed. This makes secure data destruction a critical component of your data protection strategy.
Regulatory Compliance
Various regulations mandate the secure destruction of sensitive data. For instance, the General Data Protection Regulation (GDPR) in the European Union and the California Consumer Privacy Act (CCPA) in the United States impose strict requirements on how businesses handle and dispose of personal data. Failure to comply with these regulations can result in hefty fines and legal consequences.
Methods for Destroying Sensitive Business Data on a Mac
Built-in macOS Tools:
macOS offers several built-in tools to help with data destruction. These tools are user-friendly and can be effective for most data deletion needs.
1. Using Finder to Erase Files
Deleting Files from Finder:
- Open Finder: Click on the Finder icon in the Dock.
- Locate the Files: Navigate to the files or folders you wish to delete.
- Move to Trash: Right-click on the selected files and choose "Move to Trash" or drag them to the Trash bin in the Dock.
- Empty Trash: To permanently delete the files, right-click on the Trash bin and select "Empty Trash." This action removes the files from the system.

Note: Emptying the Trash deletes the files but does not necessarily overwrite them, which means they might still be recoverable with advanced data recovery tools.
2. Disk Utility for Formatting Drives
Using Disk Utility to Erase and Format Drives:
- Open Disk Utility: Go to Applications > Utilities > Disk Utility.
- Select the Drive: In Disk Utility, select the drive or volume you wish to erase from the sidebar.
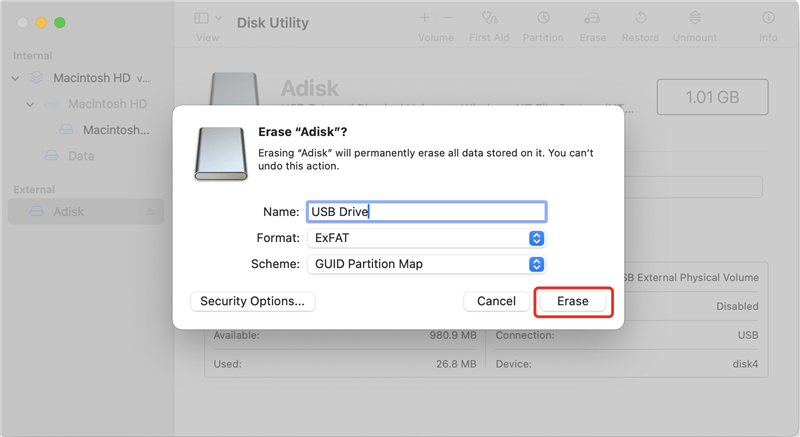
- Erase the Drive: Click on the "Erase" button. You'll be prompted to choose a format and a scheme.
- Security Options: Click on "Security Options" to choose the level of data destruction. The more secure options will overwrite the data multiple times, making recovery much harder.

Note: Formatting a drive using Disk Utility will erase all data on the drive and can be effective for general data destruction, though for highly sensitive data, additional measures might be necessary.
Third-Party Data Destruction Tools:
For more robust data destruction, third-party tools can offer enhanced security features.
Overview of Popular Tools
Several reputable data destruction tools are available for Mac users, including:
- DoYourData Super Eraser for Mac: Certified Mac data erasure program.
- CCleaner: Offers file and drive wiping features.
- FileShredder: Specializes in secure file deletion.
- Permanent Eraser: Provides advanced file destruction options.
The data which is erased by Disk Utility or has been emptied from Trash is not lost for good and can be recovered by data recovery software. To permanently erase business data on Mac, you need special data erasure tool such as DoYourData Super Eraser, Permanent Eraser, etc. Once the data is erased by Mac data eraser or file shredder, the data is lost for good, no way to recover it.
Permanently Erase Sensitive or Business Data on Mac
For securely and permanently removing business data from a Mac, DoYourData Super Eraser for Mac is an excellent choice. This tool is specifically designed for Mac OS and uses certified data erasure techniques to ensure that sensitive information is completely destroyed, leaving no possibility for recovery.
DoYourData Super Eraser allows for selective deletion of business documents or the complete wiping of a hard drive. It can permanently erase data from various storage devices including internal and external hard drives, USB flash drives, memory cards, RAID systems, and servers. Additionally, it can handle data deletion from damaged or inaccessible drives on Mac OS.
Using DoYourData Super Eraser for Mac to permanently delete business data is straightforward and user-friendly. It provides three distinct data erasure modes, ensuring that you can securely remove your business information with ease.
Method 1: Shred Business Data on Mac
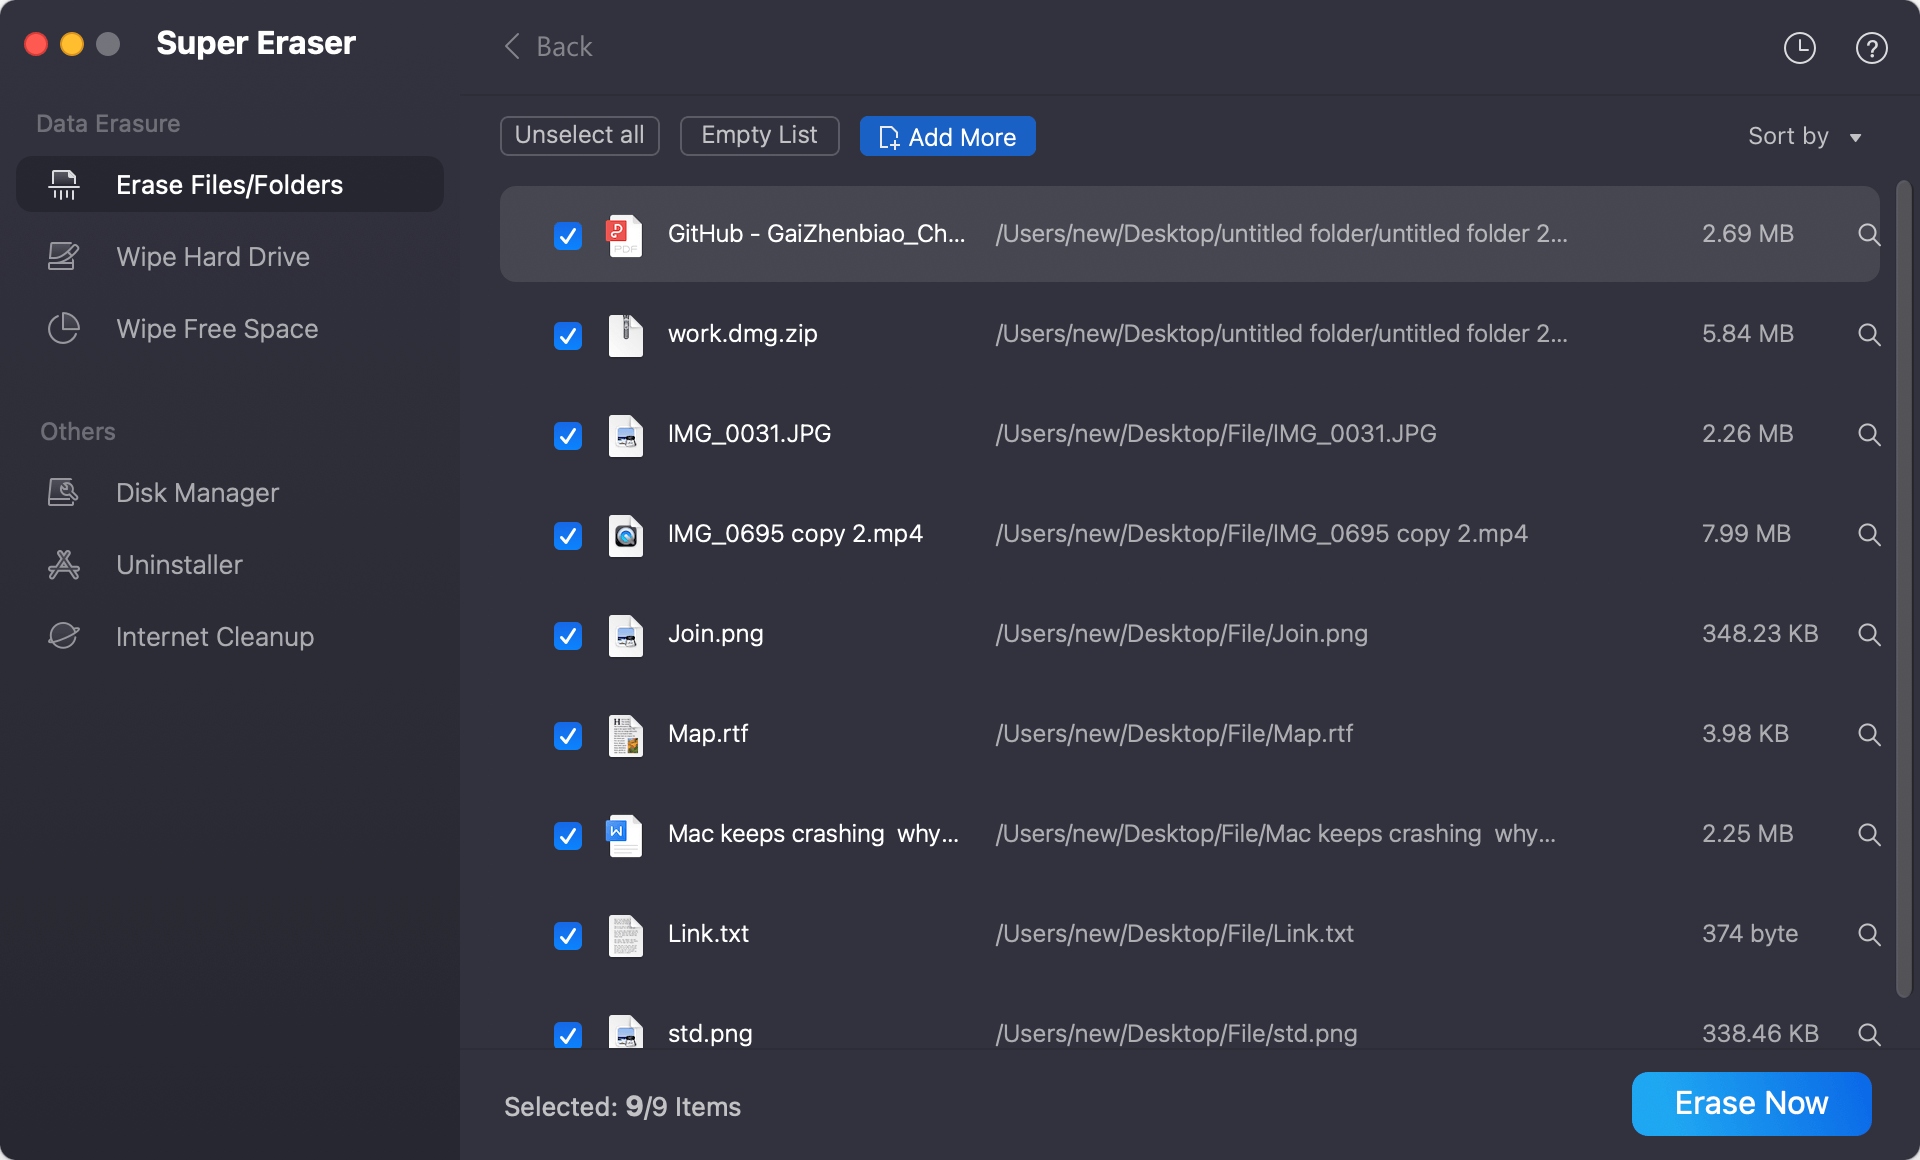
This mode lets you choose specific files and folders for deletion based on your preferences. Simply select the business data you wish to permanently erase from your Mac.

Method 2: Complete Hard Drive Wipe
This mode enables you to format and wipe the selected hard drive, effectively erasing all business data and history data stored on the drive or external storage unit. It ensures that all information is permanently destroyed.

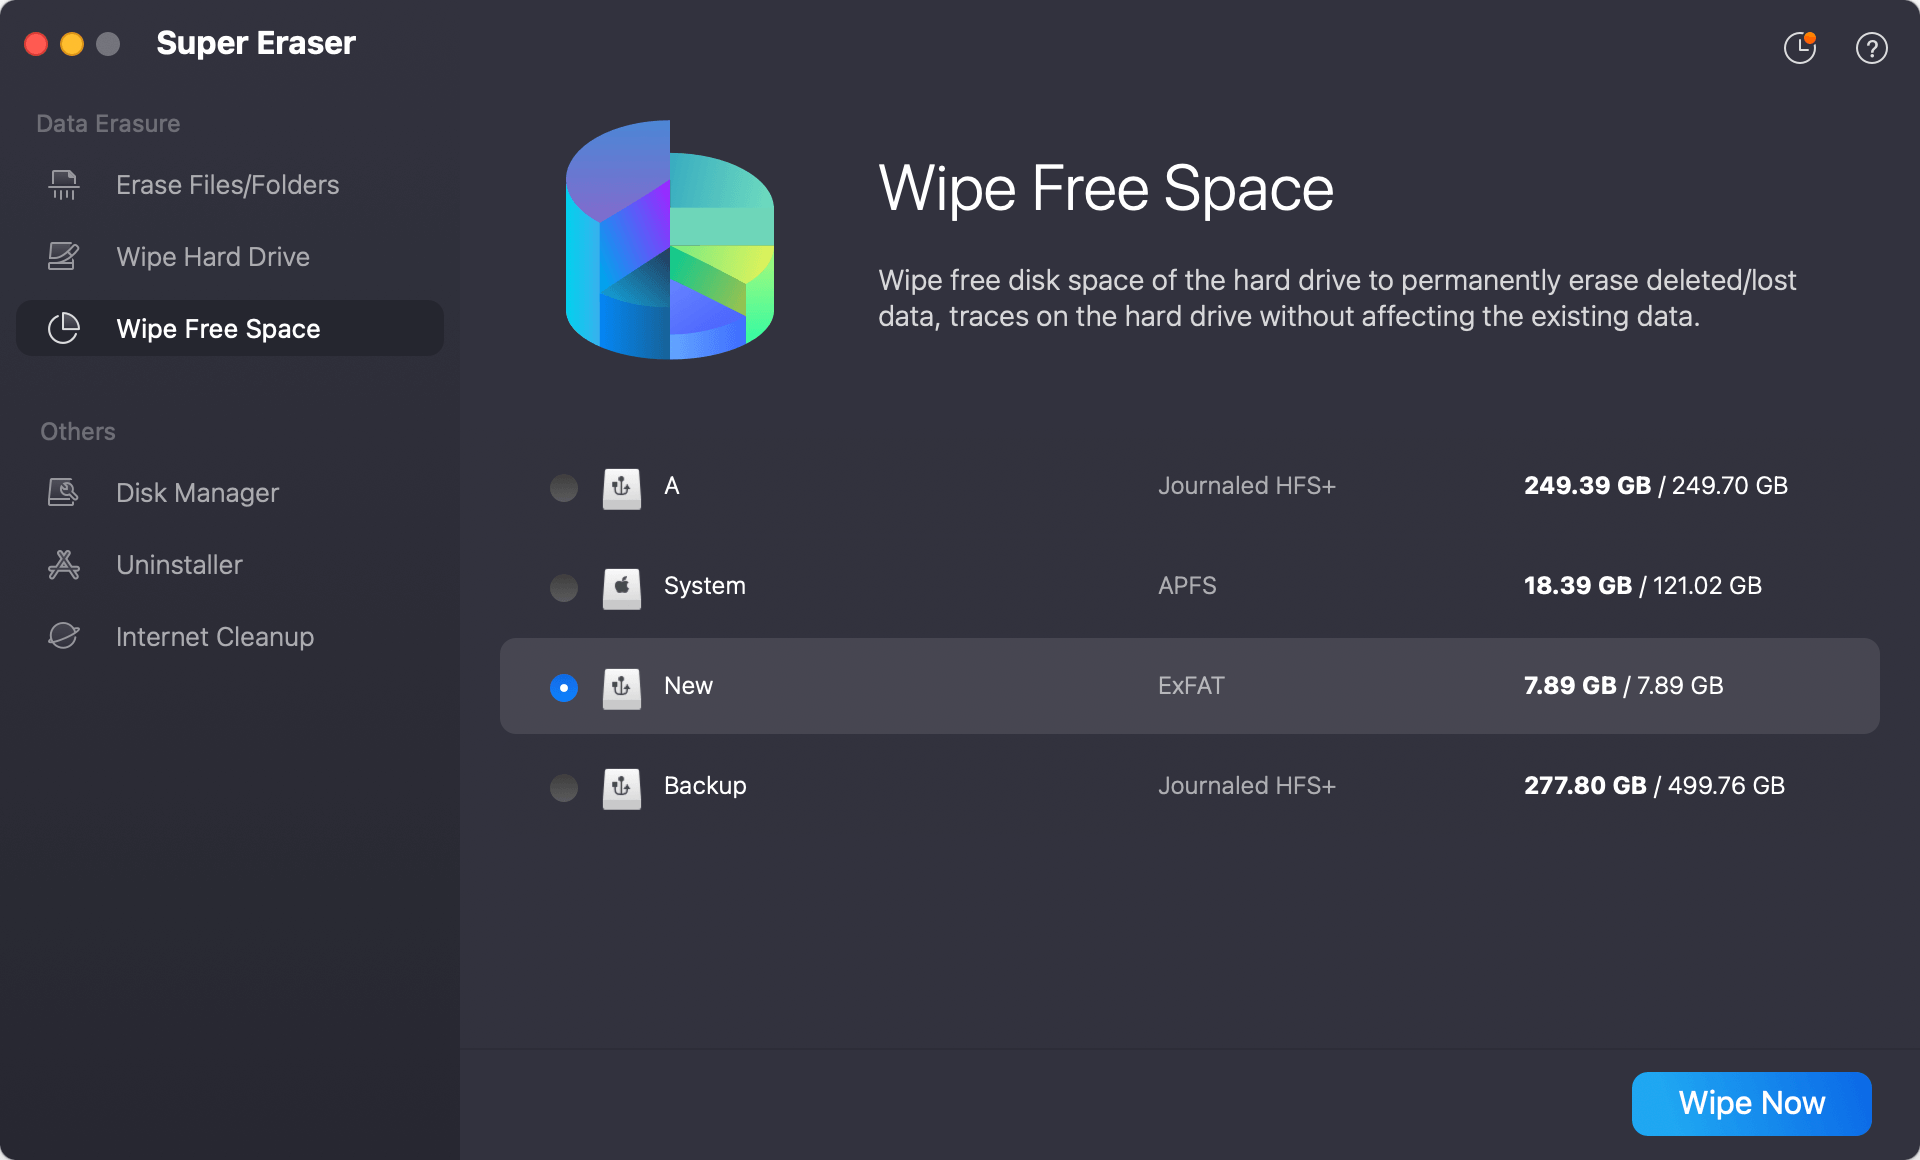
Method 3: Erase Previously Deleted or Lost Business Data
This mode is designed to permanently eliminate any remnants of sensitive business data that may have been previously deleted or lost. It thoroughly scans the available space on your hard drive or external storage unit to ensure that these traces cannot be recovered.

Advanced Techniques for Maximum Data Destruction
When dealing with highly sensitive data, standard deletion methods may not be sufficient. For such scenarios, advanced data destruction techniques offer enhanced security. Here, we delve into some of these methods, including the use of Terminal commands and physical destruction, to ensure your data is completely irretrievable.
1. Using Terminal Commands
Secure Deletion via Terminal:
Terminal commands in macOS offer a powerful way to manage and destroy files, but they require a bit of technical know-how. One of the commands often used for secure file deletion is srm, which stands for Secure Remove. This command ensures that files are not just deleted but also overwritten multiple times, making recovery significantly more difficult.
Step-by-Step Guide:
- Open Terminal:
- Navigate to Applications > Utilities > Terminal.
- Alternatively, use Spotlight by pressing Command + Space and typing Terminal.
- Use the srm Command:
- The srm command operates on individual files or directories, overwriting the data before deletion. To use it, you need to specify the path to the file or directory you want to securely delete.
- Example command:
srm -rv /path/to/your/file
- -r stands for recursive deletion, which is useful if you are deleting a directory and its contents.
- -v enables verbose mode, which will provide detailed output on the progress of the deletion.
- Understanding Overwriting Options:
- By default, srm overwrites files with random data several times. This process significantly reduces the chances of data recovery using forensic techniques.
- You can also specify the number of passes for overwriting. More passes increase security but also take more time. For example:
srm -rv -s 3 /path/to/your/file
- -s specifies the number of passes, with 3 being the default level of security.
- Verify Deletion:
- After using srm, you can use data recovery software to scan the drive and ensure that the files have been completely erased.
2. Physical Destruction
In cases where data security is paramount, physically destroying the hard drive may be the most secure option.
Methods for Physical Destruction:
- Shredding: Professional shredding services can physically destroy hard drives, rendering the data irretrievable.
- Drilling: Drilling holes through the drive's platters can disrupt the data storage mechanisms.
- Degaussing: Using a degausser to disrupt the magnetic fields on the drive can erase data, though this method requires specialized equipment.
Precautions:
- Ensure that physical destruction is performed in a secure environment.
- Verify that the data is completely destroyed before disposing of the drive.
Verifying Data Destruction
Checking for Residual Data
After using any data destruction method, it's essential to verify that the data has been completely removed.
How to Check:
- Use Recovery Tools: Employ data recovery software to scan the drive. If the tool cannot recover any data, the destruction method was likely successful.
- Inspect File System: Check for any remaining traces of the deleted files using disk inspection tools.
Testing Tools
Some third-party tools offer verification features to ensure data destruction. Tools like CCleaner and Permanent Eraser provide options to verify that data has been securely erased. You also can use a data recovery app to scan the erased drive and check if it could find the lost files, if not thing is found - means the erasure is successful.
Conclusion
Properly destroying sensitive business or personal data on a Mac is vital for maintaining data security and compliance with legal regulations. Using built-in macOS tools, third-party software, and advanced methods like physical destruction can help ensure that your data is permanently erased. By following the steps outlined in this guide, you can protect your information from unauthorized access and mitigate the risks associated with data breaches.
Always remember to choose the method that best suits the sensitivity of the data you're handling and verify the effectiveness of your data destruction efforts. By doing so, you safeguard your business and personal information from potential threats and comply with data protection standards.
FAQs About Erase Business Data on Mac
1. Is deleted business data gone forever after emptying trash?
No, the deleted data is not lost forever and can be recovered by data recovery software - such as Do Your Data Recovery for Mac. It will deeply scan the Mac internal SSD and find all recoverable files including the deleted or erased files.
2. How to permanently erase business documents on Mac?
DoYourData Super Eraser for Mac, a reliable data erasure program, can help you permanently delete business documents on Mac:
- Open DoYourData Super Eraser for Mac.
- Click Add to add the target business documents.
- Click on Erase Now button to securely and permanently erase them.

DoYourData Super Eraser for Mac
DoYourData Super Eraser for Mac is a 100% safe, powerful and easy-to-use data erasure program. It offers certified data erasure standards including Peter Gutmann, U.S. Army AR380-19, DoD 5220.22-M ECE to permanently erase data from Macs and external devices, making data recovery be impossible.