Quick Navigation:
- Back Up Your Data Before Factory Reset Your Mac mini
- Sign Out of Your Accounts
- Two Methods to Help Your Factory Reset Your Mac mini
- Permanently Wipe Data on Mac mini with Disk Wipe Software
- Conclusion
Selling your Mac mini can be a great way to upgrade to a newer model or simply pass on your old device. However, before you hand over your Mac mini to its new owner, it's crucial to ensure that all your personal data is completely erased. This process not only helps protect your privacy but also ensures the new owner starts with a clean slate. In this comprehensive guide, we'll walk you through the necessary steps to wipe your Mac mini clean before selling it.
Introduction of Mac mini:
Your Mac mini is more than just a computer; it's a repository of personal information, sensitive data, and potentially confidential documents. Whether you're upgrading to a new model or simply passing it on, you want to ensure that none of your data is left behind. Wiping your Mac mini clean is essential for maintaining your privacy and making sure the new owner doesn't encounter any issues with your old data. This article will guide you through the entire process, from backing up your data to reinstalling macOS.
Back Up Your Data Before Factory Reset Your Mac mini
Before you erase everything on your Mac mini, it's important to back up your data. This ensures you don't lose any important files and allows you to easily transfer your data to your new Mac or another storage device.
Creating a Backup Using Time Machine:
Time Machine is a built-in backup feature in macOS that makes it simple to create backups of your entire system. Here's how to use it:
- Connect an External Drive: Plug in an external hard drive or SSD to your Mac mini.
- Open Time Machine: Go to System Preferences or System Settings > General > Time Machine and select Time Machine.
- Select Backup Disk: Click on Select Backup Disk and choose your connected drive.
- Start Backup: Time Machine will automatically start backing up your files. Depending on how much data you have, this could take some time.
Alternative Backup Options:
If you prefer not to use Time Machine, you can consider other backup methods:
- iCloud: Ensure that your important files are synced with iCloud. Go to System Preferences > Apple ID > iCloud, and check that your documents, photos, and other important data are included.
- Disk Clone: Mac disk cloning software (such as DoYourClone for Mac) can help you clone all data from your Mac mini to an external hard drive and create a full bootable clone backup.
- Manual Backup: Manually copy important files to an external drive or cloud storage service like Dropbox, Google Drive, or OneDrive.
Sign Out of Your Accounts
To ensure that your Mac mini is properly reset, you need to sign out of various Apple services. This step helps disassociate your Apple ID from the device and prevents any issues for the new owner.
Signing Out of iCloud:
- Open System Preferences or System Settings: Click on the Apple logo in the top-left corner and select System Preferences or System Settings.
- Select Apple ID: Click on Apple ID and then select Overview from the sidebar.
- Sign Out: Click Sign Out and follow the prompts to remove your iCloud data from the Mac mini.
Deauthorizing iTunes (for old macOS versions):
If you're using macOS Mojave or earlier, you'll need to deauthorize iTunes:
- Open iTunes: Launch iTunes from your Applications folder.
- Access Account Information: Click on Account in the menu bar, then select View My Account.
- Deauthorize This Computer: In the Account Information window, click Deauthorize This Computer and follow the instructions.
For macOS Catalina and later, iTunes is replaced by separate apps (Music, TV, and Podcasts), and deauthorization isn't required.
Signing Out of Other Apple Services:
- Messages: Open the Messages app, go to Preferences, select the iMessage tab, and click Sign Out.
- FaceTime: Open FaceTime, go to Preferences, and click Sign Out.
Unpair Bluetooth Devices (Optional):
If you have Bluetooth devices paired with your Mac mini, such as keyboards, mice, or trackpads, it's a good idea to unpair them. This ensures that the new owner can pair their own devices without any issues.
- Open System Preferences: Go to the Apple menu and select System Preferences.
- Select Bluetooth: Click on the Bluetooth icon to open the Bluetooth settings.
- Remove Devices: Hover over each paired device, click the X next to the device name, and confirm that you want to remove it.
Two Methods to Help Your Factory Reset Your Mac mini
Method 1: Use Erase All Contents and Settings (for macOS Monterey or later)
If your Mac mini is running macOS Monterey or later, you can use Erase All Contents and Settings tool to help you securely erase all personal data from the system.
Open Erase Assistant:
- For macOS Monterey: Click Apple menu > choose System Preferences > choose Erase All Contents and Settings.
- For macOS Ventura or later: Click Apple menu > choose System settings > General > Transfer or Reset > click Erase All Contents and Settings.

Then erase assistant will open, follow the onscreen instructions to erase all contents and settings, factory reset the Mac mini to its factory settings.
Method 2: Erase Internal Drive in macOS Recovery Mode
Once you've backed up your data and signed out of all Apple services, the next crucial step is to erase the hard drive of your Mac mini. This step ensures that all your personal data is completely removed, making it impossible for the new owner to recover it. Here's a detailed guide on how to accomplish this:
#1 Restart in Recovery Mode
To begin the process of erasing your hard drive, you need to start your Mac mini in Recovery Mode. Recovery Mode is a special startup mode that allows you to perform system-related tasks, such as reinstalling macOS or using Disk Utility to erase your drive.
- Restart Your Mac mini: Begin by restarting your Mac mini. You can do this by clicking the Apple logo in the top-left corner of the screen and selecting Restart. If your Mac mini is already turned off, press the power button to turn it on.
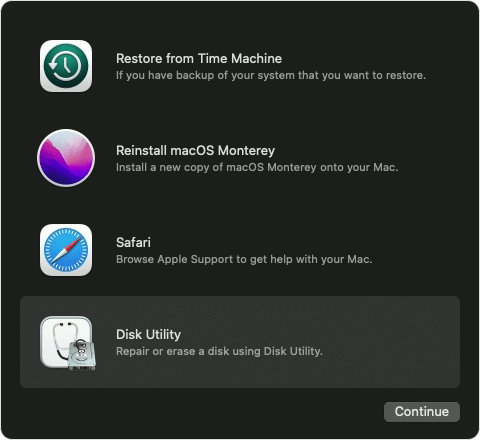
- Enter Recovery Mode: As your Mac mini restarts, you need to enter Recovery Mode. Immediately press and hold down the Command + R keys (for Intel chip) or Power button (for Apple silicon chip) on your keyboard. Continue holding these keys until you see the Apple logo or a spinning globe appear on the screen or you see the macOS Recovery screen. This indicates that your Mac mini is booting into Recovery Mode. Release the keys once you see the macOS Utilities window.
#2 Using Disk Utility to Erase the Hard Drive
Once you're in Recovery Mode, you'll use Disk Utility to erase your Mac mini's hard drive. Disk Utility is a built-in macOS tool designed for managing disks and storage devices. Here's how to use it to erase your drive:
- Open Disk Utility: In the macOS Utilities window that appears, you'll see several options. Click on "Disk Utility" and then click the "Continue" button to launch the Disk Utility app.
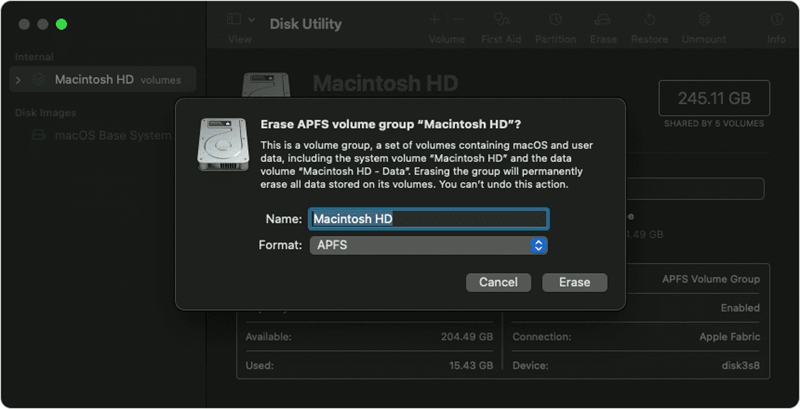
- Select Your Hard Drive: In the Disk Utility window, you’ll see a list of available drives and volumes on the left side. You need to select your Mac mini’s primary hard drive. This is usually named "Macintosh HD" or something similar, but the name might vary depending on your specific setup. Click on the drive to highlight it.
- Erase the Drive: With the primary hard drive selected, click on the "Erase" button located at the top of the Disk Utility window. A new dialog box will appear with options for erasing the drive.
- Name: You can enter a new name for the drive if you wish, but this is optional. The default name is usually "Macintosh HD."
- Format: You’ll need to choose the format for the drive. For most modern Macs, you should select "APFS" (Apple File System). If you're using an older version of macOS or have a traditional hard disk drive (HDD) rather than a solid-state drive (SSD), you might need to select "Mac OS Extended (Journaled)" instead. APFS is the preferred format for newer Macs with SSDs.
- Scheme: Ensure that "GUID Partition Map" is selected in the Scheme dropdown menu. This is the standard partition scheme for macOS and ensures that your drive is formatted correctly for macOS installation.
- Confirm Erasure: After selecting the format and scheme, click the "Erase" button in the dialog box to begin the erasure process. Disk Utility will erase all data on the drive, which may take a few minutes depending on the size of the drive and the amount of data.
- Close Disk Utility: Once the erasure process is complete, you'll see a confirmation message. Click "Done" to close Disk Utility. You’ll be returned to the macOS Utilities window.
#3 Reinstall macOS
After erasing the hard drive, you'll need to reinstall macOS to ensure that the new owner has a clean, functioning operating system.
- Return to macOS Utilities: Once the erasure process is complete, you'll return to the macOS Utilities screen.
- Select Reinstall macOS: Click on "Reinstall macOS" and then Continue.
- Follow the Prompts: Follow the on-screen instructions to reinstall macOS. This will download and install the latest version of macOS that's compatible with your Mac mini.
Note: Even you have reset your Mac mini to its factory settings, the personal data which is erased or deleted still can be recovered by data recovery software. If you want to permanently erase all your private data from the Mac mini's internal drive, just use Mac disk wipe software to wipe free disk space of the drive.
Permanently Wipe Data on Mac mini with Disk Wipe Software
DoYourData Super Eraser for Mac is one of the best Mac disk wipe software. It can help you securely and permanently erase all deleted/formatted/lost data from your Mac mini, making all personal data become unrecoverable.
DoYourData Super Eraser for Mac
- Securely and permanently delete files/folders on Mac mini.
- Wipe external hard drive, SD card, digital camera, USB drive on Mac mini.
- Wipe free disk space to permanently erase all already deleted/formatted or lost data.
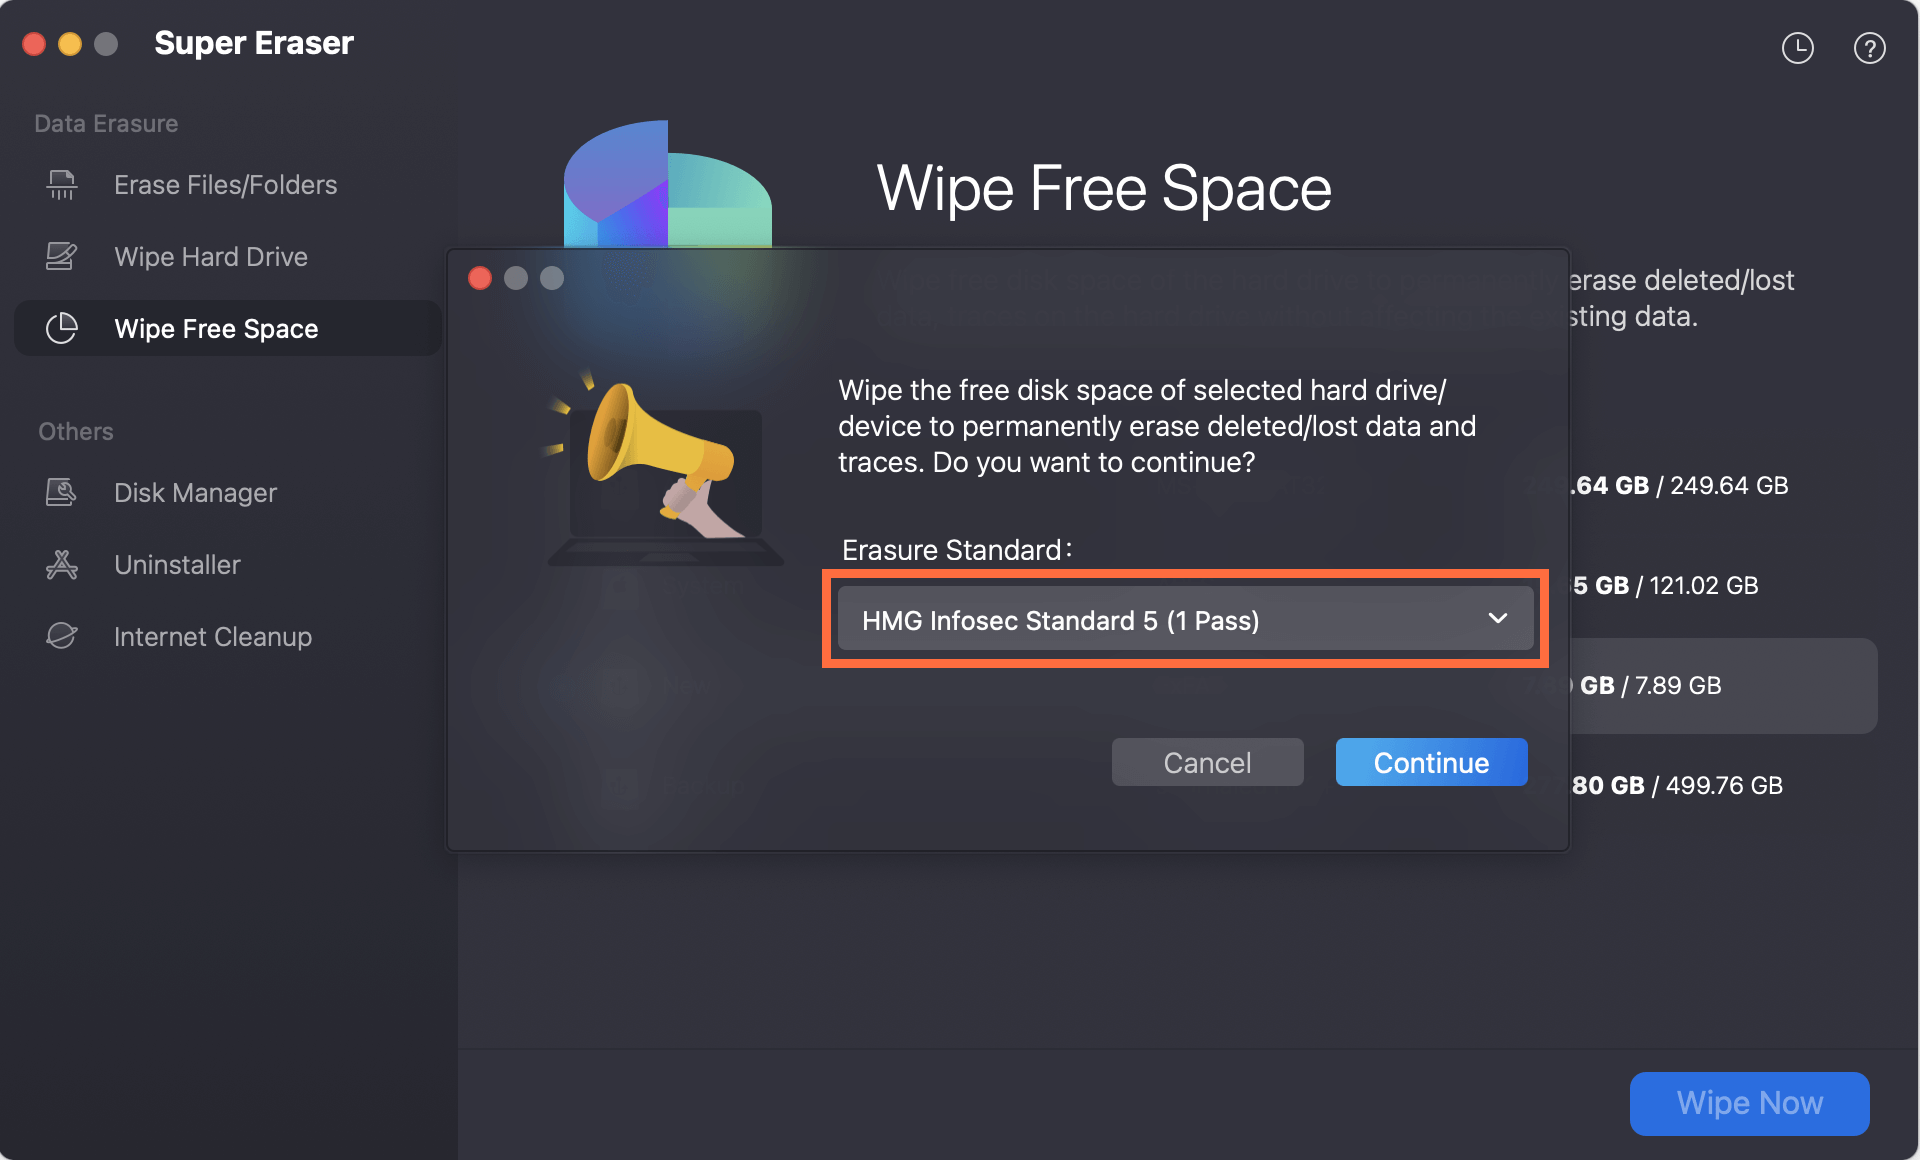
Step 1. Open DoYourData Super Eraser for Mac on your Mac mini and choose Wipe Free Space mode. Select the internal HDD or SSD, click on Wipe Now button.
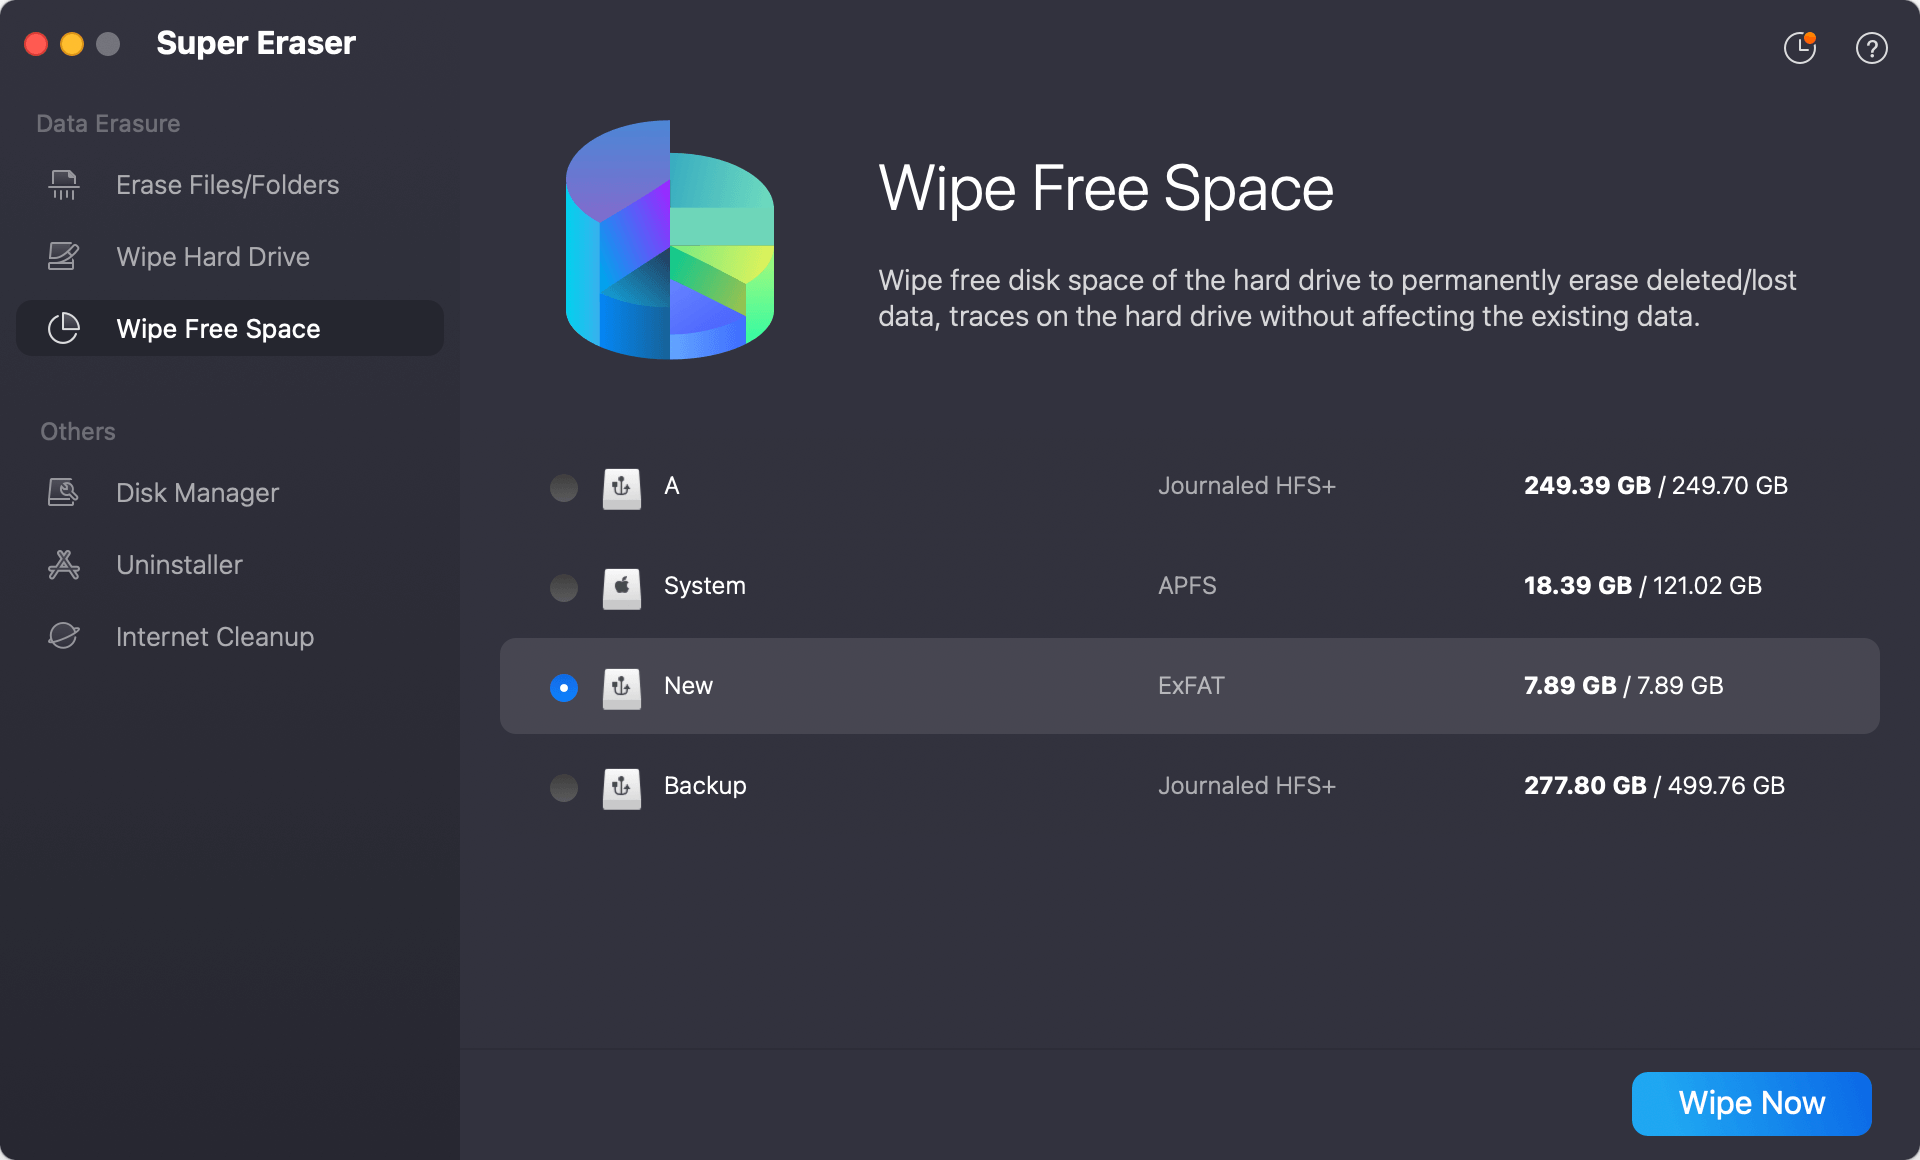
Step 2. Select a data erasure standard, click on Continue button.
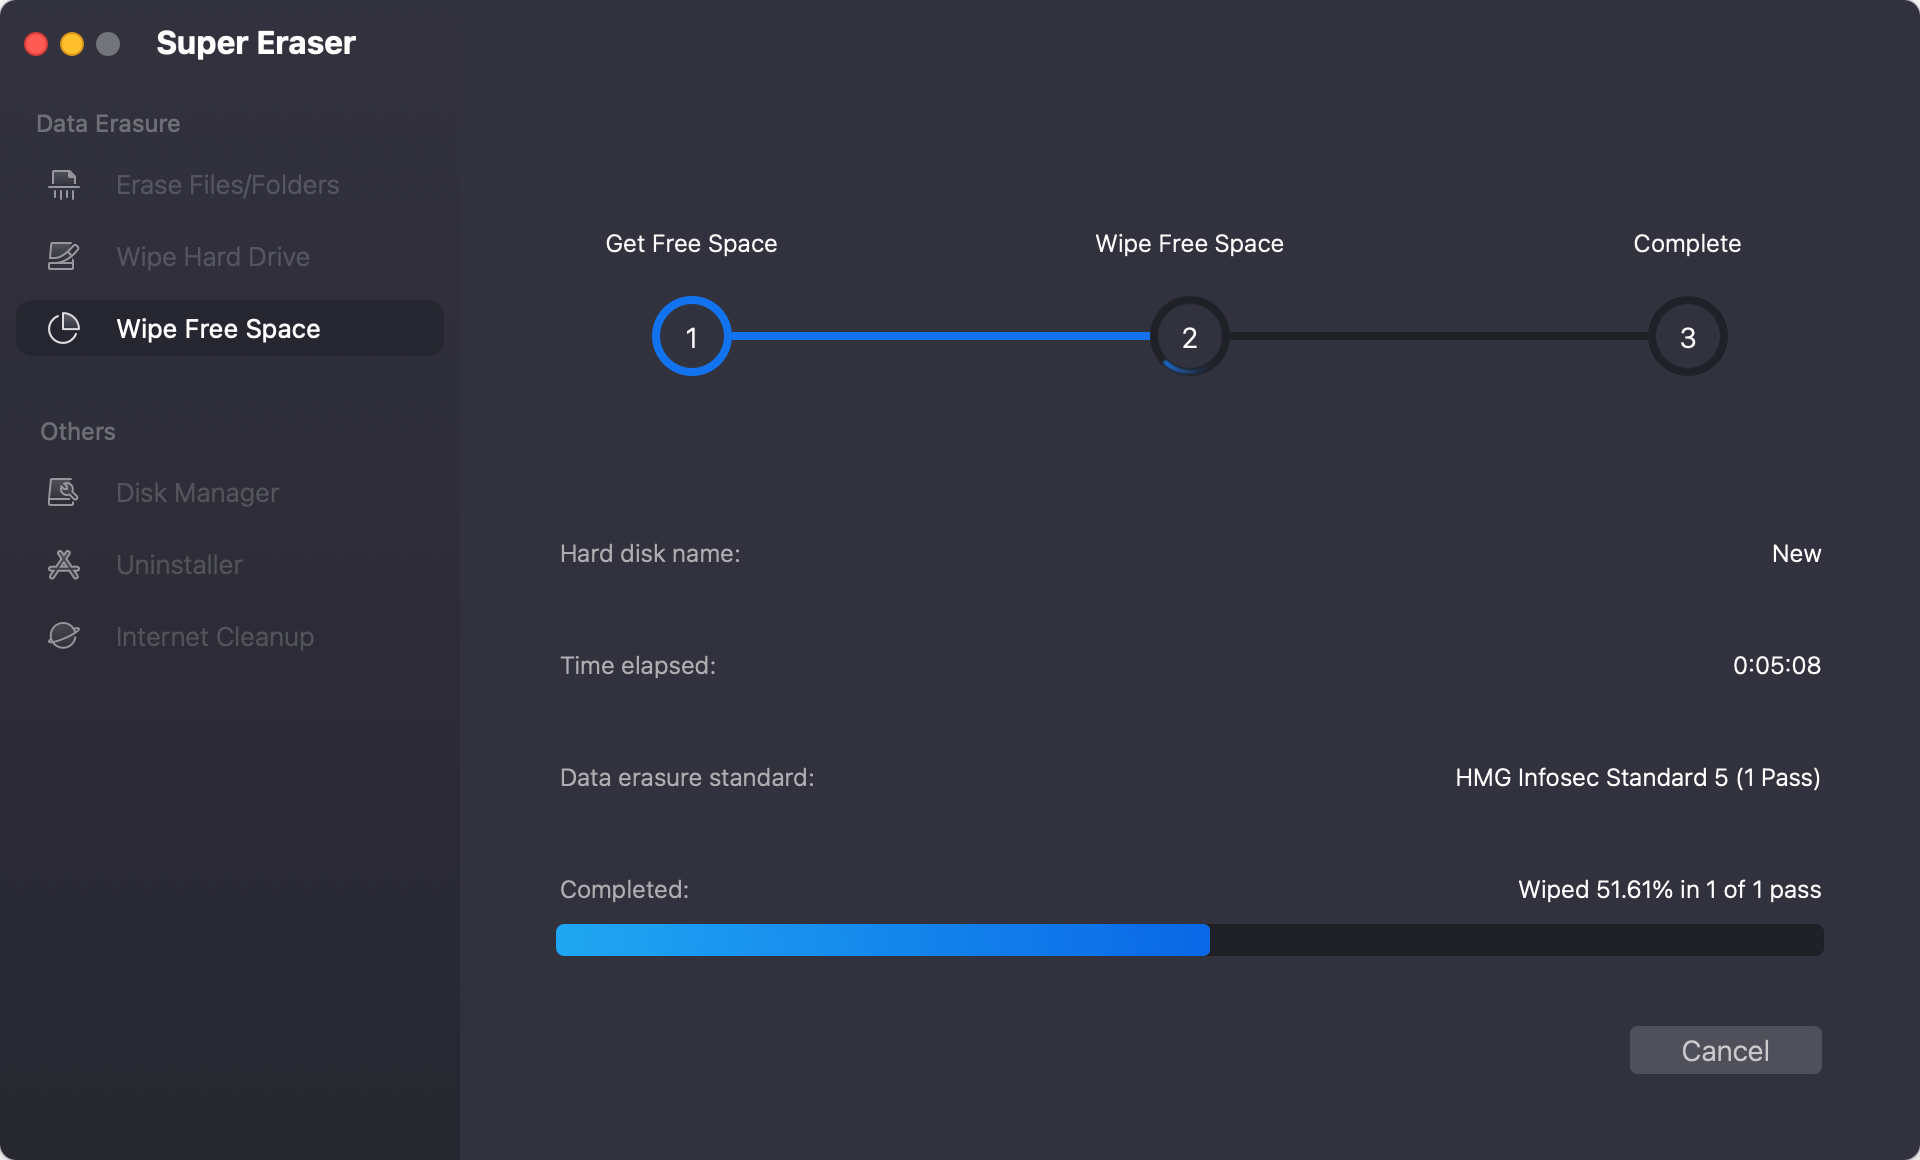
It will wipe all deleted/lost/erased data from the internal drive, leaving no trace for data recovery.
Conclusion
Wiping your Mac mini clean before selling it is a crucial step to ensure your personal information remains private and that the new owner gets a fresh start with their new device. By following the steps outlined in this guide - backing up your data, signing out of Apple services, erasing the hard drive, and reinstalling macOS - you can confidently sell your Mac mini knowing that your data has been securely erased. Always double-check each step to ensure everything is properly handled before handing over your device.
Taking these precautions will not only protect your privacy but also ensure a smooth transition for the new owner of your Mac mini.

DoYourData Super Eraser for Mac
DoYourData Super Eraser for Mac is a 100% safe, powerful and easy-to-use data erasure program. It offers certified data erasure standards including Peter Gutmann, U.S. Army AR380-19, DoD 5220.22-M ECE to permanently erase data from Macs and external devices, making data recovery be impossible.