How to Permanently Erase Data from Kingston USB Drive on Mac?
DoYourData Super Eraser for Mac is a reliable Mac data erasure program. It can help you securely and permanently erase files from Kingston USB drive, wipe Kingston USB drive on Mac. Before you sell, donate or dispose of an old Kingston USB drive, you can use this tool to wipe the drive and destroy all data from it.
![]() Updated by Shirly Chen on August 1, 2024
Updated by Shirly Chen on August 1, 2024
Quick Navigation:
- Understanding Data Deletion: Can Deleted Data Be Recovered?
- Why Need to Permanently Erase Data from Kingston USB Drive?
- Preparing Your Kingston USB Drive for Erasure on Mac
- Three Methods to Erase Data from Kingston USB Drive on Mac
- More Tips After Erasing Your Kingston USB Drive on Mac
- Conclusion
"Hi, I am trying to erase data from an old Kingston USB drive because it is no longer useful and I will throw it away. I erase it using Disk Utility, but the erased data can be found after I run a data recovery app to scan it. Is there any way to permanently erase my data from the Kingston USB drive?"

In today's digital age, data security is more critical than ever. Whether you're selling, donating, or simply repurposing your Kingston USB drive, ensuring that your personal and sensitive information is permanently erased is paramount. This article will guide you through the process of securely erasing data from a Kingston USB drive on a Mac, offering various methods to guarantee your data is irrecoverable.
Understanding Data Deletion: Can Deleted Data Be Recovered?
Before diving into the specifics of erasing data, it's essential to understand the difference between simple deletion and permanent erasure. When you delete files from your USB drive, they are removed from the visible directory and marked as available space. However, the actual data remains on the drive until it is overwritten by new data. This means that, with the right tools, someone could potentially recover your deleted files.
Permanent erasure, on the other hand, involves overwriting the existing data multiple times to ensure that it cannot be reconstructed or recovered. This process is crucial for sensitive information that must be kept confidential, such as personal identification details, financial records, or proprietary business data.
Why Need to Permanently Erase Data from Kingston USB Drive?
Protecting Sensitive Information:
When it comes to safeguarding your personal and professional data, permanently erasing information from a Kingston USB drive is crucial. USB drives often store highly sensitive information such as Social Security numbers, bank account details, or login credentials. If this data is not properly erased, it could be vulnerable to identity theft or financial fraud. Additionally, for businesses, USB drives might contain proprietary information, client details, or sensitive company data.
Ensuring Privacy:
Privacy is a significant concern when dealing with data on USB drives, especially if you plan to recycle, donate, or sell the device. Simply deleting files from the drive is not enough, as data recovery tools can often retrieve deleted information. To prevent potential privacy breaches, it's important to ensure that the drive is permanently erased before passing it on.
Compliance with Regulations:
Adhering to legal and industry regulations is another critical reason for permanently erasing data. Various data protection laws, such as the General Data Protection Regulation (GDPR) and the California Consumer Privacy Act (CCPA), require that organizations handle data disposal properly. Non-compliance with these regulations can lead to legal consequences and substantial fines. Additionally, specific industries have their own standards for data destruction.
Preventing Unauthorized Access:
Permanently erasing data is essential to prevent unauthorized access, particularly in scenarios where the USB drive might be lost or stolen. If a drive containing sensitive information is not securely erased, hackers or cybercriminals could potentially exploit the data. Even in cases where the drive is no longer in use, ensuring that the data is completely wiped reduces the risk of it being accessed and misused.
Avoiding Data Leakage:
For businesses, protecting intellectual property such as trade secrets or confidential research is crucial. Insecure data disposal can lead to data leakage, which may result in competitive disadvantages or exposure of sensitive information. Academic or research projects often contain confidential data that needs to be protected from unauthorized distribution or use.
Reducing Environmental Impact:
Responsible data disposal practices also contribute to reducing environmental impact. Securely erasing data from USB drives before recycling or disposing of them is a key aspect of e-waste management. By ensuring that no sensitive information remains on the drive, you not only protect data but also support responsible environmental practices. Proper disposal of electronic devices helps minimize the risk of environmental contamination and ensures that old devices are handled in an environmentally friendly manner.
Maintaining Trust and Integrity:
Finally, maintaining trust with customers, stakeholders, and the general public is essential for any organization. Demonstrating a commitment to data security through proper data erasure helps build trust and shows that you take data protection seriously. For businesses, this can enhance your reputation and reinforce your commitment to protecting sensitive information. By taking the necessary steps to ensure that data is permanently erased, you uphold the integrity of your data management practices and reinforce trust with those you interact with.
Preparing Your Kingston USB Drive for Erasure on Mac
Before you start the erasure process, it's important to prepare your Kingston USB drive properly:
- Backup Important Data: Ensure that you have backed up any data you want to keep. Erasing data is irreversible, and once the process is complete, the information cannot be recovered.
- Ensure the Drive is Connected: Connect your Kingston USB drive to your Mac and make sure it is recognized by the system. It should appear in Finder and Disk Utility.
Three Methods to Erase Data from Kingston USB Drive on Mac
#1 Using Disk Utility to Erase Data from Kingston USB Drive on Mac
Disk Utility is a built-in macOS application that provides a straightforward way to erase and format storage devices. Follow these steps to securely erase data from your Kingston USB drive using Disk Utility:
Step 1. Open Disk Utility: You can find Disk Utility in the Applications folder under Utilities, or by searching for it using Spotlight (Cmd + Space, then type "Disk Utility").
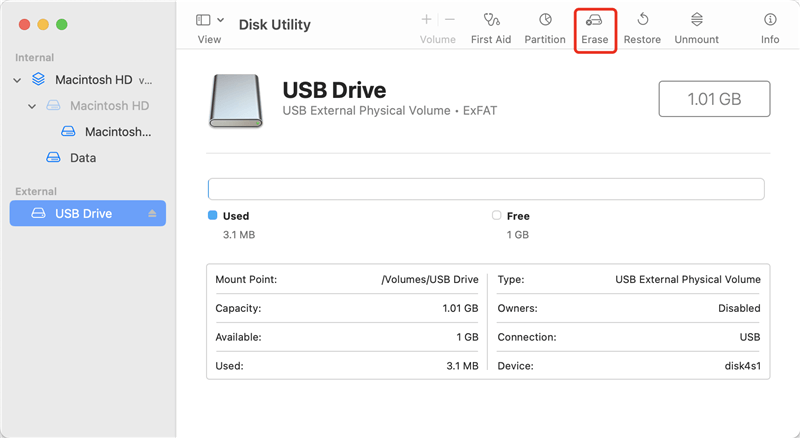
Step 2. Select the Kingston USB drive: In Disk Utility, you will see a list of drives on the left-hand side. Select your Kingston USB drive from this list. Be cautious to select the correct drive, as erasing will remove all data on the selected drive.
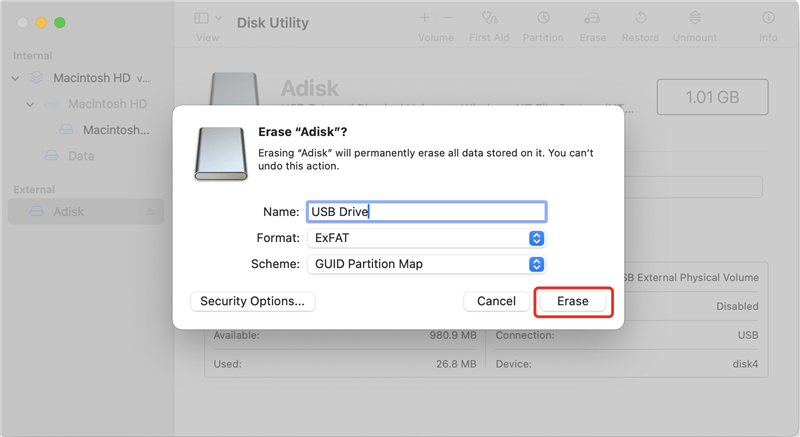
Step 3. Choose the Erase Option: Click the "Erase" button at the top of the Disk Utility window. This will open a dialog box where you can configure the erasure settings.
Step 4. Select the Appropriate Format: You'll need to choose a format for your drive. For general use, you might select ExFAT, MS-DOS (FAT), APFS or Mac OS Extended (Journaled). For most secure erasure purposes, format options like "Mac OS Extended (Journaled) are sufficient, but this choice will depend on your intended use of the drive post-erasure.
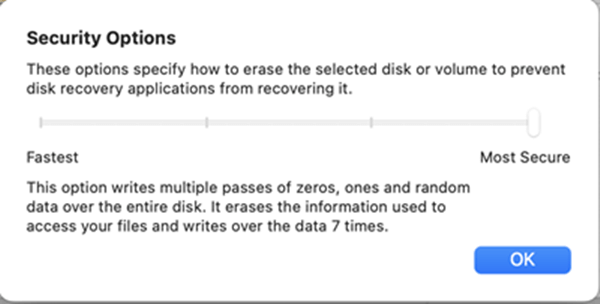
Step 5. Using Security Options: Click on the "Security Options" button in the erase dialog box. Here, you can choose the level of security for the erasure:
- Fastest (1-pass zero fill): This option quickly overwrites the data with zeros. It’s the fastest but offers the least security.
- More Secure (3-pass erase): This overwrites the data three times, making recovery much more difficult.
- Most Secure (7-pass erase): This option performs a seven-pass overwrite, which is very thorough and secure, but also time-consuming.
Step 6. Confirm and Perform the Erase: After selecting your desired security level, click "Erase." The process will begin, and the time it takes will depend on the security level chosen and the size of the drive. Once completed, your data will be permanently erased.
#2 Using Terminal for Secure Erasure to Erase Kingston USB Drive on Mac
For those who prefer a command-line approach or need additional control over the erasure process, Terminal offers powerful options for secure data removal. Here's how to use Terminal to erase your Kingston USB drive:
Step 1. Open Terminal: Terminal can be found in the Applications folder under Utilities, or you can search for it using Spotlight.
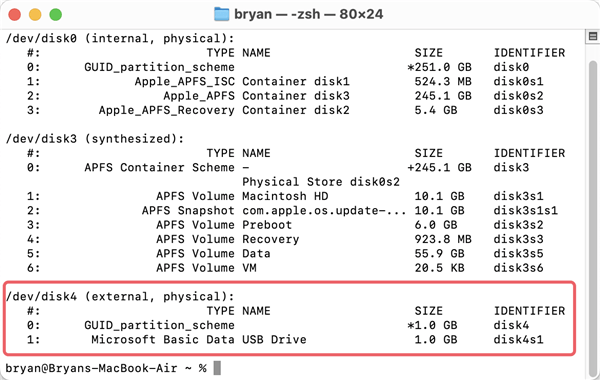
Step 2. Identify the USB Drive: Use the diskutil list command to list all connected drives. Look for your Kingston USB drive in the list to identify its disk identifier (e.g., /dev/disk4).
Step 3. Use the diskutil secureErase Command: The diskutil secureErase command allows you to securely erase your drive with varying levels of security. Here are some examples:
- Single-pass erase: diskutil secureErase 0 /dev/disk4
- Three-pass erase: diskutil secureErase 1 /dev/disk4
- Seven-pass erase: diskutil secureErase 2 /dev/disk4
Replace /dev/disk4 with your actual disk identifier. Note that the number after secureErase determines the level of security:
- 0 for a single-pass zero fill
- 1 for a three-pass erase
- 2 for a seven-pass erase
Example Commands:
If you want a thorough erasure, you might use diskutil secureErase 2 /dev/disk4. Confirm the command by pressing Enter and wait for the process to complete. This method ensures that data is overwritten multiple times for maximum security.
#3 Using Disk Wipe Software to Wipe Kingston USB Drive on Mac
The data is erased by Disk Utility or Terminal Commands may be recovered by data recovery software. If you want to permanently erase all data from your Kingston USB drive, you can use a disk wipe program to wipe it completely, ensuring no data is recoverable.
DoYourData Super Eraser for Mac is a reliable data erasure program and disk wipe software for Mac. It can help you securely wipe a Kingston USB drive and permanently erase all data from it. Once the data is erased by DoYourData Super Eraser for Mac, the data is lost for good, cannot be recovered by data recovery software.
Step 1. Connect the Kingston USB drive to your Mac. Download and install DoYourData Super Eraser on your Mac. It is a 100% safe and easy-to-use Mac disk wipe program.
Step 2. Open this Mac disk wipe software, then select a data erasure mode:
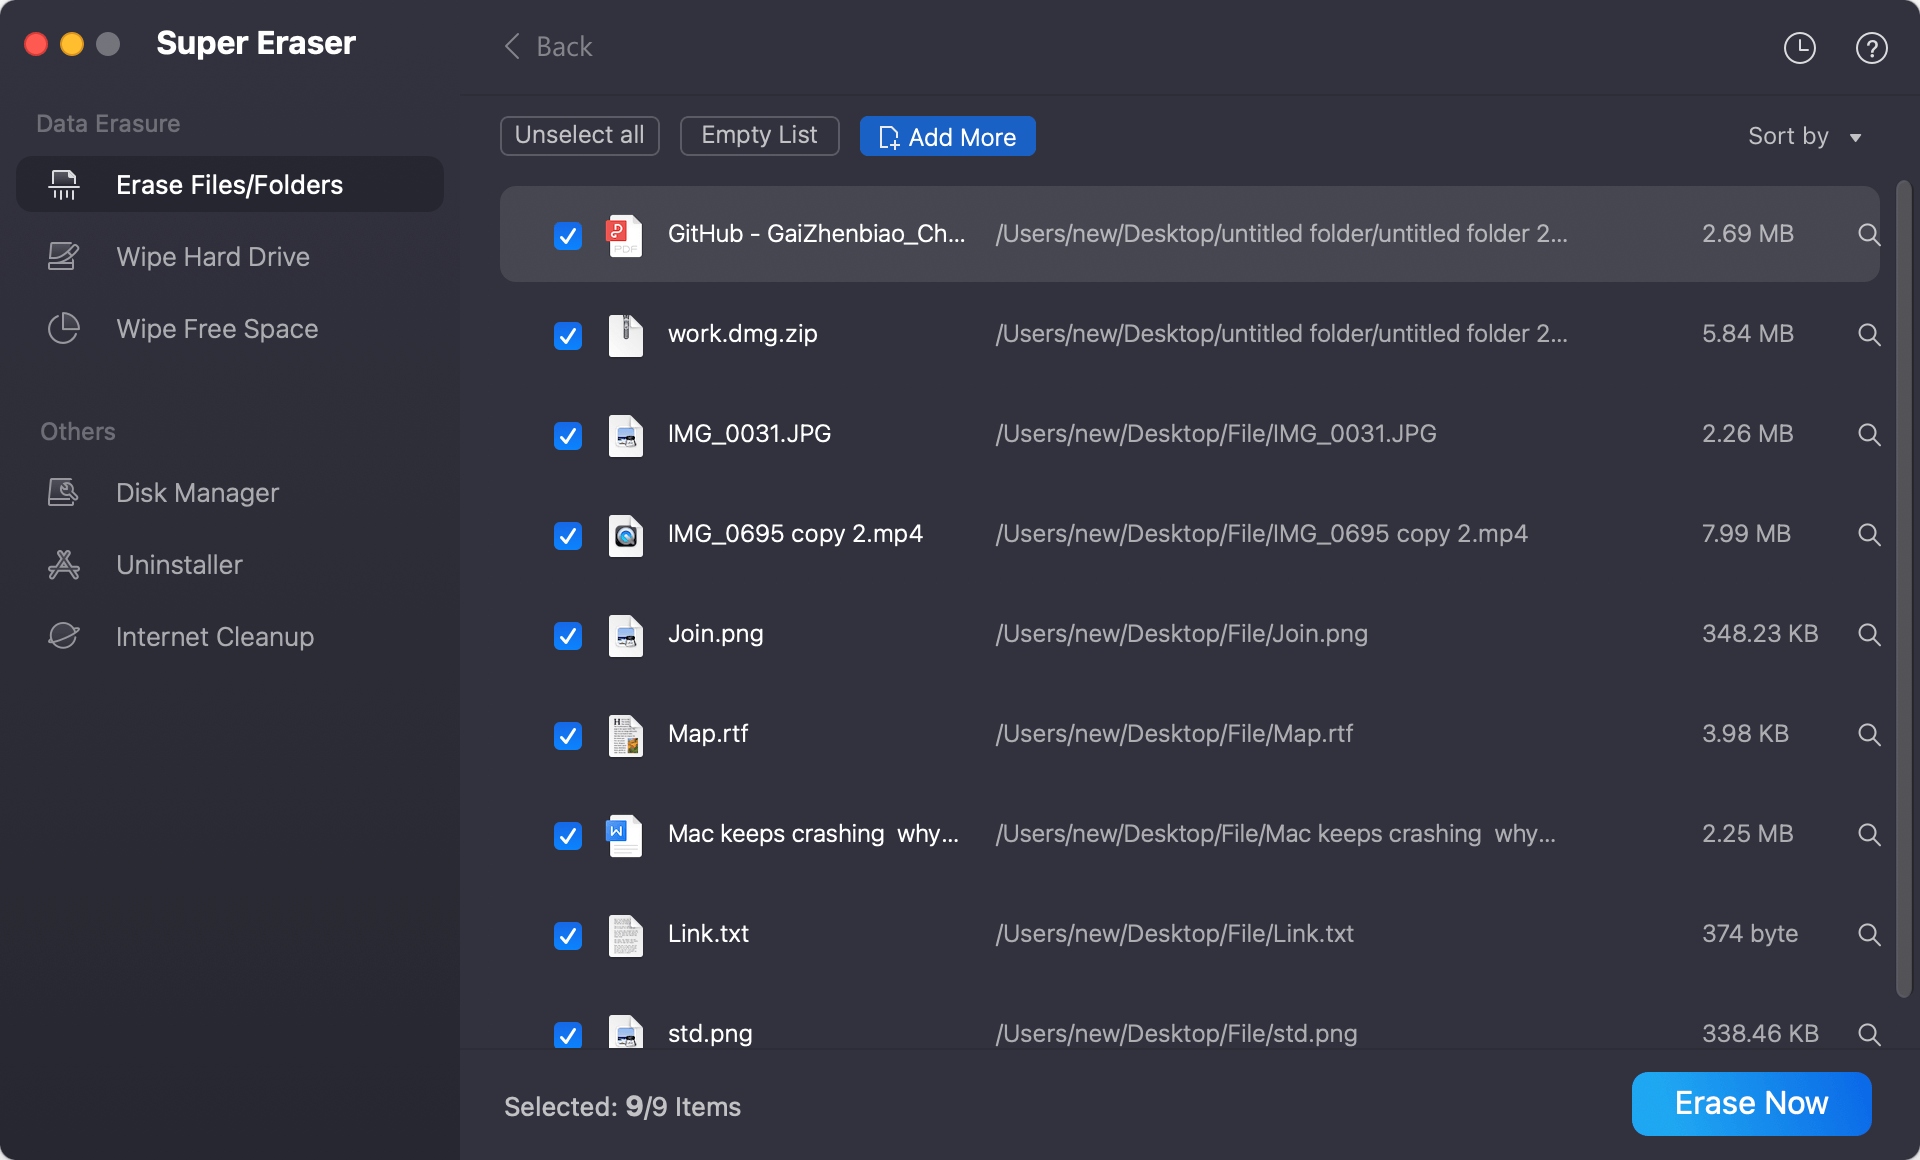
- Erase Files/Folders: Permanently erase selected files and folders from your Kingston USB drive.
![Erase Files/Folders]()
- Wipe Hard Drive: This mode can completely wipe the Kingston USB drive and permanently erase all data from it.
![Wipe Hard Drive]()
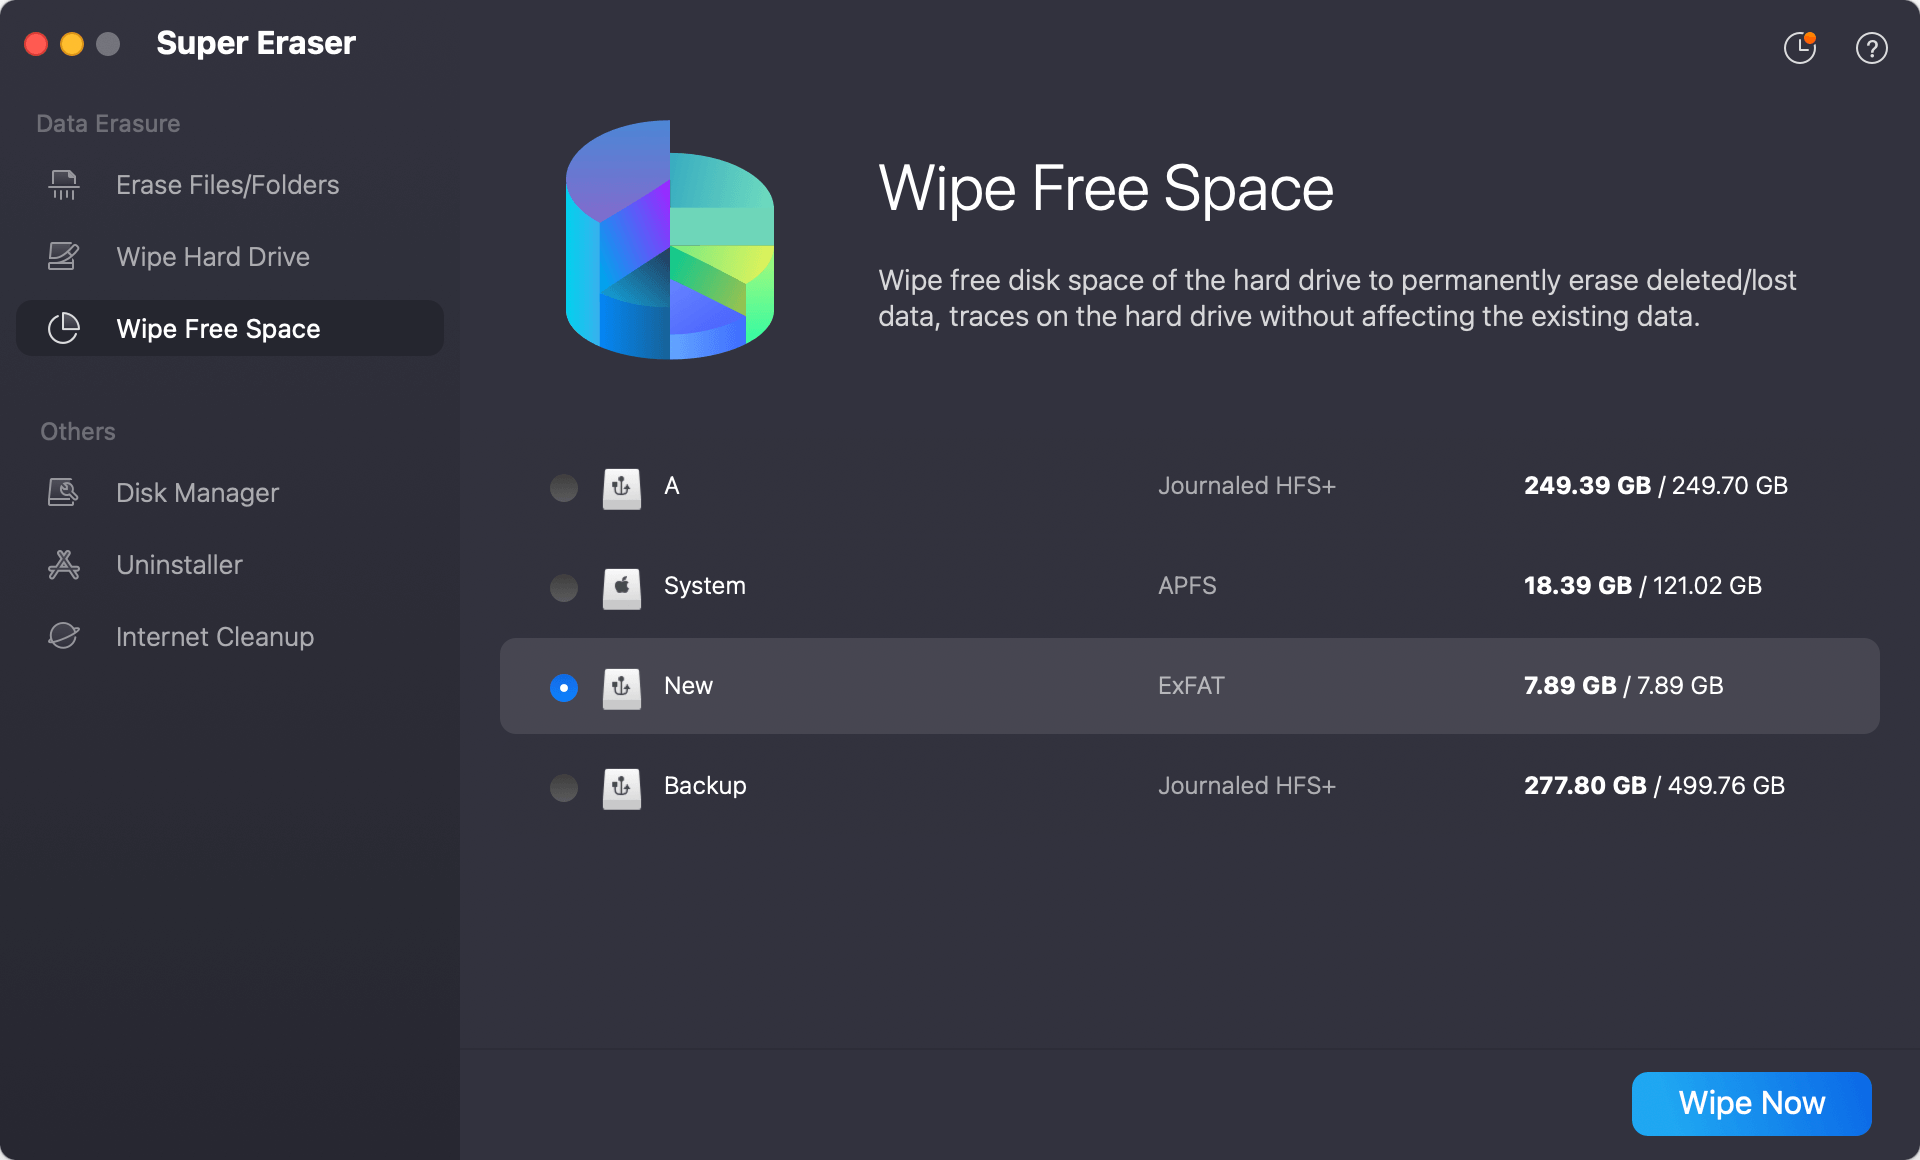
- Wipe Free Space: If you want to keep the existing files, just use this mode. It will wipe free disk space of the Kingston USB drive and permanently erase all deleted/lost files and formatted data without affecting the existing files.
![Wipe Free Space]()

Step 3. Securely and permanently erase data from your Kingston USB drive.
More Tips After Erasing Your Kingston USB Drive on Mac
Verifying Data Erasure:
After erasing your data, it's a good practice to verify that the USB drive is truly empty and the data is irrecoverable:
- Check the Drive: Open Finder and check if the USB drive appears empty. This indicates that the erasure process was successful.
- Use Recovery Software (Optional): For added assurance, you can use file recovery software to scan the USB drive. Tools like Do Your Data Recovery for Mac, Disk Drill or Data Rescue can help you check if any data is recoverable. If these tools show no recoverable files, your data has been successfully erased.
Additional Security Measures:
While using Disk Utility and Terminal provides a high level of data security, there are additional steps you can take to ensure that your data is completely unrecoverable:
- Use Third-Party Applications: There are specialized third-party applications designed for secure data erasure. Tools like DoYourData Super Eraser, CCleaner or Permanent Eraser offer advanced options for data destruction and can be useful if you need more control over the process.
- Physical Destruction: For extremely sensitive data, physical destruction of the USB drive might be necessary. Methods include shredding or crushing the drive. This is a last resort if the data’s security is of utmost importance and you are concerned about any possibility of data recovery.
Conclusion
Securely erasing data from your Kingston USB drive on a Mac is crucial to protecting your personal information and ensuring that it does not fall into the wrong hands. By following the steps outlined above, you can confidently erase your data using DoYourData Super Eraser for Mac, Disk Utility or Terminal. Remember to always back up important data before starting the erasure process and verify that the drive is truly empty afterward. Employing additional security measures, such as using third-party disk wipe software or physical destruction, can provide extra peace of mind if needed.

DoYourData Super Eraser for Mac
DoYourData Super Eraser for Mac is a 100% safe, powerful and easy-to-use data erasure program. It offers certified data erasure standards including Peter Gutmann, U.S. Army AR380-19, DoD 5220.22-M ECE to permanently erase data from Macs and external devices, making data recovery be impossible.
Written & Updated by Shirly Chen
Shirly Chen has been writing data recovery, data erasure articles for DoYourData over 4 years. She has been working as a professional website content writer & editor for quite a long time. She also writes articles about disk clone, Mac optimization, disk backup, etc.