Upgrade to macOS 27 Golden Gate: Step-by-Step Guide
Upgrading to a major operating system can be a bit intimidating. If done incorrectly, you risk hitting installation errors or even losing important documents and photos. Make a full backup of your Mac with DoYourClone for Mac first, then feel free to upgrade to macOS Golden Gate.
![]() Updated by Ricky Lin on June 17, 2026
Updated by Ricky Lin on June 17, 2026
Quick Navigation:
- Why Is the macOS 27 Golden Gate Upgrade Different?
- Steps to Upgrade to macOS 27 Golden Gate
- What to Do If You Lose Data During the Upgrade
- FAQs about Upgrading to macOS 27 Golden Gate
- Wrapping Up
Apple has officially released the stunning new macOS 27 Golden Gate! Packed with a revamped Siri AI, advanced Apple Intelligence, and sleek Liquid Glass customization, it is an upgrade every Mac user wants. But before you jump right into the update, you need to make sure your system is ready.

In this post, we will walk you through how to upgrade to macOS 27 Golden Gate safely. Follow along to keep your files secure and enjoy a smooth, hassle-free installation process.
Why Is the macOS 27 Golden Gate Upgrade Different?
Every annual Mac update brings plenty of excitement, but macOS 27 Golden Gate is a true turning point. Apple has optimized this version to deeply integrate next-generation AI and refine the visual experience.
The interface feels incredibly modern. The sidebars now bleed beautifully into the background, and a new transparency slider lets you tweak window aesthetics to perfection. However, these massive updates mean significant changes under the hood.
Because of these deep technological architectural changes, the upgrade process handles your files and hardware differently than previous versions did. Let's make sure your Mac is prepared for the shift.
Steps to Upgrade to macOS 27 Golden Gate
Step 1: Verify Hardware Compatibility
First things first: you must check if your Mac can actually run the new system. Apple has made a major decision with this release. macOS 27 Golden Gate drops support for all older Intel-based Mac models.
This means Golden Gate runs exclusively on Macs equipped with Apple Silicon (M1 chips or later) or the A18 Pro chip. If you own an older Intel Mac Pro, MacBook Pro, or iMac from 2019 or 2020, you will need to stick with macOS Tahoe.
Supported Mac Models for macOS 27:
- MacBook Neo (2026)
- MacBook Air (M1, 2020 or later)
- MacBook Pro (M1, 2020 or later)
- Mac Mini (2020 or later)
- iMac (2021 or later)
- Mac Studio (2022 or later)
- Mac Pro (2023)
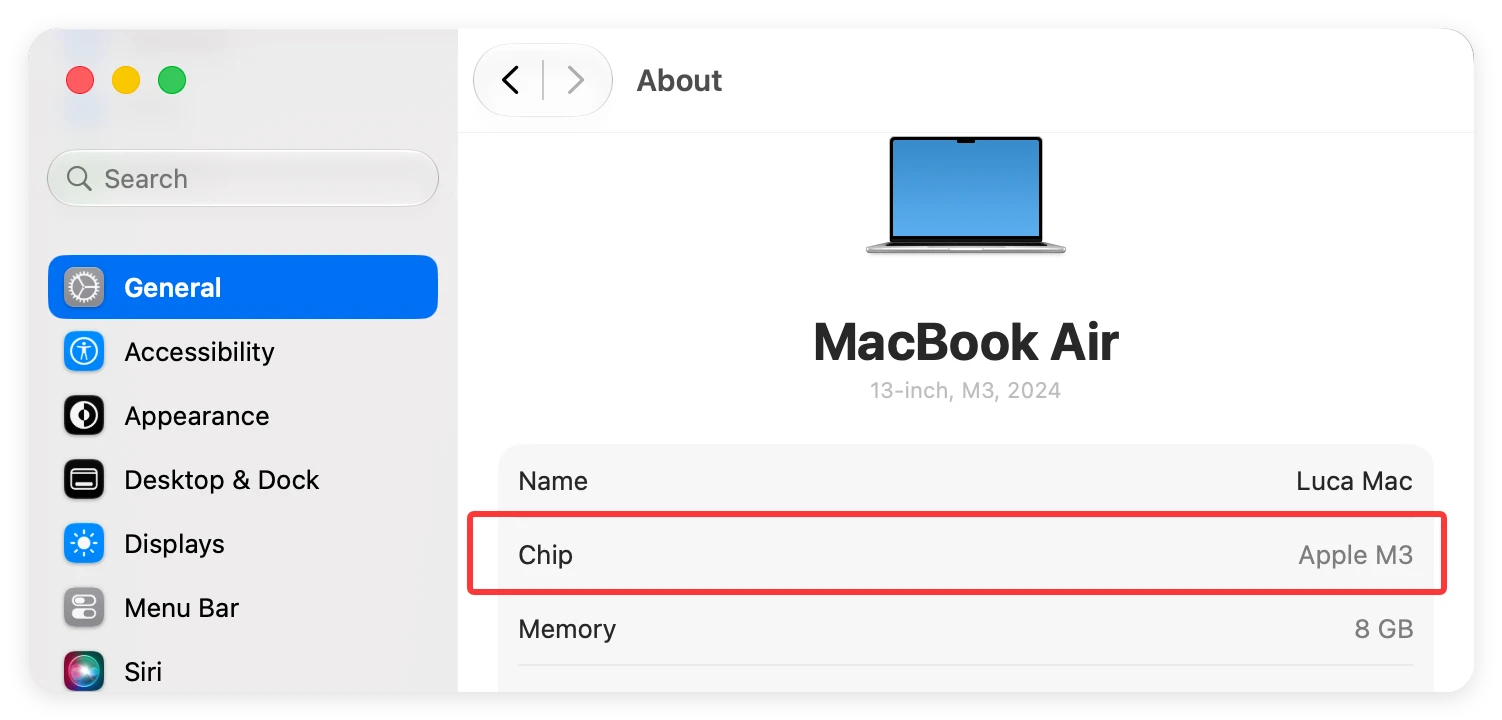
To find out what chip your Mac has, click the Apple menu icon in the top-left corner of your screen and select About This Mac or System Settings > General > About. If you see an M1, M2, M3, M4, or M5 chip listed, you are completely good to go!
Step 2: Check Your Storage Space
A very common reason major updates fail halfway through is a lack of local storage space. The install files for macOS 27 are several gigabytes in size. Furthermore, your computer needs extra space to safely unpack and install those files.
We highly recommend leaving at least 25GB to 35GB of free space on your hard drive before hitting the upgrade button. To check your storage, head over to System Settings, click General, and look at the Storage section.
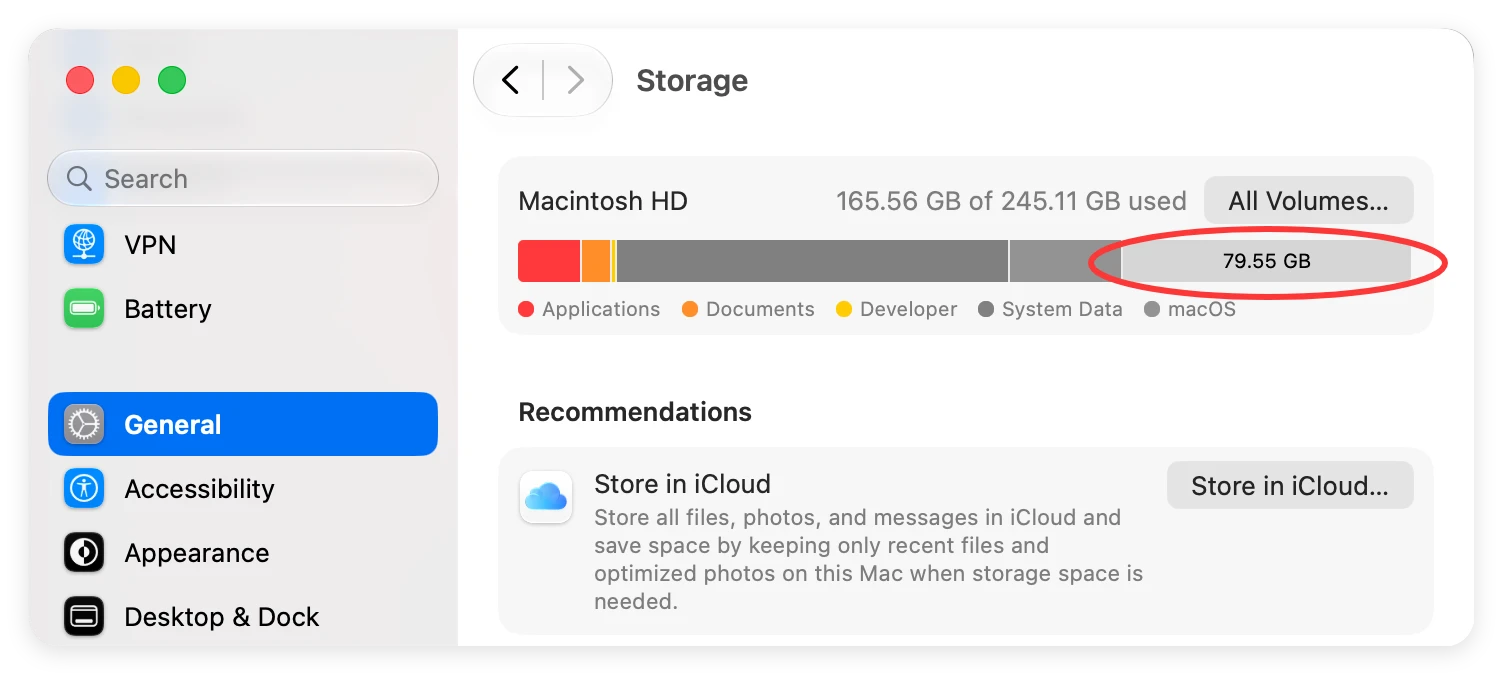
If your drive is almost full, take a moment to delete old downloads, clear out your trash, or move heavy video files to an external drive.
Step 3: Back Up Your Mac (Crucial Step!)
⚠️ Warning: Never start a major operating system upgrade without a fresh backup. Software updates change deep system files, and if your Wi-Fi drops out or a bug occurs, your personal data could be put at serious risk.
Protecting your files must be your top priority. There are a couple of excellent ways to secure your hard drive before moving forward.
Option A: Use Time Machine
Connect a formatted external hard drive to your Mac. Navigate to System Settings > General > Time Machine, select your drive, and click Back Up to "xxx" Now.
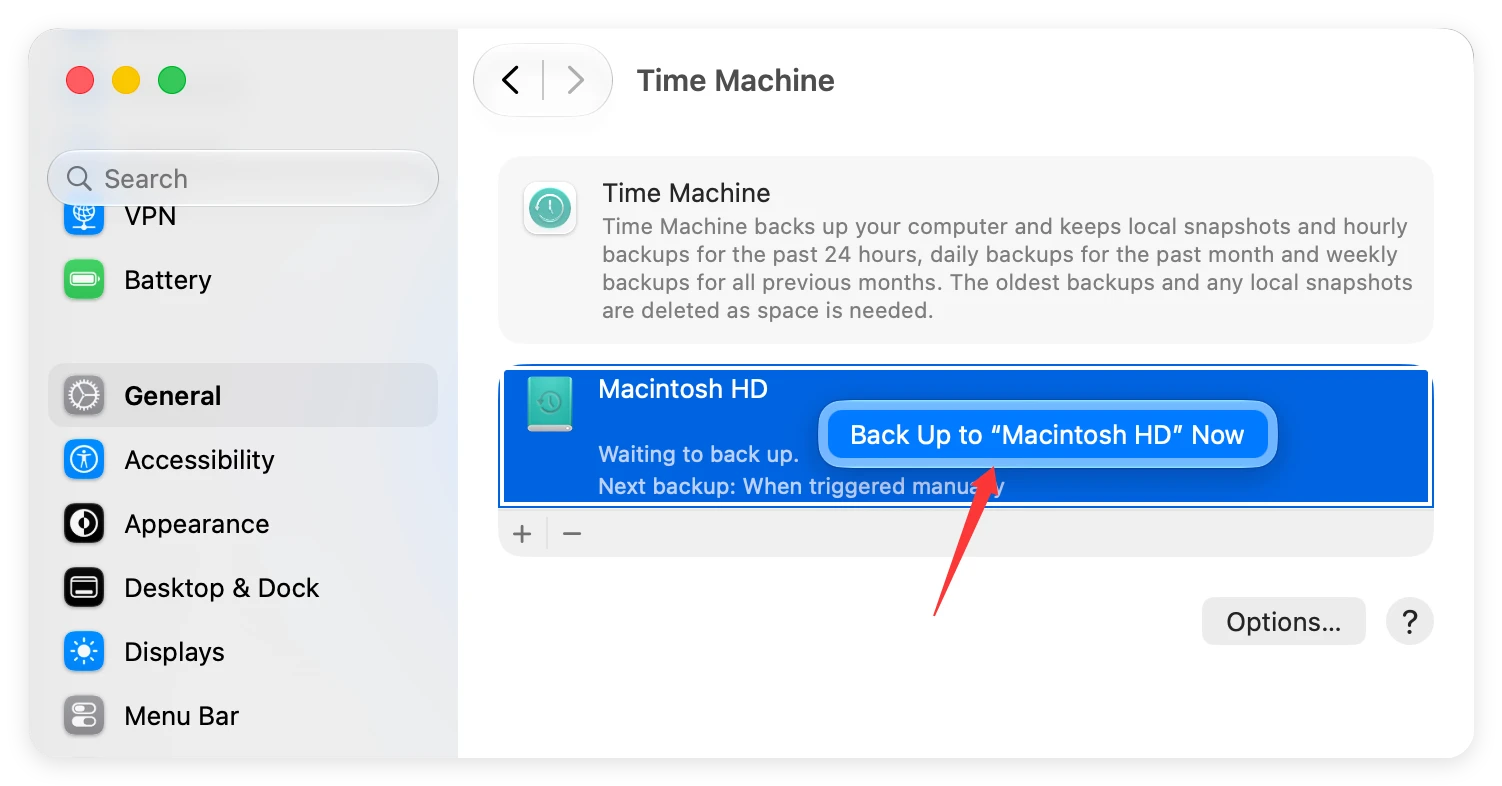
💡 Note: Apple has removed support for the legacy Apple Filing Protocol (AFP) in macOS 27. If you used to rely on an old AirPort Time Capsule for wireless backups, it will no longer work. Using a direct external USB or Thunderbolt drive is now the safest route.
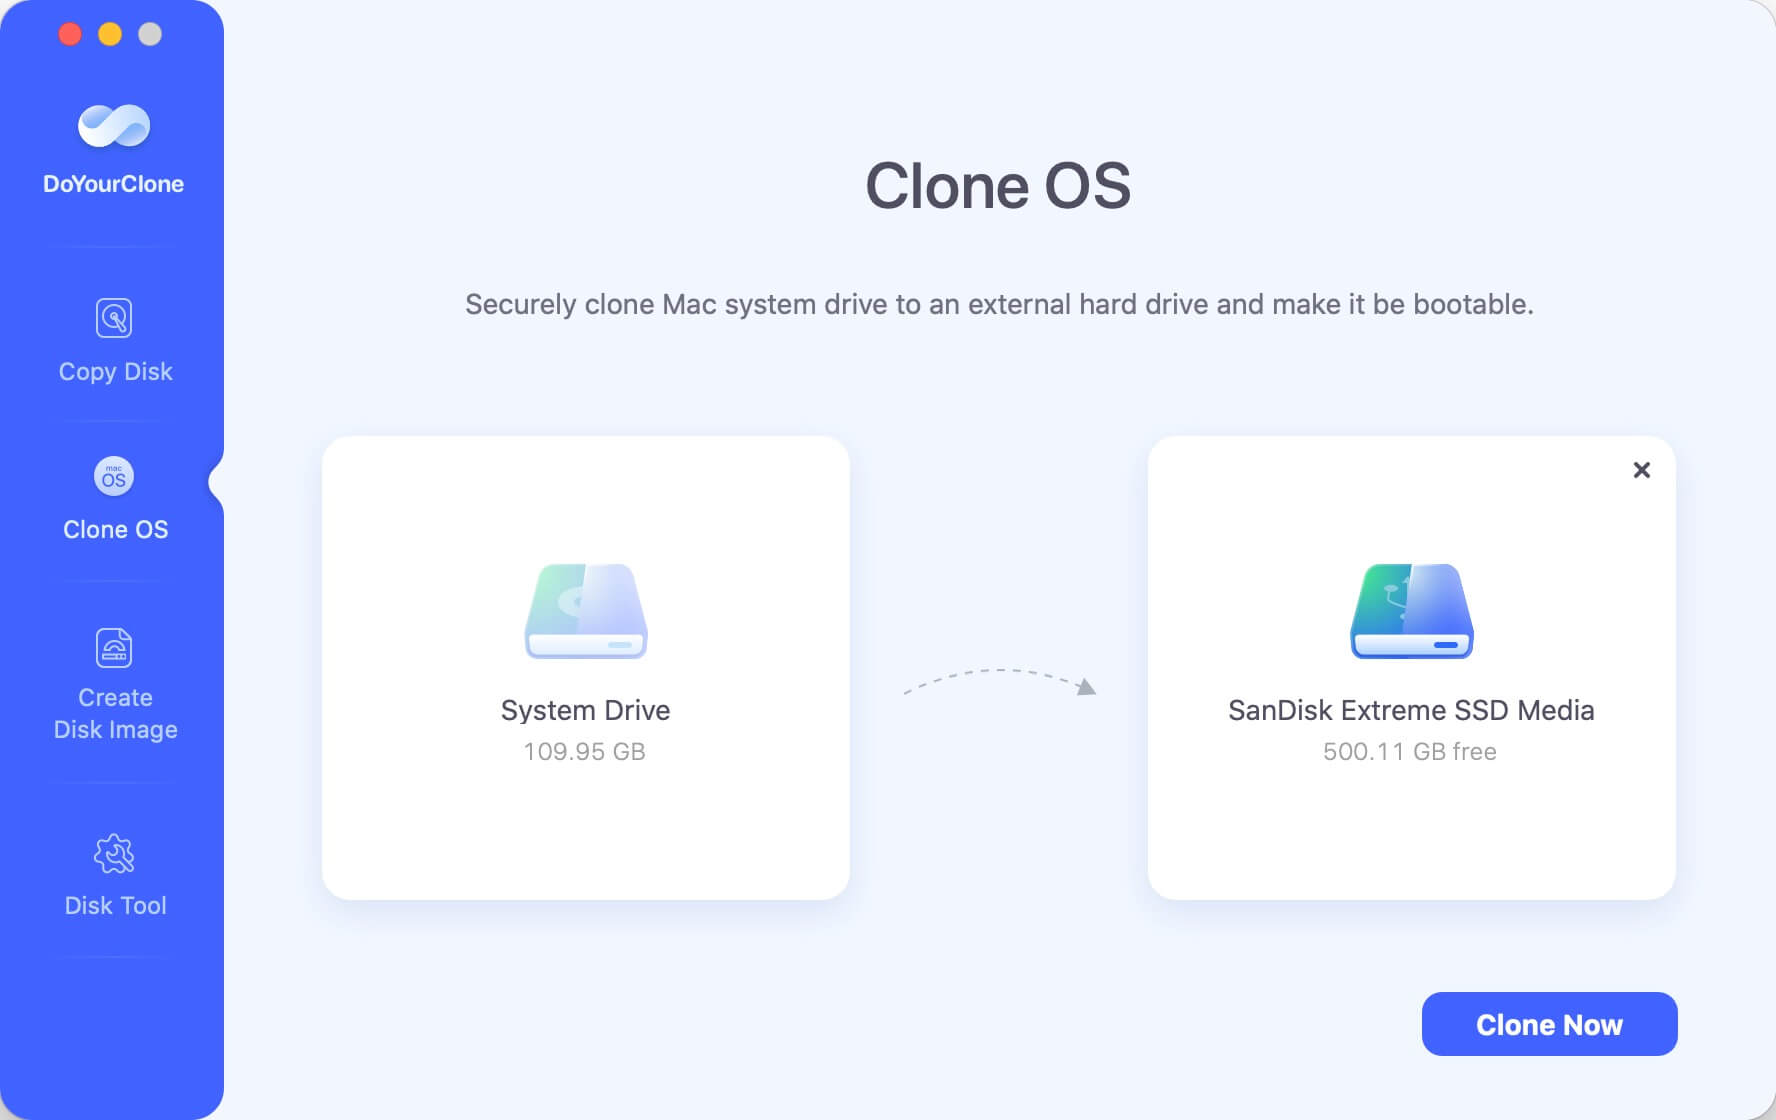
Option B: Create a Full Disk Clone with DoYourData
If you want a bulletproof backup solution, you can use specialized software like DoYourClone for Mac. Creating a complete clone ensures that if anything goes wrong during the macOS 27 upgrade.
Step 4: How to Upgrade to macOS 27 Golden Gate
Once your hardware is verified, your space is cleared, and your backup is safely stored, you are ready to install the update. Right now, macOS 27 is available through Apple's developer and public beta channels, with the final stable version launching later this autumn.
Here is the easiest way to download and install the official update directly onto your machine:
- Open the Apple menu in the top-left corner of your screen and select System Settings.
- Click on General in the left sidebar, then click Software Update on the right-hand side.
- Your Mac will automatically scan Apple's servers for any available software packages.
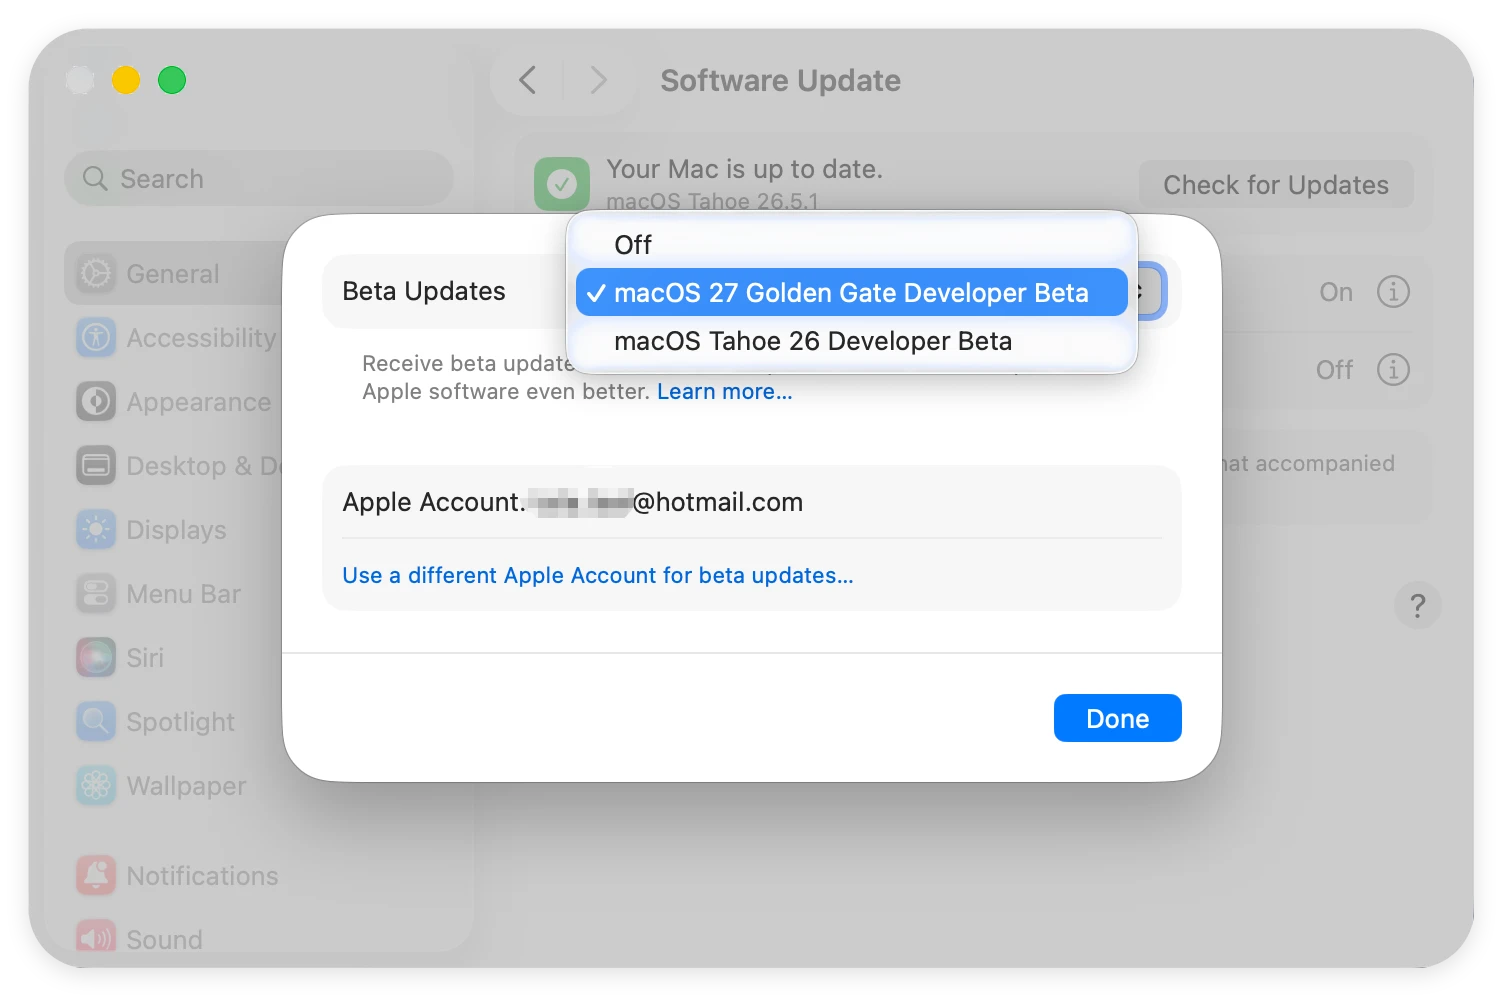
- If you are participating in the Beta program, click the info ('i') icon next to Beta Updates, select the macOS 27 Golden Gate Developer Beta from the dropdown, and hit Done.
- When the macOS 27 Golden Gate banner shows up, click the Upgrade Now button.

- Type in your Mac's administrator password to authorize the installation process.
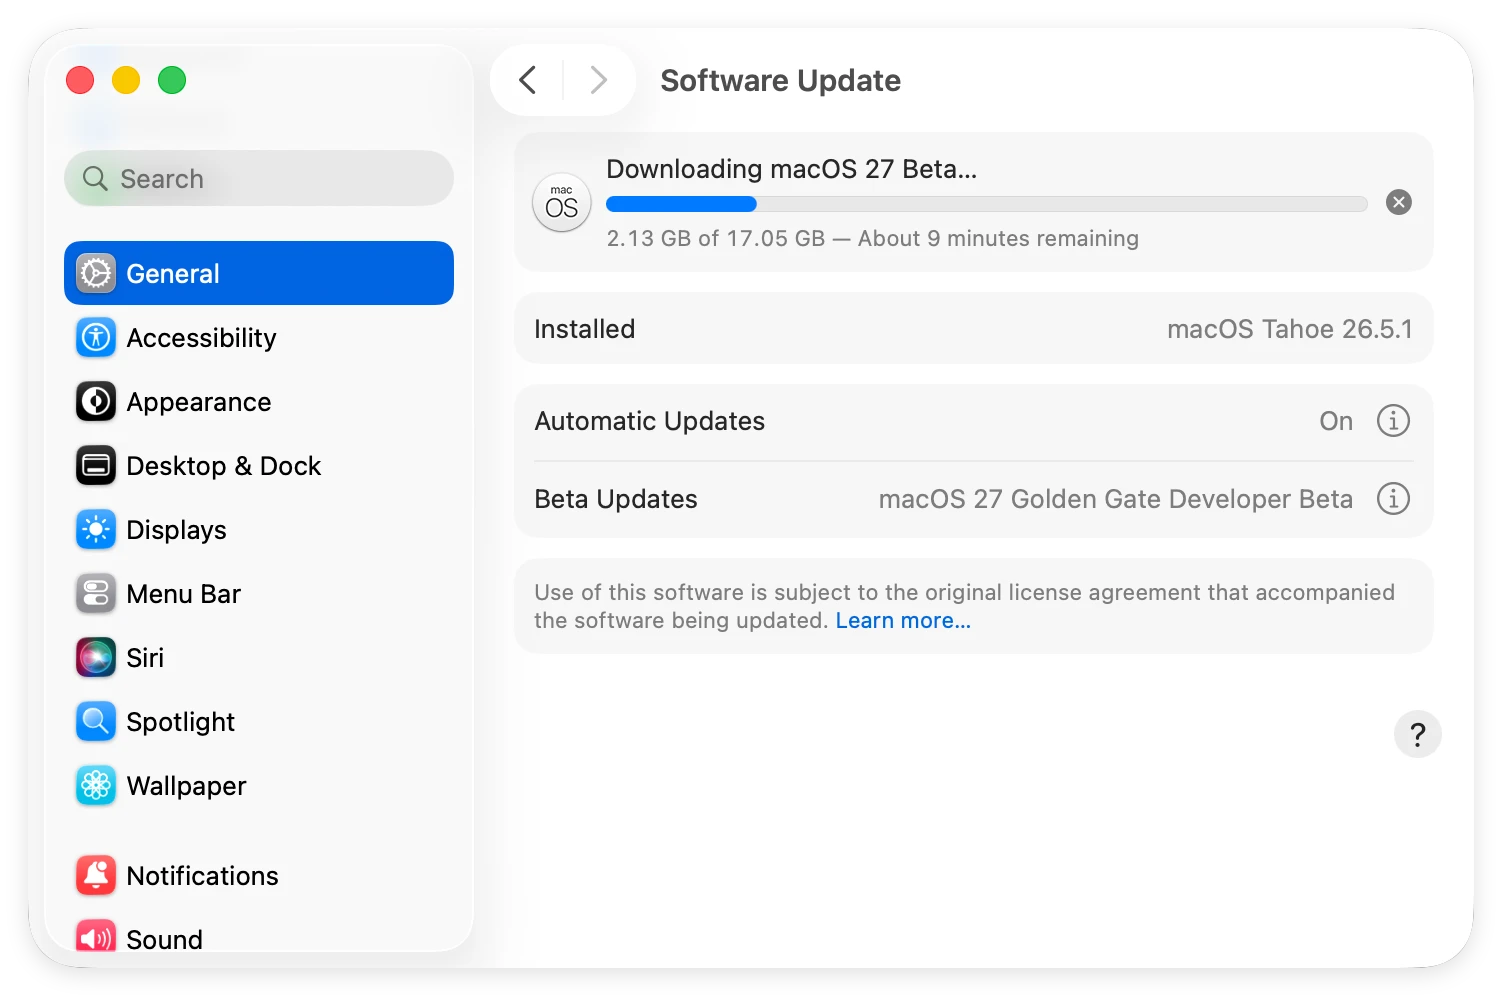
At this point, your Mac will start downloading the massive installation files. Keep your computer connected to a reliable internet source and make sure it is plugged into a power outlet.
When the download finishes, your Mac will prompt you to restart. The screen will turn dark and display an Apple logo alongside a progress bar. Your system may restart several times during this process; this is completely normal! At last, the Mac will boot into the new system once the update is done. You can finish the settings and start enjoying the new macOS.

What to Do If You Lose Data During the Upgrade
Even when you are careful, unforeseen errors like sudden power cuts, system crashes, or frozen loading bars can corrupt your hard drive. If you find that some of your precious documents, family photos, or folders are missing after upgrading, do not panic.
This is where professional tools come to the rescue. You can use DoYourData Recovery for Mac to run a deep scan on your drive. The software is designed to dig deep into your file system and securely pull back files that disappeared during a messy OS update.
The most critical rule of data recovery is speed: avoid saving new large files onto your Mac after noticing data loss, as this prevents the old data from being overwritten.
FAQs about Upgrading to macOS 27 Golden Gate
Wrapping Up
Upgrading to macOS 27 Golden Gate unlocks a whole world of intelligent features and stunning visual adjustments. By taking just a few minutes to check your Mac's compatibility, free up extra storage, and create a secure backup, you can enjoy a worry-free upgrade experience.
Take your time, follow our step-by-step instructions, and get ready to explore Apple's latest and greatest desktop operating system. Happy updating!

DoYourClone for Mac
DoYourClone for Mac, one of the best Mac disk cloning software, can help you clone HDD, SSD, external storage device on Mac, upgrade HDD to SSD, create full disk image backup, etc. It also can clone everything from your Mac to an external HDD/SSD and create a full bootable clone backup. 100% safe and easy-to-use.
Written & Updated by Ricky Lin
Ricky Lin is an senior editor of DoYourData who lives in Adelaide, Australia. He is interested in writing technology articles related with data recovery, computer issue fixes, disk clone, iPhone data recovery, video edit, Mac optimization, etc. He Joined DoYourData in 2019 and have written 500+ articles to help both Windows users and Mac users to solve data or computer problems.