Quick Navigation:
- Backup Your Data
- Signing Out of iCloud on Your Mac
- Disable iCloud Drive on Mac
- Remove iCloud Drive from Your Mac
- Alternative Storage Options
- Cleanup Your Mac and Free Hard Drive Space
- Conclusion
Do you find it hard to manage your iCloud? You might not have enough space on your hard drive or want to learn more about your cloud choices. No matter the reason, you've come to the right place if you want to know how to get rid of iCloud Drive on your Mac.
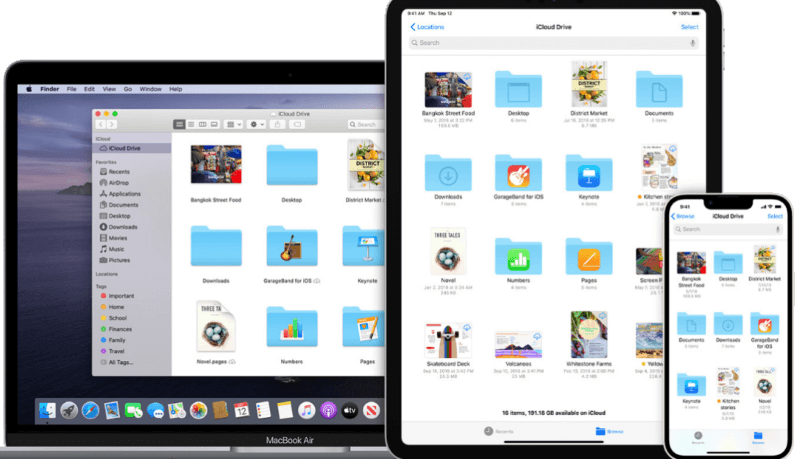
If only your files were stored on your Mac instead of in the cloud, you'd live in a perfect world. It does sound freeing. If you want to keep your digital life simple or are a tech fanatic eager to try something new, turning off iCloud Drive on Mac is easy once you know how.
Here are the easy steps you need to take to disconnect from iCloud Drive. We can help you with everything from keeping your files safe to looking into other storage options.
Backup Your Data
Before you turn off iCloud Drive, make sure your important files are safe by making backups. Even though turning off iCloud Drive won't delete your files from your Mac, it's still a good idea to make backups if something goes wrong.
Whether you use Time Machine or a different backup tool, like DoYourClone for Mac, ensure all your important files are safely copied. This proactive step gives you peace of mind and lowers the chances of losing data during the change process.
Signing Out of iCloud on Your Mac
Signing out of iCloud is the first step before turning off iCloud Drive. Here's how to do it:
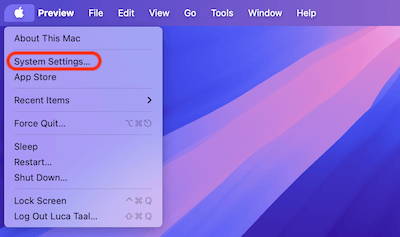
Step 1: Click on your screen's top-left corner apple icon. Pick "System Settings" from the drop-down menu.
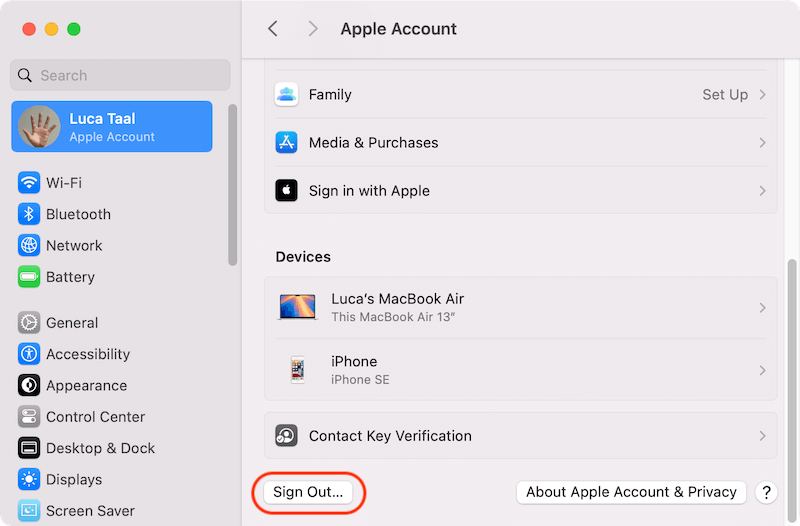
Step 2: In the System Settings window, click on your name at the top of the sidebar. It will display your Apple Account settings. Click the "Sign Out" button in the window's bottom-left corner.
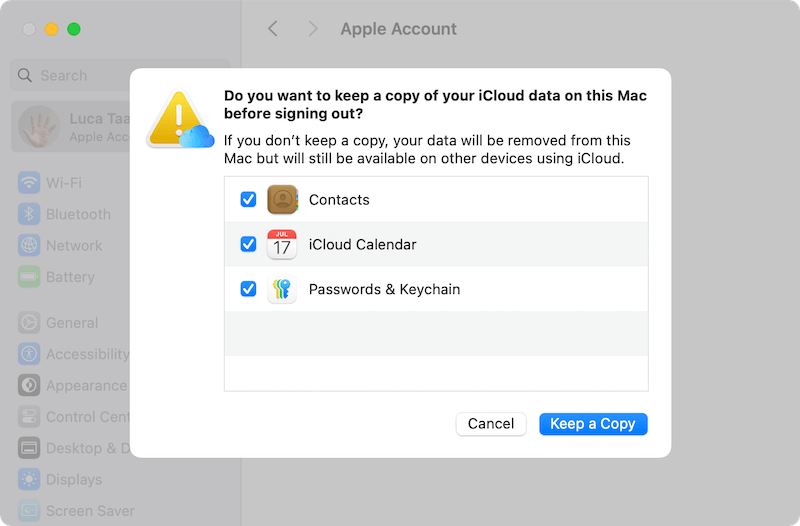
Step 3: You'll be prompted to decide what to do with your iCloud data on your Mac. Here are your options:
- Keep a Copy: This option creates a new folder named "iCloud Drive (Archive)" within your home directory, containing copies of all your iCloud Drive files.
- If you don't want to keep a copy of the files on this Mac, you can just uncheck all the items list in the window. Then the files will not be saved to your Mac. However, the files will still be available in iCloud storage and accessible from other devices.
Step 4: Enter your ID password in the designated field and click "Continue" to confirm the sign-out process. Depending on the data you have stored in iCloud, the sign-out process might take a few moments. Wait for it to finish before proceeding.
Disable iCloud Drive on Mac
Disabling iCloud Drive on your Mac is a simple process that begins after signing out of iCloud. Follow these step-by-step instructions to turn off iCloud Drive:
Step 1. Click on the Apple menu in your screen's top-left corner and select "System Settings."
Step 2. Within System Settings window, click on your name at the top of the sidebar to access your Apple account settings. In the Apple Account window, find and select "iCloud" to access your iCloud preferences.
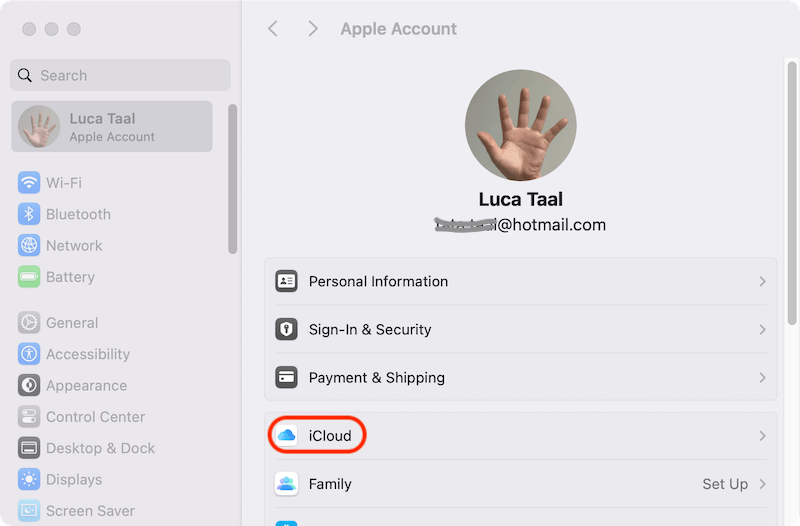
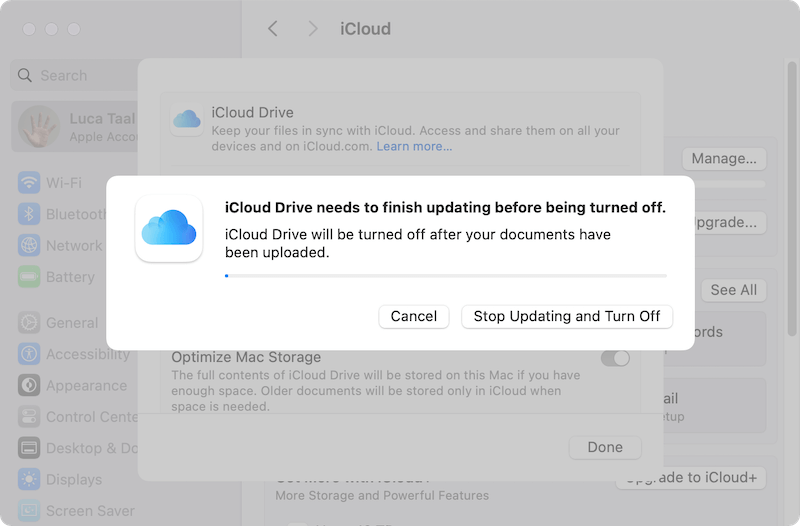
Step 3. Once in the iCloud preferences, locate and click Drive. This will open the settings for iCloud Drive.
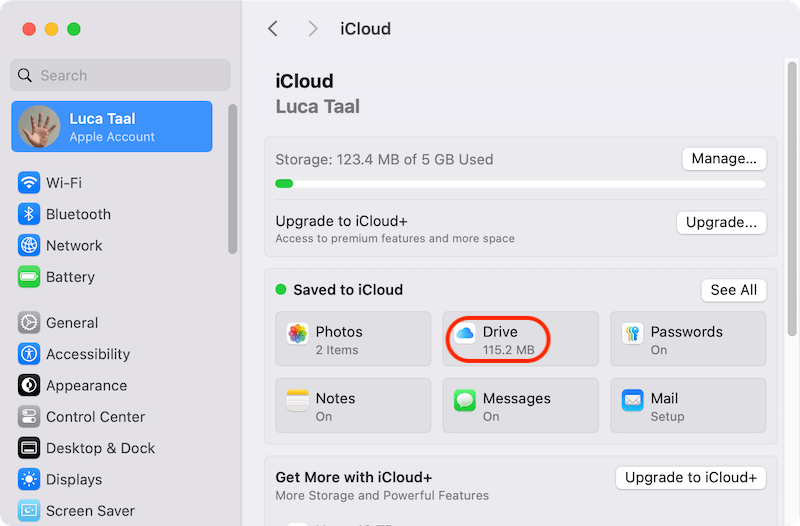
Step 4. Uncheck the box "Sync this Mac" to disable iCloud Drive on your Mac.
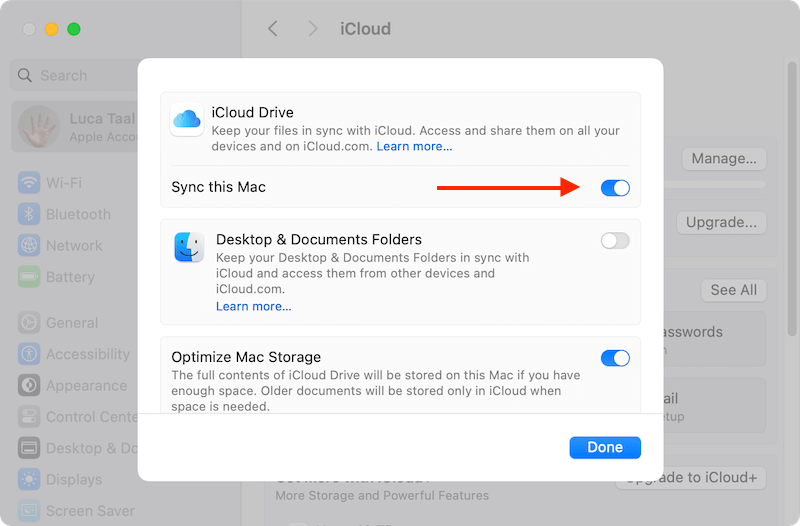
Step 5. After unchecking the box, you'll be prompted to choose whether you want to keep a copy of your iCloud Drive files on your Mac. Select your preferred option based on your storage needs to continue.
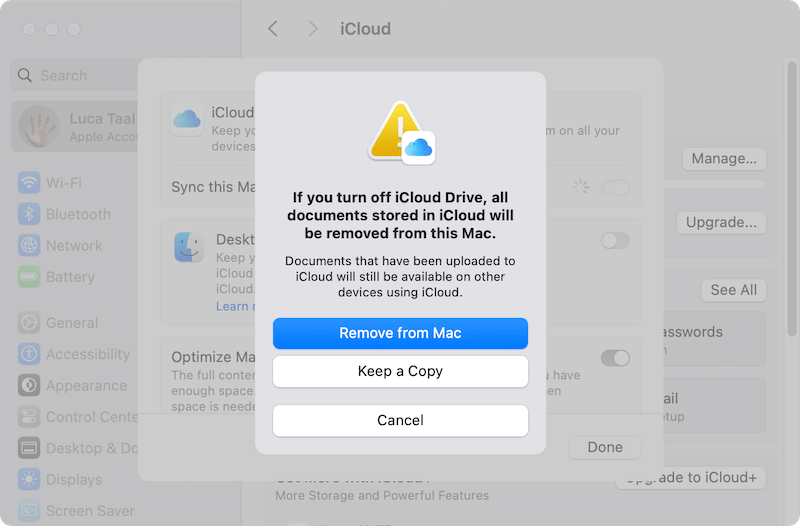
Step 6. Then it will remove the data from the Mac or keep a copy to your Mac based on your choices, and then turn off iCloud Drive.
Remove iCloud Drive from Your Mac
If you decided to delete iCloud Drive files from your Mac when you signed out, you can get rid of any files that are still there by hand:
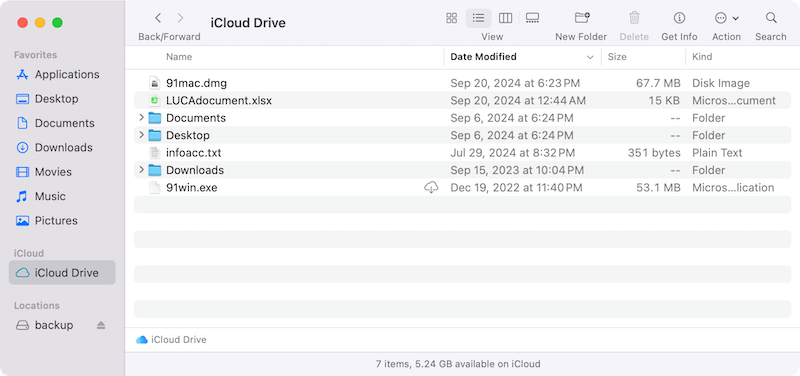
Step 1. Log in to Finder on your Mac. Look to the left sidebar and choose "iCloud Drive." There will show you all the files sync from iCloud Drive to your local drive on Mac.
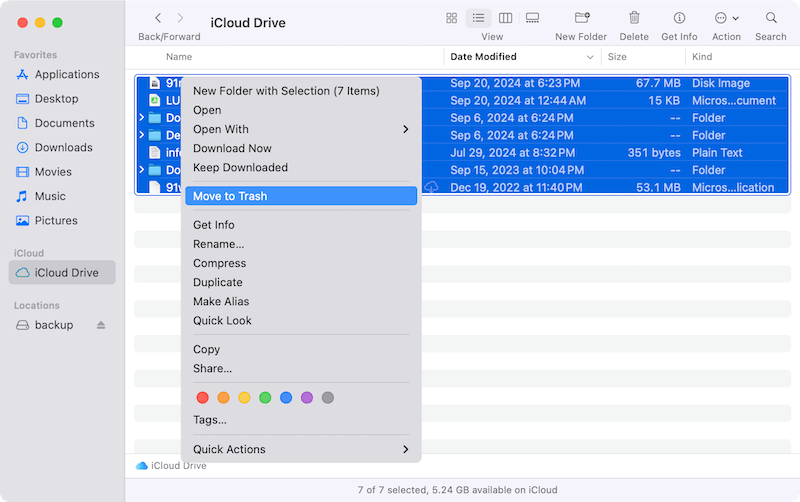
Step 2. Pick out the folders or files you want to get rid of. Right-click on the things you want to delete and pick "Move to Trash" from the menu that appears. If you want to get rid of the files completely, just empty the Trash.
🎈 Tips: No more auto-sync.
After disabling iCloud Drive on your Mac, if you add, change, or delete files on your Mac, they will no longer instantly sync to iCloud Drive, and the same goes for iCloud Drive files. It would help if you moved them by hand so they could be used on other machines.
Alternative Storage Options
Do not worry if iCloud Drive does not quite meet your storing needs. There are many other cloud or local storage choices you can choose from:
![]() Dropbox: Dropbox is known for its easy-to-use design and flexibility. It has a free plan with limited storage and several paid plans with more space. You can use Dropbox for many different storage needs, whether personal or business.
Dropbox: Dropbox is known for its easy-to-use design and flexibility. It has a free plan with limited storage and several paid plans with more space. You can use Dropbox for many different storage needs, whether personal or business.
![]() Google Drive: Google Drive is fully integrated with your Google account and has a free plan that gives you a lot of room to store files, photos, and other things. Paid plans offer even more storage space, making it a great choice for Google users strongly rooted in the ecosystem.
Google Drive: Google Drive is fully integrated with your Google account and has a free plan that gives you a lot of room to store files, photos, and other things. Paid plans offer even more storage space, making it a great choice for Google users strongly rooted in the ecosystem.
![]() Microsoft OneDrive: OneDrive has a free plan with a lot of storage space that works great for Windows users and is fully linked with Microsoft Office. Its paid plans offer more features and storage space, making it a good choice for people who use many Microsoft tools.
Microsoft OneDrive: OneDrive has a free plan with a lot of storage space that works great for Windows users and is fully linked with Microsoft Office. Its paid plans offer more features and storage space, making it a good choice for people who use many Microsoft tools.
![]() Local storage solutions: There are times when the best way to store something is the one you can touch. Use external hard drives,USB flash drives, or NAS for local file storage. This choice ensures you can access your data even when you're not connected to the internet and adds an extra layer of security.
Local storage solutions: There are times when the best way to store something is the one you can touch. Use external hard drives,USB flash drives, or NAS for local file storage. This choice ensures you can access your data even when you're not connected to the internet and adds an extra layer of security.
Cleanup Your Mac and Free Hard Drive Space
If the Mac hard drive is space limited, so you want to turn off the iCloud to release more space, there is another solutions that may help you. You can use the professional Mac cleanup tool MacClean360 to scan your Mac and clear the junk data. It can deeply scan your Mac and find the junk data. You can get more free space by cleaning the drive.
MacClean360
- Best and easy-to-use Mac cleanup software.
- Deeply scan the Mac to clean any junk data.
- Remove duplicate files, large files, and browser junk data.
After downloading and installing the software on your Mac, you can do as the following steps to clean your Mac hard drive.
Step 1. Run the software from launchpad, select the Junk Cleaner option to scan and remove the junk data.
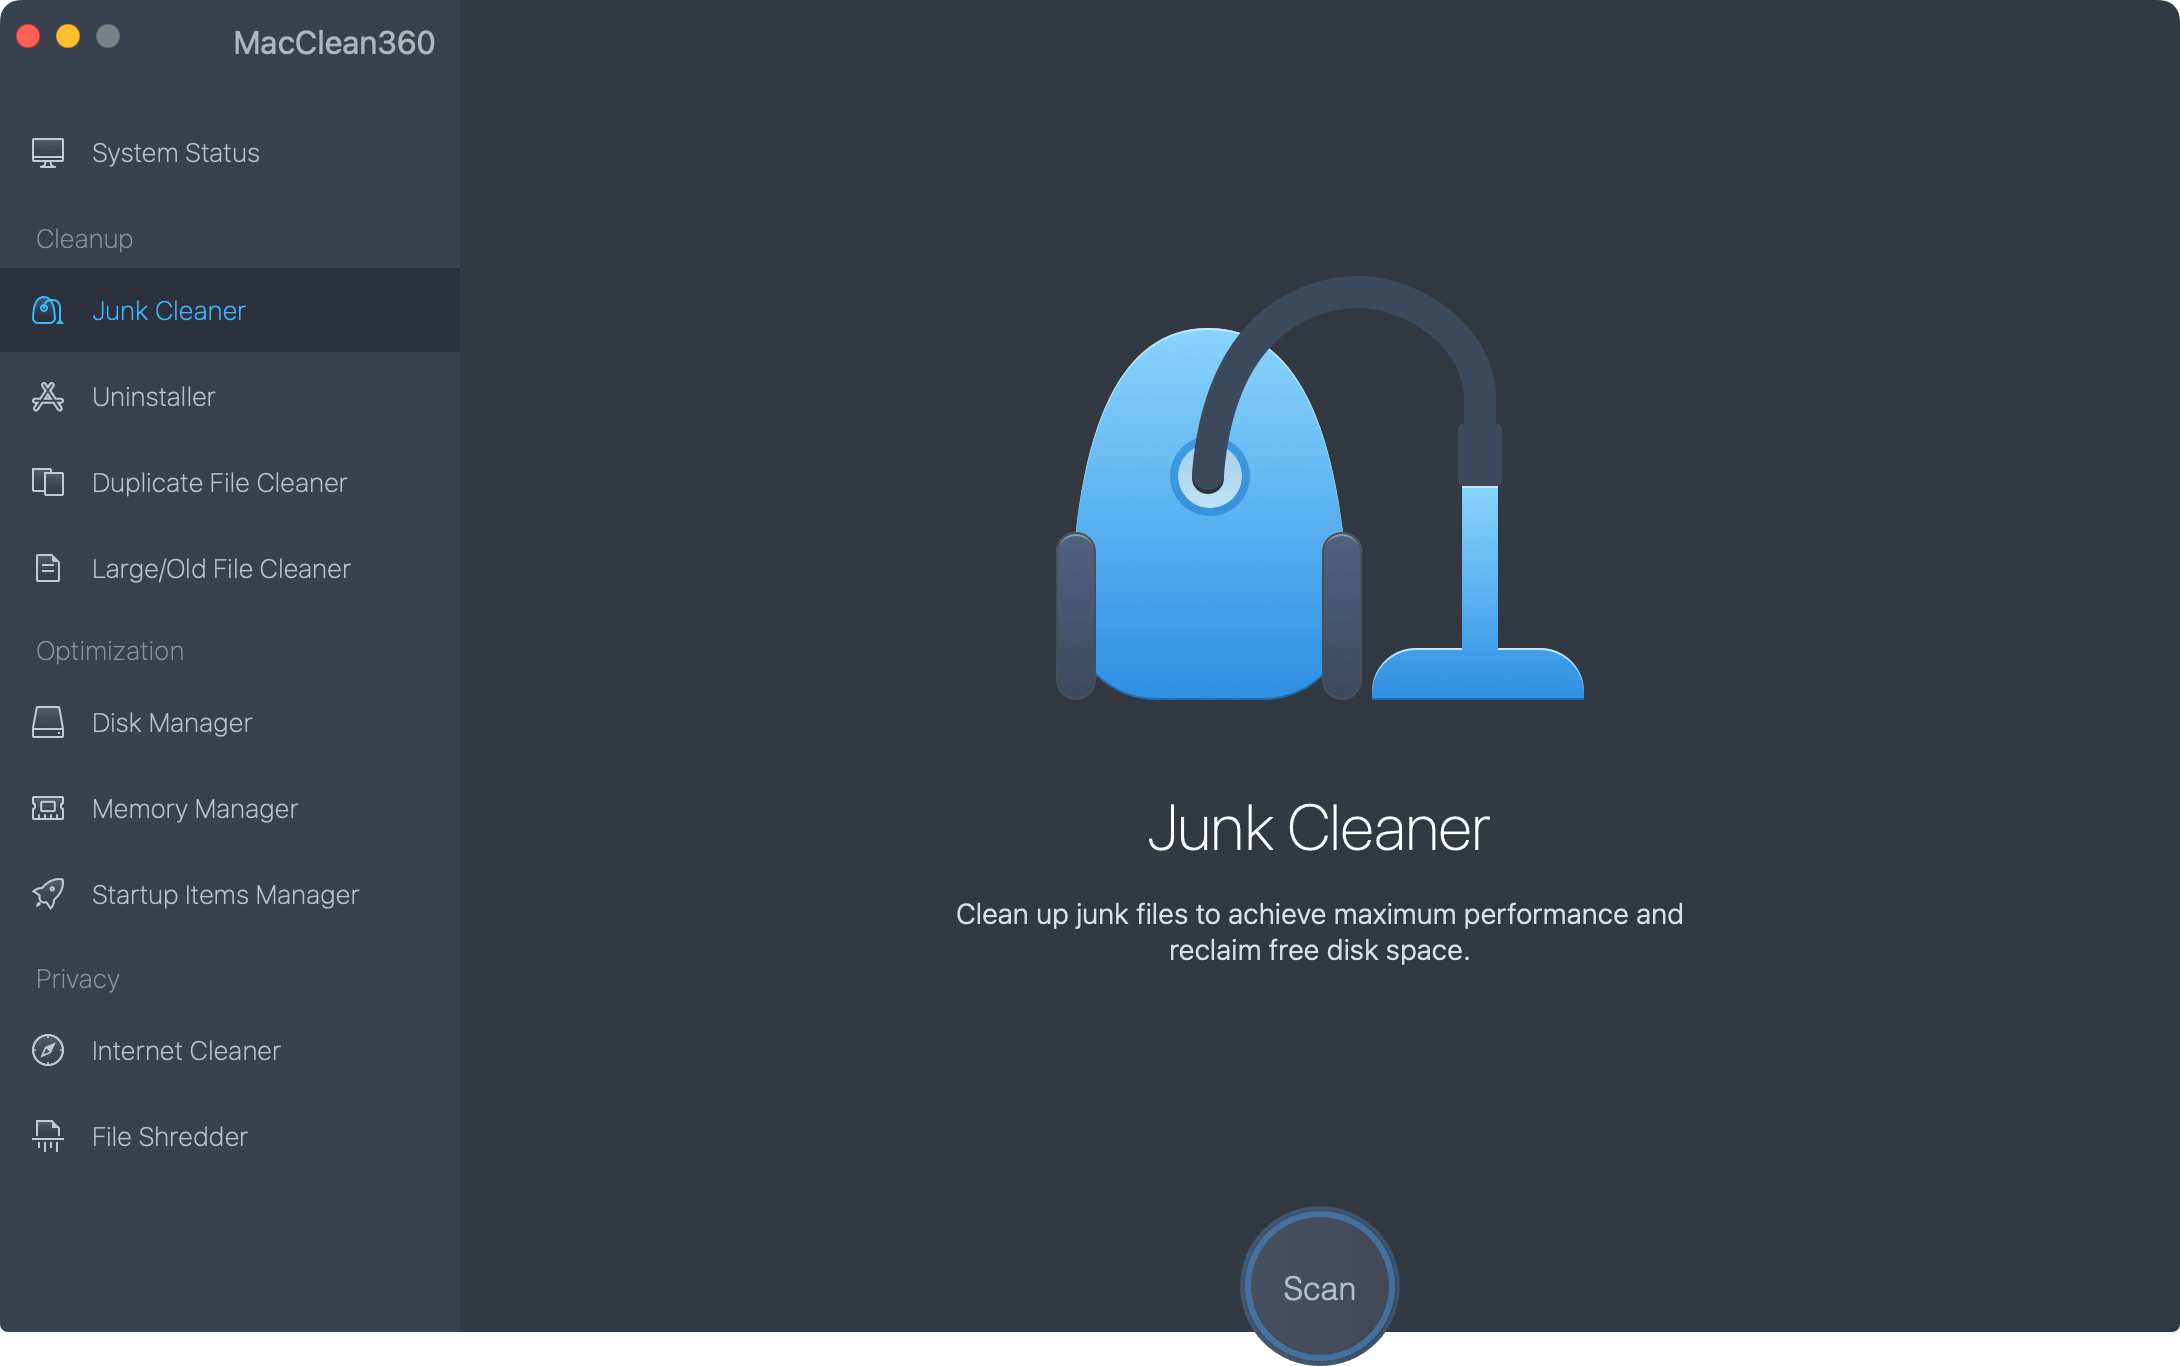
Step 2. Choose Uninstaller tool to uninstall and remove the unwanted applications from your Mac.
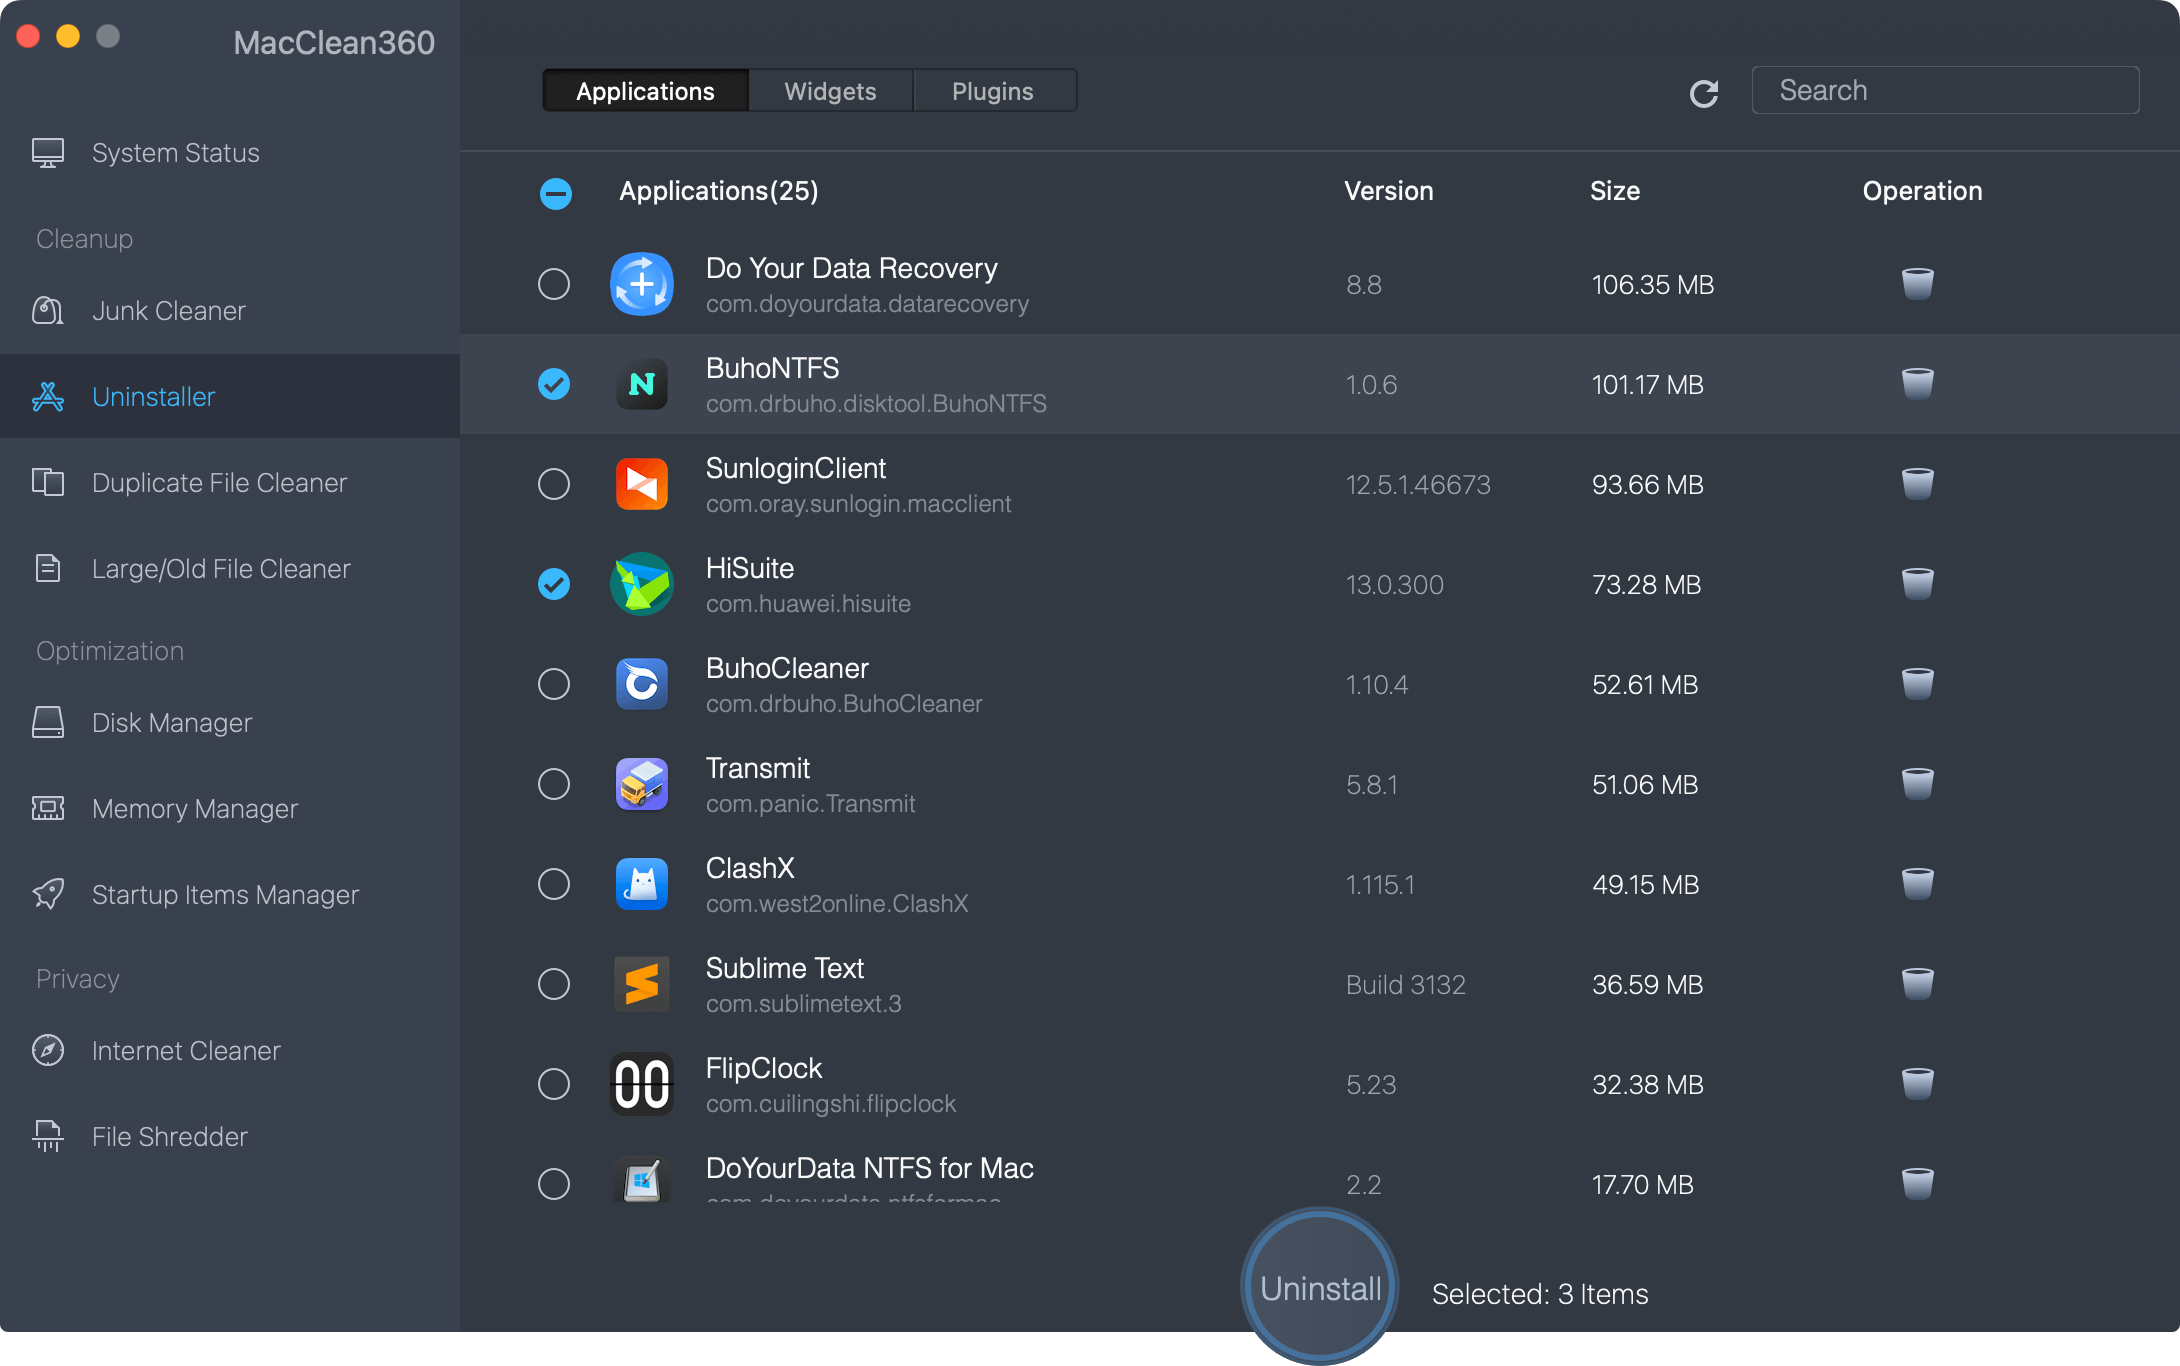
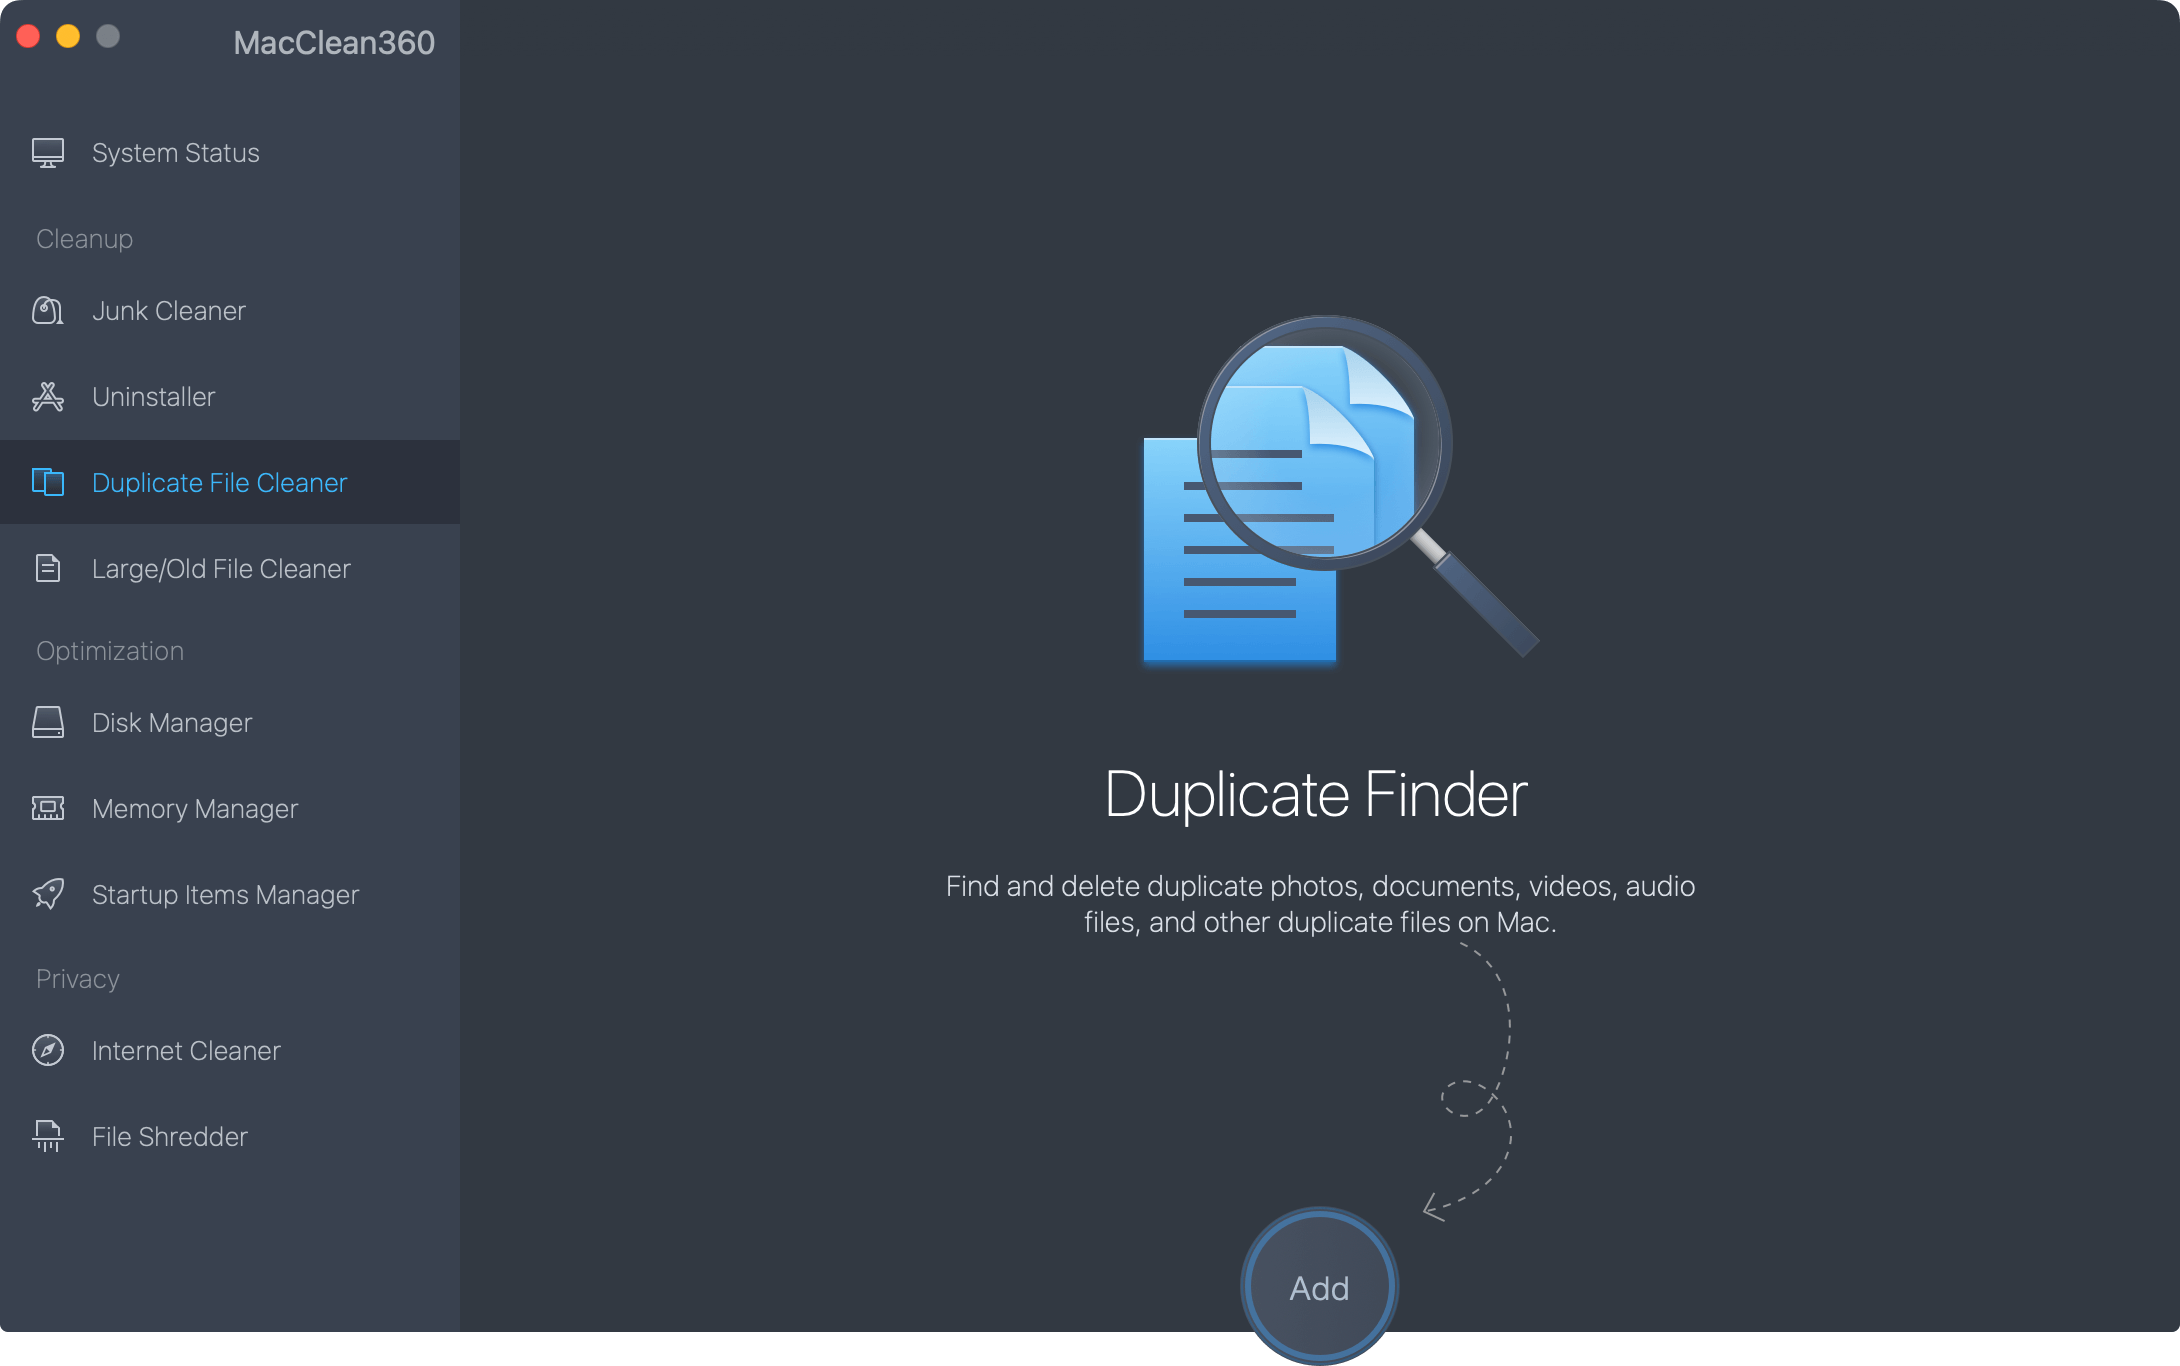
Step 3. Scan and remove the duplicate files by using the feature Duplicate File Cleaner.
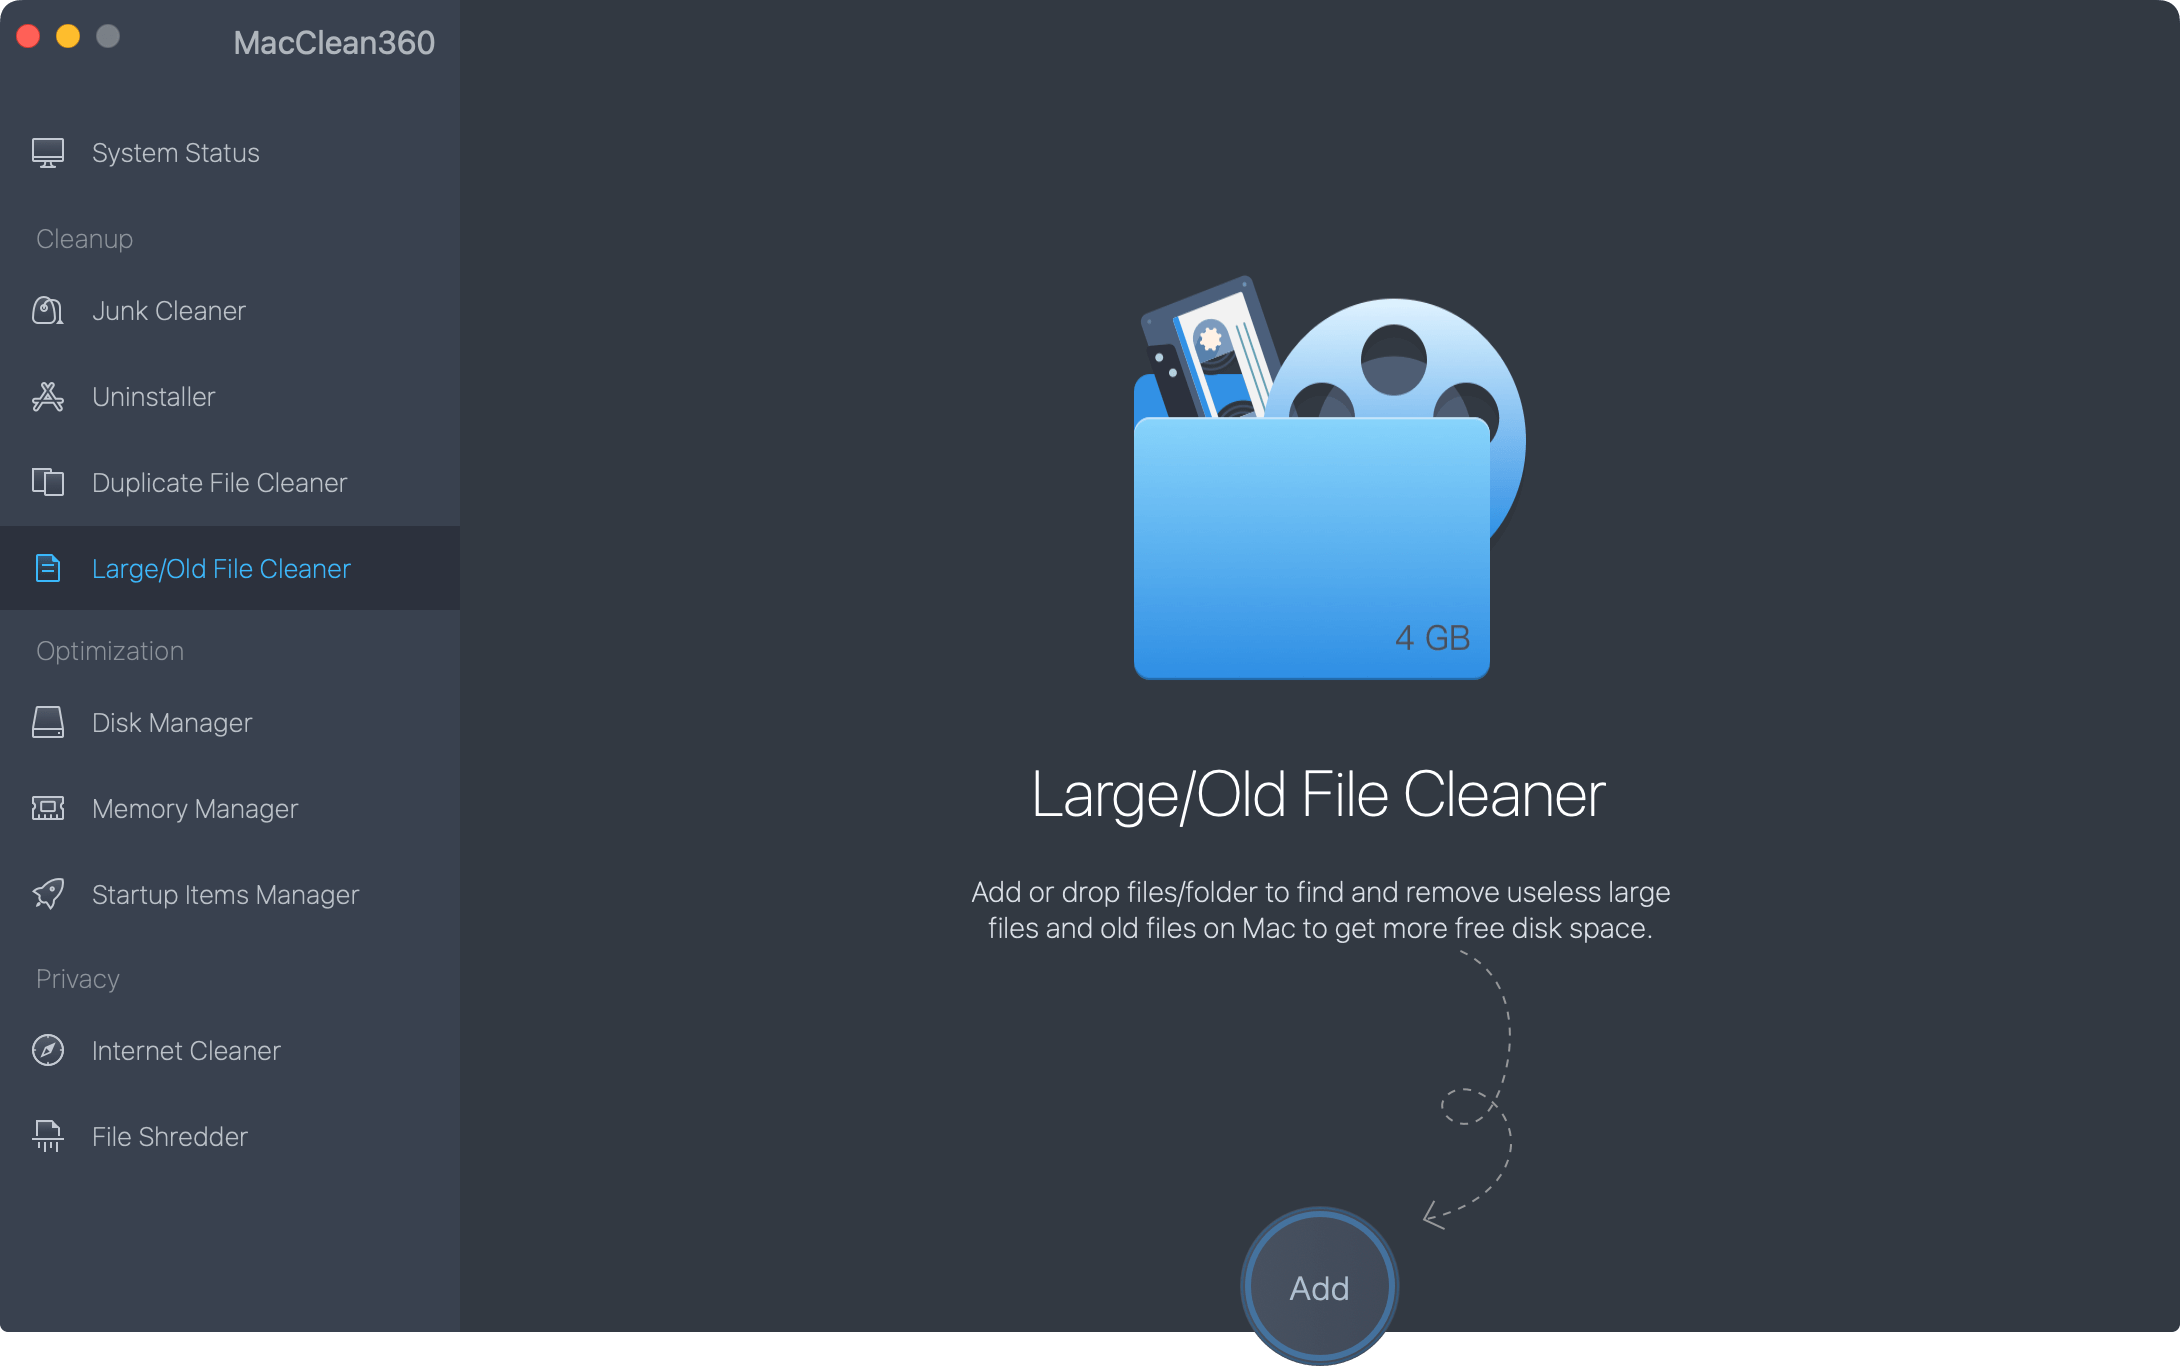
Step 4. Scan the entire drive with Large/Old File Cleaner to find the large and old files. Then you can remove the files which are not needed. Also, move the large but not frequently used files to another place.
After these options, the software will help you clear the junk and unwanted files, which can release more free space on your Mac.
Conclusion:
In conclusion, turning off iCloud Drive on your Mac can give you more choices over storing and managing files. You can safely disconnect from iCloud Drive and ensure your important files are backed up by following the steps.
Also, looking into other cloud storage options like Dropbox, Google Drive, and Microsoft OneDrive can give you a lot of choices that are perfect for your needs. There is a storage choice for everyone, whether you want the best integration, a lot of space, or local storage. You should be able to pick the storage option that works best for your digital life and wants.
You can regain control over your Mac's storage by turning off iCloud Drive. To ensure the safety of your files, investigate various alternate storage methods. To manage your drive easily on Mac and get more free space, you can use MacClean360 to clear the junk data. It's an easy-to-use application and can deeply cleanup Mac hard drive.
MacClean360
All-in-one Mac maintenance tool to clean up all types of junk data by 1 click, remove old/duplicate files, uninstall unwanted apps, clean up browser junk data, manage disk, permanently shred files, speed up slow Mac, manage startup items on Mac.