The reliable Mac data recovery software to recover deleted or lost files.
Free Trial
If your Mac Studio machine is having software issues, you might need to reinstall macOS, the operating system on your Mac. If you're ready to sell or give away your Mac Studio desktop, you might also need to reinstall macOS to erase your private data.
The macOS Recovery mode that Apple includes in its Macs makes it incredibly simple to reinstall macOS. That implies that you don’t have to be an expert computer user to do the task.
Below, we’ll outline exactly what you need to accomplish.
What Happens When You Reinstall macOS?
Every line of code for the operating system on your Mac is updated when you reinstall macOS. This is a great technique to remedy software defects since it replaces the destructive code that led to the bugs with good code.
Reinstalling macOS often doesn't alter the version of the operating system already installed on your Mac; instead, it just installs that version anew from scratch.
But we'll also teach you how to update to the most recent available version of macOS or reinstall the version that came with your Mac.
Reinstalling macOS shouldn't remove any content from your Mac, but there is no guarantee. After reinstalling macOS, your papers, emails, images, music, and other items should remain.
Different Ways to Reinstall macOS on Mac Studio
All you need for a fresh installation of macOS is a reliable internet connection and some time. Your Mac already has everything else you need in a unique boot mode called macOS Recovery.
Most people's home Wi-Fi networks are protected by a WEP or WPA password, so that's all it takes to have a safe internet connection. You won't be able to use your Mac during this time, which could take anywhere from 30 minutes to several hours, depending on several factors. When you're ready, reinstall macOS on your Mac using the methods listed below. These techniques allow you to reinstall your computer's most recent version of macOS.
Reinstall macOS on Apple Silicon Mac Studio
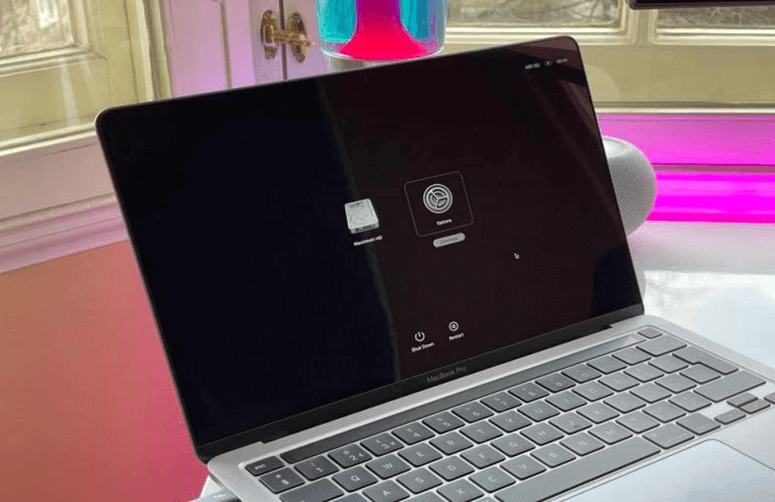
1. Press and hold the start button while turning on your Mac Studio until the startup options box displays.
2. Click Continue after selecting the Options gear icon.
3. If you are asked to select a user whose login information you recall, select the desired user, click Next, and then enter the admin password for that user.
4. Once macOS Recovery has begun, choose Reinstall macOS from the tools panel.
5. Click Continue to follow the instructions provided by the installer.
Erase and reinstall macOS
The built-in recovery mechanism on your Mac, macOS Recovery, can be used to remove macOS and then reinstall it. Your Mac will be empty of any data if you erase it. Time Machine backup your Mac before you begin.
1. Use Erase Assistant to erase your Mac.
2. Start your Mac again.
3. Follow the onscreen instructions by selecting Apple menu > Shut Down, holding down the power button until “Loading starting options” displays, then selecting Options and clicking Continue.
4. Choose Reinstall for your macOS release in the Recovery app window, click Continue, and then adhere to the prompts on the screen.
Below is a list of steps for reinstalling macOS on an Intel-based Mac without the Apple T2 Security Chip.
1. Select Restart from the Apple menu, then immediately press and hold Command-R., then immediately press and hold Command-R.
2. Click Continue after selecting Disk Utility in the Recovery software box.
3. Choose the volume you wish to delete in Disk Utility’s sidebar, then click Erase in the toolbar.
4. Give the volume a name in the Name area, select APFS from the Format pop-up menu, and then click Erase Volume Group.
5. Click Done after the erase operation is finished, then select Disk Utility > Quit Disk Utility.
6. Choose Reinstall for your macOS release in the Recovery app window, click Continue, and then adhere to the prompts on the screen.
macOS Recovery

1. Your computer should start up in macOS Recovery.
On an Apple-branded Mac: Follow the onscreen instructions by selecting Apple menu > Shut Down, holding down the power button until “Loading starting options” displays, then selecting Options and clicking Continue.
On a Mac running Intel: Select Apple menu > Restart, then depending on what you want to accomplish, immediately press and hold one of the following key combinations:
- Install the most recent version of macOS that works with your device: Option-Command-R.
- Reinstall the initial macOS version on your machine and any available updates: Option-Shift-Command-R.
- Command-R will reinstall your current version of macOS.
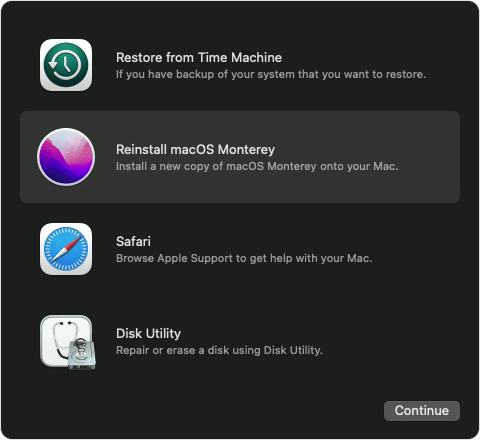
2. Click Continue after selecting Reinstall for your macOS release in the Recovery app window.
3. Comply with the onscreen directions. Choose your current macOS volume in the pane where you choose a book (in most cases, it’s the only option).
USB Installer
You may update or reinstall macOS on numerous computers without downloading the installer on each one by creating a bootable USB device. The installer size of the most recent versions of macOS is 12GB, which can save a significant amount of time. Below are the steps:
1. Select a USB Flash Drive for macOS Installation: You won't have to spend much on this task because USB flash drives are more affordable than before. However, purchase a name-brand flash drive from a dependable retailer (such as SanDisk, Kingston, or PNY).
2. Format Your USB Flash Drive: Only a Mac can produce a macOS bootable installation. Make sure to back up any vital files using a flash drive that already has data because you're about to destroy everything.
3. Get the macOS Installer here: Open the System Preferences and go to Software Update to obtain the most recent macOS installer for installing on a USB. Here, you ought to see a download link for the installer.
4. Use Terminal to Create a Bootable USB: Terminal provides the most straightforward method for producing a bootable USB device for installing macOS. Substitute your drive's name in the Disk Utility for MyVolume commands below.
Launch the app after downloading it. The app should immediately find the macOS installation in your Downloads folder. Choose the USB drive from the top volume dropdown list on which you wish to make a bootable disc, and then click Create Installer.
If your lose important data after reinstalling macOS on Mac Studio, just try Do Your Data Recovery for Mac to get lost data back, full guide: Mac Studio data recovery >>
If you want to permanently erase data before selling Mac Studio, just try data erasure software - such as DoYourData Super Eraser for Mac, full guide: permanently erase data from Mac Studio >>
Make a full backup of Mac Studio before reinstalling macOS: create a bootable clone backup for Mac Studio >>
DoYourData Products
DoYourData Super Eraser for Mac
Permanently shred files or wipe hard drive to prevent data recovery on Mac.
Free TrialClone HDD, SSD, Mac OS, external disk, USB drive, and more under Mac OS.
Free TrialWritten & Updated by Ricky Lin
Ricky Lin is an senior editor of DoYourData who lives in Adelaide, Australia. He is interested in writing technology articles related with data recovery, computer issue fixes, disk clone, iPhone data recovery, video edit, Mac optimization, etc. He Joined DoYourData in 2019 and have written 500+ articles to help both Windows users and Mac users to solve data or computer problems.