Quick Navigation:
- 1. What's the Difference Between NTFS and ExFAT?
- 2. How to Write NTFS Drives in macOS Catalina?
- 3. FAQs About Adding NTFS Support on macOS Catalina
Everyone has been enjoying themselves with macOS Catalina ever since it was released. Despite its many new and exciting features, Catalina cannot still read and write on USB and external hard drives with NTFS file system, just like its predecessors. It's adored by many because it boasts impressive features and a reliable safety system. Like other operating systems, Apple's macOS has its file system. They don't have a common file format. This article will show how to use NTFS drives on macOS Catalina.
What's the Difference Between NTFS and ExFAT?
The acronym ExFAT refers to the Extended File Allocation Table file system format. Many people use it regularly at this point. Like FAT32, ExFAT is a lightweight file system; however, unlike FAT32, it does not have the extra features and overhead of NTFS. The current file system is this. The largest difference between NTFS and ExFAT is that NTFS supports files up to 16 terabytes, while ExFAT only supports files up to 128 PIB. ExFAT is the most used file system for SDXC 32GB cards.
How to Write NTFS Drives in macOS Catalina?
Mac OS X and macOS Catalina cannot write to NTFS drives, but they can read them. The macOS can both read data from the device and copy it elsewhere. Users of macOS Catalina will need a disk format like ExFAT or other tools to write to NTFS disks.

Method 1. Enable NTFS read-write support on macOS Catalina with NTFS for Mac
If you're on macOS Catalina, you can read and write to NTFS drives with no trouble, thanks to DoYourData NTFS for Mac.
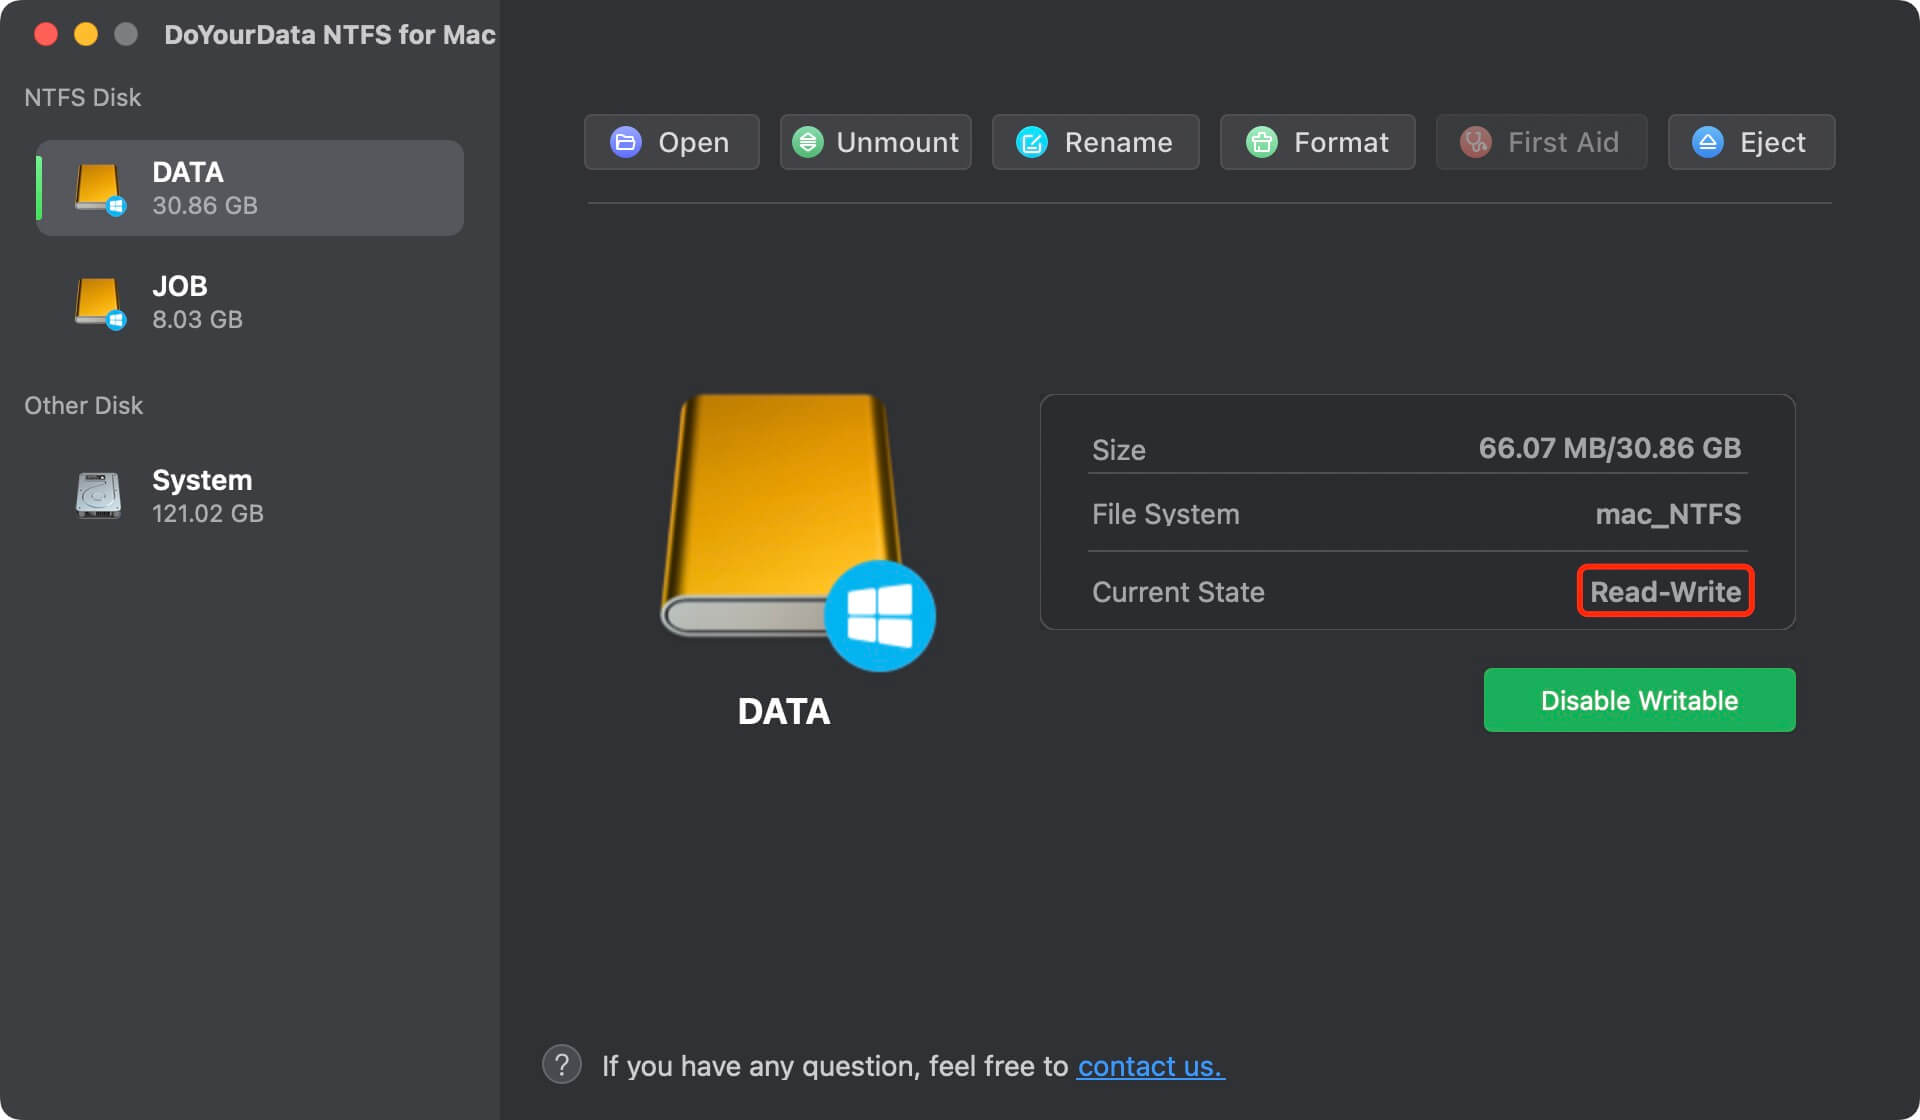
Step 1. Install the NTFS driver for macOS Catalina. DoYourData NTFS for Mac is the reliable NTFS driver and it is fully compatible with macOS Catalina. Download and install it on your Mac, and open it.
Step 2. Connect the NTFS drive to your Mac. DoYourData NTFS for Mac will list it under NTFS disk. Select the NTFS drive and click Enable writable.

Then you can check if the NTFS drive is read-write now!

Method 2. Format the NTFS drive to Mac-compatible file system
Converting your NTFS drive to a format that macOS Catalina recognizes, such as exFAT or FAT32, is the quickest and easiest method to use it.
Changing the file system on your external drive is a less complicated and dangerous alternative to the ways.
Format the external hard drive on Windows:
Plug your NTFS drive into your Windows machine via the USB port.
Then, type "This PC" into the search bar by pressing the Windows key + S.
Then, select Open to begin using it.
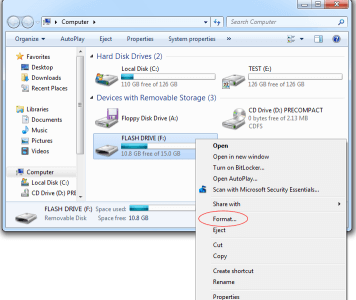
To format your NTFS drive, right-click it under This PC and select Format.
Finally, select exFAT or FAT32 as the file system for the drive and click the Start button.

You also can format the external hard drive on your Mac:
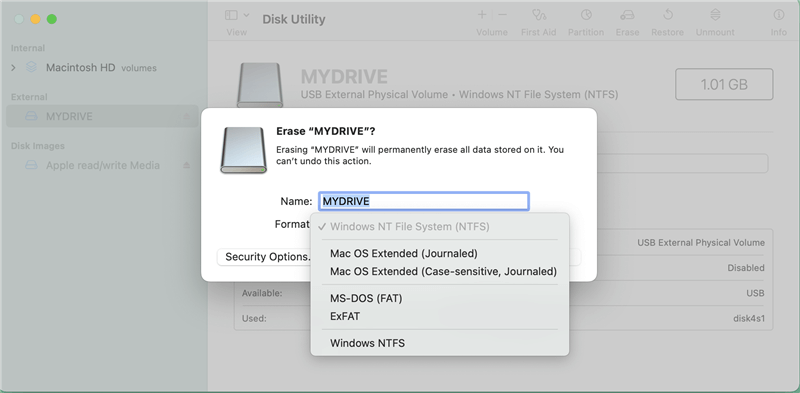
Open Disk Utility.
Select the external hard drive and click Erase.
Select a file system and click Erase again.

Depending on your computer's and storage device's speed, this should take a few seconds. Return the external disk to your Mac and reconnect it after formatting. Test the drive's functionality by attempting to store a few files.
Instead of formatting the NTFS drive on your Mac, you can utilize Terminal in macOS to grant write access to specific Windows devices. This experimental feature may cause data loss, so you should back up your Mac and the entire drive before proceeding.
This approach to using Terminal is speedy and needs no additional programs. Since this function is currently in testing, you should proceed cautiously lest any of your files become corrupted.
Tips:
- You’d better make a backup of your external hard drive before formatting or erasing it to ExFAT/FAT32/APFS/Mac OS Extended.
- If you don’t want to format the NTFS drive and you will use it on macOS Catalina, just install a NTFS drives on your Mac. It will quickly enable writable for NTFS drives on Mac.
- If you can’t erase the external hard drive on Mac, just click Fist Aid button to repair it.
- If you lose data due to formatting the external hard drive, use data recovery app - Do Your Data Recovery for Mac to scan the formatted external hard drive and get all files back.
FAQs About Adding NTFS Support on macOS Catalina
- Go to Launchpad > Find and open Disk Utility.
- Connect the NTFS drive to your Mac.
- Select the NTFS drive and click Erase.
- Select ExFAT or other file system which is compatible with your Mac.
- Click Erase again.
- Once the process gets finished, click on Done button.

If the external hard drive is an NTFS drive, you can format it to Mac-compatible file system or install a NTFS driver on your Mac.
- DoYourData NTFS for Mac
- NTFS-3G
- Fuse for Mac OS
- Omi NTFS for Mac
- Mounty for NTFS
Final Words:
The best way to enable NTFS support on macOS Catalina is installing an NTFS driver. DoYourData NTFS for Mac is a powerful and easy-to-use NTFS for Mac tool. It can quickly enable writable for NTFS drives on mac. Then you can write data to NTFS drives, delete/add/save/rename/modify files on NTFS drives without any limitation. Another way to use NTFS drive on macOS Catalina is to format the NTFS drive to ExFAT or APFS. This method will erase all data stored on the NTFS drive.