Home > Hard Drive Solutions for Mac
How to Use NTFS for Mac on Intel-based and Apple T2 Security Mac?
NTFS for Mac is a tool which can help in enabling read-write for NTFS drives on Mac. This guide will show you how to use an NTFS for Mac tool to add full NTFS support on Intel-based and Apple T2 Security Macs. You can download the reliable NTFS for Mac software and use it to enable writable for all NTFS drives on Mac.
![]() Updated by Justin Kenny on August 18, 2023
Updated by Justin Kenny on August 18, 2023
Quick Navigation:
- 1. What is NTFS for Mac?
- 2. How to Use NTFS for Mac on Intel-based and Apple T2 Security Mac?
- 3. FAQs About Using NTFS for Mac on Intel-based and Apple T2 Security Mac
Note: This guide applies to Intel-based and Apple T2 Security Macs. If you are using a Mac with Apple silicon, read this guide: how to use NTFS for Mac on Apple Silicon Macs >>
What is NTFS for Mac?
NTFS (New Technology File System) is developed by Microsoft and is Windows-based file system. This file system is not compatible with macOS or OS X. If you connect an NTFS external hard drive or USB flash drive to your Mac, it shows read-only, and you can’t write data to it or edit/modify files on it.
If you want to use an NTFS hard drive on Mac without formatting it to Mac-compatible file system, you need to install third-party NTFS for Mac software and use it to add full NTFS support on your Mac.
DoYourData NTFS for Mac is an easy-to-use NTFS for Mac tool. It is fully compatible OS X and macOS, and supports Intel-based Macs, Apple T2 Security Macs and Apple silicon Macs. This NTFS for Mac tool can help you:
- Add full NTFS read-write support on Mac.
- Mount or unmount NTFS drive on Mac.
- Format hard drive on Mac.
- Repair damaged hard drive on Mac.
- Open any disk on Mac.
- Eject external device in safe mode.
How to Use NTFS for Mac on Intel-based and Apple T2 Security Mac?
In previous article, we have talked about how to use an NTFS for Mac tool on new Apple silicon Macs, in this article, we will show you how to use an NTFS for Mac tool on old Mac models including Intel-based Macs and Apple T2 Security Macs.
Tips: To check the Mac chips, go to Apple menu > open About This Mac. If it shows M1 or M2, it means your Mac is an Mac with Apple silicon chip. Otherwise, the Mac is an Intel-based Mac or an Apple T2 Security Mac. For example, on a Mac with an Intel processor, About This Mac shows an item labeled Processor, followed by the name of an Intel processor.
If you want to use an NTFS hard drive on Intel-based or Apple T2 Security Mac, you can download and install a NTFS for Mac too, use it to enable writable for NTFS drive.
Step 1. Download and install DoYourData NTFS for Mac tool on your Intel-based Mac or Apple T2 Security Mac. Then open this NTFS for Mac from Launchpad.
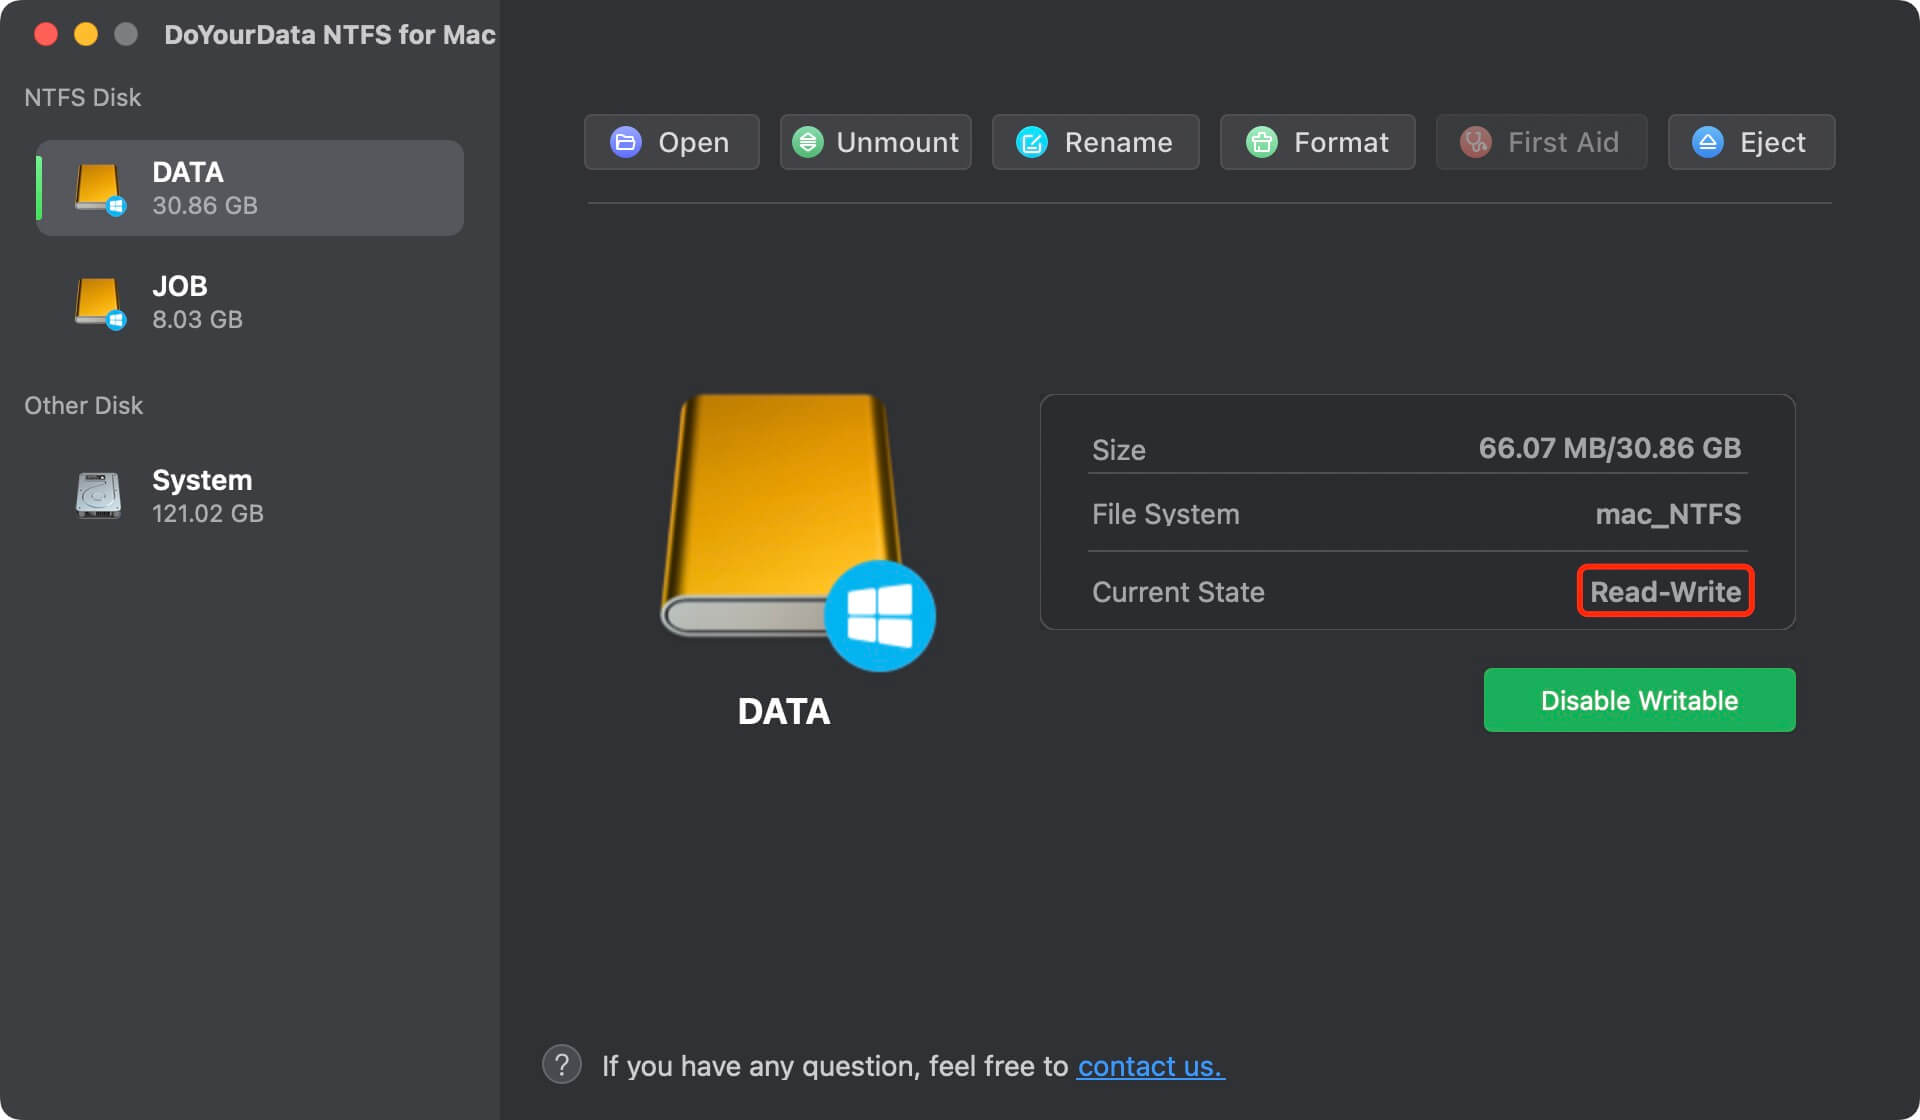
Step 2. Connect the NTFS hard drive to your Mac, then it will be listed on the interface of DoYourData NTFS for Mac.
Step 3. Select the NTFS hard drive and click Enable Writable.

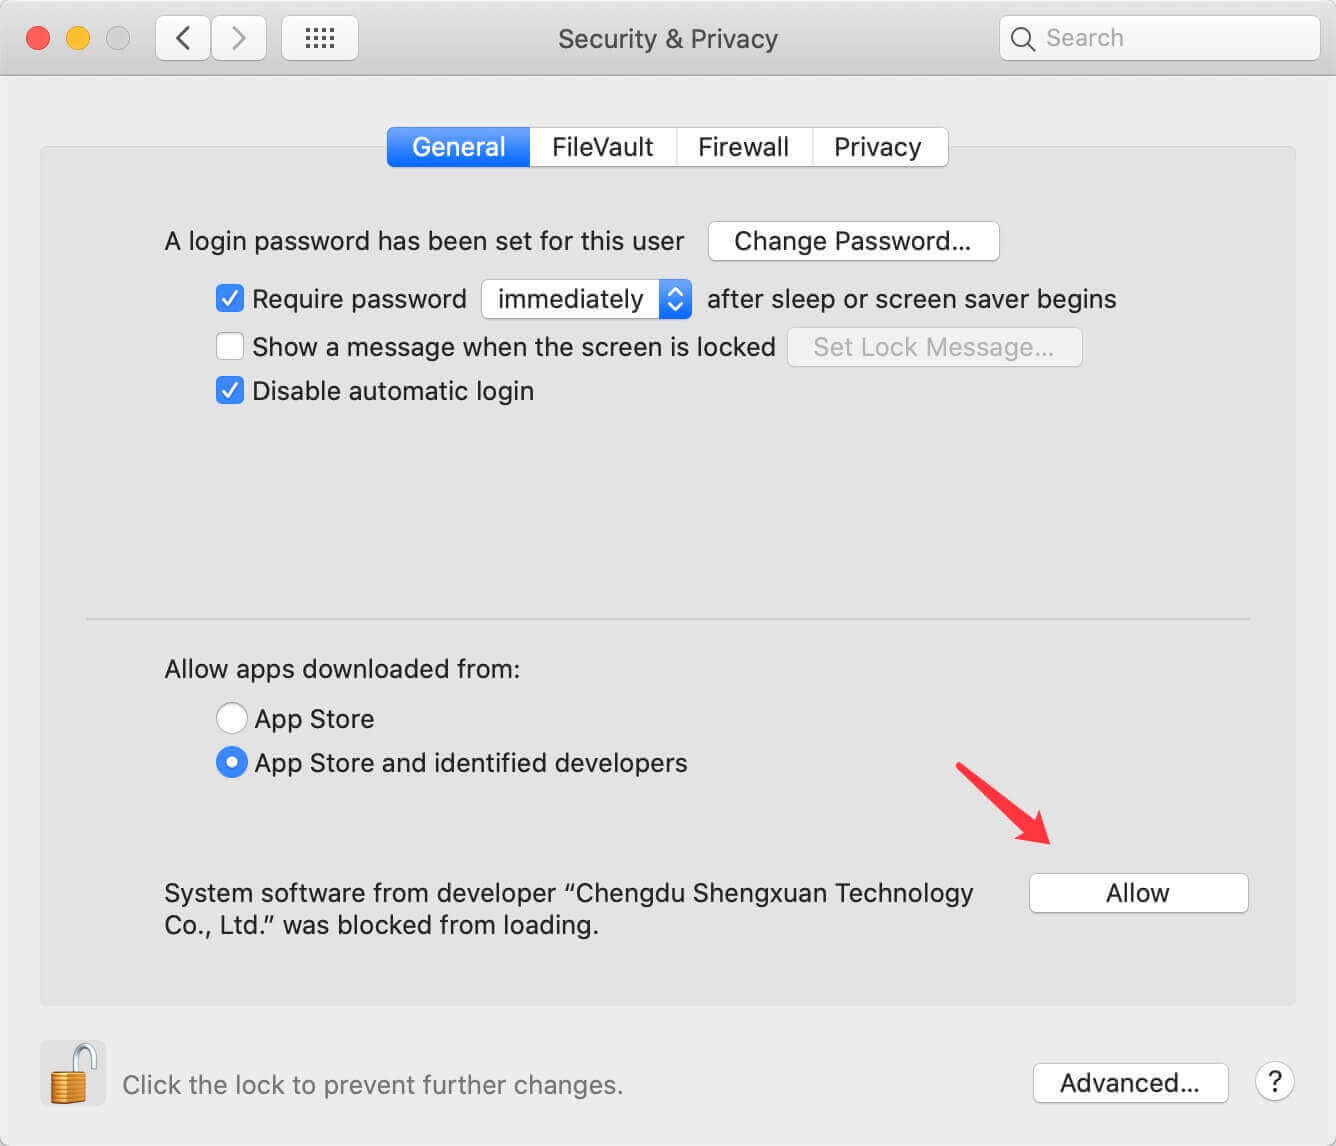
Step 4. Then open System Preferences > Security & Privacy > General. Click on Allow button to get the NTFS for Mac permission from your Mac.
Step 5. Now, restart the Mac. Open DoYourData NTFS for Mac again, select the NTFS hard drive and click Enable Writable.
Then you will find the NTFS hard drive becomes Read-write. You can write data to it or delete/save/add/modify/move files on the drive without any limitation.
The goal of NTFS for Mac tool is to make it be easy for Mac users to use external hard drive or USB flash drive on Mac without any limitation. If you want to fix external hard drive read-only issue on Mac, you can download and install a NTFS for Mac tool on your Mac and run it to grant full read-write access to NTFS drives on your Mac.
FAQs About Using NTFS for Mac on Intel-based and Apple T2 Security Mac
1. How to fix hard drive read-only issue on Intel-based or Apple T2 Security Mac?
Download and install DoYourData NTFS for Mac, run it on your Intel-based or Apple T2 Security Mac. Then select the NTFS hard drive and click Enable Writable. All NTFS hard drive will become read-write.
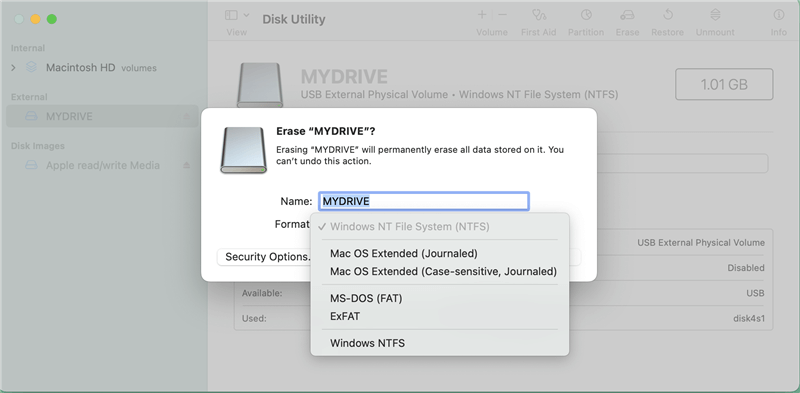
2. How to format a hard drive for Intel-based or Apple T2 Security Mac?
- Open Disk Utility.
- Select the NTFS hard drive.
- Click Erase.
- Select a file system such as ExFAT, click Erase again.
3. How to use NTFS hard drive on Intel-based or Apple T2 Security Mac without formatting?
- Download and install NTFS for Mac.
- Connect the NTFS hard drive to your Mac.
- Select the NTFS hard drive and click on Enable Writable.
- Then you can use the NTFS hard drive without any limitation.
Final Words:
If you want to use NTFS hard drive on Intel-based or Apple T2 Security Mac, you can download and install an NTFS for Mac tool, then run it to grant full read-write access to the NTFS hard drive. You don’t need to format the NTFS hard drive to Mac-compatible file system, just check the guide above to help to add full NTFS read-write support on Intel-based or Apple T2 Security Mac.
DoYourData NTFS for Mac is an easy-to-use and 100% safe NTFS for Mac tool. It is fully compatible with Apple silicon Mac, Intel-based or Apple T2 Security Macs. With this tool, you can use an NTFS hard drive as a local hard drive on your Intel-based or Apple T2 Security Mac.
Written & Updated by Justin Kenny
Justin Kenny is a writer & editor of DoYourData. He joined DoYourData in 2016 and focuses on writing articles about Windows data recovery, Mac data recovery, external device data recovery, hard drive clone, data erasure, Mac cleanup, computer issue fixes, etc. He is a super fan of Apple devices and is big on testing new digital device and system utility software.