Mac Internal SSD Is Not Showing Up on Mac
If the Mac startup disk is not showing up on Mac or can’t be found in Disk Utility, check this guide to fix it and keep your data safe.
Quick Navigation:
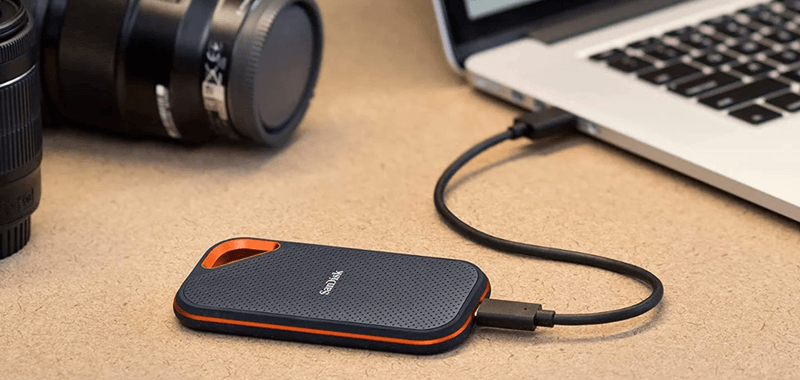
You anticipate that any external hard drive or solid-state drive (SSD) connected to your Mac will immediately mount and appear on your desktop. But several things can go wrong, such as damaged disks, USB hubs, cables, etc.
If your Mac does not recognize your external SSD, Follow the steps to solve the issue. External HDDs, Memory cards, USB flash drives are also covered in this troubleshooting manual.

When you connect an external solid-state drive to your Mac, the operating system automatically creates a directory entry for the drive, known as a mount point, so that the SSD's file system can be accessed. After that, you and your programs can access the data stored in the file system. In other words, if you want to utilize your SSD for storage or transfer on a Mac, you'll need to mount it first.
The mounted storage device will have a directory entry in the /Volumes folder on macOS. The mounted storage device is shown on the desktop and in the Finder for your convenience on a Mac. If your SSD hard disk isn't in any of these locations, the external SSD might not be installed on Mac. Disk Utility's left sidebar does not display the SSD, and its right pane reads "Not Mounted." The SSD's contents are completely inaccessible.
Can you see the disk in Finder, but you can't get it to appear on your desktop? Correcting it is simple. To do this, you need to toggle on a preference in the desktop settings.
Open a Finder, click it on Apple menu.
Select Settings, open Finder Settings.
Click General and Sidebar, select External Disks.

The Mac cannot read the SSD if it is not installed. You can manually mount the solid-state drive using Disk Utility or another disk management program.
Navigate to Disk Utility in the Finder by clicking on Applications > Utilities > Disk Utility.
Choose the SSD drive or partition that is not mounted.
Click the Mount button in the upper right.

When a computer is restarted, any cached temporary files are deleted. The computer's overall performance may be enhanced, and any underlying difficulties resolved due to this. If you're having trouble mounting the SSD in Disk Utility, restarting your Mac may help.
If your desktop or Finder has issues reading from or writing to a portable device, this is the best way to fix the problem.
First, disconnect the SSD from your Mac.
Second, Select Restart from the Apple menu.
Third, when the chat box asks whether you want to restart your Mac displays, select Reopen Windows after logging in.
Once your Mac has finished restarting, you can reconnect the SSD.
An SMC reset is an alternative solution for Macs with Intel processors. The storage management controller (SMC) is a sub-system controlling low-level processes like power and battery management.
Detach the power line or remove the battery from your iMac, Mac Pro/mini, or battery-powered laptop, and then press and hold the Power button for 5 seconds.
Hold the Shift, Control, Option, and Power buttons on a non-removable-battery MacBook Air, MacBook Pro, or Power button for 10 seconds.
The external drive's file system may be incompatible with your Mac. For instance, the APFS file system is not supported by Macs running macOS Sierra or earlier. Upgrade or update the OS if at all possible.
The Mac App Store offers updates for those running macOS High Sierra and earlier. Select Software Update from the Apple menu's System Preferences & About This Mac section if you use a newer macOS version.
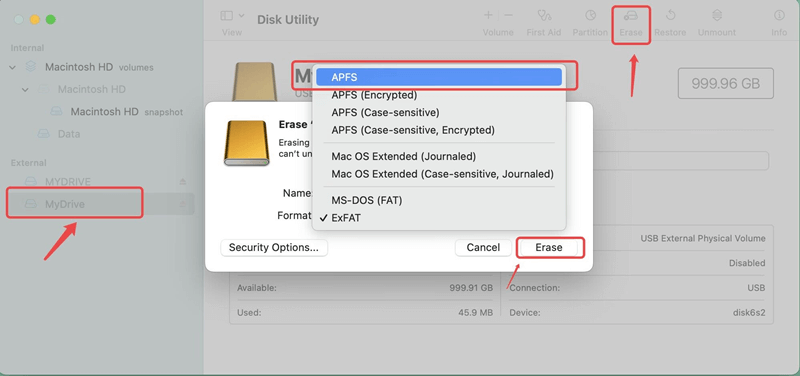
Formatting the SSD can fix most of logical errors and can change the file system of the SSD (for example format the NTFS SSD to APFS SSD or ExFAT SSD).
Open Disk Utility.
Select the SSD.
Click Erase and select a file system.
Click Erase again.

Whether you want to export data from an unrecognized SSD to your Mac or recover lost data from a reformatted SSD, you can try data recovery software - such as Do Your Data Recovery for Mac.
Step 1. Connect the SSD to your Mac and open Do Your Data Recovery for Mac. Select the SSD to start data recovery.

Step 2. Click on Scan button to deeply scan the SSD, finding all recoverable files including existing files, deleted/formatted data.

Step 3. Once the scan is completed, you can preview all recoverable files. Then select the wanted files and save them.

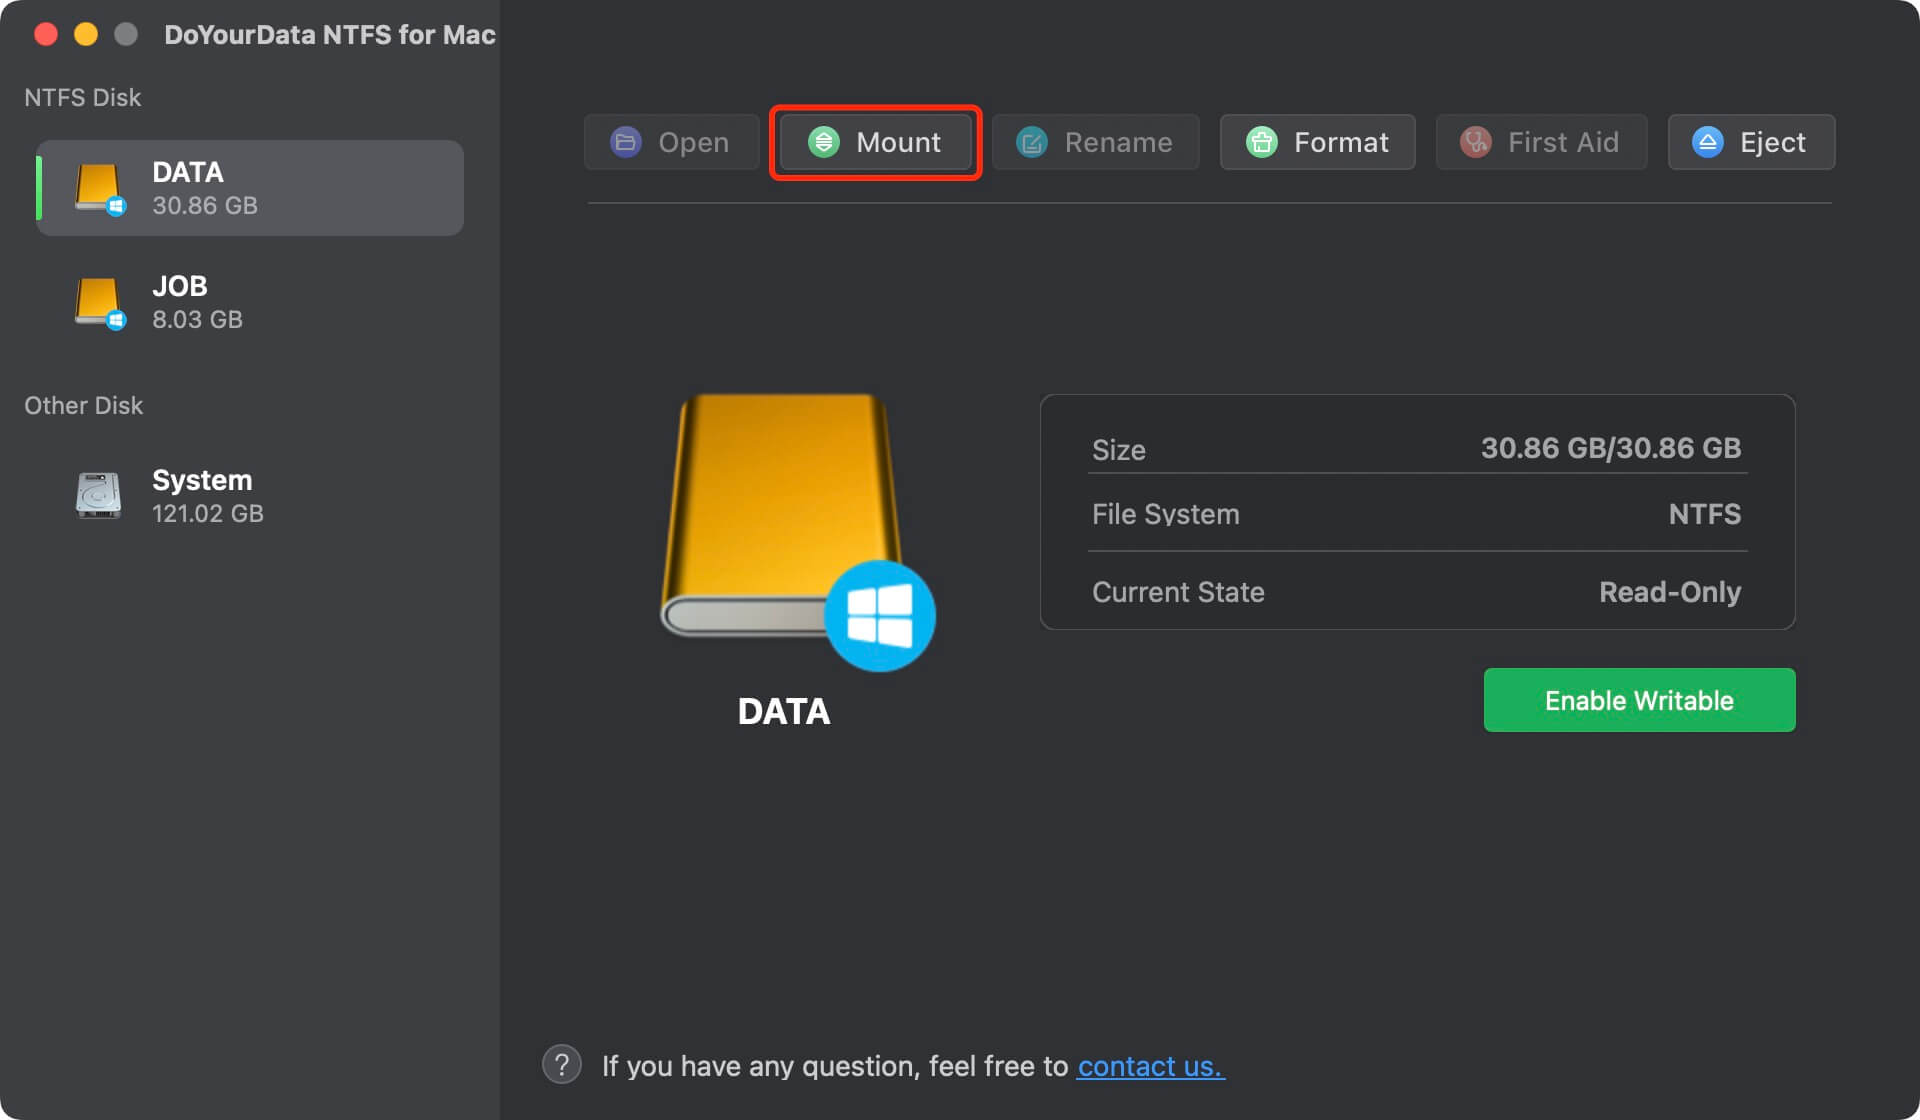
Another disk tool - DoYourData NTFS for Mac is able to securely and quickly mount external SSD on Mac or format it to fix logical errors.
If the external SSD is NTFS drive, just select it and click Mount and then click Enable Writable to grant full read-write access to the drive.

If you want to format the SSD, click Format and select a file system, click Format again.

The First Aid allows you to repair the damaged SSD.

Mac Internal SSD Is Not Showing Up on Mac
If the Mac startup disk is not showing up on Mac or can’t be found in Disk Utility, check this guide to fix it and keep your data safe.
1. How to mount external SSD on Mac?
Normally, when you connect an external SSD to your Mac, it mounts on Mac desktop automatically. If it does not mount on your Mac, open Disk Utility, find the external SSD and click on Mount button.
2. How to fix external SSD not showing up on Mac?
Open Finder > Settings. Click General, Sidebar, then select External Disks. Then the external device will show up on desktop and Finder’s sidebar.
3. How to recover data from an unrecognized external SSD on Mac?
4. How to repair damaged external SSD on Mac?
#1 Open Disk Utility, select the SSD, click Erase or First Aid to repair the damaged SSD.
#2 Use a disk management tool - such as DoYourData NTFS for Mac, select the SSD and click First Aid or Format to repair the damaged SSD.
