Quick Navigation:
- Common Causes of Disk Utility Not Loading Disk
- Solution 1: Use First Aid in Recovery Mode
- Solution 2: Reset NVRAM/PRAM
- Solution 3: Clear SMC
- Solution 4: Reinstall macOS
- Preventative Measures
- Conclusion
- FAQs About Fixing Mac Disk Utility Not Loading Disk
Disk Utility is an important tool for Mac users because it lets them control disks, split them up, and fix problems. Problems where Disk Utility fails to load a disk, on the other hand, can be annoying and frustrating. Several things, such as program conflicts, damaged files, or hardware problems, could cause this issue.
Disk Utility doesn't recognize a disk, which makes it harder to do important maintenance and troubleshooting chores. If you know what's causing this problem and how to fix it, you can avoid losing data and having your system go down.
This guide will look at the most common reasons Disk Utility won't load a disk and offer a range of fixes, from simple ones to more complex ones. To keep your Mac running smoothly, we'll also talk about other tools and preventative steps. Here are some ways to ensure that your Disk Utility is always ready when needed.
Common Causes of Disk Utility Not Loading Disk
Knowing the most common reasons for this problem is important before getting the answers. If you know the root reason, you can fix it more quickly and effectively.
⚠️ Corrupted disk or file system
If a disk or file system is damaged, Disk Utility might not be able to load it correctly. Corruptions can happen when the drive is physically damaged, shut down incorrectly, or software mistakes happen.
🚫 Software conflicts
Disk Utility can sometimes stop working because of problems with third-party programs or background tasks. These problems can happen when you use antivirus software, disk management tools, or other programs that connect to your files.
🚨 System bugs and glitches
Like any other operating system, macOS can have bugs and other problems. These can sometimes mess up important system tools like Disk Utility, especially after an update or if the system isn't kept up to date.
🧑💻 Hardware issues
Sometimes, the issue might not be with the program but with the hardware. Disk Utility might be unable to see the disk if the hard drive is broken, the wire is loose, or the USB port isn't working right.
Solution 1: Use First Aid in Recovery Mode
The "First Aid" tool of Disk Utility is meant to fix small disk errors like problems with the directory structure or file system inconsistencies. If Disk Utility can't load the disk normally, getting to it through Recovery Mode can help.
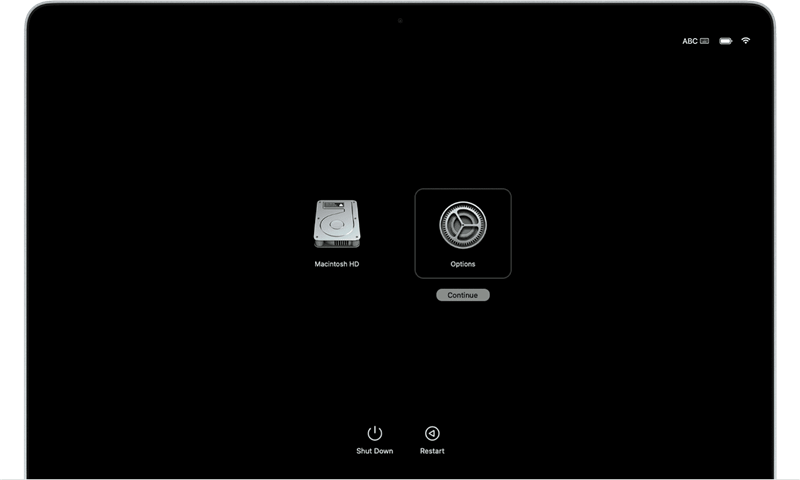
Restart your Mac. Hold the Power button (or Command and R keys for Intel-chip Mac) as your Mac restarts until you see the Apple logo or a spinning globe. When you do this, your Mac will start up in Recovery Mode. Choose Options and click Continue.
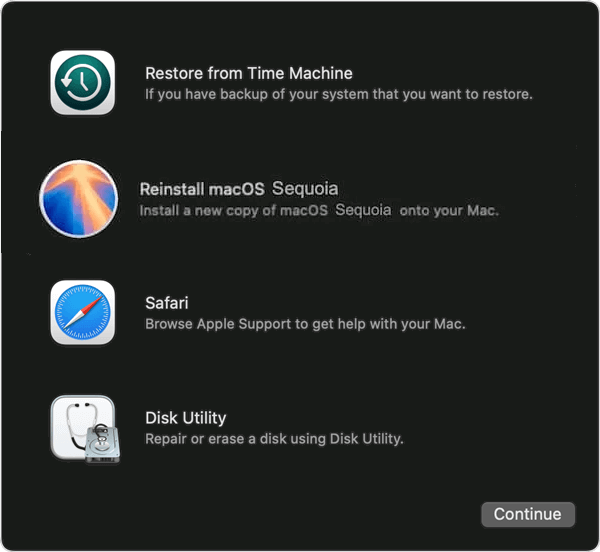
Choose Disk Utility. In the window that comes up, called macOS Utilities, choose Disk Utility and click Continue.
Choose the problematic disk. Choose the disk that gives you trouble from the list on the left side of the Disk Utility window. It could be called "Macintosh HD" or something else you chose.
Run First Aid. To run First Aid, select the disk giving you trouble and click the "First Aid" button in the toolbar. Disk Utility will ask you to run the First Aid process. Click Run and then do what it says on the screen. This process will look for mistakes on the disk and try to fix them.

Solution 2: Reset NVRAM/PRAM
Non-volatile random Access Memory (NVRAM) and Parameter RAM (PRAM) hold important system settings like the speakers' volume, the screen's resolution, and the choice of starting disk. These settings can get messed up sometimes, which can cause problems with Disk Utility. Please following the steps below to reset:
Step 1. Begin by shutting down your Mac completely. Before you do anything else, turn your Mac on and press the Option, Command, P, and R keys. Hold the keys for about 20 seconds more. During this time, your Mac might restart.

Step 2. Once you've held the keys down for 20 seconds, let go of them. Your Mac will finish the process of starting up.
By returning the system to its original settings, resetting the NVRAM/PRAM can often fix software-related issues, such as Disk Utility.
Solution 3: Clear SMC
The SMC (System Management Controller) controls many low-level tasks on your Mac, such as power management, heat management, and setting up the hardware. Some hardware problems affecting Disk Utility can be fixed by resetting the SMC.
- Shut down your Mac: Turn off your Mac completely.
- Hold Power button: Press and hold the Power button for 10 seconds, then let go of it.
- Wait and restart: After a short time, press the power button to turn your Mac back on.
Solution 4: Reinstall macOS
If none of the other debugging steps work, reinstalling macOS can often fix software corruption problems that keep happening and affect Disk Utility. When you reinstall macOS, all system files are returned to how they were before, and your files are not lost.
Step 1.To start, turn your Mac on. Hold down the Power button (or Command and R keys for Intel-chip Mac) when your Mac restarts.
Step 2.Press until you see the Apple logo or a globe moving. It means that your Mac is entering Recovery Mode. Select Options and click Continue.
Step 3.Pick "Reinstall macOS" from the macOS Utilities window and click Continue.

Step 4.Follow prompts to continue with the re-installation, follow the steps shown on the screen. The newest version of macOS will be downloaded and put on your Mac by this process.
Wait for the installation to finish. During this process, your Mac will restart a few times. When it's done, your macOS system will return to how it was before, which might fix the problem with Disk Utility.
Preventative Measures
1. Back up your info regularly with Time Machine or another backup tool. To keep a full backup of your Mac and easily restore the system and fix the issue that Disk Utility cannot load or recognize disks.
To keep a complete backup of your Mac, we suggest you the best Mac cloning software DoYourClone for Mac. This application can create a bootable clone backup for your Mac along with all the system files, applications and personal files. Should you suffer issues, like Disk Utility cannot load disks, or any other issues with the system, you can restore the system with the cloned backup or just boot from the cloned drive directly to continue your work.
DoYourClone for Mac
- Best Mac cloning software can support latest macOS Tahoe.
- Create bootable clone backup for Mac with all the data and apps.
- Intuitive interface leads you handle the software easily.
After downloading and installing the disk cloning software on your Mac, then you can do as follows to create a full and bootable clone copy for your Mac.
Step 1. Run the software from launchpad and select the Clone OS option at the left side of the software interface.
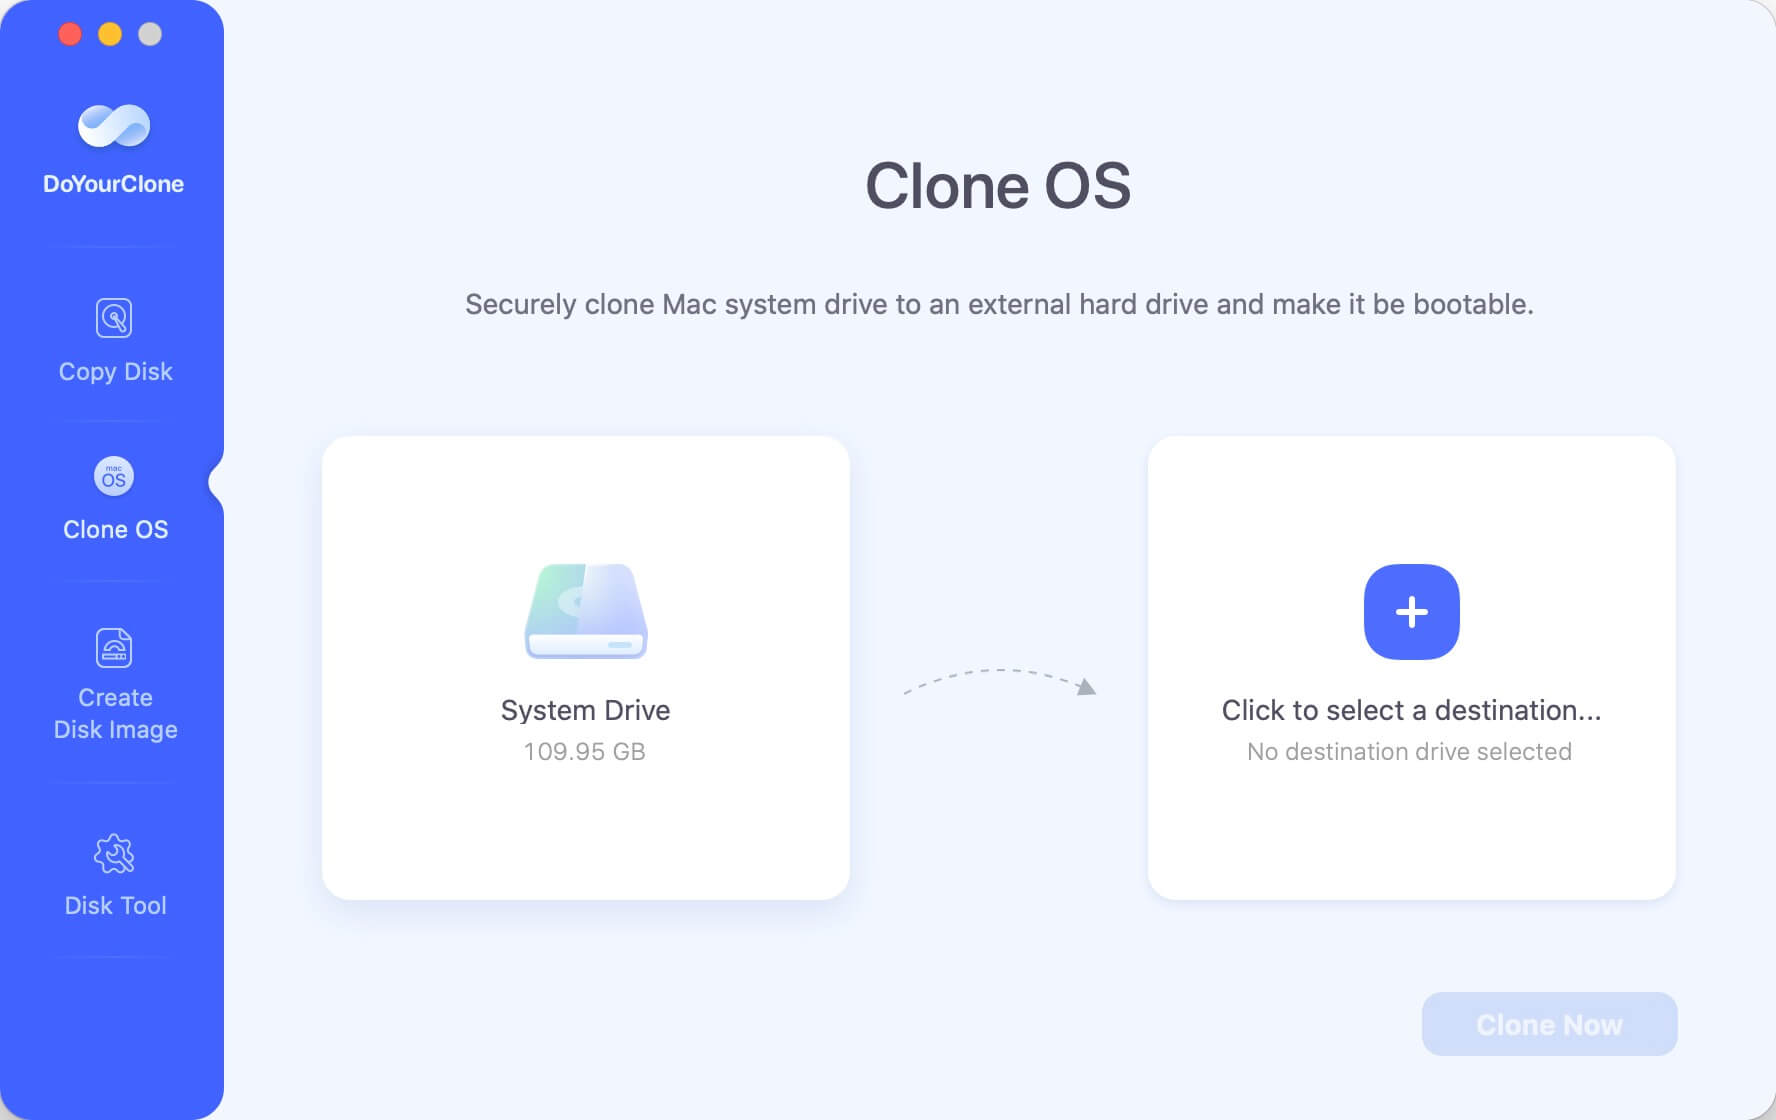
Step 2. The Mac system drive is selected automatically as source, you can just select another external drive as destination.
✍Note: As the cloning process will overwrite the destination drive, ensure to move the important files from the external drive to another place. Or just use an empty external hard drive.
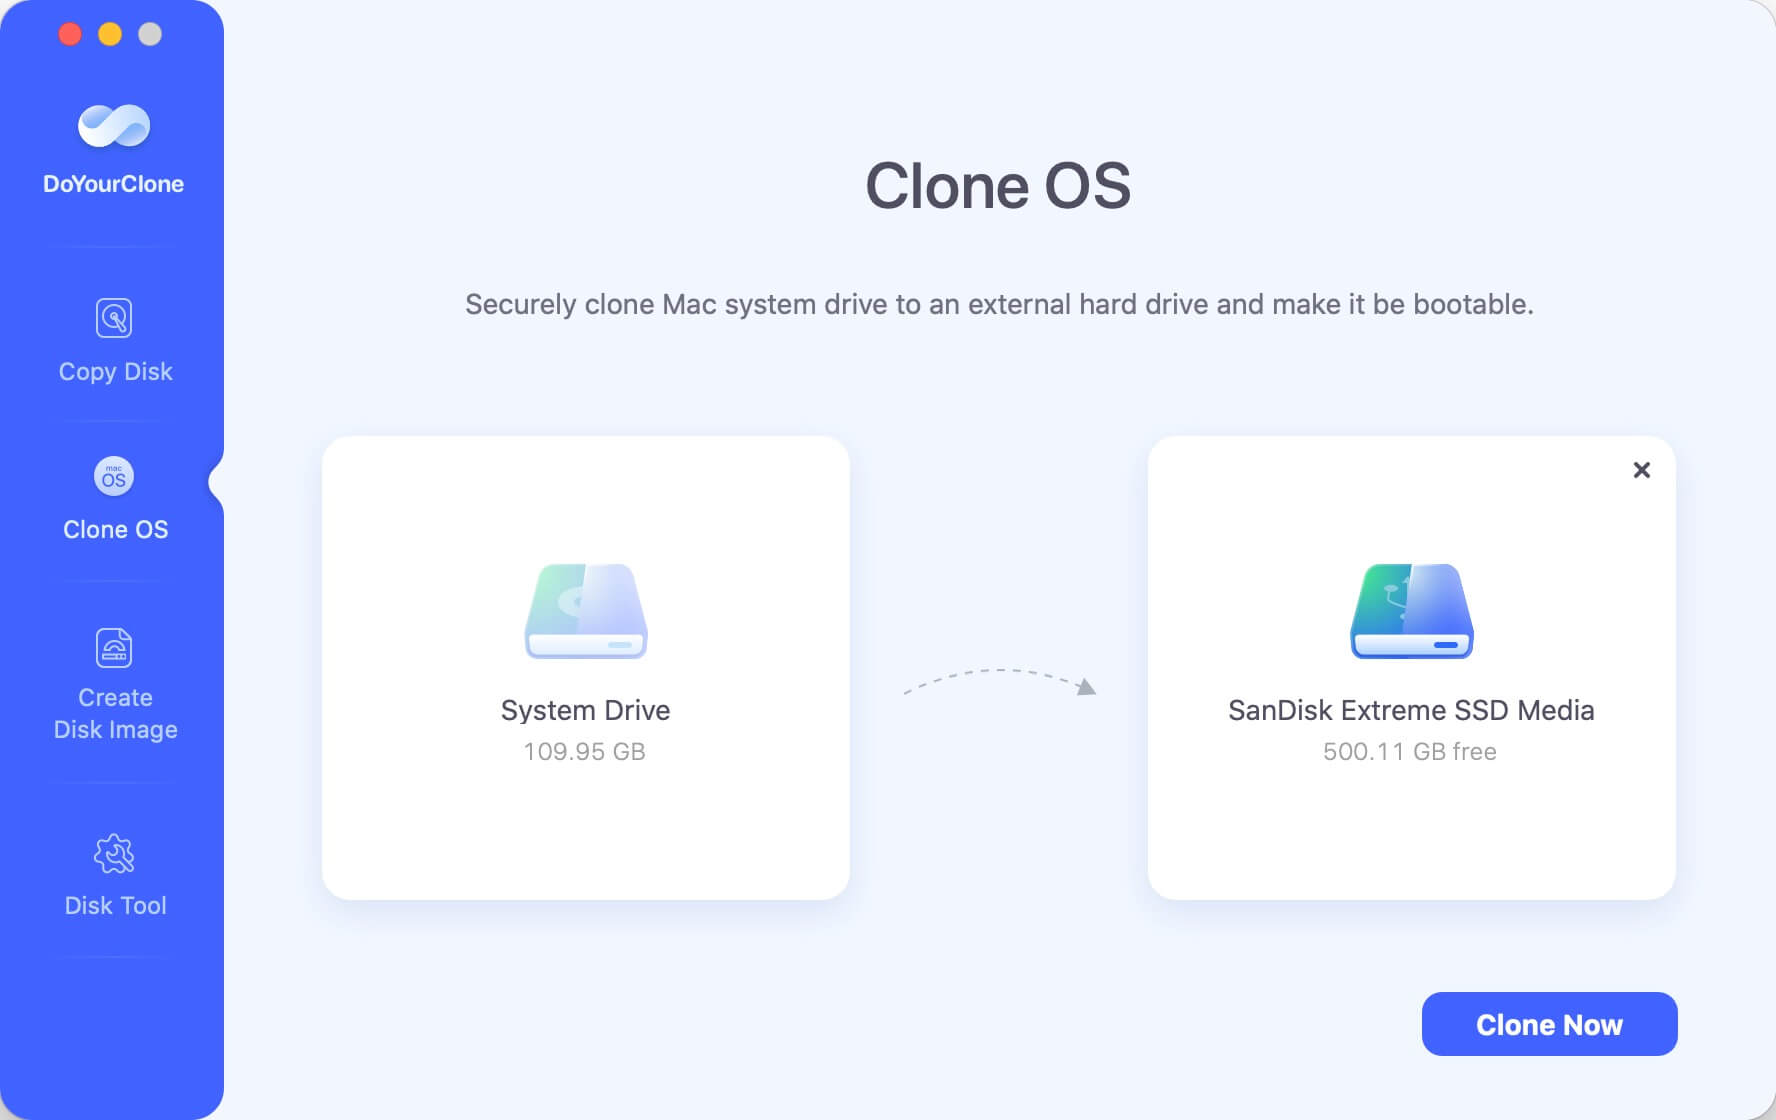
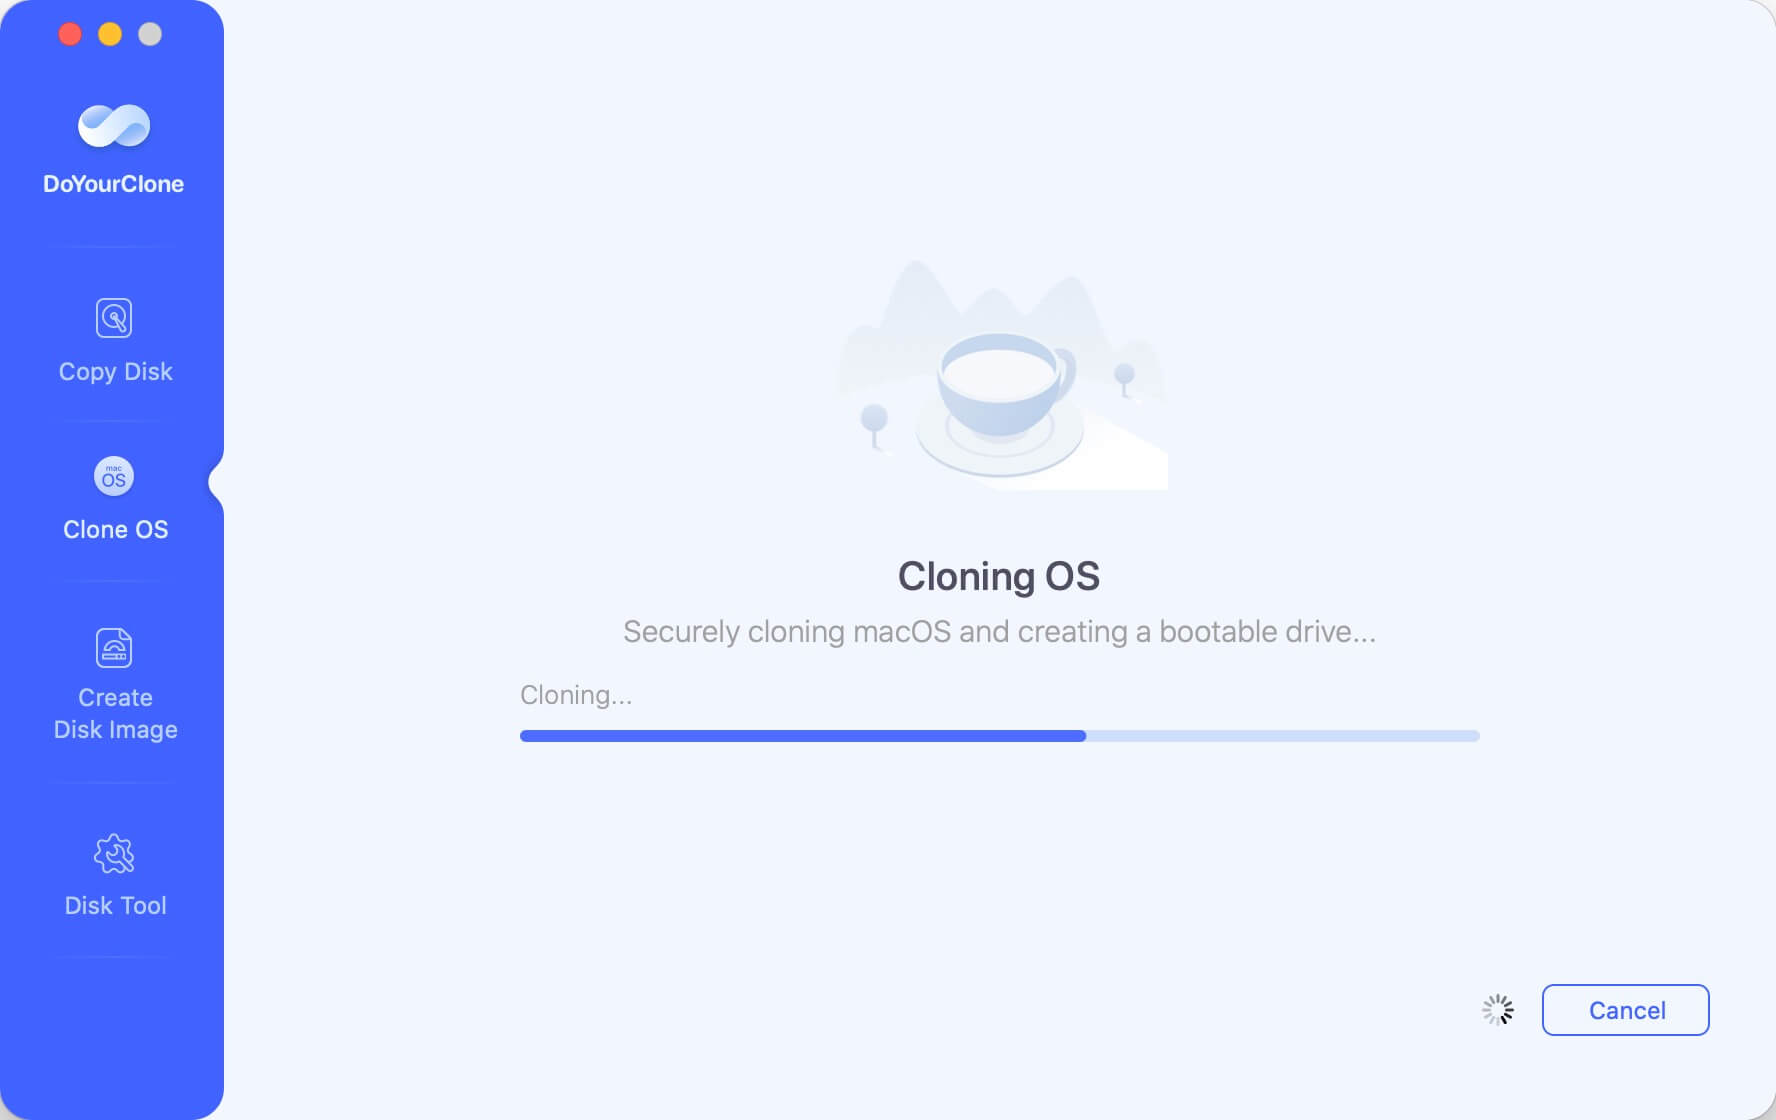
Step 3. Click on the Clone Now button, the software will start to create a bootable and complete clone for your Mac drive.
2. Check for and fix disk errors often with Disk Utility's "First Aid" tool.
3. To keep your files safe, always eject external drives safely.
4. To keep an eye on your disk's health and find problems early, use tools like DriveDx or SMART Utility.
5. Ensure you always have the latest version of macOS installed to get the best bug fixes and speed boosts.
Conclusion
It can be unpleasant when Disk Utility doesn't load a disk, but it can be fixed with the right steps. You can use targeted solutions if you know the typical causes, like damaged disks, software conflicts, system bugs, and hardware problems.
This problem can be fixed by running First Aid in Recovery Mode, resetting NVRAM/PRAM, resetting the SMC, and restarting macOS. You can keep your Mac running smoothly by taking preventative steps and using different tools. With these tips, you can fix any problems with Disk Utility and keep your Mac healthy.
FAQs About Fixing Mac Disk Utility Not Loading Disk
1. The common reasons for the issue Disk Utility not loading disk.
Here are some common reasons for the Mac Disk Utility not loading disk issue:
- Disk or file system is corrupted.
- Software conflicts.
- Mac system glitches or bugs.
- Hardware issues.
2. Methods to fix Disk Utility not loading disk issue.
To fiux the issue that Mac Disk Utility not loading disk, you can try the following methods:
- Method 1. Run First Aid in Recovery Mode.
- Method 2. Reset NVRAM/PRAM.
- Method 3. Clear SMC.
- Method 4. Reinstall macOS.
3. How to prevent the issue Disk Utility not loading disk?
First, take regular backups with Time Machine or other backup tools, like DoYourClone for Mac.
Second, often check and fix disk errors using First Aid tool in Disk Utility.
Third, always eject external drives safely before you unplug them.
Fourth, monitor the disk's health and find issues early.
At last, update to latest version of macOS to get bug fixes and speed boosts.
DoYourClone for Mac
DoYourClone for Mac, one of the best Mac disk cloning software, can help you clone HDD, SSD, external storage device on Mac, upgrade HDD to SSD, create full disk image backup, etc. It also can clone everything from your Mac to an external HDD/SSD and create a full bootable clone backup. 100% safe and easy-to-use.