Quick Navigation:
- Why Clone Your Hard Drive?
- Preparation Before The Cloning Process
- Cloning Hard Drive On Mac
- Conclusion
- FAQs About Cloning Old Hard Drive to New Hard Drive on Mac
It might seem hard to upgrade the hard drive on your Mac, but it doesn't have to be. Imagine giving your computer a new lease on life with a faster and bigger hard drive while keeping your favorite files, programs, and settings. If you want to get a bigger hard drive or switch to a lightning-fast SSD, cloning your old drive to a new one is the best way.
The process is easy to follow because it is laid out in steps, even if you aren't tech-savvy. We'll discuss everything you need to know to make the change easy and stress-free, from picking the right tools to ensuring the data moves smoothly. Are you ready to give your Mac a makeover? Let's learn about cloning hard drives and how they can help your computer.
Why Clone Your Hard Drive?
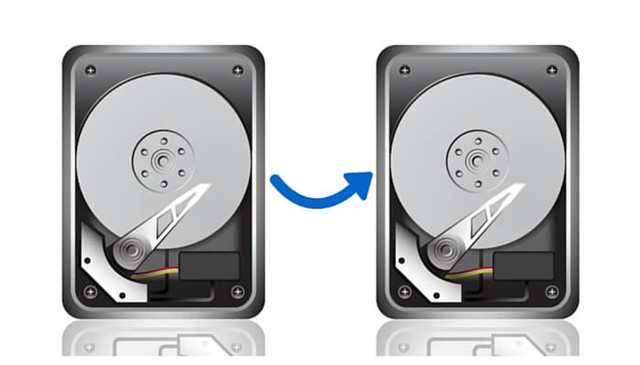
When you clone your hard drive, you make an exact copy that includes your operating system, programs, settings, and personal files. Many good things about this process make it useful in many situations.
💠 Upgrade to a Larger or Faster Drive
If you need more storage space or want better speed, switch to a bigger HDD or a faster SSD. You will never run out of space on a bigger drive because it holds more files, programs, and media. Moving up to an SSD, on the other hand, makes your system much faster, which means it boots up, opens apps faster, and generally works better.
💠 Backup and Restore
Cloning your hard drive is a complete way to back up your data. If your drive fails, a cloned drive will let you quickly get your system back to what it was, with all your files, programs, and settings intact. It keeps you from losing important info and cuts down on downtime.
💠 System Migration
Moving to a new Mac or hard drive is easier when you clone your files. Cloning copies your system environment, so you don't have to reload the operating system, apps, and files by hand. It ensures that all your data, settings, and preferences are kept so you can start working again without any problems with your new gear.
Preparation Before The Cloning Process
Doing the right things before cloning your hard drive ensures the process goes smoothly. These are the most important steps you need to take:
💠 New Hard Drive
The first thing you need to do is get a new hard drive that works with your Mac. Ensure it has enough space to hold all the files from your old drive. If you're updating, consider whether faster SSDs or bigger HDDs would be better for you.
💠 External Enclosure or Dock
An external enclosure or dock is a must-have for people who use computers or systems with few drive bays. You can now use USB, Thunderbolt, or FireWire to connect the new drive to your Mac. Check that the enclosure or dock can handle the type of link and drive size you want to use.
💠 Backup Important Files
Even though copying works, you should make a copy of your important files first. Make a copy of your important files using Time Machine, macOS's built-in backup tool, or another safe backup method.
💠 Cloning Software
Disk Utility, a built-in tool in macOS, can be used to perform simple cloning tasks. Third-party programs, on the other hand, offer more complicated features and more options. These tools make the cloning process faster and easier to use. For example, the most reliable Mac cloning software DoYourClone for Mac can ensure to create bootable clone for macOS.
Cloning Hard Drive On Mac
enough to hold all the data on the old hard drive. Then you can use Disk Utility or the third party cloning software to clone the drive.
📍 Tips: The cloning process will overwrite the destination drive. So, ensure to choose the correct destination drive. Otherwise, it would cause data loss.
💠 Method 1: Clone Using Disk Utility
The Restore feature in Disk Utility can make a copy of your drive. You can do as following steps to do the job:
Step 1. Go to Applications > Utilities > Disk Utility, double click to open the tool. It will list all the connected drives on your Mac.

Step 2. Choose your new hard drive (the destination) from the list on the left panel.
Step 3. Click the Restore tab at the top of the window. It will then pop up a window for the disk cloning.
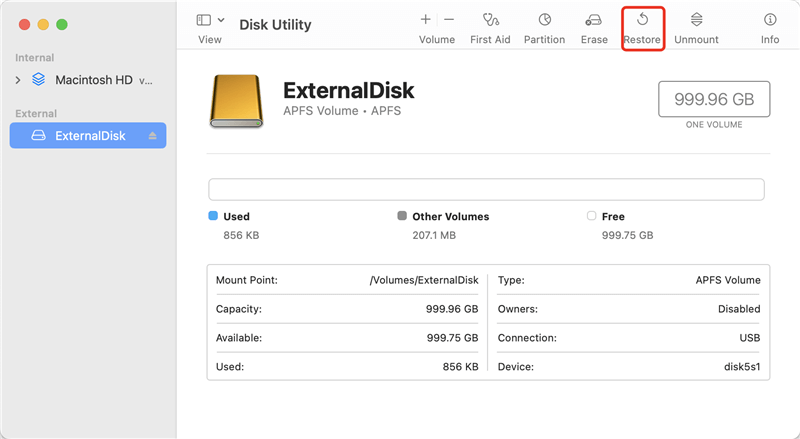
Step 4. Then select the source drive (the old system drive) in the Restore from field. You can select it from the drop-down list.
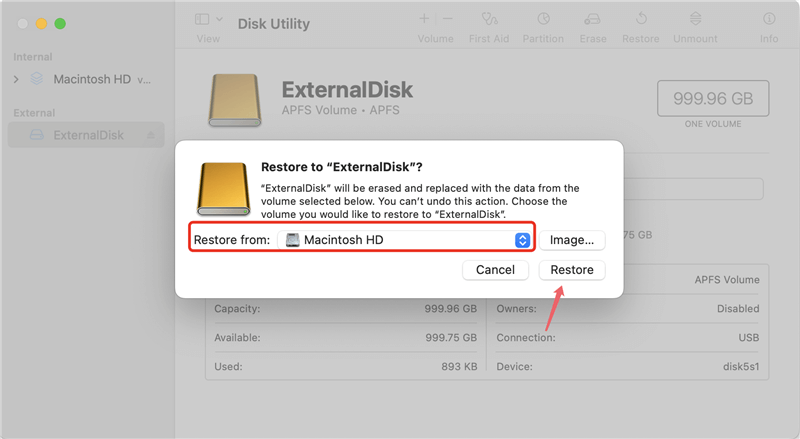
Step 5. Press Restore to begin the cloning process. The tool will clone the old drive to the new drive. Based on how much data is being sent, it could take a while.
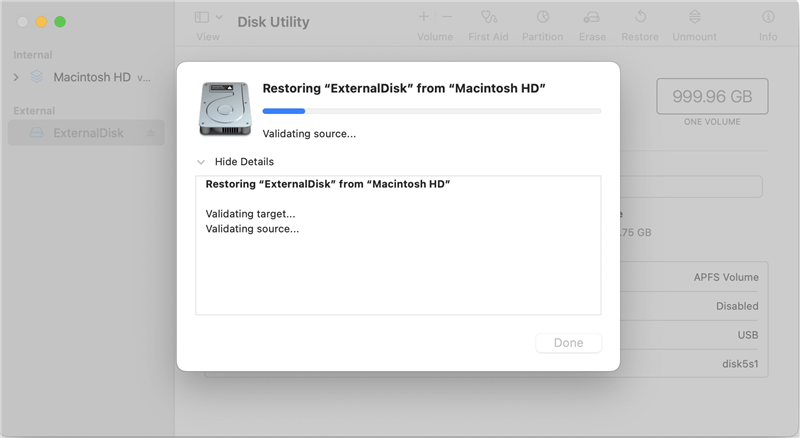
Once the process is done, all the data from the old hard drive it copied to the destination drive. You can access the new hard drive and confirm it. However, with the Disk Utility, it's cannot ensure to create a bootable clone for the system drive. If you want to create a bootable copy for your Mac drive, you can use a reliable disk cloning application.
💠 Method 2: Clone Using Third-Party Cloning Software
The Mac cloning tool DoYourClone for Mac can also make copies of your Mac's hard drive and is very easy to use. The software can even create a bootable clone copy for your macOS, along with all the system data, personal files and apps.
DoYourClone for Mac
- Fully clone all the data, applications, personal files from macOS drive.
- Clone the system drive and make sure the clone drive is bootable.
- Easy to handle and clone macOS for system migration or backup.
First, download the software. Open the installer when it's done downloading and follow the on-screen directions to install the software on your Mac. Then you can do as follows step by step:
Step 1. After the software DoYourClone for Mac is installed, go to your Applications area and double-click the the icon of the software to start it up. You'll see a well-organized, easy-to-use design when you open the app. To clone your Mac OS drive, just select the mode Clone OS.
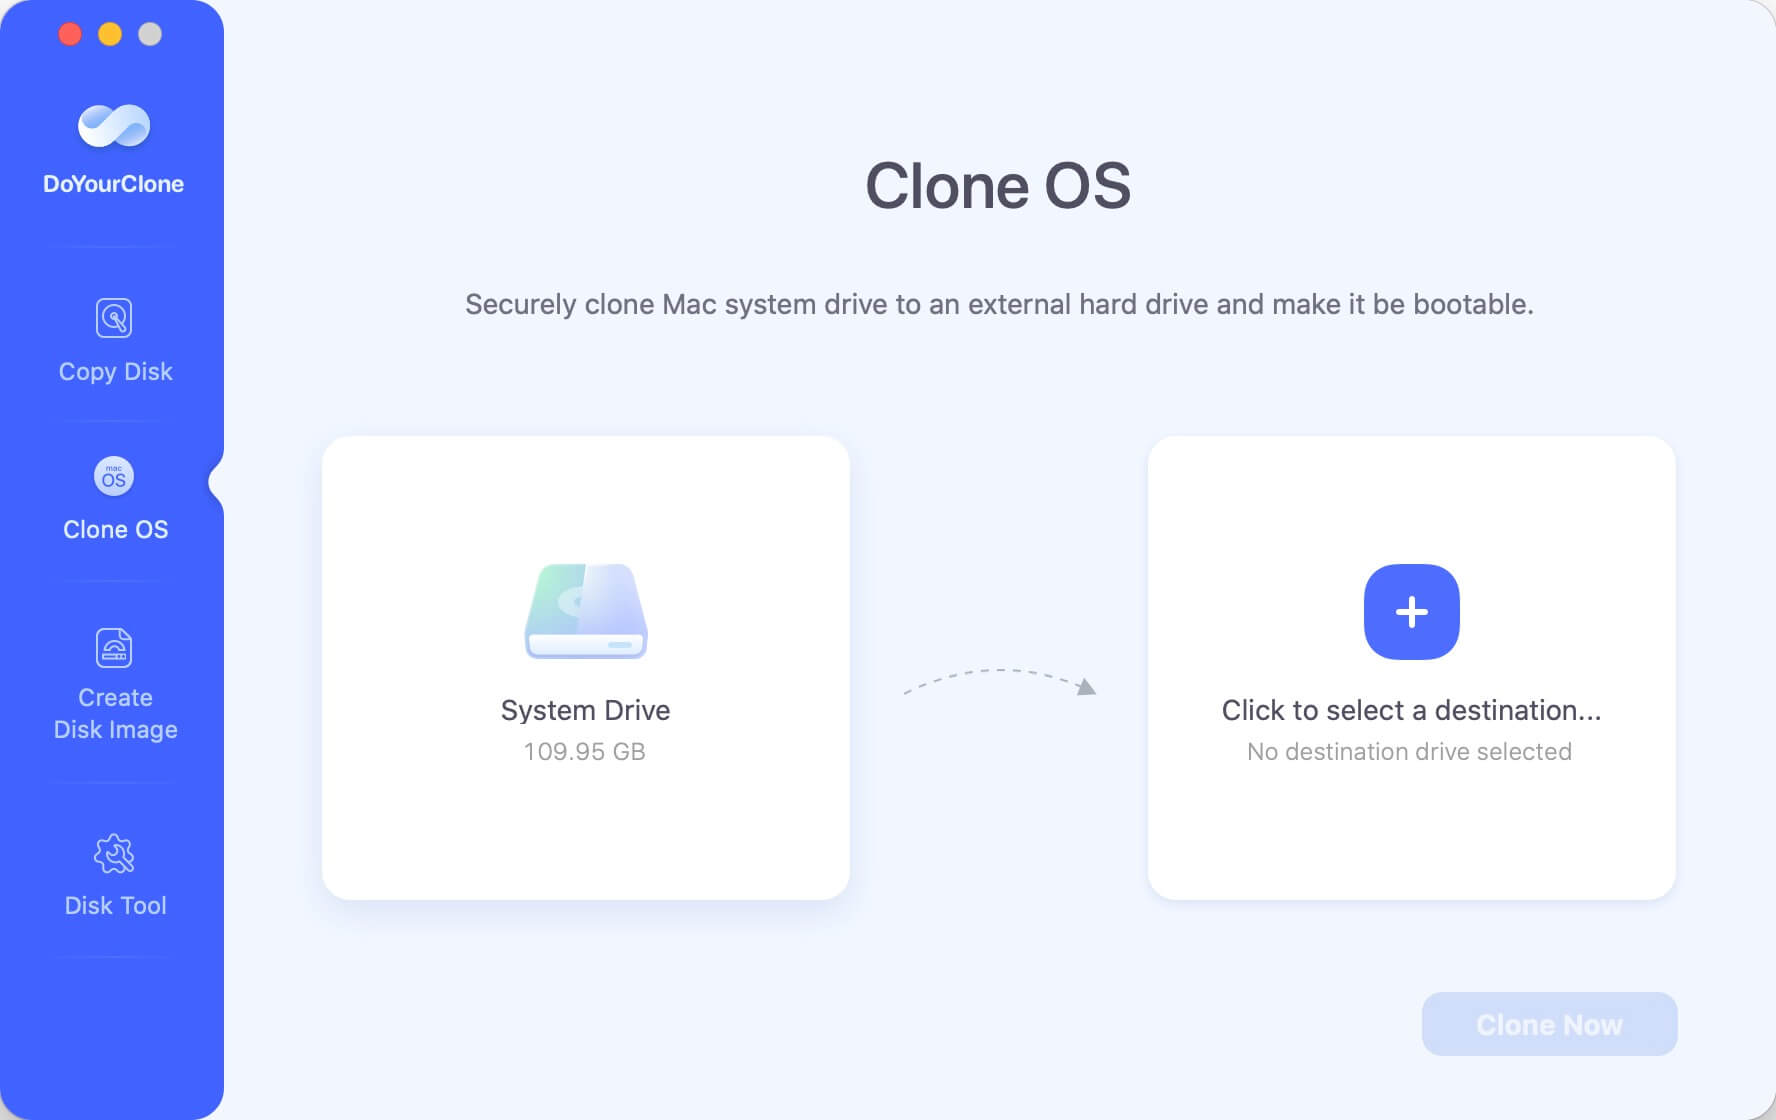
Step 2. You don't need to select the source drive as the software will select the old system drive by default. You must choose the target drives in the main window. Make sure you pick the right destination drive so you don't lose any info.
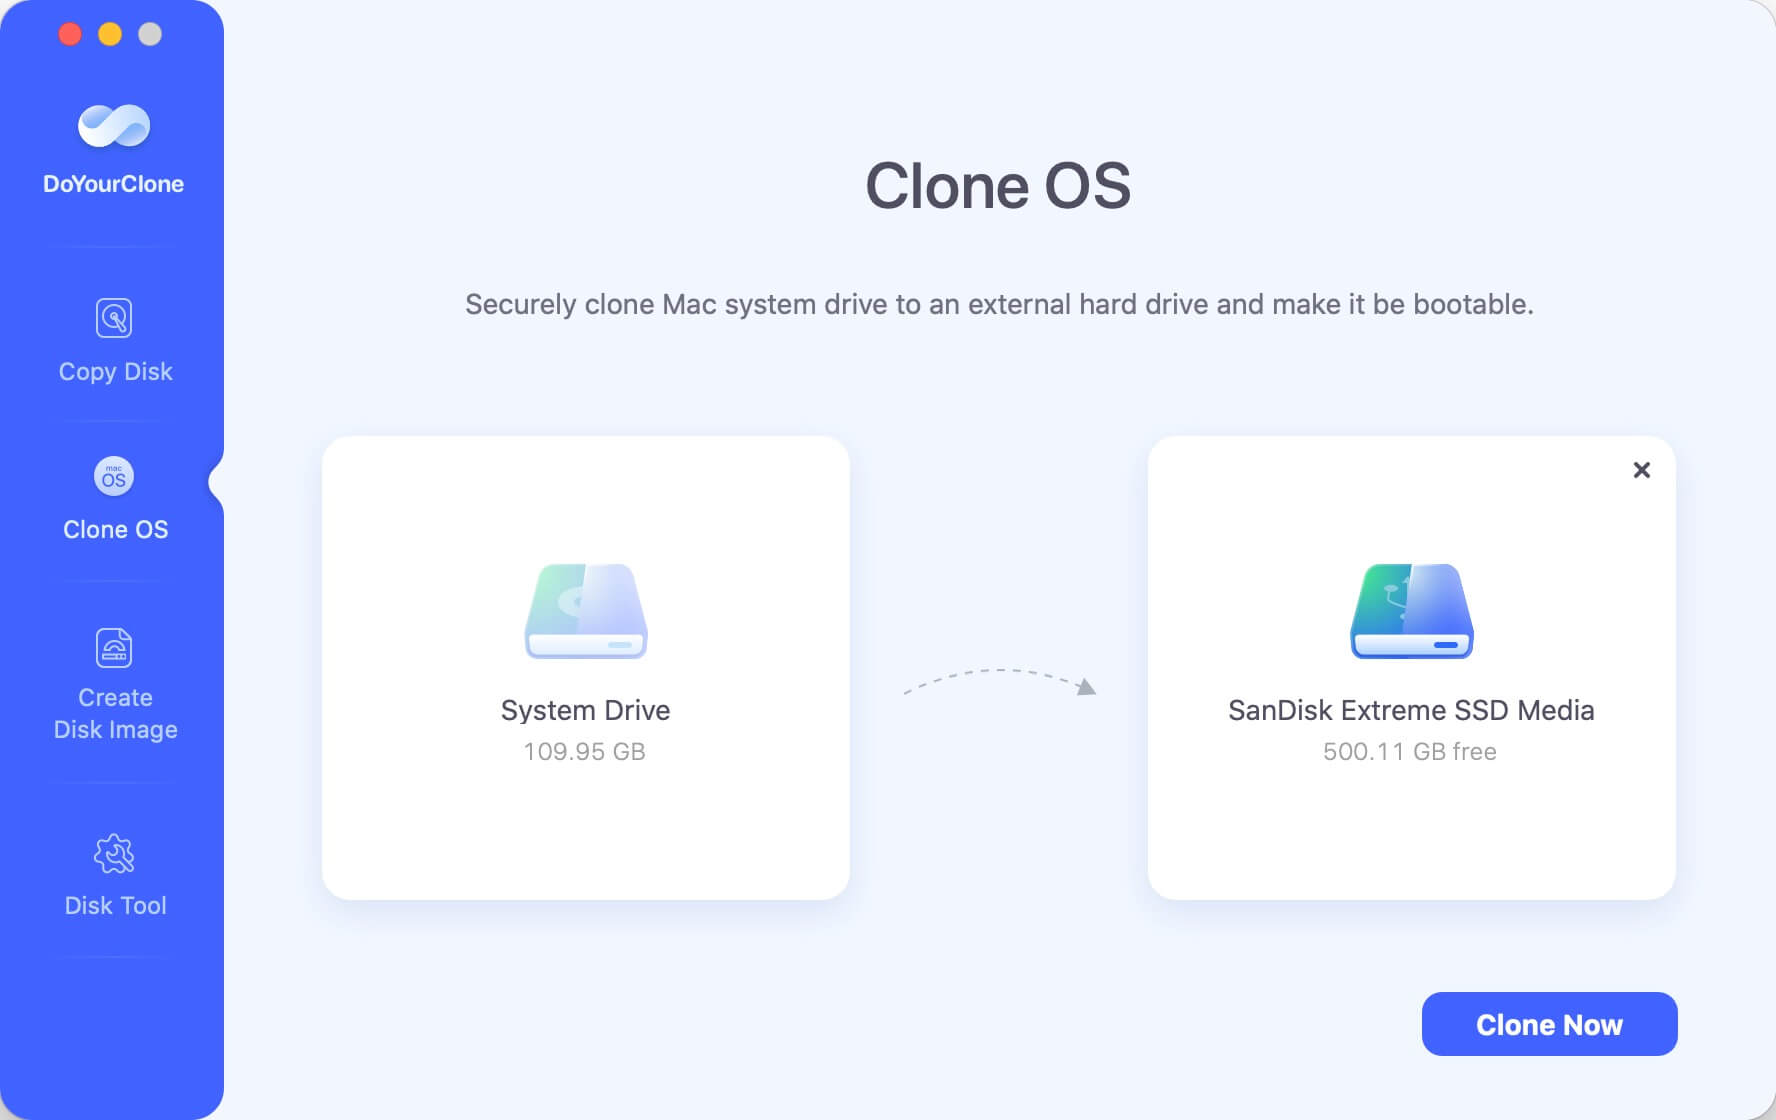
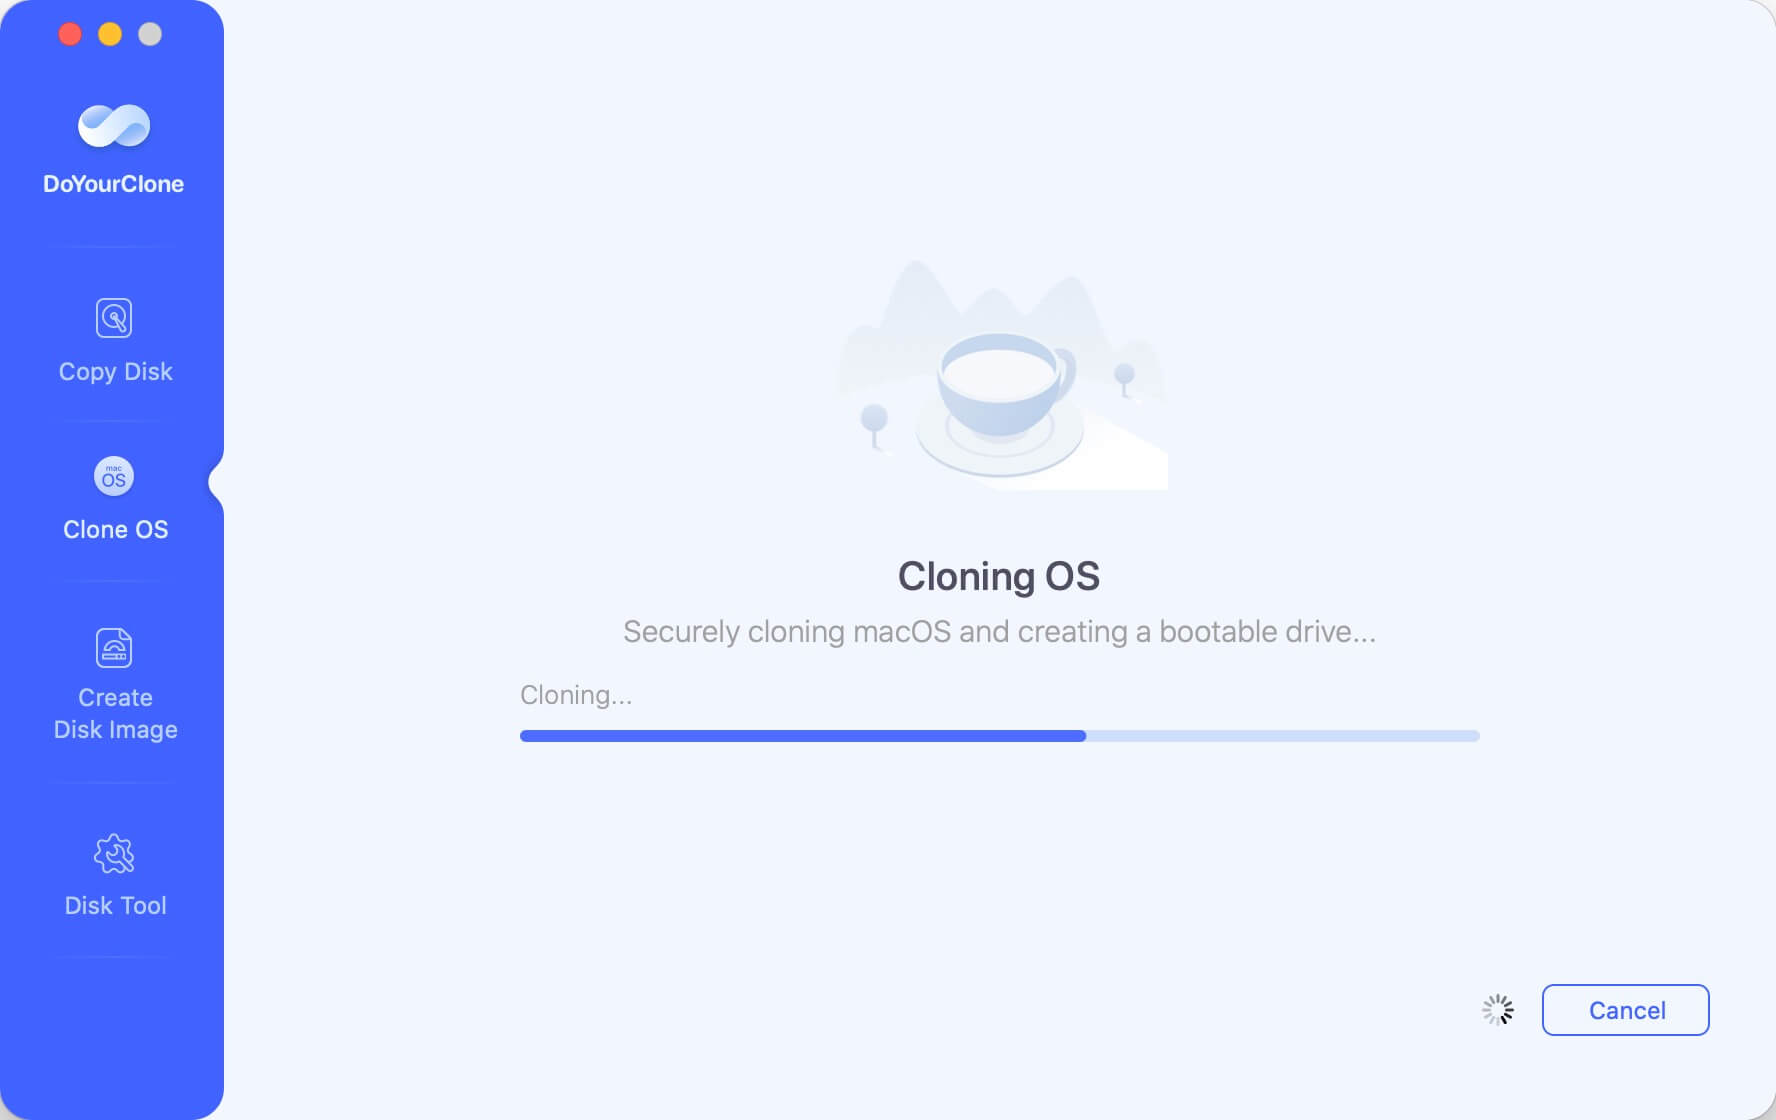
Step 3. After confirming the destination drive, hit the Clone Now button to start cloning. DoYourClone for Mac will begin moving files from your old drive to your new one, keep you updated on its progress, and give you a rough idea of when it will be done. This openness lets you keep a close eye on the process and lets you know about any problems that might come up.
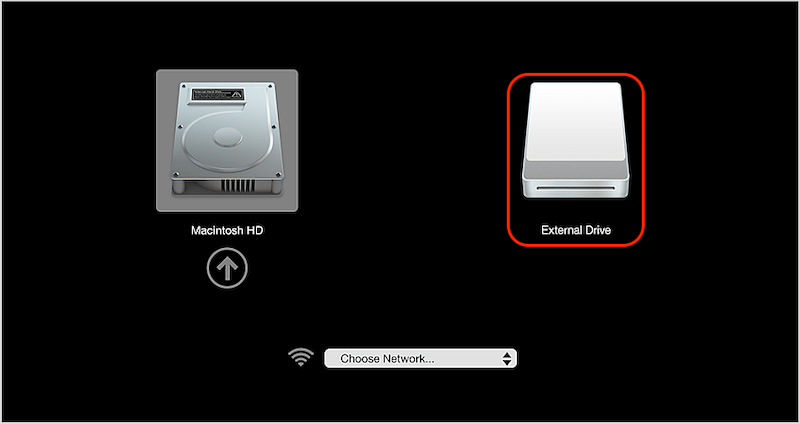
After the cloning process is finished, the new hard drive keeps all the system data, personal files, and installed applications from the old drive. Then you can change the startup disk and check if the clone is successful. Restart the Mac, press Power button (or Option key for Intel-chip machines) while starting. Then you will see the bootable disks. Choose the new cloned drive and check if the system will boot up normally. If so, the clone is successful and you can replace the drive or just keep it as a full backup.
Conclusion
Putting your old hard drive on a new one is easy on a Mac and can give your computer a new lease on life. You can ensure the move goes smoothly by following the steps in this guide, from setting up your new drive and using Disk Utility or using DoYourClone for Mac.
This process increases your storage space and speeds things up, giving you a solid backup system and making system transfer easier. You can confidently upgrade your Mac if you plan and have the right tools. You can keep all of your important files, apps, and settings.
FAQs About Cloning Old Hard Drive to New Hard Drive on Mac
1. How to clone hard drive in Disk Utility?
To clone a hard drive in Disk Utility, you can do as follows.
- Start Disk Utility from Applications > Utilities.
- Select the new drive and click Restore tab.
- Choose the old drive from the field Restore from.
- Click the Restore button to start the cloning process.
2. Is the new drive cloned using Disk Utility bootable?
For the new macOS systems, it cannot ensure the cloned drive bootable. To create bootable clone for the macOS drive, you can try the professional third-party macOS cloning software.
3. What's the best alternative software for Disk Utility cloning feature?
The best alternative is DoYourClone for Mac. The software is easy to use and very fast to clone macOS. The most important part is that the software can ensure to create a bootable clone for your macOS drive and it supports the latest version of macOS.
4. How to create bootable clone for Mac drive with DoYourClone for Mac?
Follow the steps below to create a bootable clone for macOS with the software:
- Run the software and select Clone OS mode.
- Choose a new hard drive as destination.
- Hit the Clone Now button to start the cloning process.
DoYourClone - Best Disk Clone Software
DoYourClone is a 100% safe, powerful and easy-to-use disk cloning program. It supports to clone any hard drive, clone HDD to SSD, upgrade old drive to new drive, create bootable clone backup for Windows and macOS. With this program, you can easily clone any hard drive. It supports sector by sector clone, SSD upgrade clone, etc.