Quick Navigation:
- Why Upgrade the HDD to an SSD?
- Copy HDD to SSD on Mac with Disk Utility
- Clone HDD to SSD on Mac with DoYourClone for Mac
- Copy HDD to SSD on Mac with Carbon Copy Cloner
- Conclusion
- FAQs About Cloning HDD to SSD on Mac
One of the best ways to accelerate your Mac's speed and make it feel new is to switch from an HDD to an SSD. Imagine starting your system in seconds, running programs immediately, and having a better, more responsive experience. Don't worry if the thought of loading everything again from scratch scares you!
When you clone your HDD to an SSD, all your files, apps, and settings are moved without problems. This guide will walk you through the process, ensuring you have a smooth change, no matter how much tech knowledge you have.
In this article, we will introduce some effective Mac disk cloning tools and show you how to use them to clone HDD to SSD on your Mac.
Why Upgrade the HDD to an SSD?
Before starting the cloning process, knowing the benefits of switching to an SSD is important.
- Speed
With SSDs, speeds are much faster, which is one of the best reasons to switch. SSDs read/write data much faster than HDDs, meaning starting your Mac will take much less time. It takes almost no time for apps to start up, and chores like transferring files and updating software are finished much faster. - Reliability
HDDs use spinning disks and moving read/write heads, but SSDs don't have any moving parts. It makes SSDs much more sturdy and less likely to break or damage physically. Drops, bumps, and general wear and tear are less likely to damage SSDs, giving you more peace of mind and a longer data storage life. - Energy Efficiency
Because they use less power, SSDs are better for the environment than HDDs. Because laptops use less power, their batteries last longer, so you can work or play for longer amounts of time without having to charge them. It saves energy and makes the system run cooler, so it doesn't need as many noisy cooling fans. - Noise Reduction
SSDs are quiet because they don't have any moving parts. Solid-state drives (SSDs) are quieter than hard drives (HDDs), which can make noise from spinning disks and clicking read/write heads. It is especially helpful in places that need quiet, like museums or late-night work sessions, where keeping noise to a minimum is important.
Copy HDD to SSD on Mac with Disk Utility
Disk Utility makes it easy to copy your HDD to an SSD. You can do this with the tools that come with macOS. To make a copy of your drive, do these things:
Step 1. Connect the SSD to your Mac, then open Disk Utility, format it to APFS or Mac OS Extended.
Step 2. Then select the SSD, click Restore. Select Restore from Macintosh HD. Then click on Restore button.
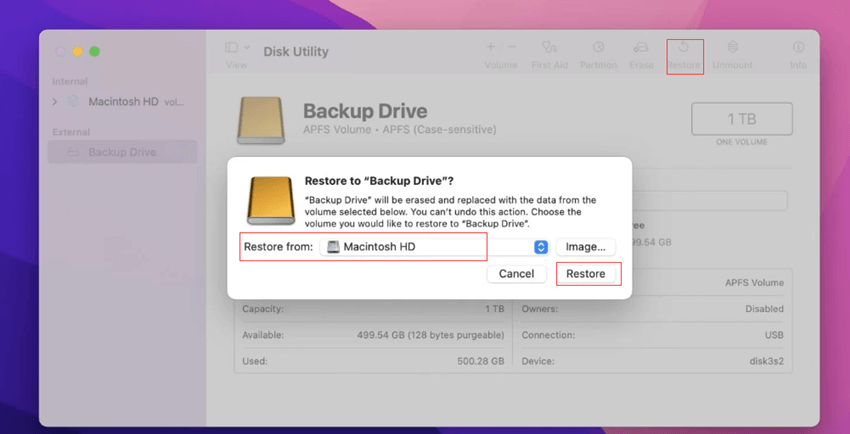
Depending on how much information is copied, this process could take a while.
Clone HDD to SSD on Mac with DoYourClone for Mac
DoYourClone for Mac is one of the best Mac clone software. It can help you securely and easily clone Mac HDD to an SSD.
DoYourClone for Mac
- Clone HDD to SSD on Mac.
- Create ZIP or DMG disk image for Mac.
- Create bootable clone backup for Mac.
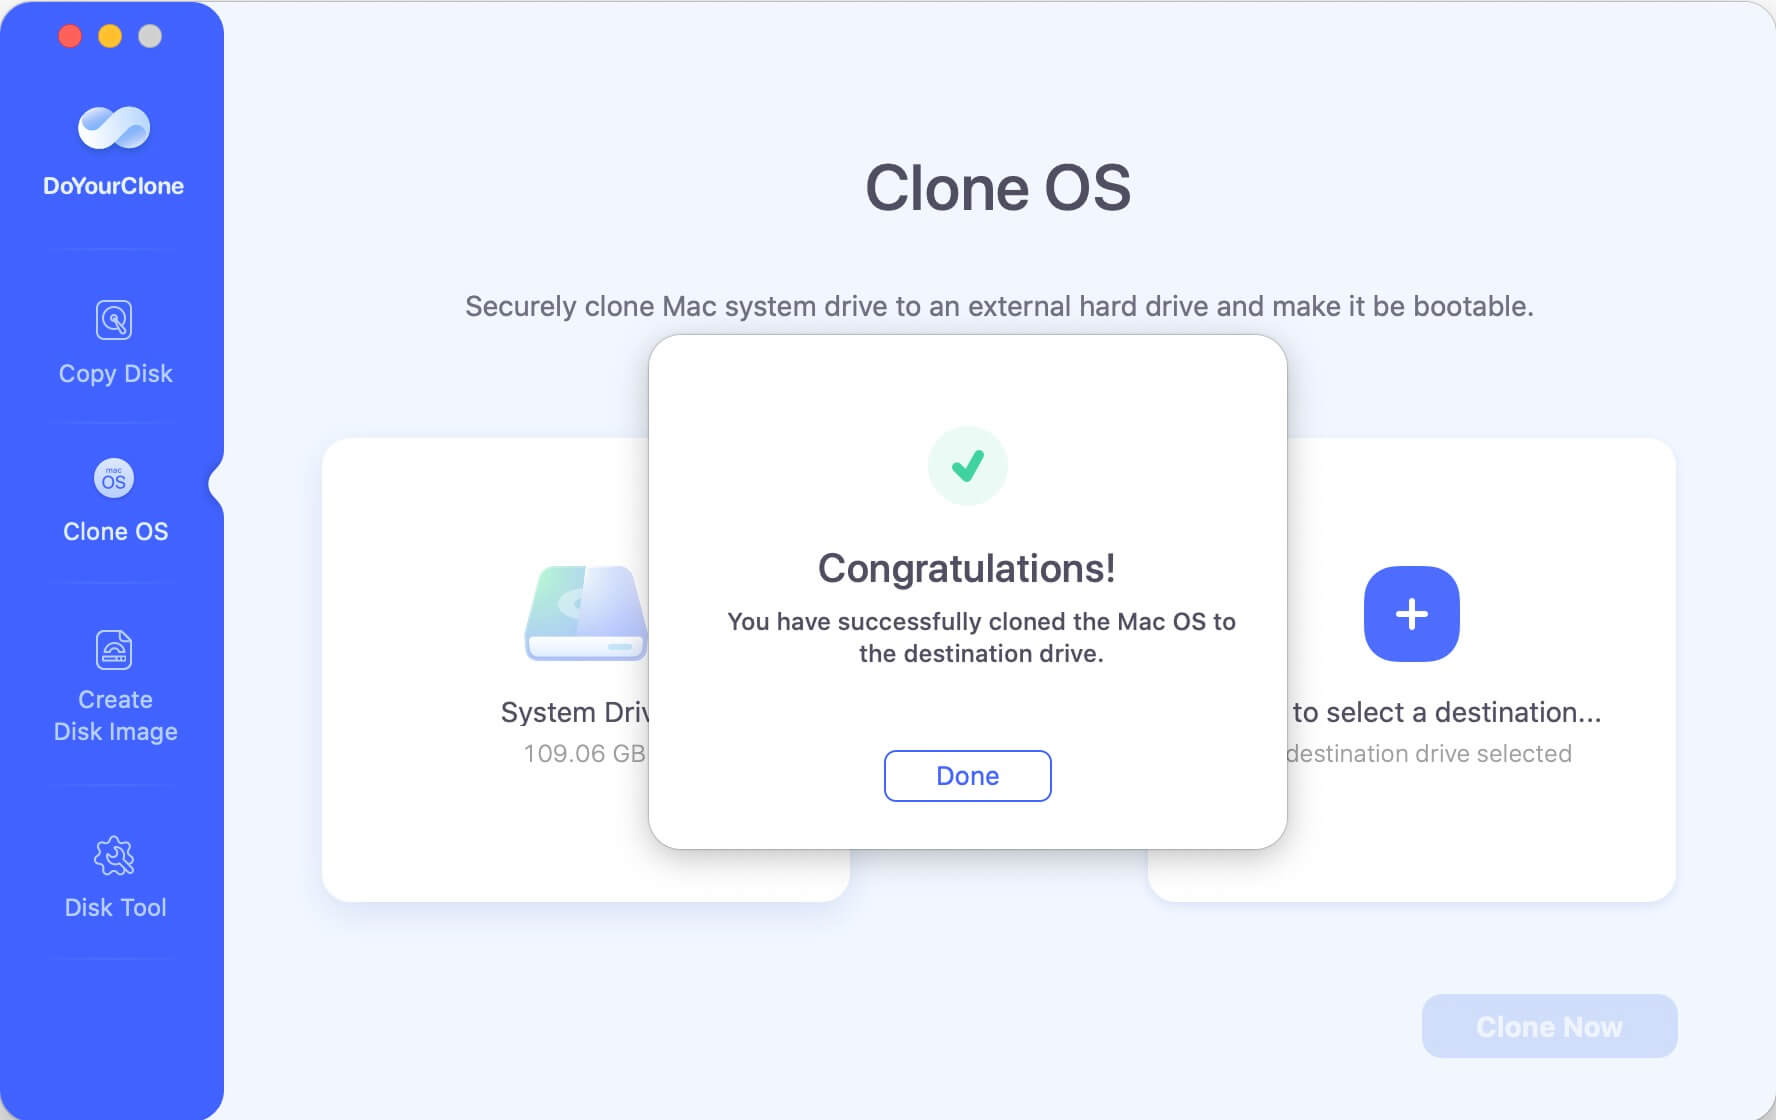
Step 1. Connect an external SSD to your Mac, then open DoYourClone for Mac. Choose Clone OS mode. Select the SSD as the destination drive.
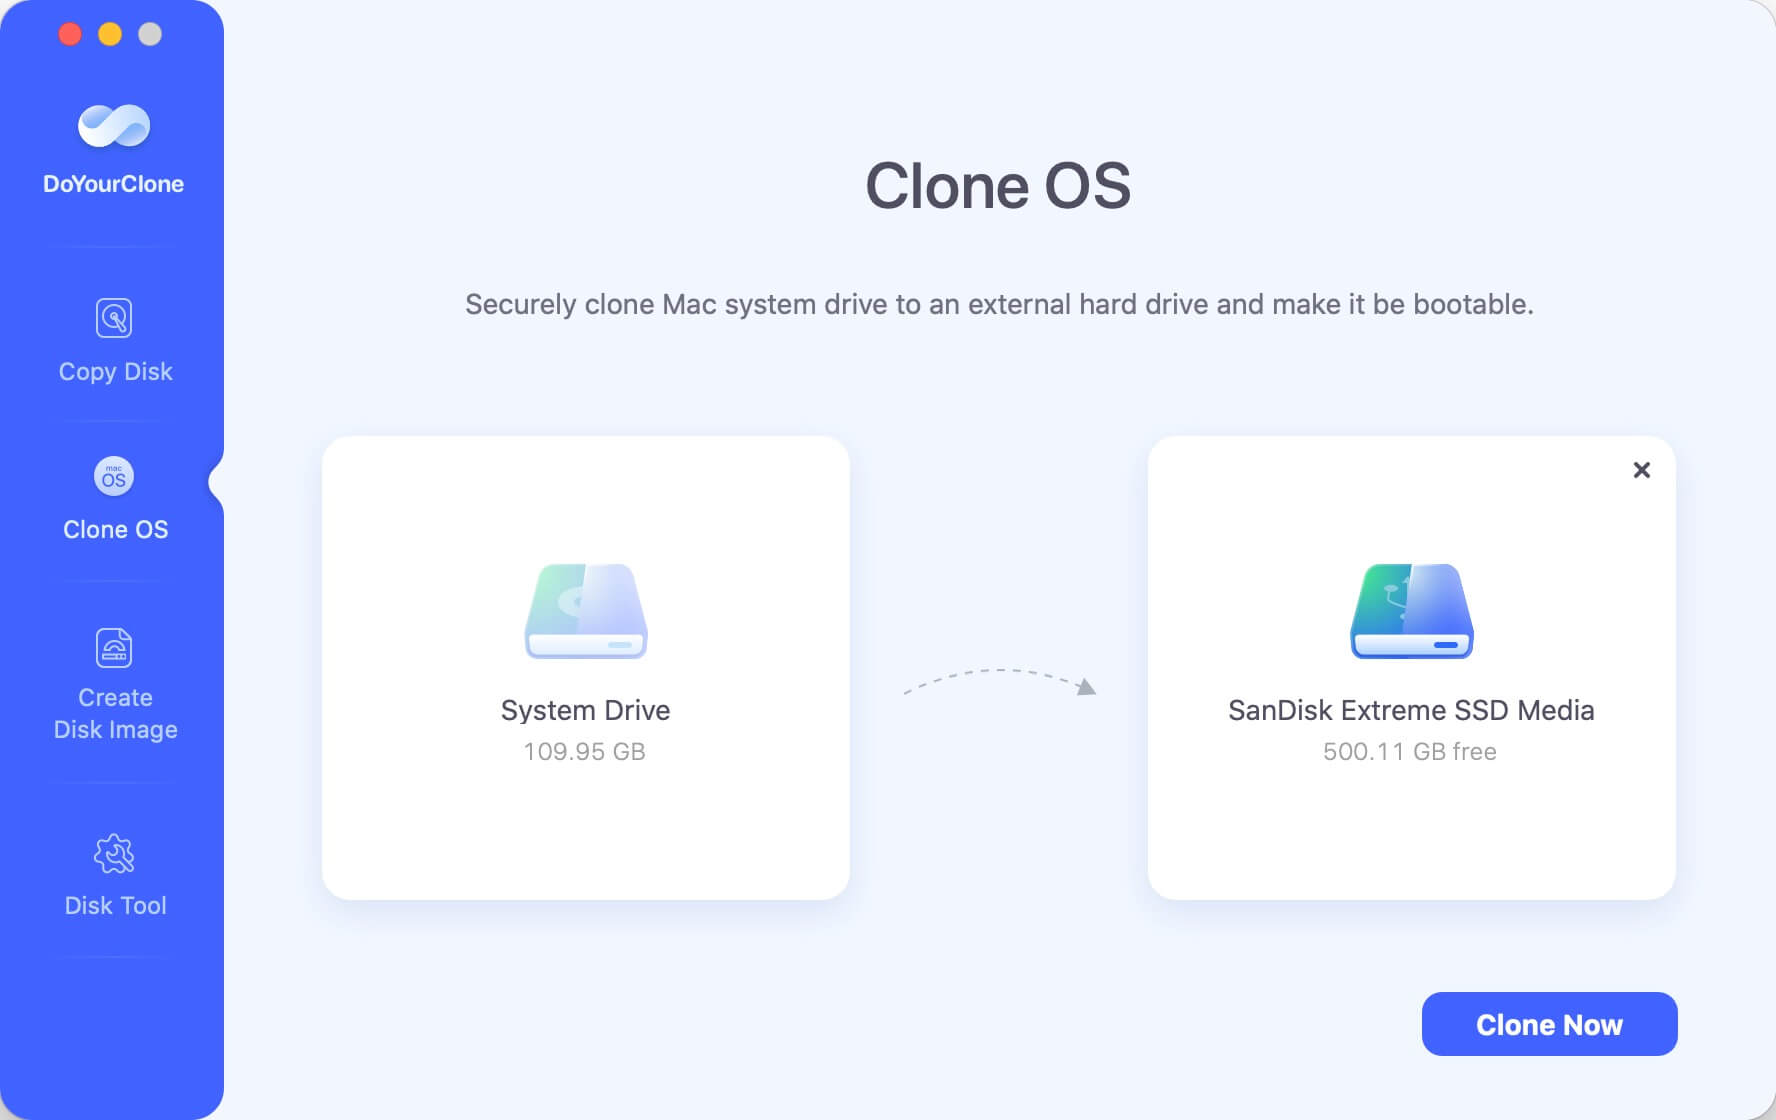
Step 2. Click on Clone Now button. It will clone all data including operating system, apps, user files, settings and other data from your Mac HDD to the external SSD.
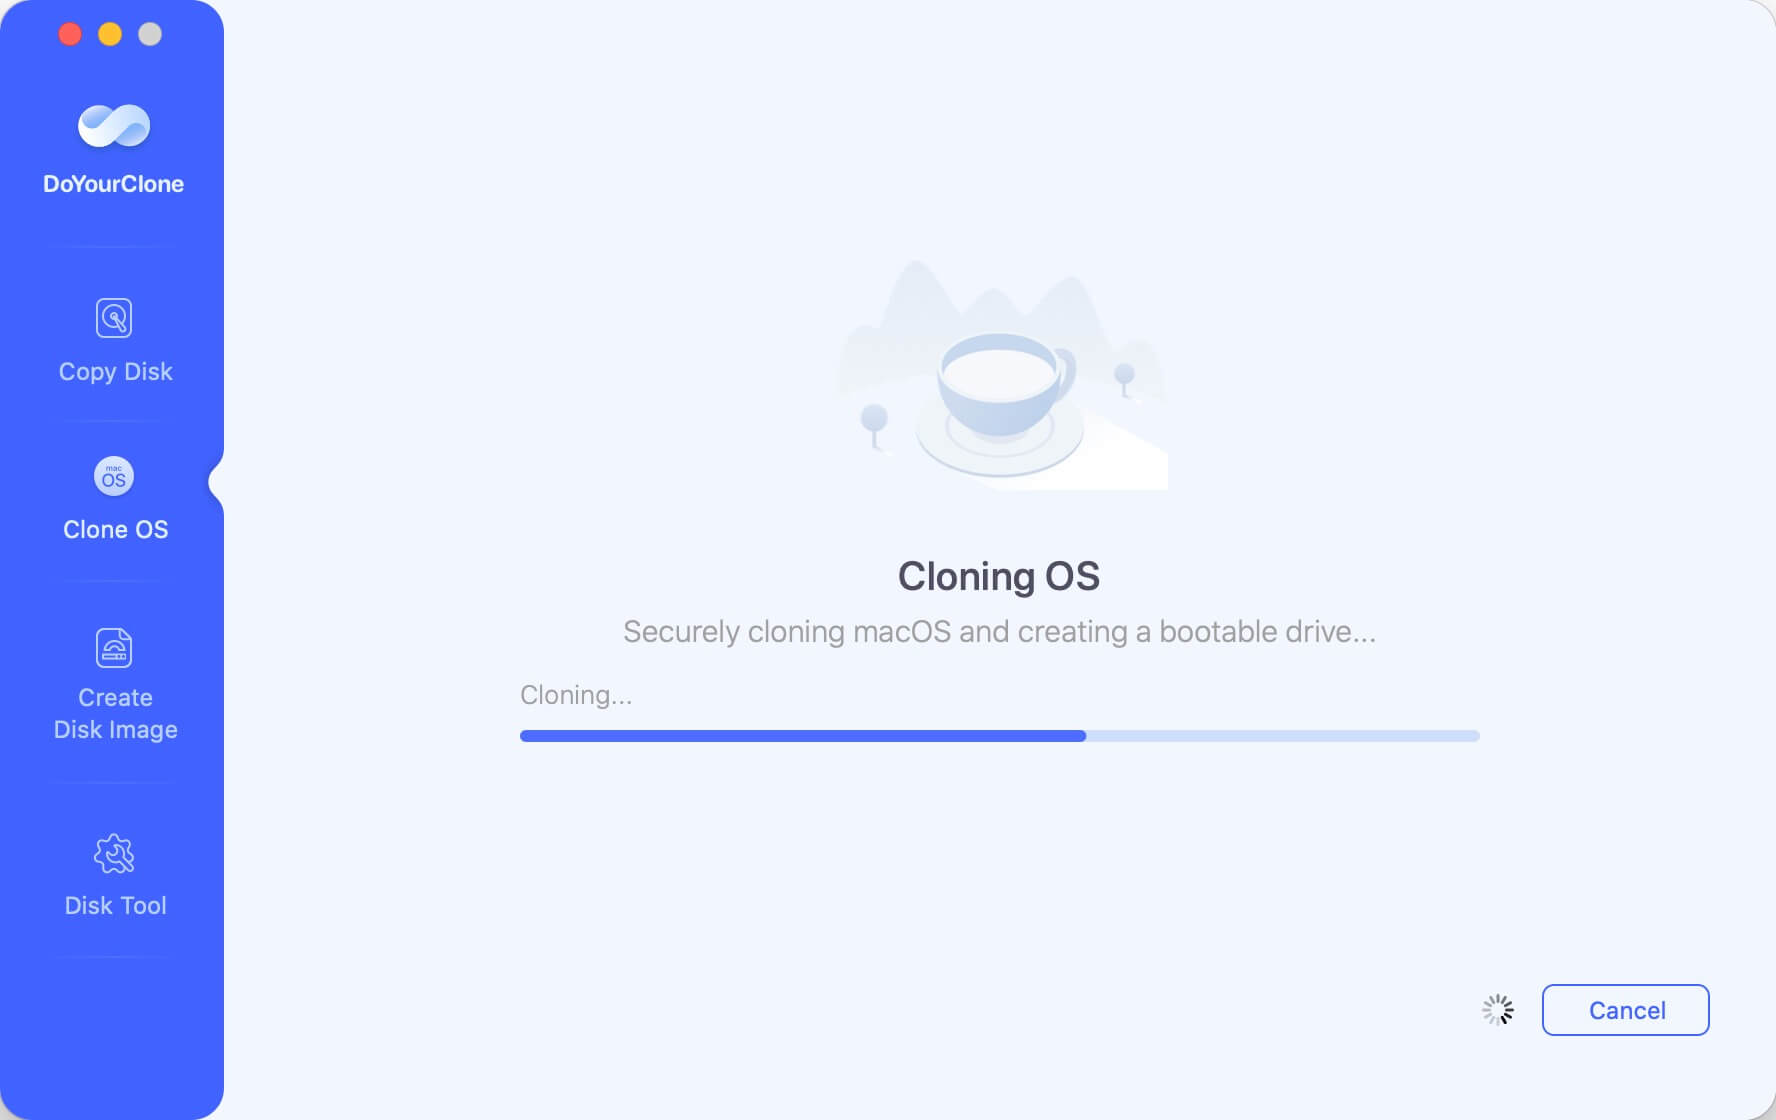
Once the process gets finished, you can use the external SSD as a startup disk on any Mac.
Copy HDD to SSD on Mac with Carbon Copy Cloner
Using third-party cloning tools like Carbon Copy Cloner (CCC) to copy your HDD to an SSD is a safe and easy way. It can be done in several ways, as shown below:
Step 1: Download and Install.
You can get Carbon Copy Cloner from the Bombich Software website. To set up the software, open it after putting it into the Applications folder.
Step 2: Connect the SSD.
Either a USB case or a SATA-to-USB adapter can be used to connect the SSD to your Mac. Make sure that your Mac can see the SSD. The SSD should be formatted as "Mac OS Extended (Journaled)" or "APFS." If not, open Disk Utility (Applications > Utilities > Disk Utility).
Step 3: Launch the Software.
You can open Carbon Copy Cloner from the folder called "Apps." You might have to permit CCC to view your drives.
Step 4: Set Up the Clone Task.
Use the "Source" dropdown menu in CCC to choose your HDD as the source file. At the "Destination" dropdown box, choose your SSD as the disk you want to use. To begin the cloning process, click the "Clone" button. You can proceed with the clone immediately, or CCC may ask you to make a new job or schedule it.
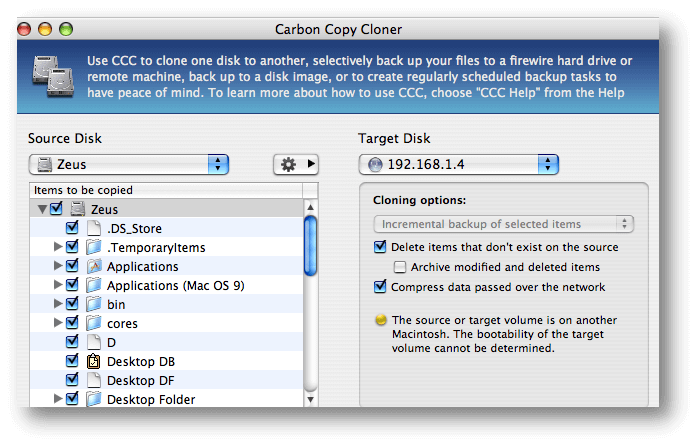
Step 5: Monitor the Cloning Process.
CCC will show how far along the cloning process is. Depending on how much data is being sent, this process could take a while. Ensure your Mac stays on and linked to the SSD during this time.
Step 6: Complete the Cloning and Verify.
CCC will let you know when the cloning process is complete. Take the SSD out of your Mac safely. Turn off your Mac and swap out the native HDD for an SSD. Look at the manual with your Mac for specific directions, especially for laptops.
Step 7: Boot From the SSD.
Turn on your Mac. If the SSD doesn't work immediately, hold down the Option key when starting and choose it as the startup disk. To ensure the SSD is always used when the computer starts up, go to System Settings > General > Startup Disk and choose it as the preferred boot drive.
Conclusion:
In conclusion, switching from an HDD to an SSD on your Mac will make it faster, more reliable, use less energy, and make less noise. MacOS's Disk Utility or third-party software like DoYourClone for Mac, Carbon Copy Cloner is a safe way to copy your files without problems.
By following these step-by-step guides, you can improve the speed of your Mac and get faster boot times, faster app launches, and a generally smoother computing experience. Get ready to notice a big difference in how fast and efficiently your new Mac works now that it has SSDs.
FAQs About Cloning HDD to SSD on Mac
1. How to clone HDD to SSD on Mac?
Disk cloning software - such as DoYourClone for Mac can help you clone HDD to SSD on Mac. It can copy HDD to SSD, create disk image backup for HDD - save it to the SSD, create bootable clone for your Mac, etc.
2. What is the best disk cloning software for cloning HDD to SSD on Mac?
Here is the list of top 5 Mac clone software:
- DoYourClone for Mac
- Donemax Disk Clone for Mac
- AweClone for Mac
- Carbon Copy Cloner
- SuperDuper!
3. How to set the external SSD as the new startup disk?
- Shut down the Mac.
- Restart the Mac, press and hold the Power button.
- Boot into macOS Recovery mode.
- Select the external SSD as the startup disk.
- Restart the Mac.
![]()
4. How to create a bootable clone for Mac?
- Download and install DoYourClone for Mac.
- Choose Clone OS mode.
- Select the external SSD as the destination drive.
- Click on Clone Now button.
- Clone macOS, apps, settings, user files and other data from your Mac to the external SSD.
DoYourClone - Best Disk Clone Software
DoYourClone is a 100% safe, powerful and easy-to-use disk cloning program. It supports to clone any hard drive, clone HDD to SSD, upgrade old drive to new drive, create bootable clone backup for Windows and macOS. With this program, you can easily clone any hard drive. It supports sector by sector clone, SSD upgrade clone, etc.