Quick Navigation:
- Why you want to downgrade from Sequoia to Sonoma?
- Can you go back to Sonoma from Sequoia?
- 4 Methods to Downgrade from macOS Sequoia to Sonoma
- Method 1: Downgrade macOS Using Time Machine
- Method 2: Downgrade via macOS Recovery
- Method 3. Use a bootable clone backup for macOS Sonoma
- Method 4: Downgrade via A Bootable Installer
- Conclusion
When you upgrade to the new version of macOS, it can feel like opening a present. It's full of new features and improvements. But sometimes, that new gift comes with a surprise: problems with compatibility, slow performance, or just the feeling that the old version was more stable.
You're not the only one who recently upgraded to macOS Sequoia and now wants the security and comfort of macOS Sonoma. Don't worry about downgrading macOS Sequoia to macOS Sonoma; this detailed guide is here to help.
Downgrading can get your Mac back to a safer and more comfortable state, whether you miss certain features, have problems with software, or just like how reliable the older system was.

Why you want to downgrade from Sequoia to Sonoma?
There are several reasons you may want to know how to go back to macOS Sonoma from macOS Sequoia. For instance:
Mac becomes slower - If your Mac run slower on Sequoia than on Sonoma, you may think it's not worthwhile to enjoy the new features.
App incompatible issue - Some essential apps you use regularly don't run normally in Sequoia, so you can only downgrade the macOS in order to use the apps.
Personal preference - If macOS Sequoia doesn't work the way you want it to or some experiences are not good to you, then you may want to downgrade to Sonoma.
Can you go back to Sonoma from Sequoia?
You will think about downgrading from macOS Sequoia to macOS Sonoma if you don't like the new system for whatever reason. Fortunately, macOS offers users this freedom to downgrade, it's different from iOS or iPadOS.
Before you downgrading the system, it's better to consider the pros and cons of sticking with macOS Sequoia. For example, the macOS Sequoia offers some new features and makes some improvements that the old version doesn't have.
Also, you can clear the Mac and free up space, reinstall apps to confirm if some issues are related to the new macOS. And you need to know that the process may take time with some of the methods.
Also, be aware that if you recently purchased a new Mac that came with macOS Sequoia preinstalled, it's impossible to revert to Sonoma or an earlier version of macOS.
4 Methods to Downgrade from macOS Sequoia to Sonoma
After suffering some problems or want to go back to the familiar experiences and features, there are some methods can help you. Please follow the methods below and choose a proper solutions:
Method 1: Downgrade macOS Using Time Machine
Using Time Machine to downgrade from macOS Sequoia to macOS Sonoma is easy and quick, as long as you have a recent backup from when your Mac was running macOS Sonoma. Here is how to do it:
Step 1: Restart your Mac in macOS Recovery mode
To begin, turn your Mac back on and hold down Power button (use the Command + R keys for Intel-based chip Mac) right after the starting beep. Hold down until you see the Apple logo or a globe spinning. It means that your Mac is in Recovery mode.
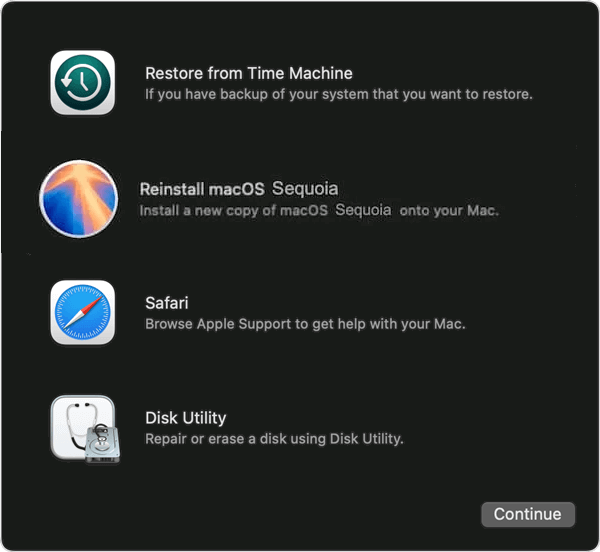
Step 2: Erase the startup disk
Select Disk Utility. Then click Continue. Disk Utility lets you choose the starting disk, which is sometimes called Macintosh HD. Then click the "Erase" button. Make sure that the format is APFS, and the method is GUID Partition Map. Close Disk Utility when you're done removing it.
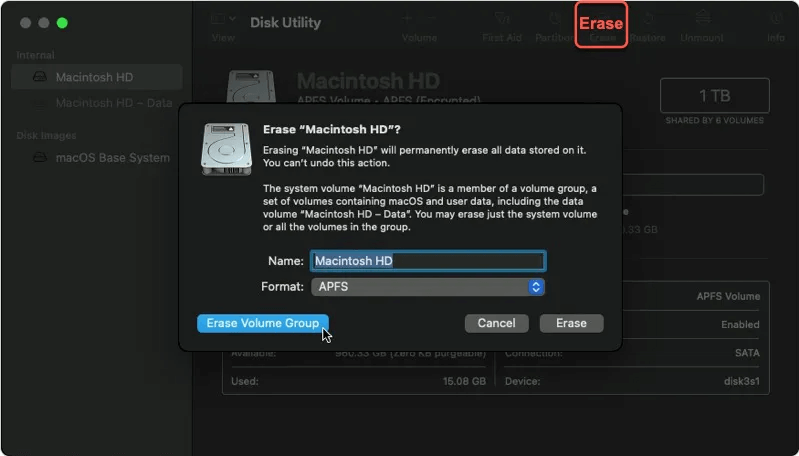
Step 3: Restore from Time Machine backup
Click Finish and return to macOS Utilities. From there, choose Restore from Time Machine Backup. Hook up your Time Machine drive to your Mac. Follow the steps shown on the screen to choose your backup source and the backup you want to recover. Pick out the most recent backup of macOS Sonoma and begin the restore process.
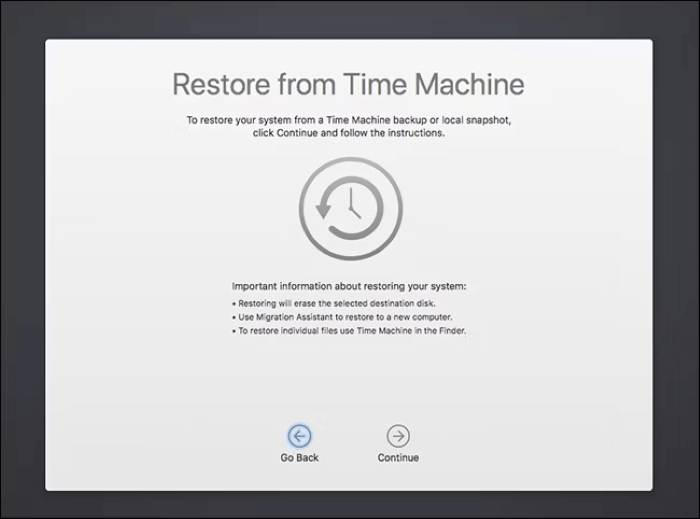
Step 4: Complete the restoration
It will depend on how big your backup is, and the repair process will take some time. After the backup is done, your Mac will restart and start up in macOS Sonoma, with all of your files and apps back to how they were before the backup. Make sure that everything is working right and that all of your important things are still there.
Method 2: Downgrade via macOS Recovery
You could also use macOS Recovery to go from macOS Sequoia to macOS Sonoma, which is a good choice if you'd rather start over. You don't need a Time Machine backup for this method, but you will need a stable internet link to get the older version of macOS. Here's what to do next:
Step 1: Restart in macOS Recovery mode
When your Mac starts up, hold down the Power button (Press and hold Command, Option, Shift, and R keys simultaneously for Intel-based chip Mac). This set of keys will ensure that your Mac tries to update either the macOS version that came with it or the most recent version that is still available. You must hold down the keys until you see the Apple sign or a globe spinning.
Step 2: Erase the startup disk
To exit macOS Recovery mode, open the macOS Utilities window and choose Disk Utility. Then click Continue. Select the starting disk, usually Macintosh HD, and press the Erase button. Choose APFS as the file system and GUID Partition Map as the layout. Close Disk Utility when you're done removing.
Step 3: Reinstall macOS Sonoma
Go back to the macOS Utilities window and choose Reinstall macOS Sonoma. Then click Continue. To install macOS Sonoma, follow the steps shown on the screen. The installer needs to be downloaded from Apple's servers to your Mac, so you must have a stable internet link. If your internet is fast, this process might take a while.
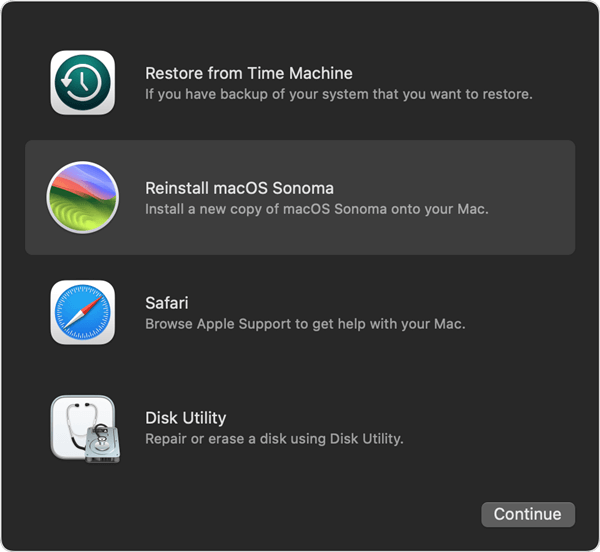
Step 4: Complete the installation
After the download is done, your Mac will restart and start up in macOS Sonoma. For example, when you set up a new Mac, you'll need to go through the basic setup process. After that, you can use your backup to get your info back.
Method 3: Use a bootable clone backup for macOS Sonoma
Before you upgrade to macOS Sequoia, you can create a bootable clone of macOS Sonoma. If there are any issues with the new operating system, you can go back to the old system by booting from the bootable cloned drive directly.
With the cloning software DoYourClone for Mac, it's able to create a bootable clone for macOS Sonoma easily. And this is the easiest way to downgrade and make your Mac boot into macOS Sonoma quickly. You can download and install the software on Mac first:
DoYourClone - Reliable Disk Clone Software
- Reliable and easy-to-use Mac cloning software.
- Fully compatible with macOS Sonoma and macOS Sequoia.
- Create bootable clone backup for your Mac.
To create a bootable clone for macOS Sonoma, here are the simple steps:
Step 1. Start the cloning software from the Launchpad and select the option Clone OS.
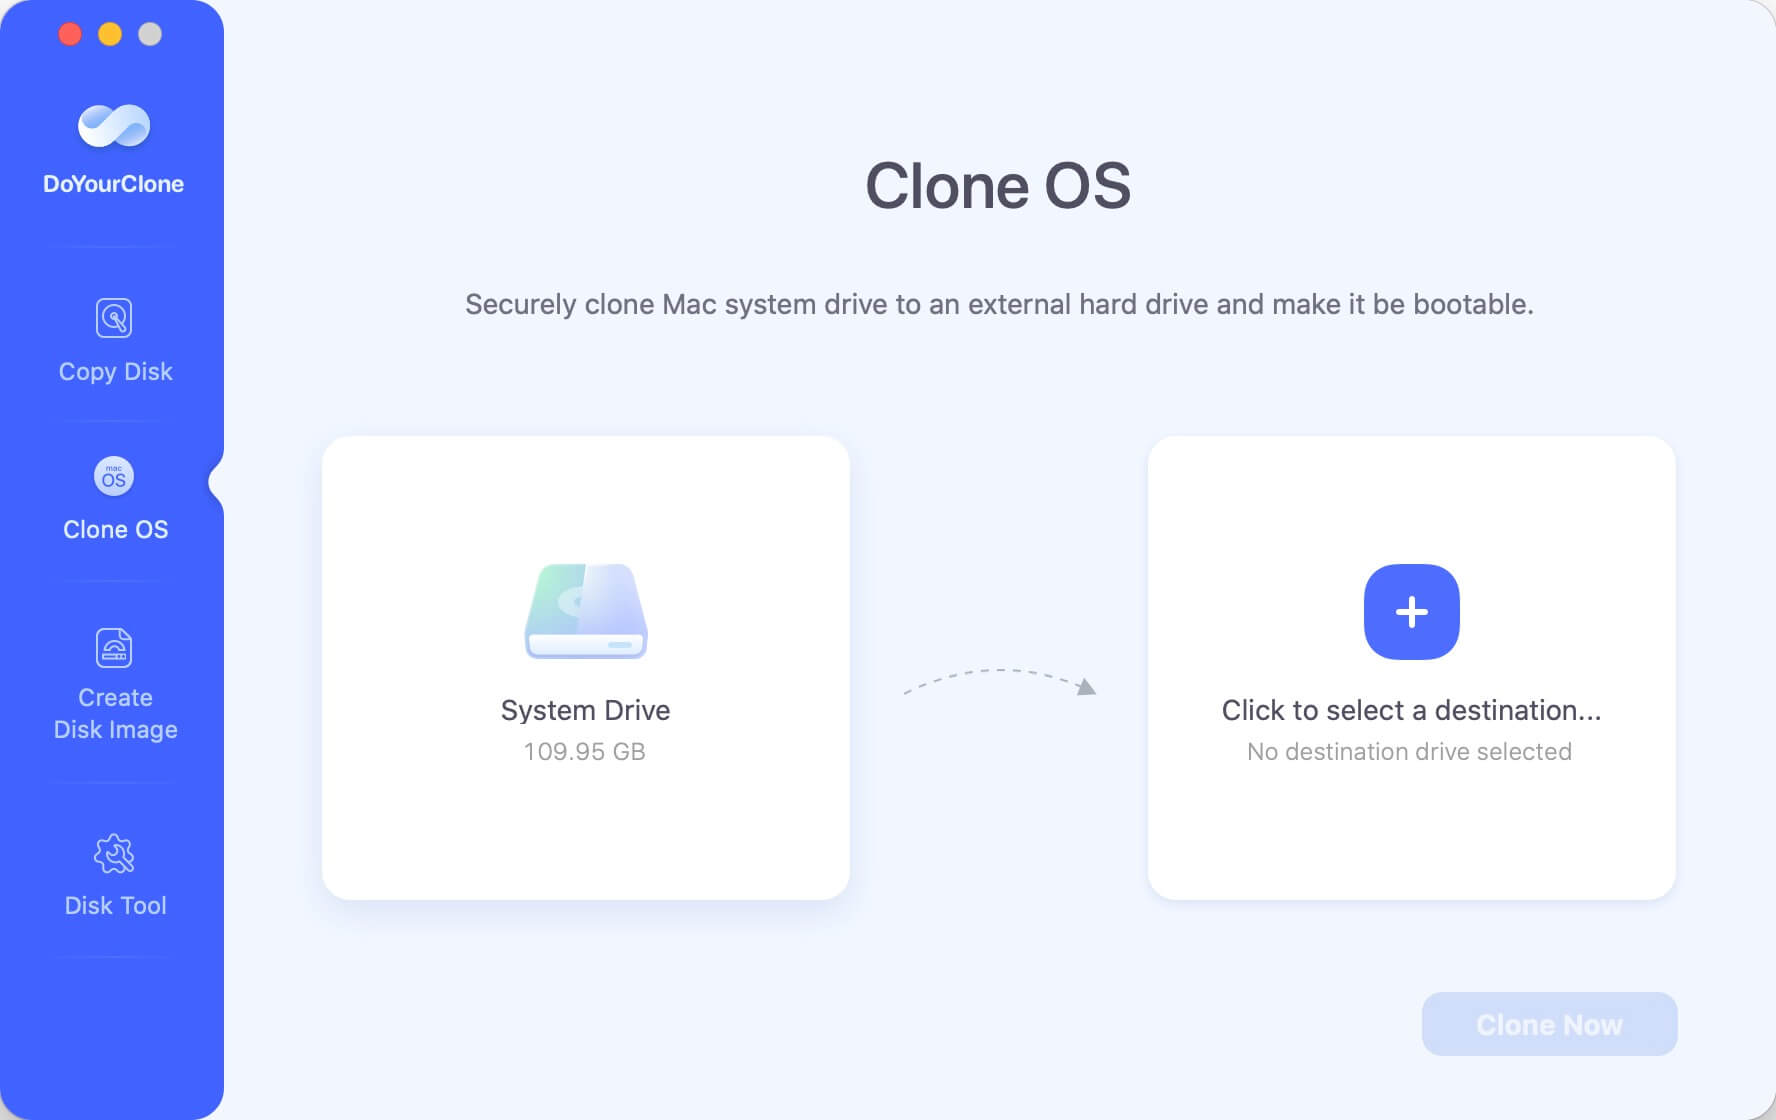
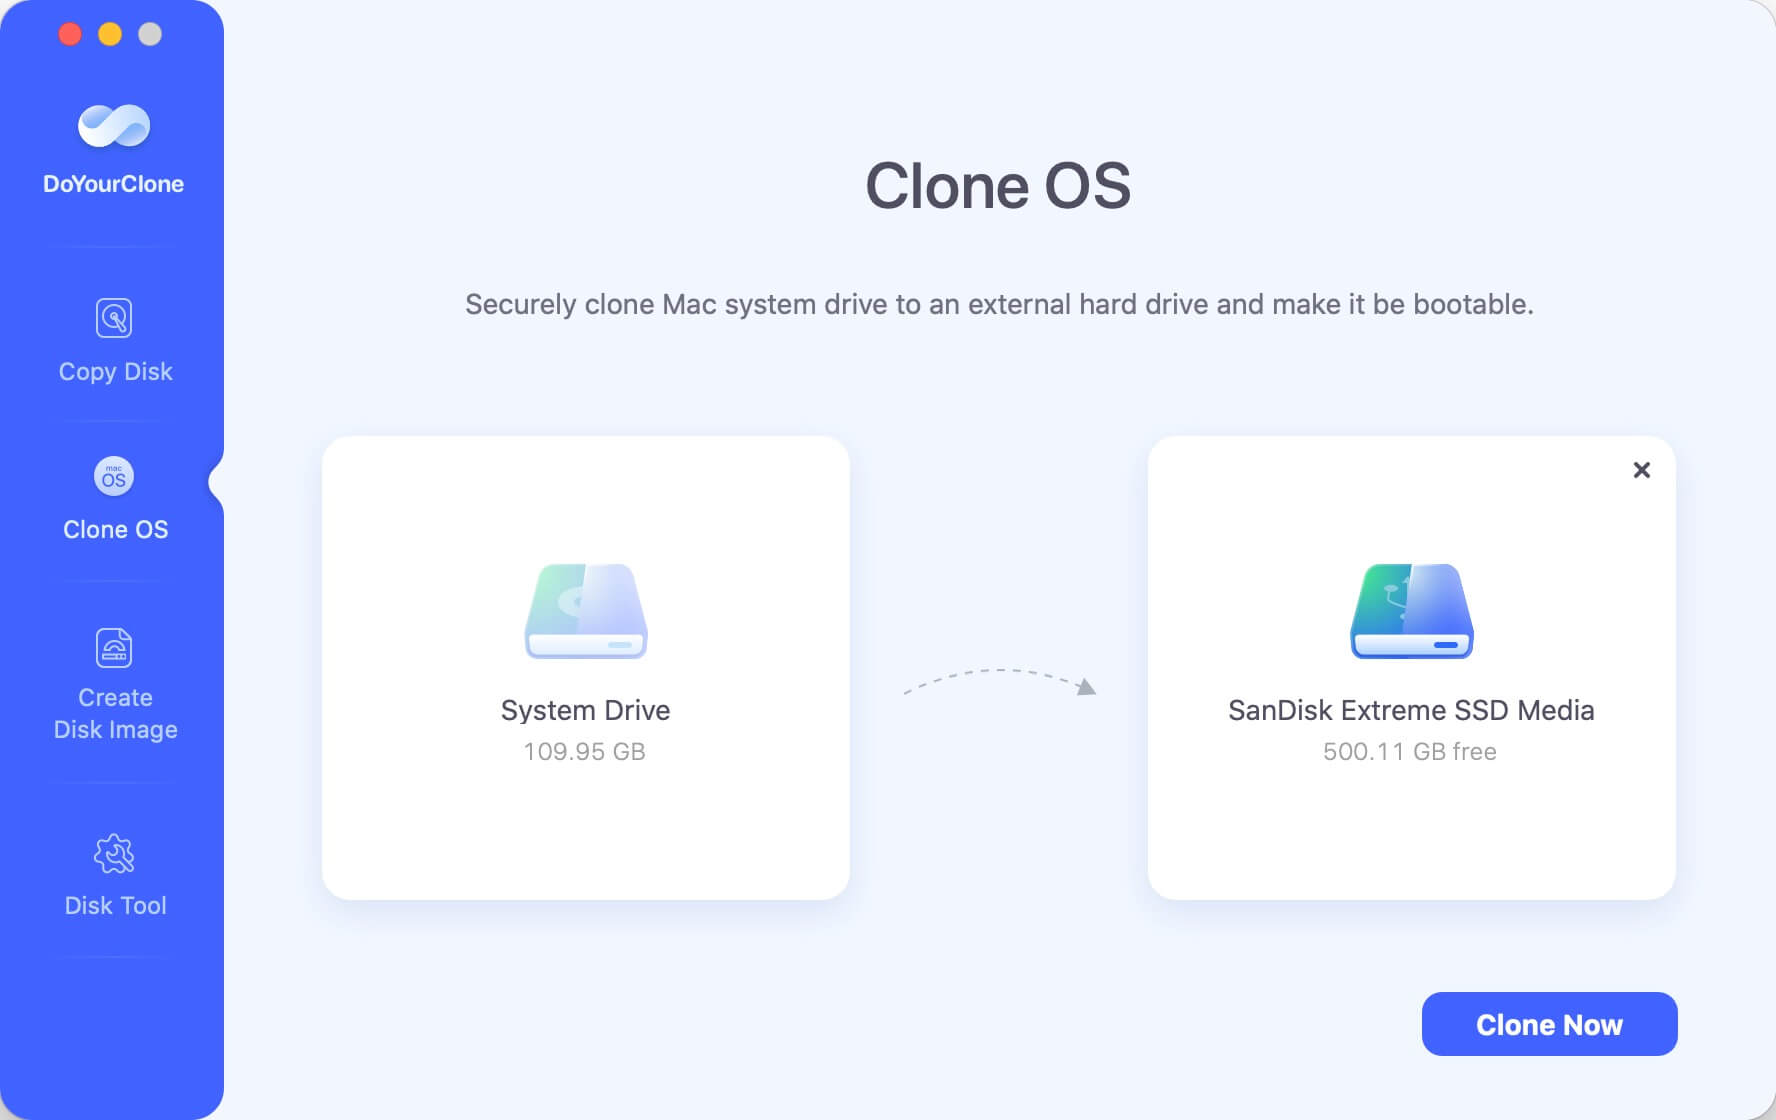
Step 2. The software will select the macOS Sonoma system drive by default. You only need to choose an empty external hard drive as destination. Click on Clone Now button to start cloning.
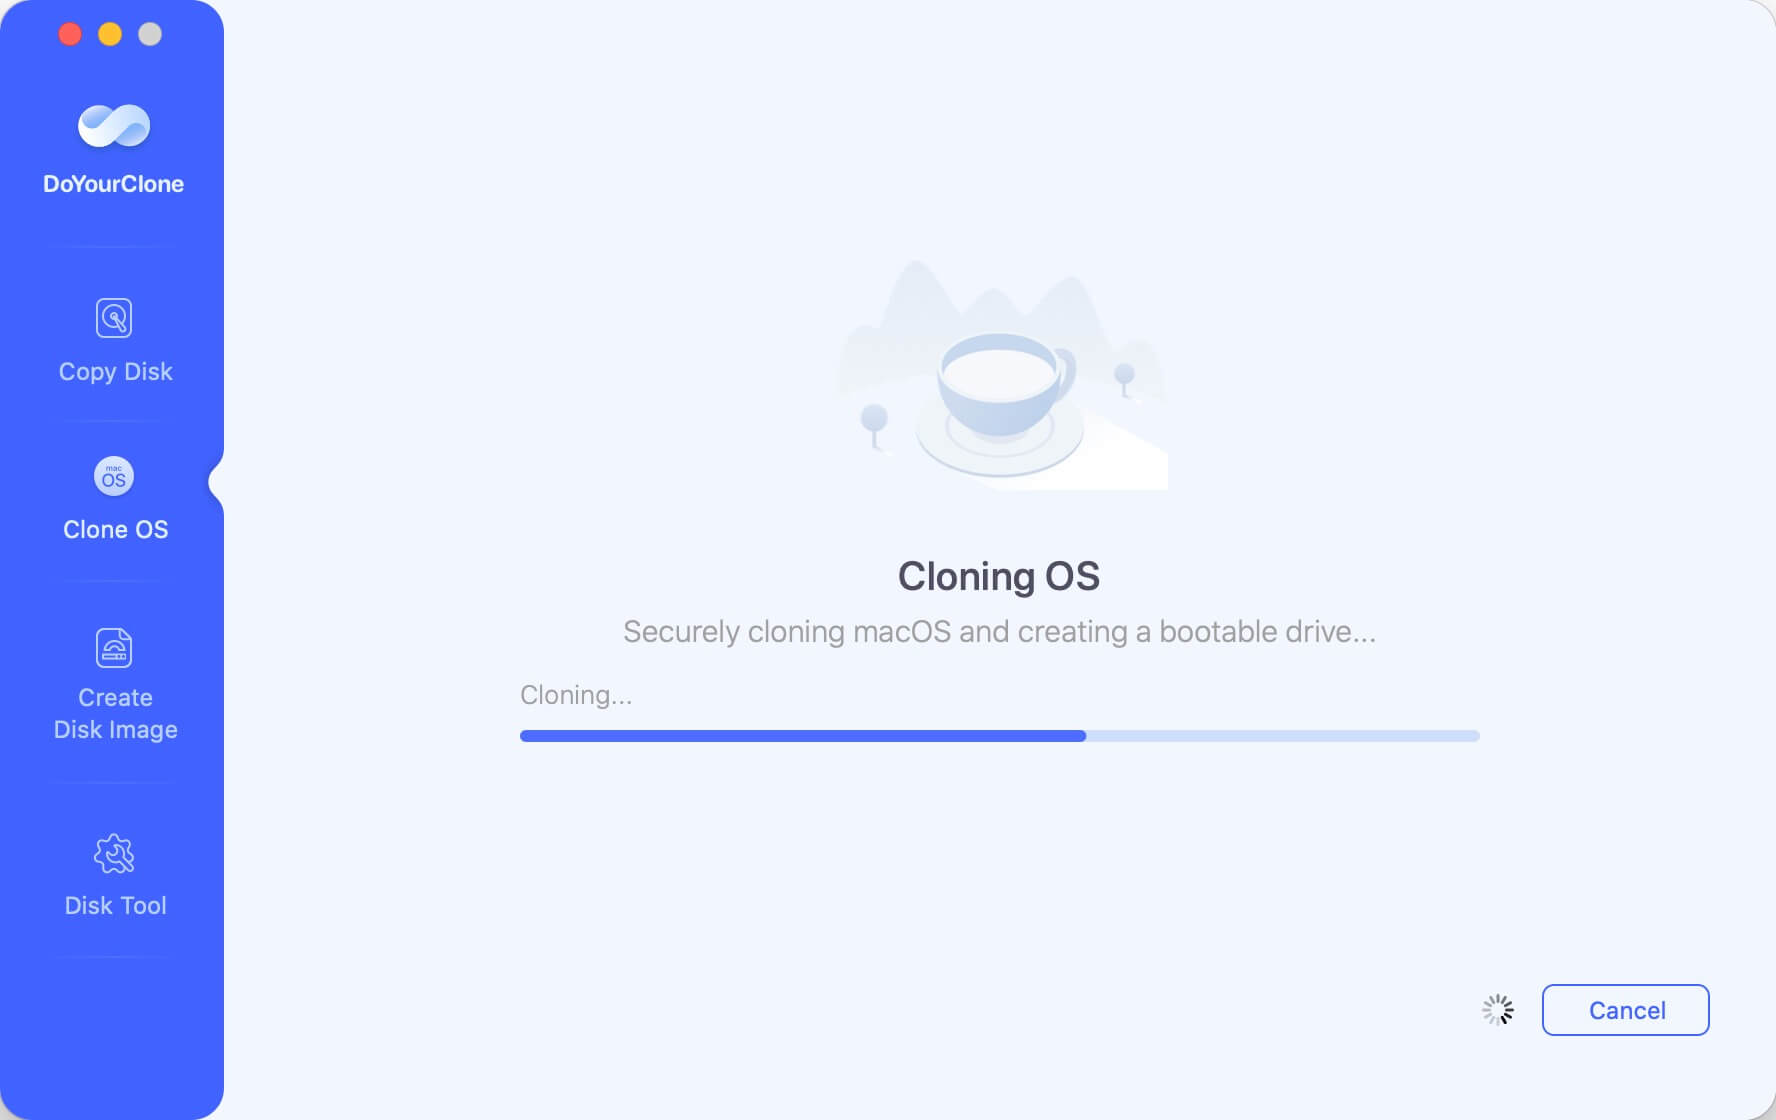
Step 3. After the cloning process is done, the macOS Sonoma was cloned to the external drive completely.
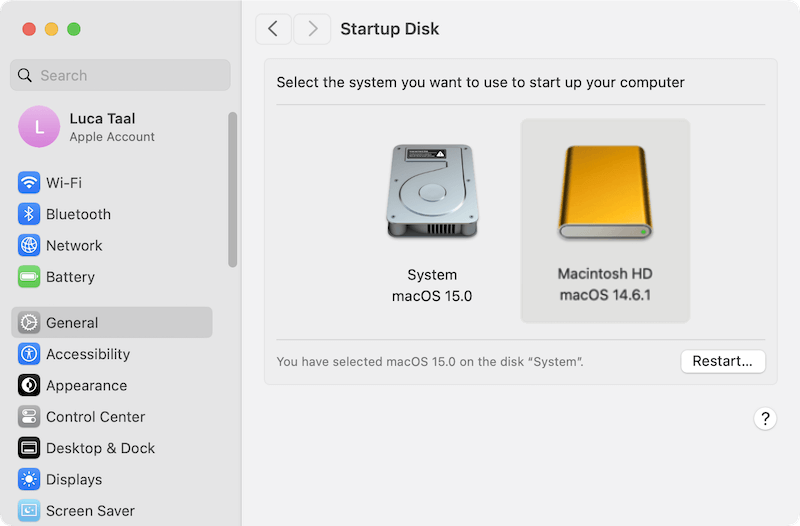
If you decide to go back to macOS Sonoma after upgrading to macOS Sequoia, you can directly boot the Mac from the cloned drive directly. Connect the cloned external drive and change the startup disk in the macOS Sequoia: Click the Apple menu > System Settings > General, click Startup Disk, then choose the cloned drive for macOS Sonoma as the startup disk and click Restart button. The Mac will then restart and boot into macOS Sonoma.
Method 4: Downgrade via A Bootable Installer
A safe way to downgrade from macOS Sequoia is to make a bootable installer for macOS Sonoma. It is especially true if you'd rather use a real installation medium. As long as you use this method, you can install macOS Sonoma without being connected to the internet.
Step 1: Create a bootable macOS Sonoma installer
To get macOS Sonoma, go to the Mac App Store and look for it. Once you download it, the application will appear in your Applications folder.
A USB drive with at least 16GB of space should be put into your Mac. Format the USB drive as Mac OS Extended (Journaled) with a GUID Partition Map. Then open Disk Utility and choose the drive. Open Terminal and type the following:
sudo /Applications/Install\ macOS\ Sonoma.app/Contents/Resources/createinstallmedia --volume /Volumes/MyVolume
Change "MyVolume" to the name of your USB drive. When asked, press Enter and type your password. Then, follow the on-screen directions. During this process, a bootable driver will be made on your USB drive.

Step 2: Erase the startup disk
When you turn your Mac back on, hold down the Option key right after the starting chime. The bootable installer should be on the list of starting disks. Choose it and press Enter. In the macOS Utilities window, pick up Disk Utility and use APFS format to erase your starting disk (Macintosh HD).
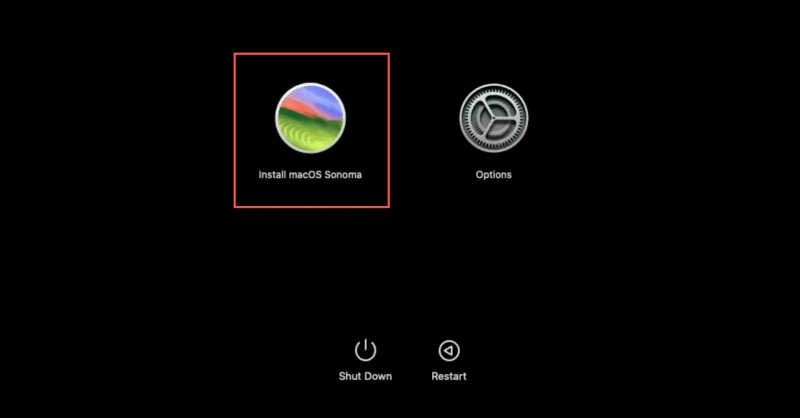
Step 3: Install macOS Sonoma
Now that the starting disk is gone, go back to the macOS Utilities window and choose Install macOS. To install macOS Sonoma from the bootable launcher, follow the steps shown on the screen. It will take a while, and your Mac will restart several times during this process.
Step 4: Restore your data
Once it's done, your Mac will start up in macOS Sonoma. You'll have to go through the setup process again. You can get your info back from a backup once it's set up.
Conclusion
If you go from macOS Sequoia to macOS Sonoma, you can get your Mac back to a more stable and comfortable setting. There are steps you need to take for each method, whether you choose Time Machine, macOS Recovery, bootable launcher, or using cloning software DoYourClone for Mac.
Before you go any further, remember to back up your info. If you follow this complete guide, you can safely switch back to macOS Sonoma and have a more reliable computer experience. Don't let the problems with the latest macOS stop you from getting work done. Downgrade with confidence to get your Mac back to working at its best.
DoYourClone for Mac
DoYourClone for Mac, one of the best Mac disk cloning software, can help you clone HDD, SSD, external storage device on Mac, upgrade HDD to SSD, create full disk image backup, etc. It also can clone everything from your Mac to an external HDD/SSD and create a full bootable clone backup. 100% safe and easy-to-use.